

Welcome to “Tips From Sticks-In-The-Mud Woodshop.” I am a hobbyist who loves woodworking and writing for those who also love the craft. I have found some ways to accomplish tasks in the workshop that might be helpful to you, and I enjoy hearing your own problem-solving ideas. Please share them in the COMMENTS section of each tip. If, in the process, I can also make you laugh, I have achieved 100% of my goals.
When working with cedar, you must be prepared to deal with the defects. Of course, there are knots on every surface.

One look at a cedar tree and you see why there are so many knots: limbs everywhere.
You can celebrate the defects by leaving them au naturel, or you can celebrate them in the way you fix them, or you can disguise them with, say, a Dutchman.
I didn’t want any rough or sharp edges that might catch tender little grandbaby skin, so I made sure to fill each one. A Dutchman would have been fine, but this project had run long already.
As something of a trademark, I incorporate black-tinted epoxy into many of my projects. Here are the steps I used:
First, you need epoxy, and you have options. If you buy large containers of epoxy you might spend a good bit up front, but, stored properly, it will keep for years and years. The resin and hardener are separate and very stable.
If you’re only wanting to dabble in a little epoxy, good ol’ two-part syringe epoxy is perfectly fine. Don’t purchase the fast-curing kind if you’re adding amendments because the additions speed curing further and even one drop of dye or small amounts of sawdust will harden it faster.
Have your surfaces prepared in advance: clean, dry, no grease and no paint. No epoxies have a long “open” time.
Always work in small aliquots. If your defect is deep, fill it in layers no thicker than 1/8″ each.
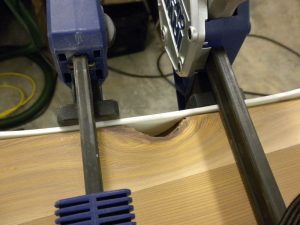
To fill the knothole in the edge of this bench I cut a dam from a 5-gallon plastic bucket and clamped the dam with squeeze clamps.
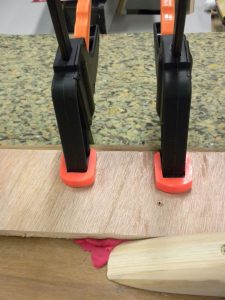
To ensure no epoxy ran out from the bottom, I made an additional dam out of PlayDoh and clamped a plywood scrap on for reinforcement. Now, patiently fill the defect in 1/8″ layers. It’s not necessary for each lamination to cure completely between applications but each should be allowed to cool thoroughly.
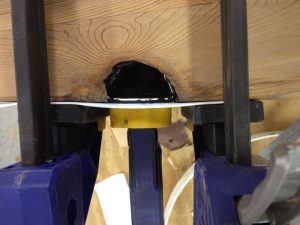
Make your last layer thinner, which will allow bubbles to escape more easily.
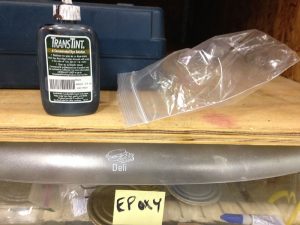
One drop of Transtint Dye will darkly color a large quantity of epoxy. I suspect this bottle might last me a lifetime. I store it in a used zipper-locking bag in case of spills.
Jim Randolph is a veterinarian in Long Beach, Mississippi. His earlier careers as lawn mower, dairy farmer, automobile mechanic, microwave communications electronics instructor and journeyman carpenter all influence his approach to woodworking. His favorite projects are furniture built for his wife, Brenda, and for their children and grandchildren. His and Brenda’s home, nicknamed Sticks-In-The-Mud, is built on pilings (sticks) near the wetlands (mud) on a bayou off Jourdan River. His shop is in the lower level of their home.Questions and comments on woodworking may be written below in the comments section. Questions about pet care should be directed to his blog on pet care, www.MyPetsDoctor.com. We regret that, because of high volume, not all inquiries can be answered personally.
It is always fun and informative to read Jim’s columns.