Molly Bagby is an employee at Highland Woodworking who recently finished up a 2 Week Basic Woodworking course at Center for Furniture Furniture Craftsmanship (CFC). Although she grew up at Highland Woodworking from a mere 1 week old, her knowledge of woodworking skills is limited. With this class, she was able to change that. You can follow her on Instagram @HighlandWoodwoman.
To read my previous post on The Importance of Sharpening, click here
After we learned the most important skill in woodworking (sharpening), it was time to move on to joints. For learning purposes, we practiced with poplar wood, an ideal wood choice for beginning joinery. During the two weeks of the class, we learned and practiced 3 types of joinery, Mortise and Tenon, Dovetails, and Half-Blind Dovetails. It’s amazing how much work goes into just 1 little joint of a project.
The hand tools I used for all of my joinery included:
- Lie-Nielsen Tenon Saw
- Crown Marking & Mortise Gauge
- Japanese Marking Knife
- Sterling Toolworks Double Square
- Starrett Combination Square
- 5″ Bench Mallet
- Narex 6 Piece Boxed Bench Chisel Set
Specific Tools for Mortise and Tenon
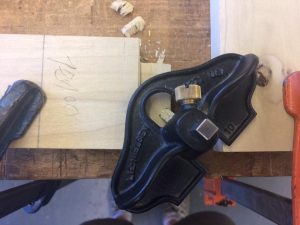
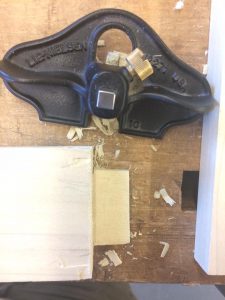
- Lie-Nielsen 271 Router Plane
- Drill Press
As I’ve said before, even though I have grown up around power tools, I’ve never actually used any of them. We went through a full walkthrough of the machine room on Day 1, and were told the only machine we could use by ourselves without shop assistant supervision was the drill press. Over the course of the first week, I got to know the drill press really well with the amount of mortise waste I was drilling out on my samples. An important tip I learned on the drill press was to make sure all dust and wood chips are removed from the table before setting up what you are drilling, or else you’ll get an uneven drilling.
I spent several days “perfecting” my mortise and tenon joint. I am a slow learner and even though Peter demonstrated each process in front of the entire class, I needed a separate tutorial for each one, where I could go step by step to make sure each “move” I made was correct. By the end of the week, when everyone else was starting their projects and had already “perfected” their dovetails, I had made about 5 mortise and tenon joints. That also included a full day of re-sharpening all of my chisels, and countless demos and discussions by Peter about other aspects of woodworking.
One of the most helpful tips I learned in making my mortise and tenon joints was the use of the Lie-Nielsen 271 Router Plane to help flatten the cheek of the tenon.
My last few words of advice on making a mortise and tenon joint: make sure you measure tenon size based on the size of the mortise you end up with! If you base your tenon on the size you were originally intending from the beginning….it will likely not fit.
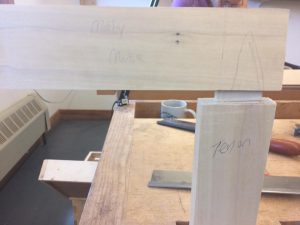
A successful mortise and tenon joint!
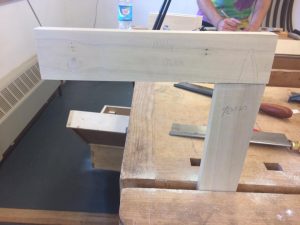
They fit into each other!
The whole time I was working on my mortise and tenon joints, I couldn’t help but thinking about Mortise & Tenon Magazine, and fully understanding the meaning behind the name of this incredible magazine! If you haven’t read this magazine, I strongly suggest you get a copy. They’re just about to release issue #3!