

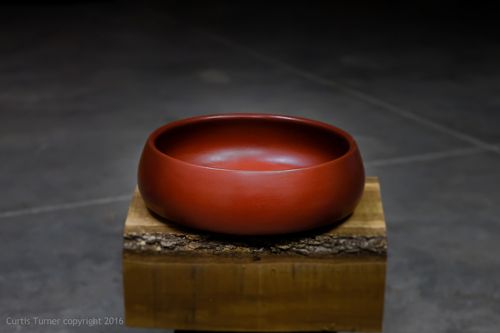
I actually got a jump on the holidays this year! I recently completed this 9″ bowl. I wanted this gift to be somewhat unique. I considered various embellishments but ultimately decided to use milk paint. I tested various samples before settling on Barn Red over Black. I applied 3 coats of red with a sponge brush. I then used medium and fine Scotch Brite pads to smooth the surface. Then, I applied two coats of spray shellac followed by coat of wax. I am very pleased with the deep red color. I actually hate to give this one up.
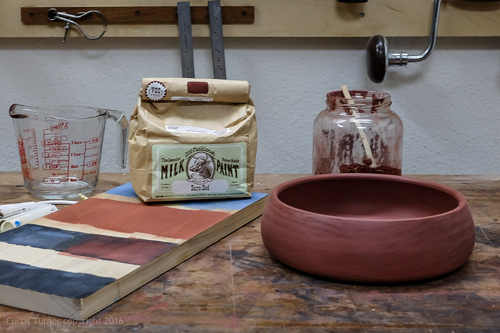
I enjoy working with different materials and embellishments. I would offer a word of advice on milk paint, or any new technique; practice first. I make an effort to test samples when I am trying something new. I have used milk paint on several turnings and a Dutch Tool Chest. Milk paint is not like other types of paint you may have used. The initial applications are typically splotchy, rough and chalky. It takes several coats of the paint and sanding between coats before the beauty of milk paint becomes apparent. Also, I would encourage new users to mix the paint close to the recommended mix. The paint spreads much further than one expects. The concept of thinning the mix to stretch the paint is a false economy. It quickly becomes apparent many more coats will be required to end up with the same appearance as 2-3 coats of properly mixed paint.
In addition, I recommend a finish be applied. The topcoat can be an oil, shellac, lacquer or wax. The topcoat will slightly change the appearance so a sample board of finishes is also recommend.
I would encourage you to give milk paint a try. It is available in small packages and has almost an indefinite shelf life if stored as directed.
Curtis was the 2012 President of Central Texas Woodturners, a member of the American Association of Woodturners, and a member of Fine Woodworkers of Austin. Curtis teaches and demonstrates nationally for Lie-Nielsen Toolworks. He also owns a studio where he teaches and works. Curtis lives and works in Central Texas with his wife and four young children. Take a look at his website at www.curtisturnerstudio.com.
You mentioned Barn Red over Black but failed to mention the application of the black. Please provide more detail. Thanks!
Don
I applied one coat of the black milk paint. Once dry, I lightly sanded it with 220 grit sand paper.
Absolutely beautiful bowl, I had my doubts when I read the title of the piece, very well done, I am struck by how much it looks like a burnished terra cotta bowl. Native Americans would burnish ceramic bowls that could not be fired at a high enough temperature to vitrify them, and serve to make them waterproof the burnishing would make them easier to clean and more waterproof. The burnishing was done with a very smooth stone, and in later years with the back of a silver spoon, the silver oxide also adds some black as you did. I have used this spoon technique on occasion to smooth difficult grain like on the edge of a cutting board, when I couldn’t get it as smooth as I wanted and wasn’t going to use a hardening finish.