

Welcome to “Tips From Sticks-In-The-Mud Woodshop.” I am a hobbyist, not a professional, someone who loves woodworking, just like you do. I have found some better ways to accomplish tasks in the workshop and look forward to sharing those with you each month, as well as hearing your problem-solving ideas.
As I’ve mentioned previously, I have respiratory-tract allergy problems. That’s the reason I have Kleenex boxes (yes, I use the name brand, they’re just better, and completely worth paying more for) stashed all over the shop. The obvious problem, of course, is that if one is allergic to dust, pollen and mold, and leaves his “facial tissues” unprotected, he is introducing dust, pollen and mold into his respiratory tract with every Kleenex.
The first solution that came to mind was to purchase some of those decorative covers for Kleenex boxes and put two strips of foil tape over the hole the tissues pop through, one layer of tape from the inside, one from the outside.
They come in plastic, wicker, and church-lady crochet. The latter two styles would do nothing to keep out dust, pollen and mold, so I set my sights on a plastic cover. A cheap plastic cover, that is.
I thought about going to the dollar store, but that was out of my way, so I looked at WalMart while I was there. Nothing. I asked someone in Housewares. “We don’t have them over here, but you might look where the paper towels are.” I assumed the clerk meant the paper towels and facial tissue were close to each other. Or, WalMart had introduced a new, pop-up box for paper towels.
Whatever the situation, no decorative covers existed by the paper towels, either.
However, while I was searching in housewares, I saw a little plastic shoebox that I thought I could adapt. Best of all, they were only 97¢. When I got home I decided to try them in three different ways.
First, on my workbench, upside-down, as a simple cover for the Kleenex. I instantly discovered an advantage to this box over the original idea: The decorative cover would have been a tight fit, requiring two hands and a good bit of time to access. The shoebox engulfed the Kleenex box, so it could be snatched off, a tissue retrieved, and quickly put back in place.
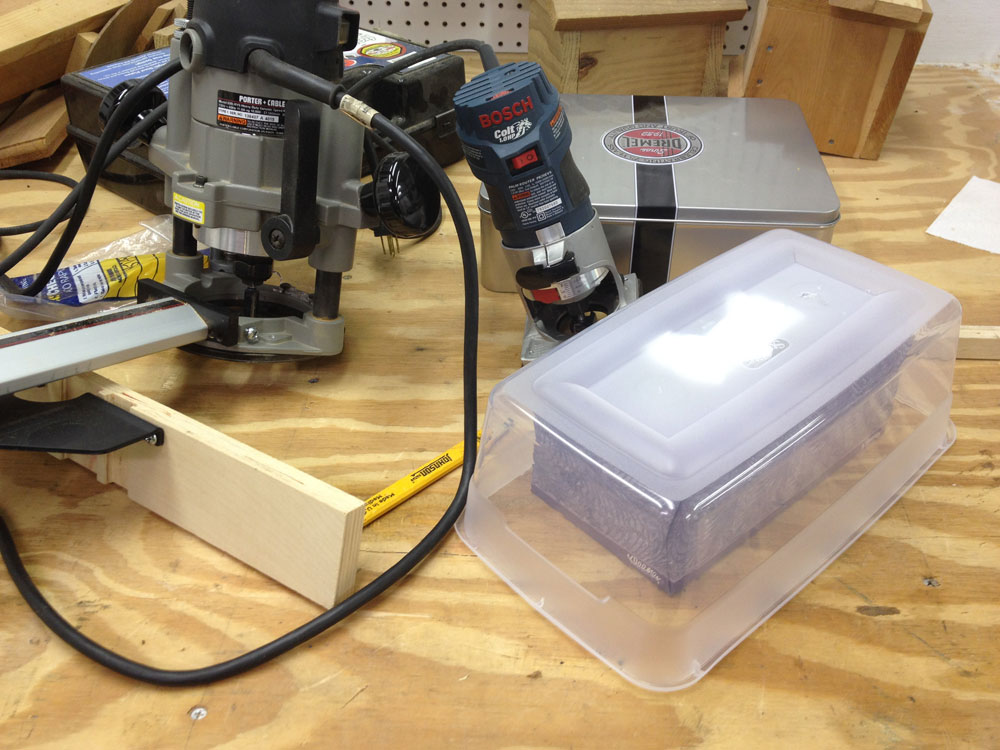
I keep a pretty clean shop, but I typically don’t clean except between projects. So, like any woodworking area, there is always dust around, leading to a runny nose and sneezing. I can never be far from a Kleenex box, but don’t want the Kleenex to make the situation worse. These shoeboxes protecting the Kleenex boxes should help.
For the less-used box that lives on my rolling tool cabinet, I decided to put the Kleenex box inside the shoebox, with the lid on top. It was a test to see how long my impatient self tolerated the extra step of removing the lid in exchange for possibly better dust protection.
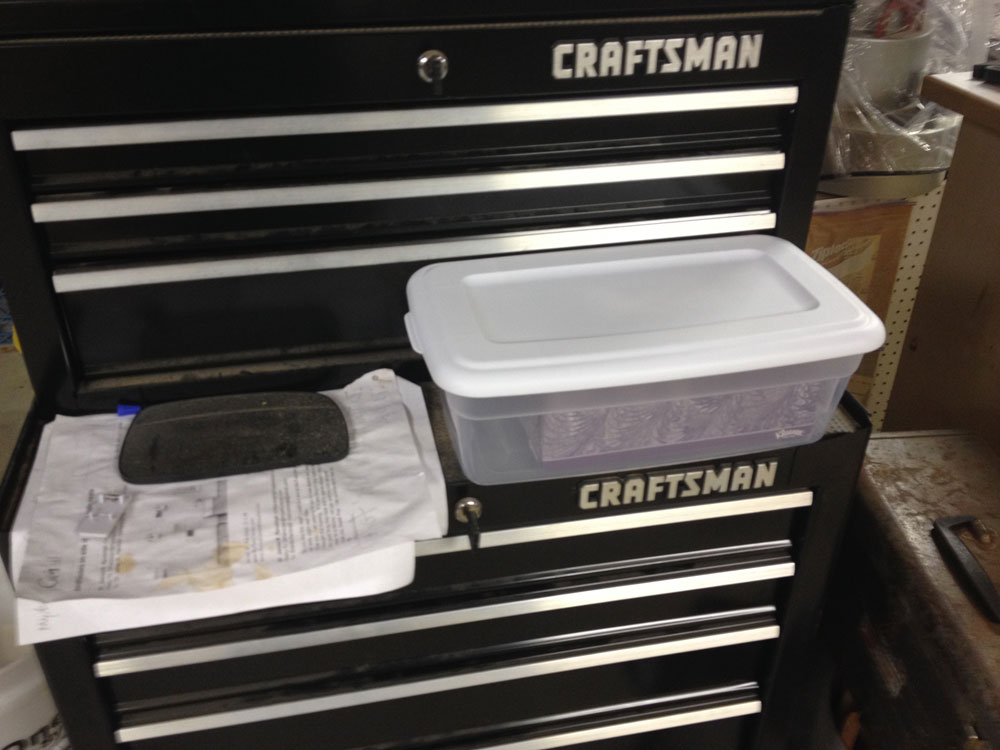
Now for the test: Will Mr. No Patience be willing to take the time to remove the snap-on lid in exchange for better dust protection for his Kleenex?
Trial style 3 was to attach the lid to a shelf near the sink, put the Kleenex onto the lid with the shoebox snapped into the lid. It seems likely that, with the first two styles, dust is going to be stirred when exposing the tissues, partially defeating the purpose of the shoebox covers. If style 3 proves itself, a compromise for the middle style would be to turn the Kleenex box upside-down in the dust-free shoebox. Watch my tip column for an update in the coming months.
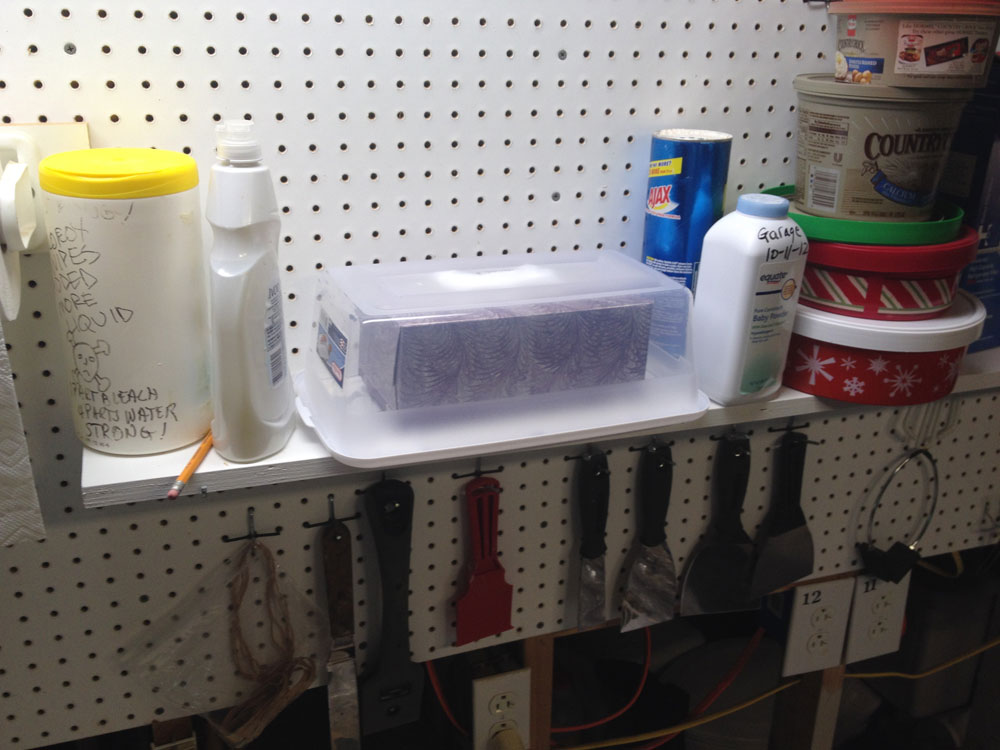
In my mind I’m picturing that I can squeeze the shoebox and pop it out of the lid, which is screwed to the shelf. Maybe that will be almost as fast as “Style 1,” but still enjoy the improved dust protection for the Kleenex.
Jim Randolph is a veterinarian in Long Beach, Mississippi. His earlier careers as lawn mower, dairy farmer, automobile mechanic, microwave communications electronics instructor and journeyman carpenter all influence his approach to woodworking. His favorite projects are furniture built for his wife, Brenda, and for their children and grandchildren. His and Brenda’s home, nicknamed Sticks-In-The-Mud, is built on pilings (sticks) near the wetlands (mud) on a bayou off Jourdan River. His shop is in the lower level of their home.Questions and comments on woodworking may be written below in the comments section. Questions about pet care should be directed to his blog on pet care, www.MyPetsDoctor.com. We regret that, because of high volume, not all inquiries can be answered personally.
Turn the box of Kleenex up-side down in the shoe box. BUT FIRST, cut a slit in the bottom of the box so you can pull out the “pop-up” Kleenex. Mount the box so that all you have to do is pull the Kleenex out from the bottom, shake & you SHOULD have a clean tissue.
Try it on the shelf in your last photo, of course you’ll have to cut a slot in the shelf too.