

I recently received my new Lie-Nielsen Honing Guide and a couple of their available accessory jaws, which I discussed in my The Plane Facts: The Lie-Nielsen Honing Guide article posted last week.
If you, like many of us, have previously been using one of the inexpensive guides with a honing board, you will need to make another board. The dimensions of the Lie-Nielsen Honing Guide are different enough that each 5-degree incremental angle stop on previous boards will not work (but feel free to measure what you have, to confirm for yourself).
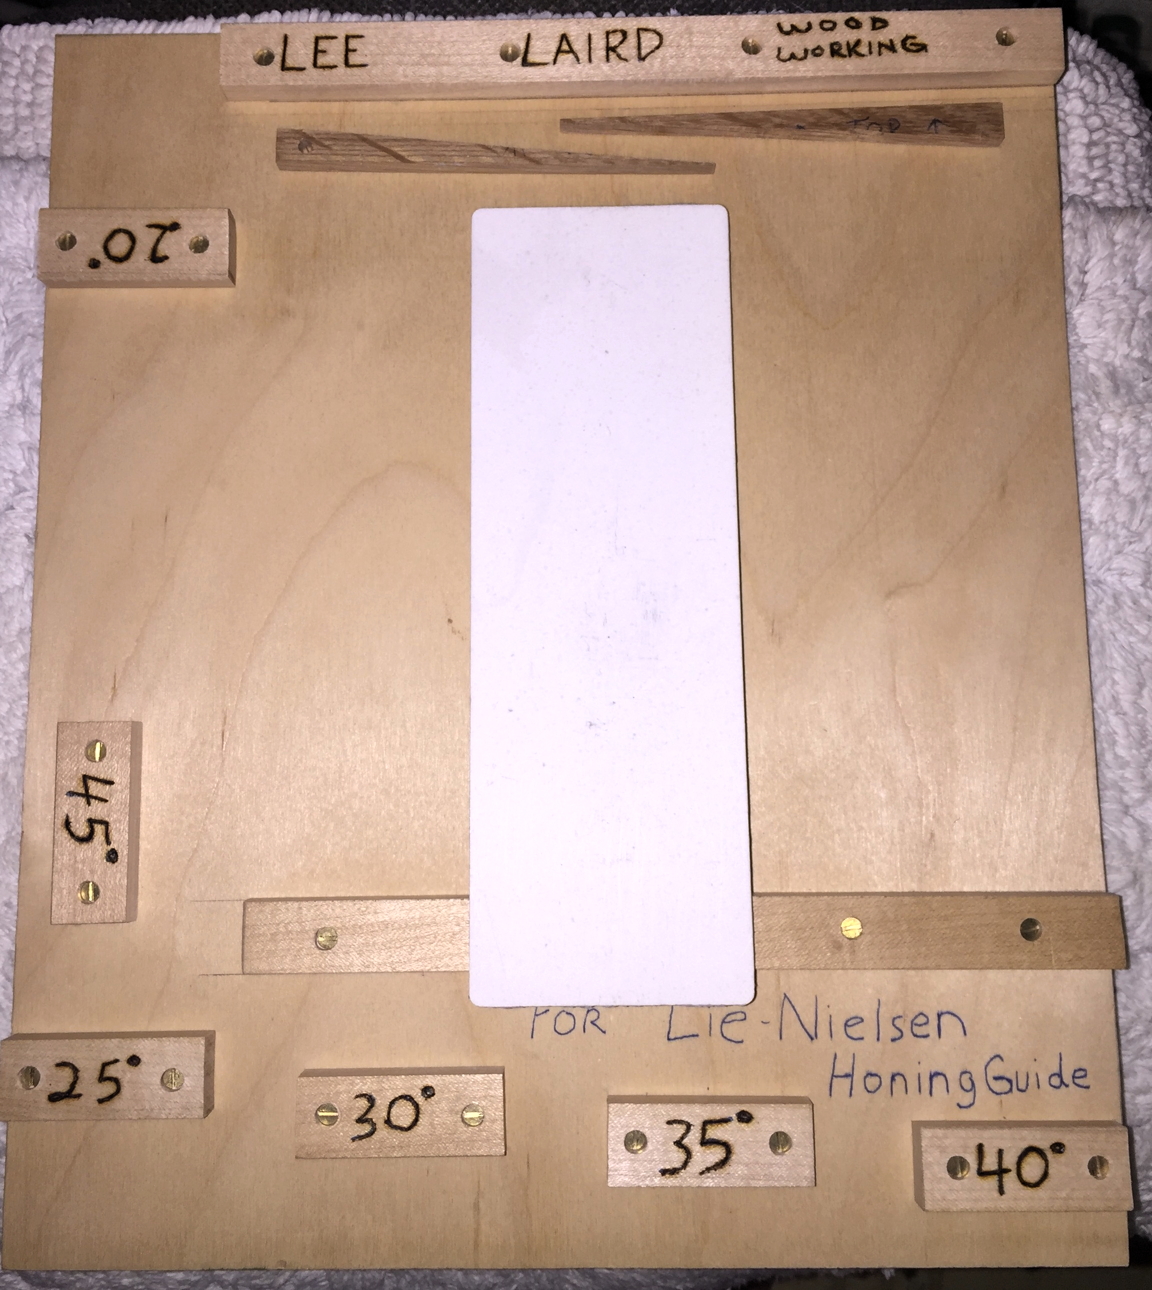
For my new honing board, I used an 11” x 13” piece of Baltic Birch Plywood, which lasted nicely on my previous honing board. For the stops, I raided my scrap-bin and found some Maple that was between 1/2”-3/4” thick (which wasn’t critical). Packed in with the new honing guide is a basic information sheet from Lie-Nielsen providing the distance for each of the stops, from 20-degrees up to 50-degrees, in 5-degree increments. I cut the maple into lengths around 2” and pre-drilled holes at each end with holes large enough so that the threads on the screws I used wouldn’t engage in the stop. This prevents the stop being held up off of the base, which can occur if the screw is engaging both the stop and the base.
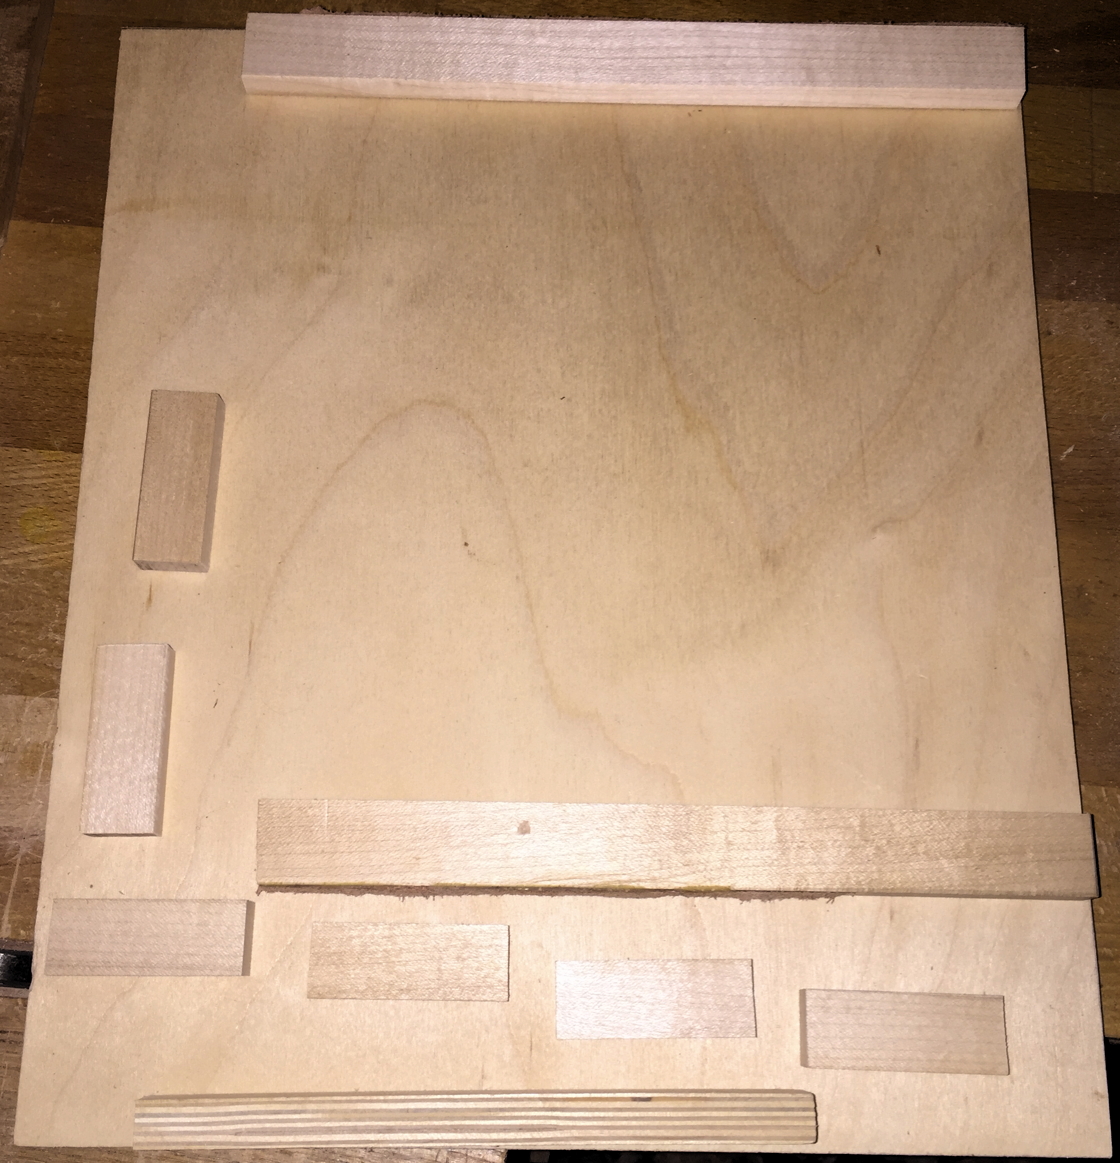
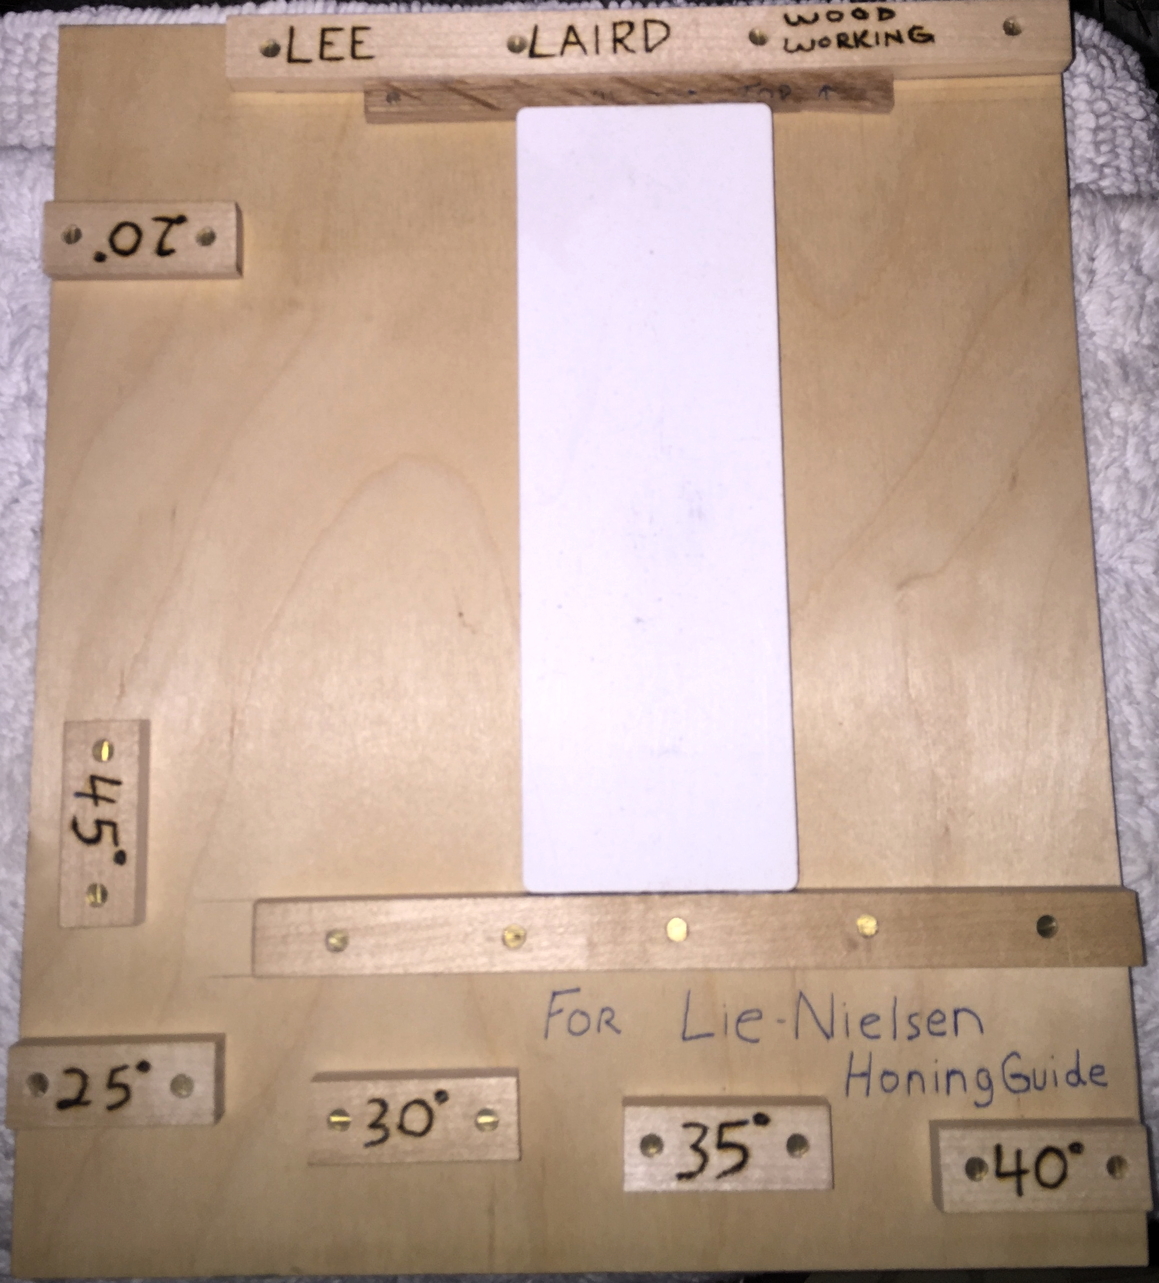
All of the stops are cut to size and laid out on the plywood.
I made a line where the front edge of each stop belonged. Next, I clamped a straight piece up against the line, which really helps prevent the stop from accidentally shifting any direction but sideways, which won’t effect the projection of the tool or the angle.
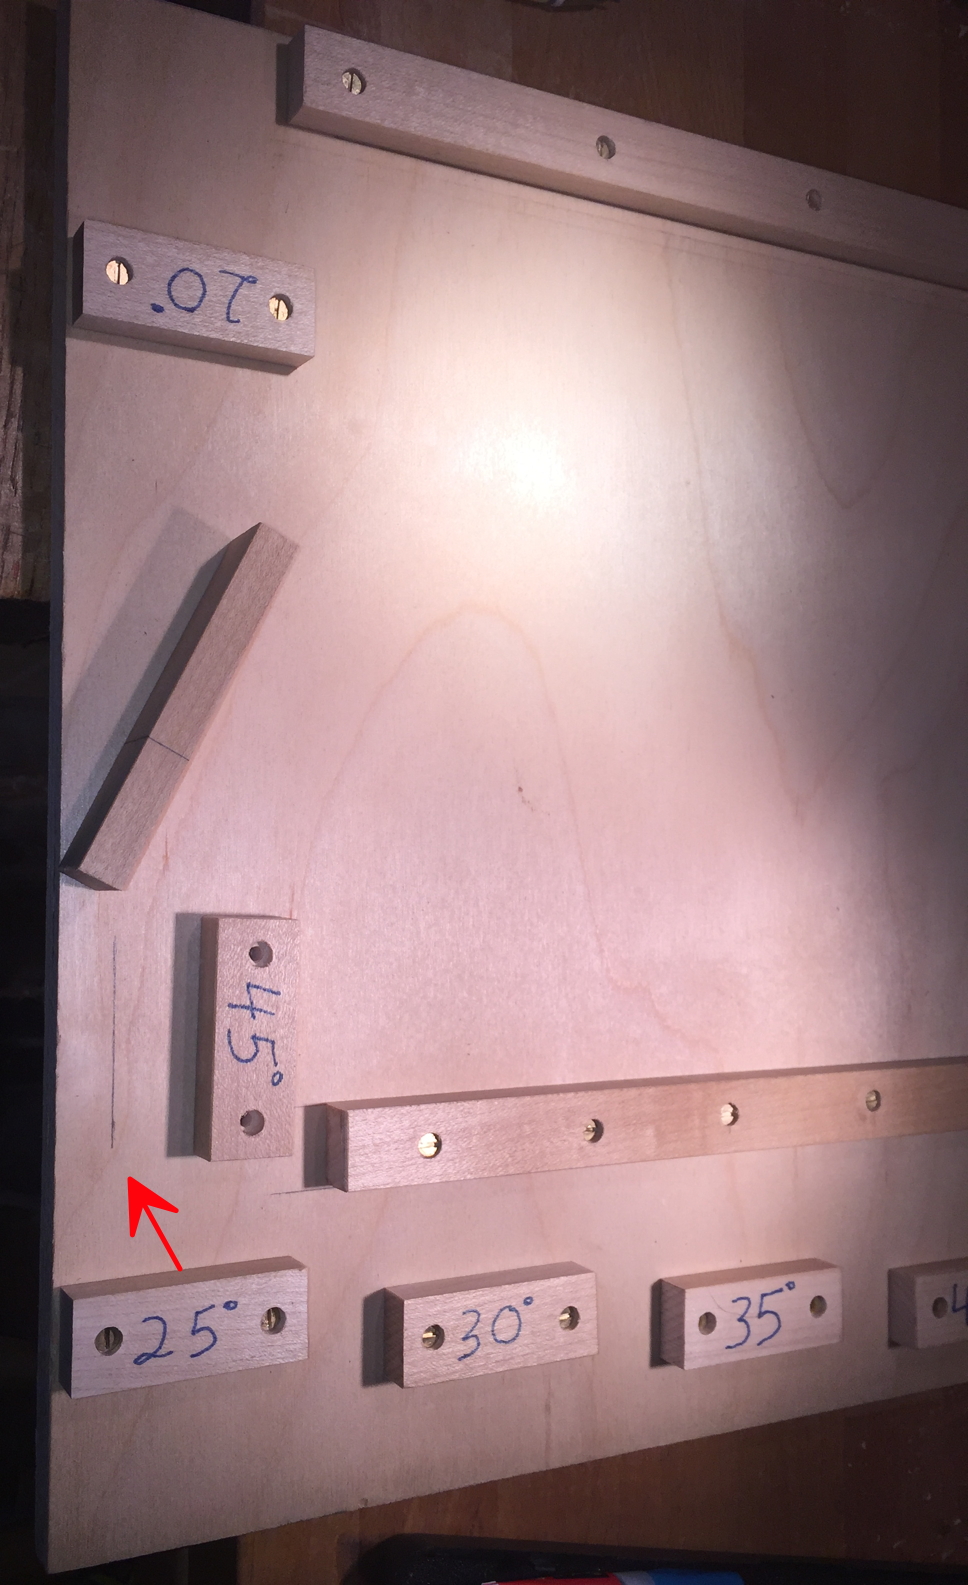
The location for the 45-degrees stop is highlighted with the red arrow.
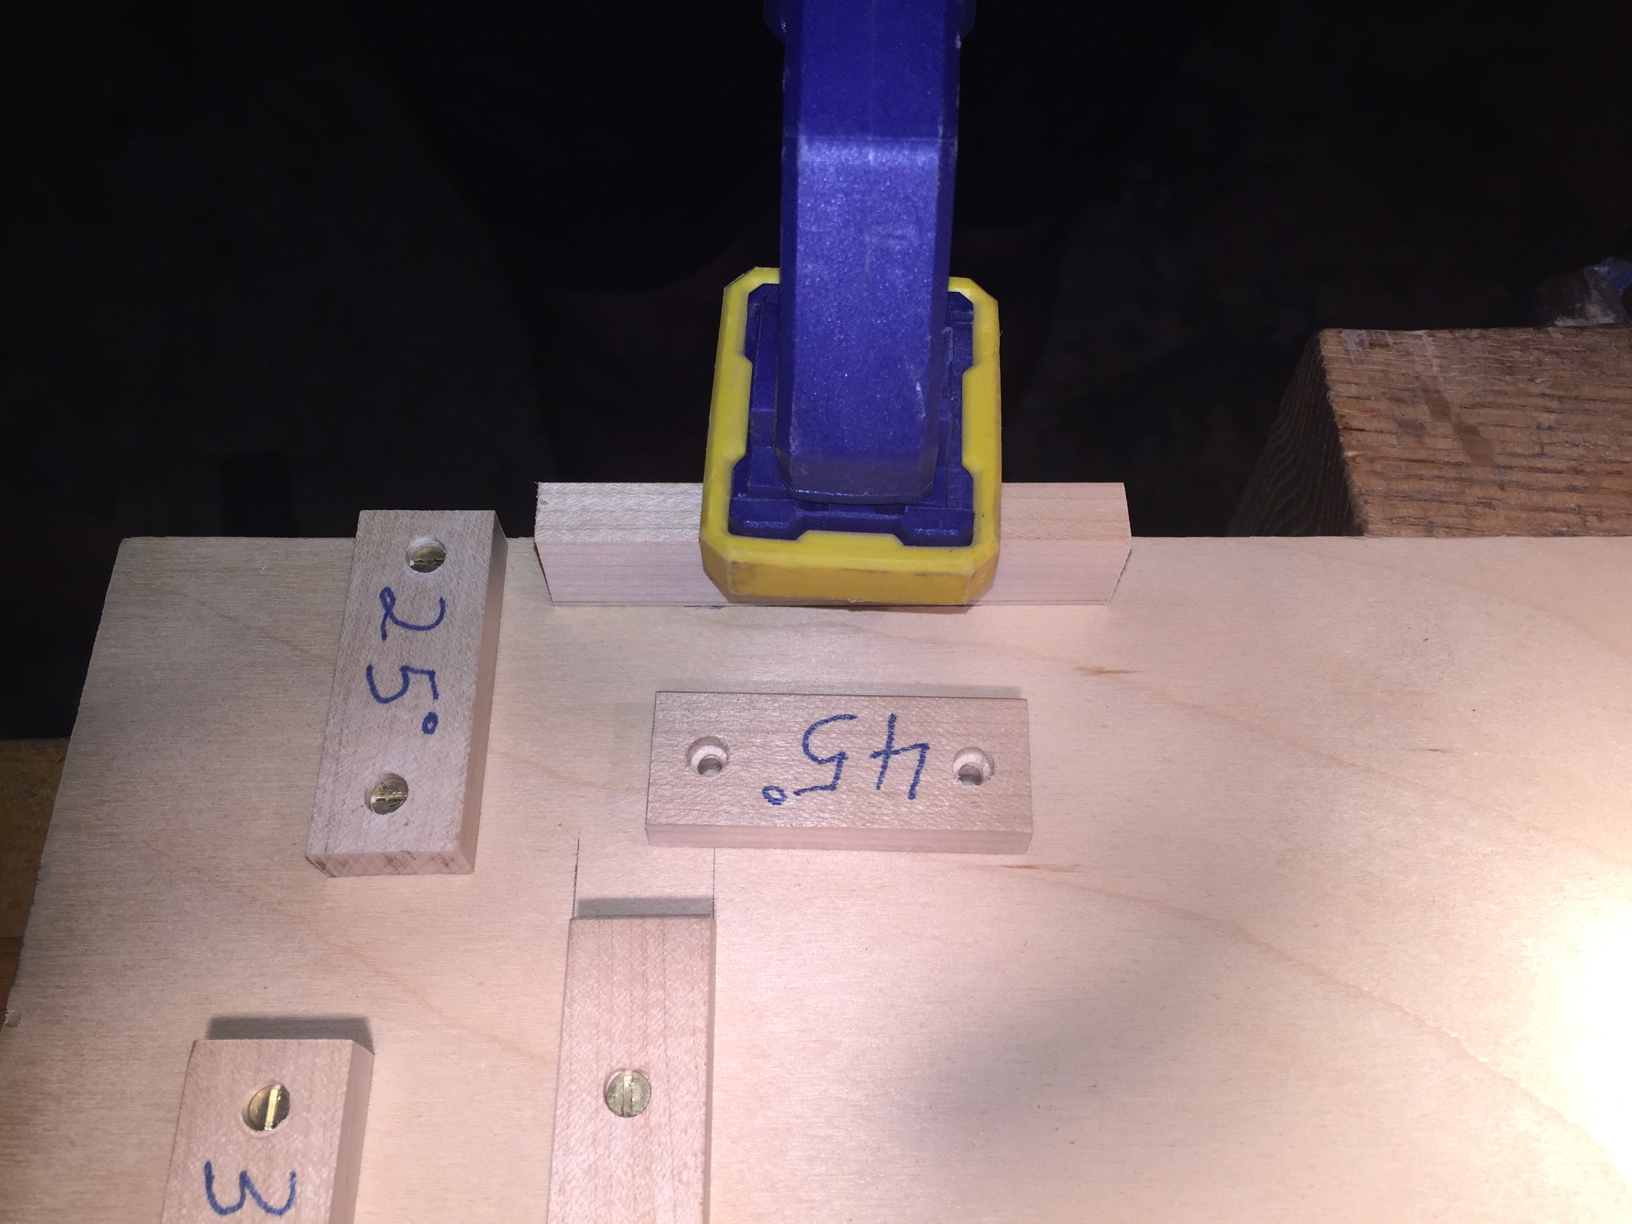
The straight block is clamped against the line to facilitate proper orientation.
The 45-degree stop is installed precisely where intended.
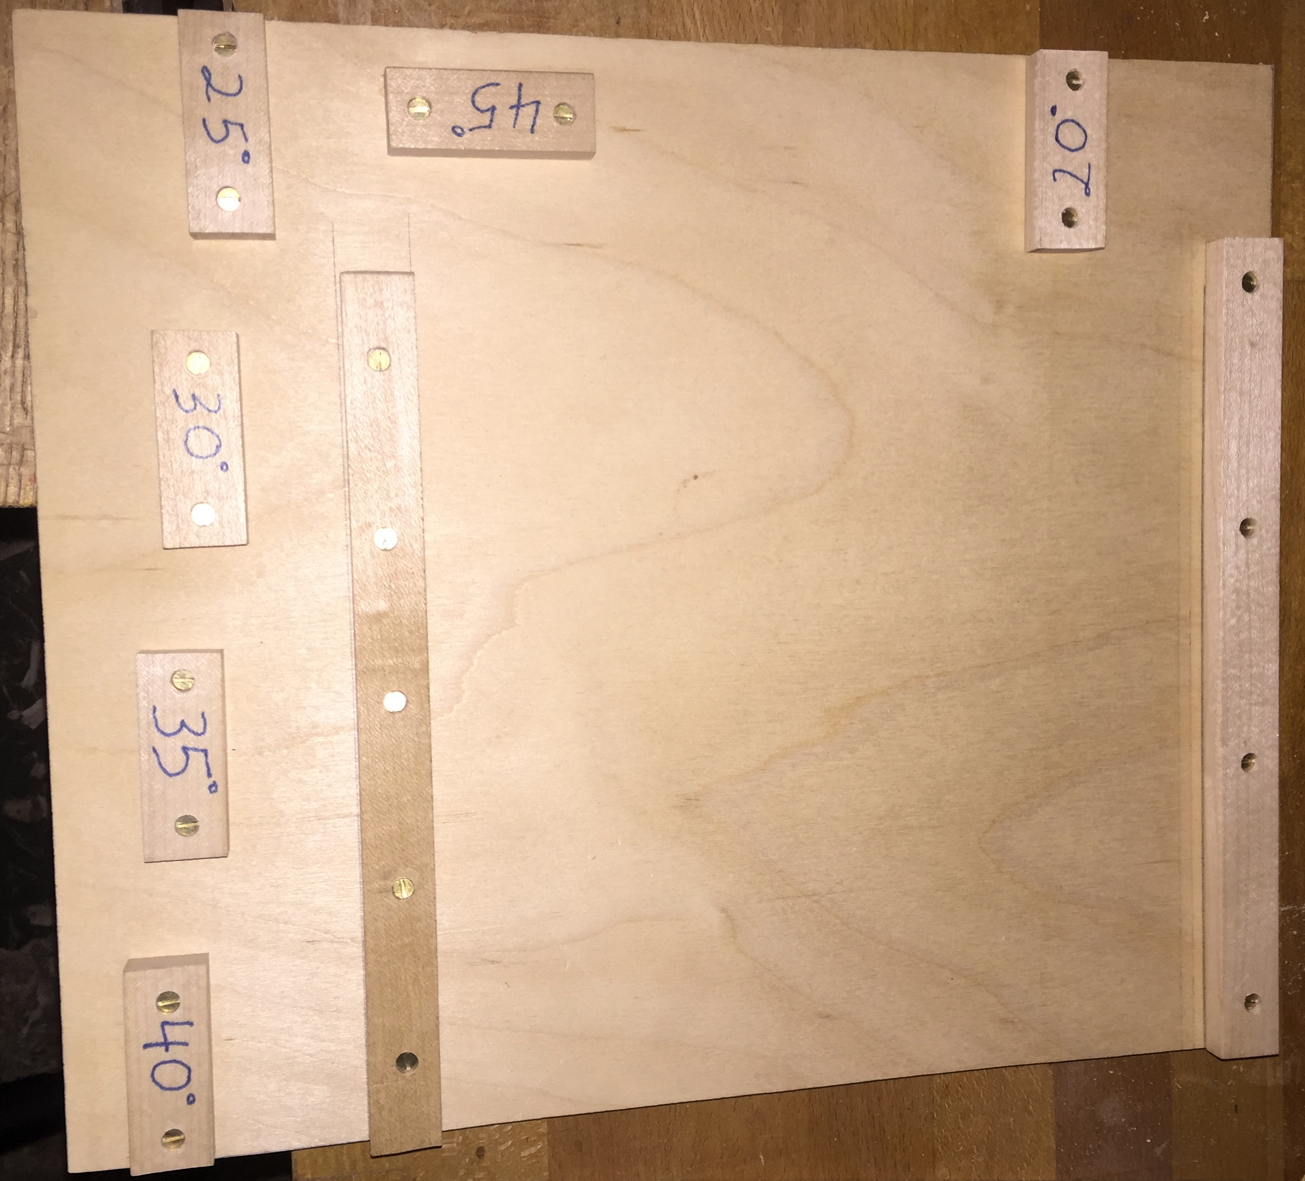
I used two longer pieces of the same Maple to house the area where the stone will be used. I pre-drilled again and inserted two end screws to make sure the stop stayed aligned, and then put in the rest of the screws. Since I use a couple of different types of stones, I left about ¼” extra beyond the length of my longest stone, which I made some cross-wedges to keep from moving. With two styles of stones, I also made a ¼” Baltic Birch Plywood removable plate that fits between the stone stops. My Shapton Glass Stones are quite short in comparison to most other stones so they need the boost.
First set of wedges cut to retain stone.
Wedges engaged with good results.
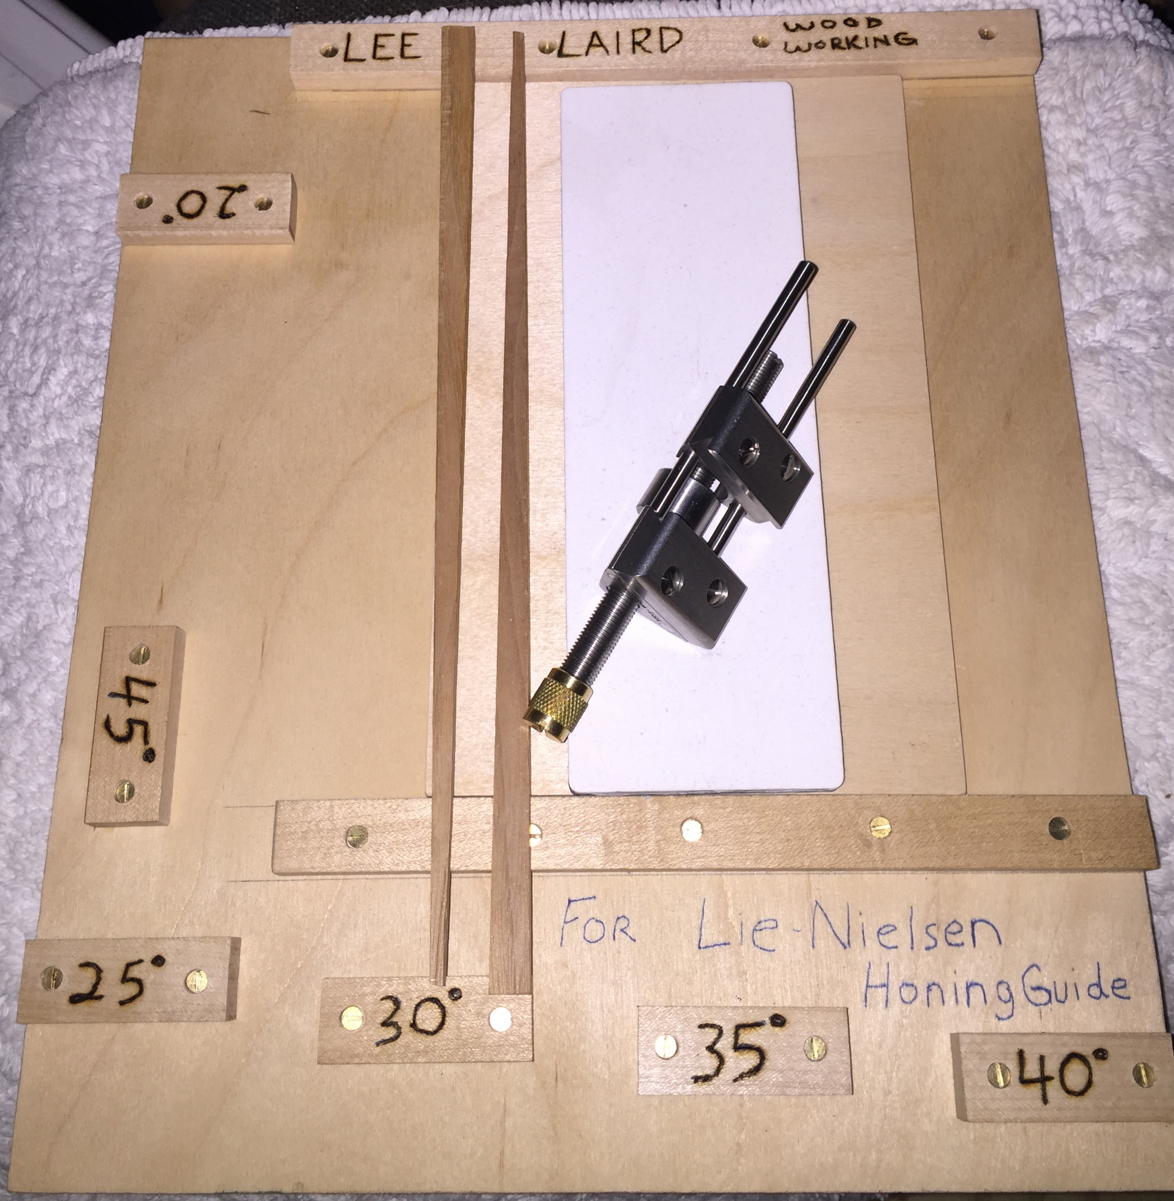
Here is another set of wedges I made for a bit more control, along with the honing guide, and the elevating plate for the Shapton stone.

The accessory jaws are shown on the left in this photo, along with the completed honing board and guide.
After all of the stops on the top surface were completed, I installed another scrap-bin piece on the underside at the edge closest to the user. I made sure the screws wouldn’t go all the way through the plywood and located them so they also wouldn’t run into any screws used for the stops on the top surface.
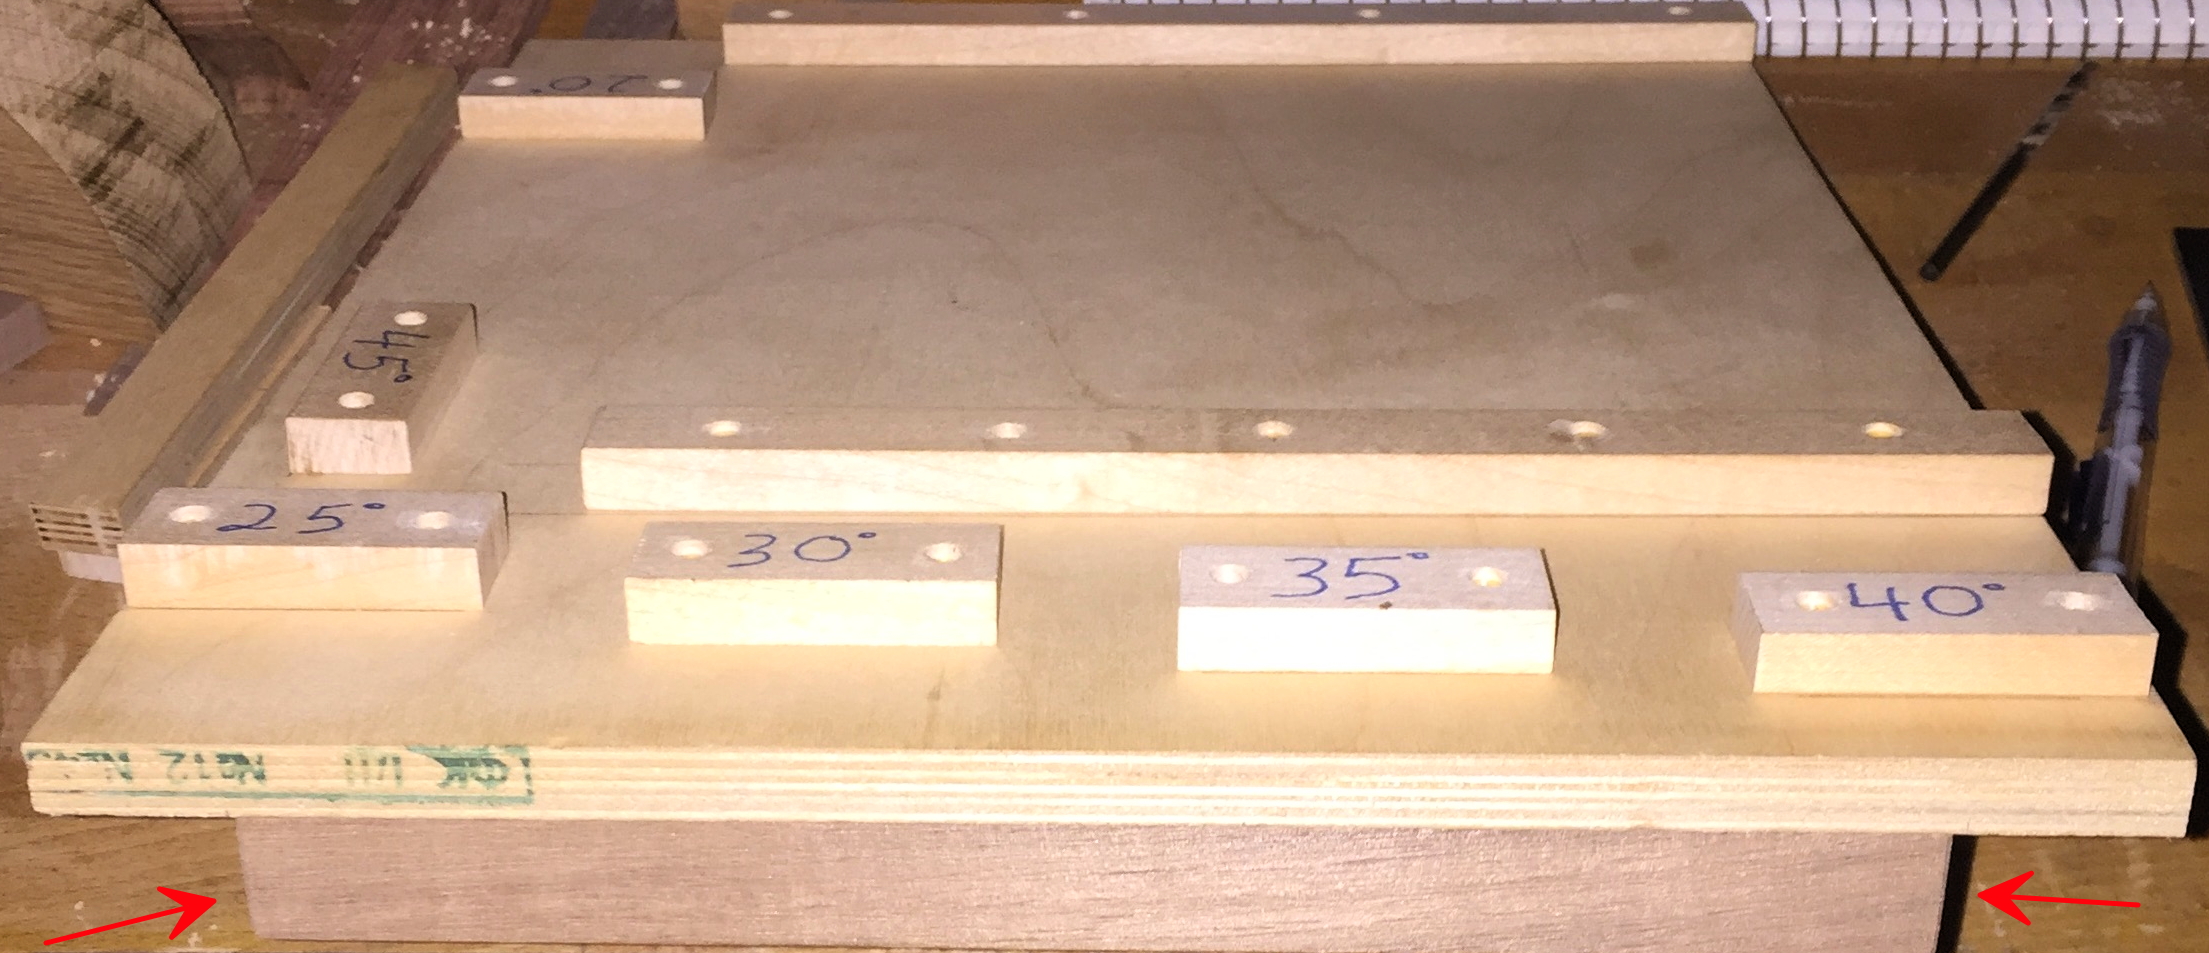
Red arrows flank the stop on the bottom surface.
I hope you enjoyed the article, and thank you for checking it out. Please let me know if you have any questions or comments.
CLICK HERE to read Lee’s blog entry on how he used the board.
Lee Laird has enjoyed woodworking for over 25 years. He is retired from the U.S.P.S. and worked for Lie-Nielsen Toolworks as a show staff member, demonstrating tools and training customers. You can email him at LeeLairdWoodworking@gmail.com or follow him on Twitter at twitter.com/LeeLairdWW
I can’t be the only one with this question so here goes: Could you show us how this board is used ? Seems useful I just have never seen one made or used. Thanks.
Lee will be doing a new blog on the use of the board shortly!
Here is a link to the new blog entry from Lee Laird about how the board is used: https://woodworkingtooltips.com/2017/06/use-honing-guide-board/
Wow great idea. I have the guide you showed first so could you please give us the measurements for the blocks? Thanks Russ
Hi Russ,
Sure, I’ll be glad to provide you with dimensions from the edge of the honing guide board to the front edge of the stops. There is also a method you can use to determine these for the honing guide you are using, as there will be minor (or not so minor) differences between guides. You’ll need a protractor with one long arm, as well as your honing guide (or guides, if you want to set up stops for each honing guide you plan to use), and I like to use an iron from my #3 or #4. Set the protractor to whatever angle you’d like to start with, which I’d most likely choose 25-degrees (the standard bevel angle many irons possess when they are brand new) just so I could work the bevel at the original angle, when the micro bevels become too large to be efficient. With the iron in my honing guide and the bevel facing down, loosen the guide’s pressure enough so the iron can just move forward/backward, with finger pressure. Place the base of the protractor against the bottom of a flat board, with the honing guide/s wheel(s) in contact with the top surface of the board move the honing guide/iron combo up against the long leg of the protractor, and move the iron either forward or backwards until the back of the iron is parallel with the protractor’s leg. With this set, you should be able to move the honing guide/iron until the iron contacts the protractor’s leg, along the length that they overlap. When you are sure they match, tighten the honing guide, so the iron won’t accidentally move. Now place the honing guide/iron combo so the wheel(s) are just off the board you intend to make your setting jig, but still up against it’s edge. The iron should lay flat on the same board, and you should place a wooden stop up against the cutting edge of the iron. You can use a fast acting glue, or clamp the stop so you can drill holes for mounting screws, so the stop won’t move while attaching it to your board. Make sure you mark each stop with the angle it represents. Repeat these steps for each angle at which you plan to hone, with a stop for each angle. Even though it sounds like a lot of steps/work, it really is a pretty quick procedure, to make one of these boards as your jig.
Ok, so let me also give you the generic distances for the stops, as you requested. The good thing about these stops is that it really doesn’t matter too much that the angles are crazy precise, as long as you reference the same stops each time you sharpen/hone. The last little thing is to make each stop parallel to the reference edge, so you get repeatable results each time, which is one of the great things about this jig.
25-degrees = 1 1/2″
30-degrees = 1 5/32″
35-degrees = 7/8″
40-degrees = 5/8″
45-degrees = 7/16″
I hope this helps and thanks for checking out the blog!