This is the final post in a six-part series – to go back to the first entry in the series, click here. If you just want to go back to the most recent entry, click here.
I have built a Windsor Chair.
I still don’t believe that I have any right to claim those words, yet here is a finished chair in front of me, that I put together with my own two hands (with a few assists from some convenient power tools…) Sure, I built it from a windsor chair kit, but does that matter to the beginning woodworker? Perhaps, but only in the sense that I was actually able to complete it, which is only going to drive me onward to the next woodworking project. I can see how someone might get addicted to this.
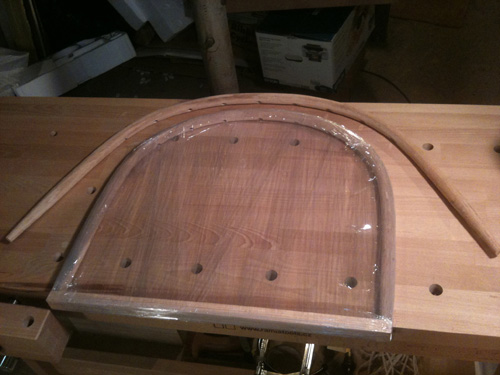
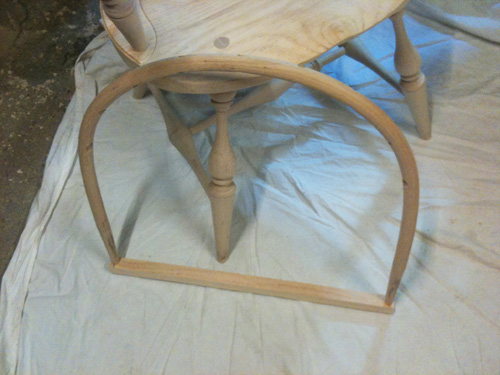
But let me back up a bit. Last time I posted on this blog, I was expecting a new bow to arrive by mail. When I unpacked it, I immediately set it next to old bow, to get a sense of how much the wood had actually moved due to the humidity. The comparison was impressive, to say the least.

If you haven’t read the previous post, just know that there is an easy solution to this issue, and it doesn’t occur very often at all. Chris Benner, who makes these kits, said he had encountered one other similar situation in all the years he has been selling them. I was just lucky enough and inexperienced enough to let it happen to me. If you have one of these chair kits at home, or are planning to purchase one, just follow Chris Benner’s advice for the bow and you should have no problems:
Take a 24? piece of scrap lumber and drill a couple 3/4? holes in it at the center distance between the two bow holes in the arm. Then when you unpack the kit, place the bow in the two holes to keep it from opening up.
The new bow was delivered already inserted into such a piece of scrap lumber, as you can see here:

Alright, now that I received the final piece, it was time to get back to work. The next step was to install the correctly-fitting bow onto the spindles, so after a bit of sanding, I did a quick dryfit to make sure it really would work, then took the plunge. I applied glue to one spindle hole at a time, then maneuvered the bow to fit over that spindle. After about three spindles were installed on each side, the bow fit well into the arm holes at the bottom. The bow is definitely a close fit, but I suppose that is how it must be for something that you want to last for many years. The last few spindles required that same combination of finesse and brute force that I’ve been developing throughout the chair build, but I eventually got it to fit and sit the correct distance from the base of the chair.
Next I drove a chisel into the top of each spindle above the bow, and then hammered a glue-covered wedge into the space created by the chisel. A bit of dry-time was required at this point, so I took a break to go grab a drink and reflect on how much easier the bow installation process had been then what I had imagined. I wonder if I’ll hit a point someday where I’ll stop doubting my capabilities to the point of sometimes being afraid to go forward with a woodworking project. It is refreshing to jump into a project like this on a regular basis and try something that I don’t already know how to do.

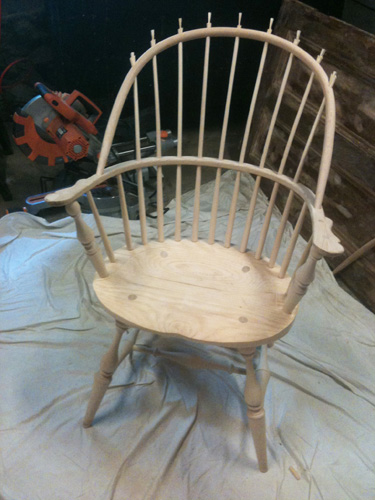
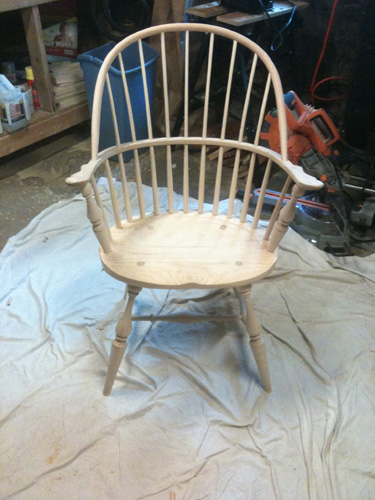
After sufficient drying and reflection time (i.e. once I finished my drink), I came back to cut off the spindles close to the bow, then sanded down what was left. I drew this part out a bit more than was probably needed, realizing that I was close to completion. It’s a bittersweet moment when you realize that all of the work you’ve done to finish something is at an end. After one last sanding pass, Voila – we have a chair.

Now of course, there is the matter of how I am going to stain or paint the chair, and I’m going to put a bit of thought into that. Painting would do a better job covering up the little mistakes that I know are there, but if I stain the chair and can see these little mistakes every day, they will act as reminders of what I’ve learned from each mistake. I haven’t decided yet which tactic I will take. I am proud of this chair, mistakes and all, so maybe I’ll just go with what I think will look the nicest.
A few lessons I’ve learned in this process:
- scheduling woodworking doesn’t always work out. I imagine all the experienced woodworkers who read my words in that first post about the schedule I was on responded by saying “Good Luck with that!” And they would have been right. For future projects I will try to be flexible with my time schedule, but it is probably good to have it in place at the start so I will stay motivated to keep going.
- Improvisational woodworking is not a bad thing – I used this experience as an opportunity to improve my skills with a number of different tools, including jigsaw, sander, coping saw and chisel. And next time I’ll have a better sense of which tool works best for each scenario.
- I think it was critical that I read the instructions several times through before I started. Improvisational woodworking and learning as you go are at their best when you know where you are going next. Reading the instructions allowed me to stop and ask questions at times when I wasn’t sure how to proceed, and really learn something in the process.
So now that I’m done with this project, what should I do next? Oh, the possibilities…


Very good information. Did you video the process? I’d be interested to see it. Also, are you encouraged to try such a build from scratch?
Dear Newbie, I started reading your post because I too wanted to build something like that.But by the time I got to your 3rd episode, I was thoroughly bummed out. While somewhat “entertaining” it was too much chit-chat, trying to be funny and just plain too drawn out to be meaningful and instructional. The whole experience could have been done in two episodes. If you want to write a novel, this is not the place for it.
Ignore him. Some people would not be satisfied if they were hanged with a new rope!
I enjoyed every minute of the read. Thanks for being willing to post your experience. Now, did you stain or paint your chair? Can you post pictures of the completed chair?
Ben, thank you for the feedback!
The still unfinished chair is on display in our Atlanta store, but I would like to someday finish it with milk paint – I’ve heard a coat of red covered by a coat of black is a really nice traditional technique, need to read more about it. I’ll be sure to write about it and take pictures when I do!
Thanks again,
Kelley
This was a great read and very entertaining. The information goes good with the kit and will help anyone who is thinking of trying this project. Again great job. Thank you.