

Ok, so do you have a card scraper sitting around in your shop collecting dust? If you do, don’t think you’re alone. I’ve talked to a large number of woodworkers across the country that are in a similar boat. I’ll provide you with some easy to follow instructions that will hopefully make the card scraper one of your go-to tools from this day forward. Oh, one caveat… The quality of steel in your scraper can absolutely make or break this success. I know first hand, as I had a card scraper in my shop early on, and no matter what I tried I just couldn’t get it to work properly, or if it did, it would only last a few strokes. I finally decided on a whim that I’d buy another card scraper, just to see if it was me or the scraper. Well, I’m sure glad I did, because the second one worked like a charm. I’ve even gone back to the original one (yep, I still have it for times when I want to dig in and do something I wouldn’t really want to do with my good scraper) and applied the same techniques, but to no avail.
When you first get a card scraper, the likelihood is that its edges will be similar to when you buy a new handplane. Not too bad, but certainly not to the level where you get your best results. The first thing to do is to file the two long edges of the scraper. I use a scraper file/burnisher made by Glen-Drake, which provides great results and helps make it easy to accomplish. Before getting started, I made a spacer block the same thickness as the distance from the file surface to the outside edge of the handle (see photo below). Make sure you test your spacer by placing the file on it, while the handle is on the bench. I put a light source behind the block and made sure no light was leaking through towards the handle or the end.
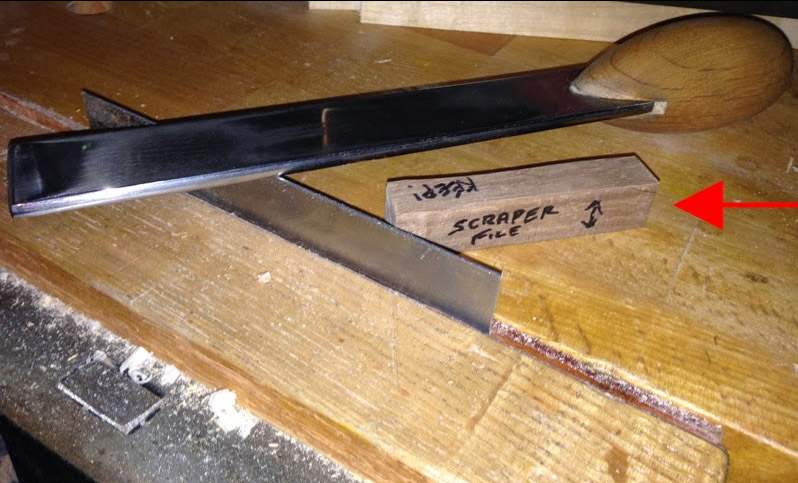
In the photo above, I have the handle of my file resting on the workbench surface and the file clamped in my bench vise. When clamping, I hold the scraper against the spacer so it is the same height above the bench. With the scraper at this height, it’s simple to keep a flat and square surface on the scraper edges. All you have to do is keep the handle of the file on the bench while moving it down the scraper surface with light pressure. One little trick I use is to coat the edge with black Sharpie so I can tell if my file is taking material equally across the edge of the scraper. One other thing I do is hold the file in a similar position to that in the photo, rather than trying to move it down the scraper from the tip of the file to the handle. The way I hold the file tends to have less chatter on the scraper, so less junk to remove later.
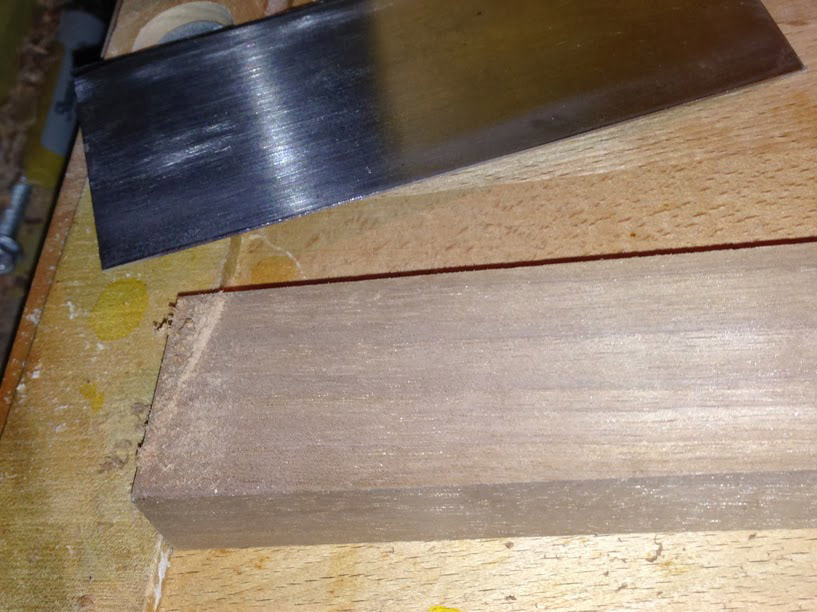
Above is a photo of the scraper’s results if used immediately after filing the edge. As you can see, it’s mostly dust, but there are little “almost” shavings. I thought it would be nice to have the comparison between this stage and the final surface.
The next step is to knock down any burr that either previously existed, or is now there from the filing. Depending on the type of stones you have, softer being a bigger deal, I sometimes use the same file with a pass or two to remove the burr. This is simple and quick. Another option is to use a diamond plate or even a hard 1000-grit stone (like the Shapton Glass series). After you have eliminated or at least reduced the burr, it’s time to hit the stones. Place a thin ruler on one edge of the stone so that side of the scraper is lifted ever so slightly, placing your efforts at the opposite edge. This focuses the work where needed, rather than basically working the whole surface of the scraper. Work on your 1000-grit stone first and then move up to 8000-grit or 10000-grit. The end result should be a very narrow polished band at the edge (hard to capture with a camera), on all four long sides of the scraper.
Next, make a wooden block (unless you have a piece of high density plastic, which I like better) that is almost as tall as the scraper is wide, and make certain the edge of the block you use is square to the bottom surface. This is to support the scraper on the stones when up on edge. Again, use the same 1000-grit/8000-grit stones, but make sure the scraper is oriented as if you were drawing a diagonal on the stone, and push as if moving straight down the stone. With the scraper angled to the movement it helps prevent creating a groove in your stones. If the scraper was oriented straight up and down the stone, the grooves would occur readily and by the time you finished, would be substantial. As usual, work each grit until the scraper has a consistent surface (a dull grey on the 1000-grit and a polished surface from the 8000-grit).
Now you’ve finished the prep work, so it’s on to creating the cutting edge. Well, that’s really not exactly true. The cutting edge is already there and you can test this if you’d like. It’s not as aggressive as it will be after the next step, but it will take a shaving. Just remember that the angle at which you engage the wood is different.
Lay the scraper flat on your bench, along the edge, and carefully move your burnisher up and down the wide surface at the edge. If you don’t have a burnisher, a carbide router shank will work, but be careful you don’t accidentally cut yourself on the router bit. This is done on all four edges. **Since I’ve been using the ruler trick on my stones, I’ve omitted this stage and the scraper behaved equally as well.
Clamp the scraper again in the bench vise and get your burnisher. I usually run the burnisher down the edge, holding it level with very light pressure. I then drop the handle side down ever so slightly and again lightly run it down the edge. I stop when I’m probably around 5 degrees, and it’s surprising at just how little pressure is required on these passes. If you’ve never tried it like this before, give it a shot with just the amount of hand pressure you might apply when shaving. Very light, as you don’t want to dig into your face/leg (men/ladies).
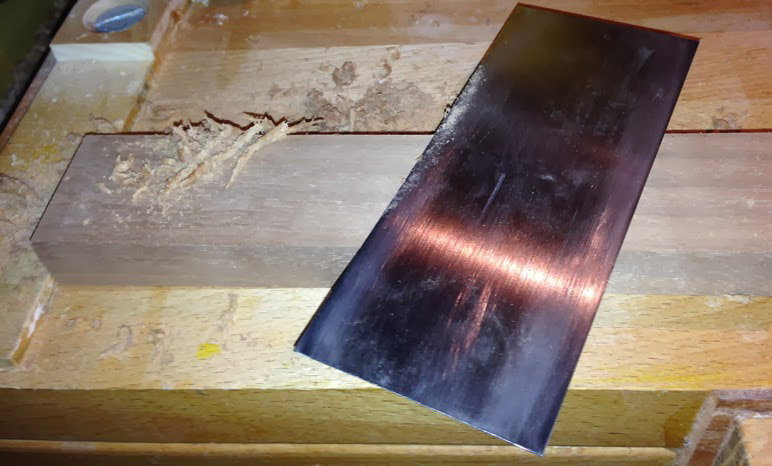
Below is a photo of the same piece of Walnut as in the second photo, which shows the shavings the card scraper produced after going through the full sharpening/burnishing techniques. Decent results after just a little bit of work!
It is also very surprising at just how a little burr does a better job and will last longer than if you create a large burr. Part of that is probably obvious when you think about it, as a thin piece of metal sticking further out is more likely to bend with similar forces.
I hope this helps anyone that has had trouble in the past or for those who have never tried a card scraper before. When you get used to doing the steps it’s usually not more than about 5 minutes to be back to making shavings. If you have trouble getting a cutting edge or keeping one, it may just be the card scraper isn’t of good quality, so just upgrade to a better one and you’re off to the races.
Thanks for checking out my blog and let me know if you have any questions or comments.
Lee
Lee Laird has enjoyed woodworking for over 20 years. He is retired from the U.S.P.S. You can email him at lee@lie-nielsen.com or follow him on Twitter at twitter.com/is9582