Based in Atlanta, Travis can’t draw a straight line, cut a board or drill a hole without a healthy flow of electrons. Follow along as this lifelong video game enthusiast, professional introvert, and one time IT virtuoso leaves behind cyberspace for a hybrid world where binary fuses with boards to create a digital woodspace. You can contact him at digitalwoodspace@gmail.com.
Buying a new tool is a lovely day. If you’re like me, you’ve spent hours researching and making sure you’re making the right choice. I spend hours reading forums, watching videos, and trying out demonstration examples when possible. I consummate the relationship with a handful of numbers on a piece of plastic.
Once home, I take every precaution that my new tool suffers no damage while unpacking. I cut the box open with the care used by surgeons upon making an initial incision. With the guts of the box exposed, I gingerly pull out the pieces, one by one, and lay them before me. With a scene reminiscent of an airplane crash investigation sprawled across an unused hangar, I take the manual and begin going over all of the parts. Do I have enough? How do they fit together? Do I need help with this?
Over the next several hours, I start by cleansing every part of what can best be described as Cosmoline (shipping goop). Sometimes it’s really easy (likely it isn’t Cosmoline) and other times it’s an absolute pain in the ass. However, I’ve traded a portion of my life to purchase this tool, so I am not skipping steps now. Once all parts are clean, I play a game of slow-motion Tetris. Part A goes into Part B. Part B connects to Part C… Once everything is assembled, I then spend several more hours applying coats of rust prevention product and making sure angles are what they should be.
Six months later, I start to notice something. That tool I purchased and spent so much time getting set up is starting to rust. I regularly strip and replace the rust prevention coating, so what’s going on? Unfortunately, my shop isn’t climate controlled. It’s a 2-car garage attached to my house. Temperatures jump up in the summer and sink down in the winter. In the summers, humidity is my enemy. In the winters, condensation is my enemy. In between those extremes, my own stupidity is the enemy.
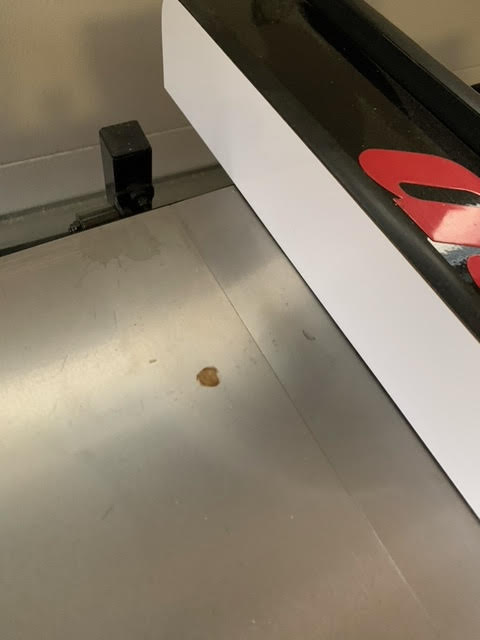
For instance, it was recently raining outside, and I needed to open the garage door to move something from my car into my house. It never crossed my mind that the weather stripping on the base of the garage door would drip water on to my table saw. To my surprise, when I went to start woodworking that weekend, my table saw was covered in polka dots of rust. Even though I religiously rust protect the surface, I discovered it doesn’t matter what prevention I’ve done when it’s just too much water to evaporate before that barrier is broken.
Since my garage is not climate controlled, and I imagine a lot of us don’t have climate controlled shops, the one thing I have found really works well is a dehumidifier. If you can run a hose from it to drip outside of your shop, even better. Manually dumping the bucket becomes an every third day task for me during the summer. However, it has substantially cut down on idle rust in my shop. Idle rust is what happens when temperatures fluctuate throughout the seasons, and aren’t from a specific cause like leaving a dripping wet cold Coke can on your cast iron table.
For direct rust accidents, like that Coke can or a sweaty glove, the one thing I have learned is that it’s perfectly okay to resurface my cast iron. It won’t look as great as it did on day one when I spent so many hours setting it up, but it will function. The key here is to re-surface the entire surface as evenly as possible. Simply scrubbing out the rust with a Scotchbrite pad will only leave a divot where that Coke can sat. If it’s on the periphery of your table, and unlikely ever need to be square, fine. If it’s somewhere wood will regularly come in contact with, you’re likely better off making sure that entire surface matches what you are taking off to get rid of that rust.
Here’s where things may get frustrating, and you may ask yourself if you are helping or damaging your cast iron top. Removing rust will make your cast iron top look different. The grit of the Scotchbrite pad you used will make the top look different than when you first set it up. Most often, the clean lines will turn into what can best be described as cloudy swirls. If this really bothers you, by all means go for higher grits to bring the sexy back. However, functionally, so long as the rust is gone, and the treatment/re-finishing was consistent, it will be fine.
Finally, outside of goofy stuff like opening my garage door on a rainy day, the best way I’ve found to prevent rust build up is to clean my tools after using them. It won’t help as much as the seasons change, thus the dehumidifier recommendation, but it generally keeps the shop rust free. If you spent all night turning a bowl, wipe down your lathe with a dry cloth. If you cut some pickets out of 2×4’s from your local big box, wipe down all surfaces on your table saw when you’re done. While rust prevention options like Boeshield, Renaissance Wax, blah, blah, blah can help, ultimately, keeping your woodworking space clean will serve you much better when trying to prevent rust. That and a dehumidifier.
This is the first summer I have spent significant time woodworking. I work in a garage without any kind of environmental controls beyond raising and lowering the garage door or cracking a window. What I have learned quickly is that it gets really hot, really fast! I thought surely there must be some tips for managing the temperature in an unmanaged room, but it turns out a lot of people manage it by just not woodworking at all, especially in sunbelt states like mine. While I have by no means solved making sawing away on a balmy summer afternoon pleasant, I have discovered a few things that make life a little more bearable. To start, a little about the space itself.
I work out of a 2 car garage with 2 windows facing the street and a garage door orthogonal to the windows. There is a 120v wall outlet between the windows and one perpendicular to it on the opposite wall for a grand total of 4 outlets, all on the same 20 amp circuit. The space was originally a carport that was converted into a garage, which no doubt influenced some of the interesting electrical and materials choices.
The Electric Desert
The simplest solution would be a window air conditioning unit. Unfortunately, with such a shortage of power in the garage it would be a bit difficult running anything in addition to the A/C unit. For instance, I have a 120v table saw that when cutting with a shop vac running will trip the breaker when cutting harder material like maple or bloodwood. Add an A/C unit to the mix and it will probably trip the breaker when I look at my tablesaw.
The other issue with a window A/C unit is cub appeal. Since the windows in my garage face the street I’ll either repel my neighbors with the unsightliness of it, or attract burglars by proudly announcing; “See this garage with the fancy A/C unit? It might have stuff in it you can pawn!” Of course I keep nothing in my garage and move tools in and out as needed. Sufficient to say, a window A/C unit has issues beyond just powering it.
As a somewhat related aside, one thing that baffled me when I first began purchasing battery powered tools a few years ago was why they had bundles that included fans. I guess I understand the rationale for it now provided you are working in a small enclosed space with limited power like a shed.
Management not Remedy
Unable to remedy the problem with a 25,000 BTU A/C unit, my thoughts turned toward managing the heat. Resurrecting some of the memories I have left from IT work and disaster planning, I devised a heat management strategy that doesn’t really make things that much better, but it does help me systematically manage the environment. Otherwise, I might just say to hell with woodworking in the summer and instead spend my time in ice cream shops, running through splash pads, or sneaking into my neighbor’s pool.
The most important thing to have is a thermometer. Maybe I’m alone with this, but I regularly think it’s either much hotter or cooler than it really is. Taking the guess work out of what the ambient temperature is kind of important as things like heat stroke and death are usually solved by a combination of exposure time + temperature. I’ve read in some cases you don’t even realize it until you start feeling colder!
Next on the list is a portable fan. It can be as small as those cute little Vornado(s) or as big as a Big Ass Fan, but it needs to be something that can move air around and cool you down when pointed right at you. Also, don’t get lazy about moving the fan as you move around your work area, take the time to have it pointed in your general direction else you may as well have no fan at all.
Get a mask that you can breathe through. In the fall and winter feel free to break out those stuffy N95 disposable masks you stockpiled over the past few years, but for daily summer work spend a little extra and get a breathable mask that doesn’t make you feel like you are cooking your own face. Fine saw dust is generally accepted as being bad, so make sure the mask is breathable and N95 or higher. There’s lots of options out there and if you really want to go crazy try the Trend Airshield Pro.
Much like sand and glitter, sweat will get everywhere when woodworking the summer away. It does make for some nice Rorschach rust patterns on anything cast iron, but it gets a little annoying to constantly clean up. To combat this viscous venom, I found taking a trip back to the 80’s aerobic videos on YouTube provided some inspiration in arm and head bands. Fortunately, technology has progressed a little bit since those fuzzy bands were common place and you can now find silicone iterations of them which do a better job of not getting caught in a saw blade. Either retro or cutting edge, they really help keep the salty menace at bay. Now if they only made a shop version of yoga pants…
Finally, and most difficult, take regular breaks. I know that once I get going, it is hard to stop but woodworking is like a race where there is no timer, there is no place, and everyone that finishes wins. Trust me, no one is going to care if it took you one hour or three to plane boards for your next project. Funny enough, I’ve also found that taking cool down breaks has made me more efficient while woodworking. The reason being, it gives me a moment to consider what I’m working on whereby I realize that I was about to cut something either the wrong way (inverted) or I need to change out the bit I was about to cut a chamfer to the wrong depth. If you can’t take a break, then figure out if any of your work can be re-located. Build or buy (shameless plug) a portable work surface where you can dovetail, tenon, mortise, etc. outside of your shop. I do dovetails on a coffee table while binging Euphoria or watching JapanesePrintmaking on Twitch. I have a portable generator that I use to run a planer so I can make fine mulch in my backyard where it is generally quite a bit cooler than my garage. There are options out there, get creative!
TLDR (Too Long, Didn’t Read)
Managing heat in the summer is a real PITA party. Finding what works and doesn’t takes time, effort and a lot of patience. Frustratingly, once you have a system in place it won’t make things better they will just become bearable. Which, like 1200 grit sandpaper, is super fine. If you have an A/C equipped shop, post it in the comments below so we know who to visit!
Took both; and a third, fourth, fifth, sixth… Briefly, I started woodworking with 3D design, followed by rough carpentry, finish carpentry, 2D design, handheld CNC, gantry CNC, fine woodworking, finishing, hand woodworking, carving, etc… Today I spend hours each night hand cutting pin and tail boards in pursuit of near perfect dovetails.
Along each of these roads, I have learned something that has helped me move further down the other roads. While touching a little bit of everything has been fun and expensive, upon reflection taking so many roads has left me a little bit lost! In an effort to re-focus, I retraced my steps and began segmenting the woodworking I do into three major disciplines; digital, hand and power.
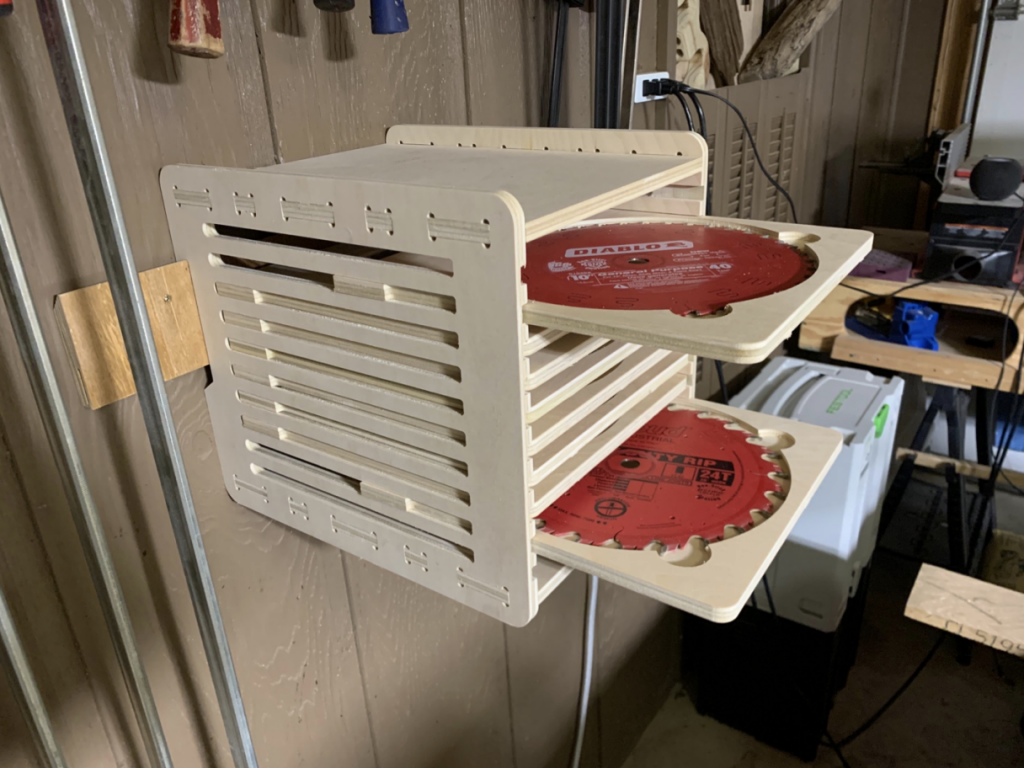
Blade storage – Designed with Illustrator and cut with CNC from 1⁄2” Plywood
Every woodworking project falls into one of these three disciplines as the predominant ‘tool’ used to accomplish the task. Take building a planter box, if I use a circular saw to cut the parts and an impact driver to join them with screws, its power woodworking. If I instead use a hand saw to cut the parts, and lap joints or tenons to join them, hand woodworking. If I design the parts in Illustrator, use a CNC to cut the parts, then join them with tenons through dogbones, digital woodworking.
These are ‘in a vacuum’ examples. They are focused on exclusively using only tools the discipline would imply and afford me to use. The reality is, most of us will end up doing some form of hybrid woodworking, and that’s how I ended up taking so many different roads. In hindsight, I sometimes wish I could go back to just one road.
So how do I categorize a project I am working on? In my opinion it is the tool I use to make the final components for a project. I stress final because there is a lot of preparation that goes into woodworking, especially if you are using rough sawn or minimally surfaced boards.
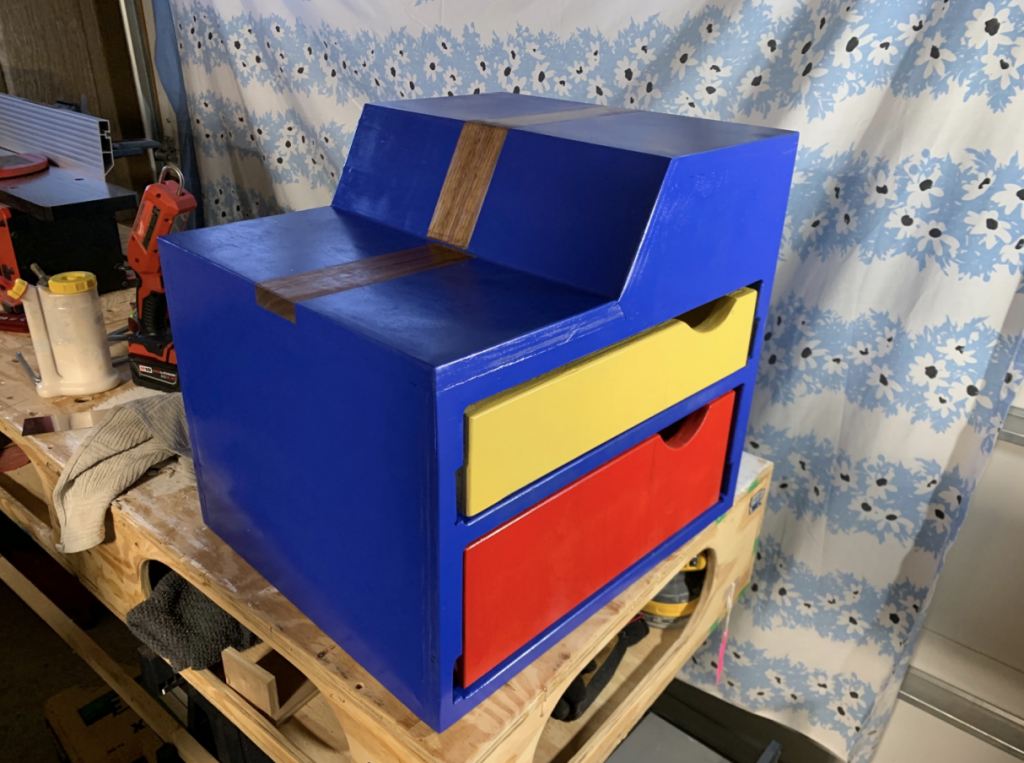
Bauhaus Box – 3⁄4 inch Plywood cut with a Track saw. Corners rounded over with a handheld router. Hand pull cut out with a jig saw. Walnut accent strip because I mismeasured.
Let’s say I want to put my hand sawn dovetails to use, what discipline would I use? To start, I will need boards. To prepare them I need to joint and plane them. The hand method will use jointer and planer planes, power the same just attached to an electrical outlet, and digital with a straight and surfacing bit. Boards in hand, time to cut them to the dimensions I need. My options are a hand saw, table saw or a compression bit. I miss using my CNC so I’ll use the compression bit. With my parts in hand, time to break out the dovetail saw! Pins fitting tails and a pint of glue later, I have an unfinished nightstand. I need a workout, so I grab a sanding block and get to work. With every edge and corner nice and smooth it’s time for a sealer. Since my arms are sore from sanding, I opt for a power sprayer. After a few coats, I can finally say ‘work complete’.
Time to share my creation with #woodworking. How do I describe how I built it? If I write about every step and what I used for each step, it would be really boring like the paragraph above. Taking into account each step and the three woodworking disciplines, I would say the nightstand is a product of digital woodworking. Huh?
When looking holistically at this piece of fine art, using CNC to create all of the components defined what the nightstand would fundamentally look like and its overall character. Had I hand cut the boards there would be a dimensional difference, however slight, in each component. A table saw would have been closer, but I find even perfectly set up, there is slight variation with each cut depending on blade height, push speed, weather, etc. Assuming I nailed the dovetails, that would be the part of the project I find to be the highlight, but it’s not enough to say the project is hand woodworking.
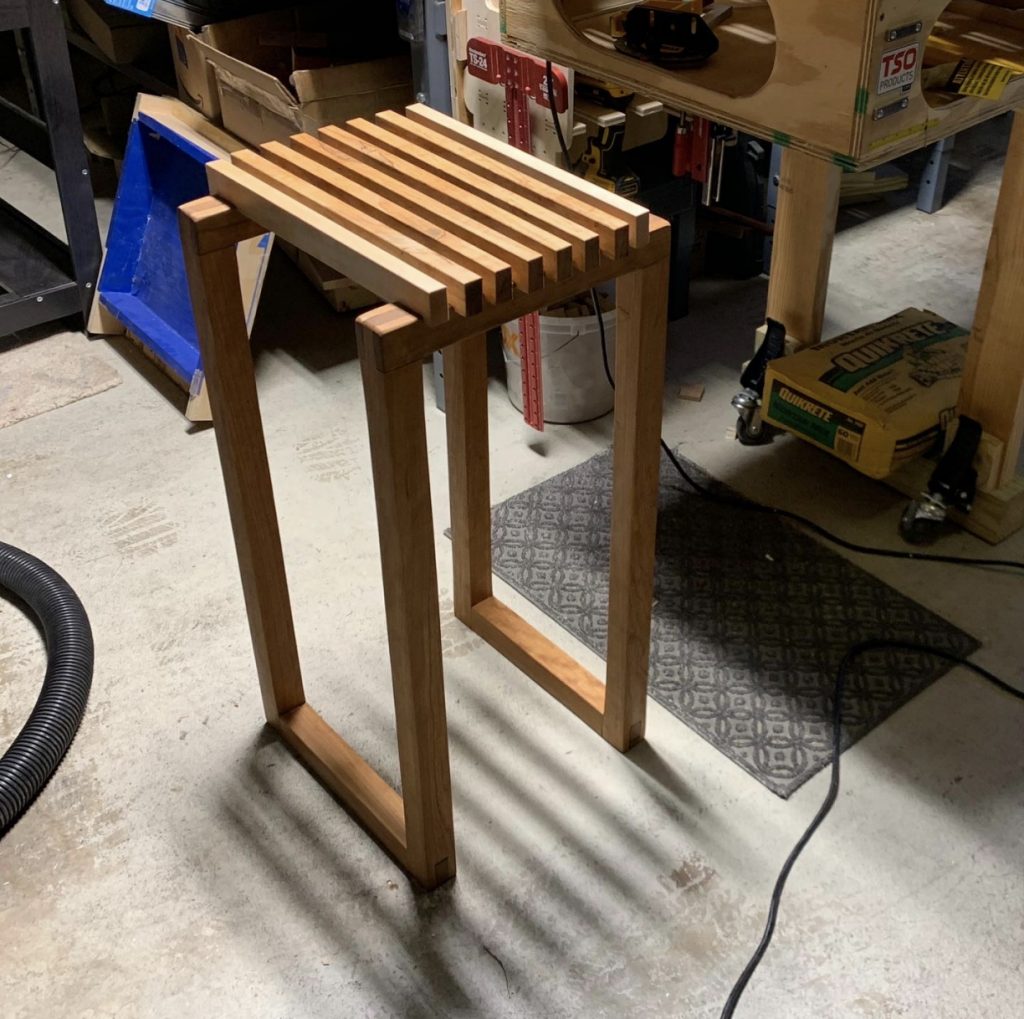
Planter Stool – Hand cut through tenons throughout. Cherry supports and Ambrosia Maple runners.
Does it really matter? Yes, no, maybe so. It helps if you are new to woodworking and have limited space to work with. I ended up taking so many different roads because I didn’t see anything that broke down woodworking into logical disciplines which leaves me the mental mess I am today. Most of the examples I followed incorporated a little bit of each. I didn’t know what I didn’t know. While digital, hand and power are still vast categories, they do provide a single road to go down, focus on and more importantly master. In the nightstand example, every step could have been done with only CNC, hand or power tools and I would have ended up with virtually the same nightstand.
Either of the three paths will have its own unique points of frustration and satisfaction, but picking one really helps to cut down on the ‘noise’ and expense when getting started. If I had to start all over again I think I would pick hand woodworking with a focus on boxes. It’s quiet, relatively inexpensive, and will build a knowledgebase that easily carries over to the other two. That being said, I think if all I ever did was hand work, I’d eventually get tired of it and quit woodworking. But I’m an electron addict that needs a regular fix.
Starting down a woodworking path without many tools can lead to serious sticker shock if you’re not careful assessing whether or not a tool purchase is really necessary. Deciding which tools to invest in is even more challenging when you simply don’t know what you don’t know. Like whether you need the 6” or 12” square; a miter saw or a table saw; a carpenter’s pencil or a mechanical pencil. There’s an old woodworking adage I’ve run across a few times that goes something like ‘only buy a tool when you need it’. I took that to heart when I started filling out my toolbox and have found over the past year it’s a good starting point for a tool purchase but shouldn’t be the sole guiding principle. Of course, I didn’t really figure that out until thousands of dollars into my woodworking journey. Looking back at the what and why of my purchases, I’ve developed something of a list of ‘rules’ for purchasing tools that fellow novices may find helpful.
Stick to the plan
Was any $$$ saved with these multipack purchases?
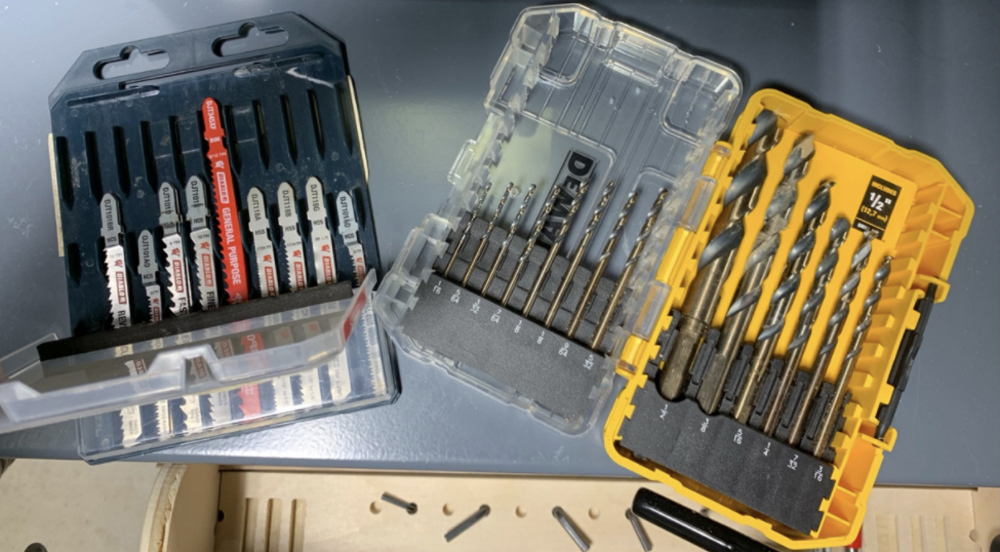
I used to wander up and down the aisles at big box stores with only a vague idea of what I needed for a project. I would write out a list of what I thought I needed but would inevitably end up purchasing more than what was on the list; or the wrong thing entirely! For instance, I went one day to purchase a random orbital sander that was on sale. While there, I saw a sheet sander sitting next to it that was also on sale. Since I had no idea what the difference between the two was, I bought both just in case. When I went to buy a particular drill bit or jigsaw blade, rather than purchase exactly what I needed, I bought multipack deals with twenty different bits and twenty different blades. I mean why buy one drill bit for $2.99 when you can have twenty for $19.99? That’s only one dollar a bit! The jigsaw variety pack includes ten different blade types and maybe one day I’ll have a use for one of the ten blades that cuts metal! Ultimately, these and many more purchases were made out of self-doubt and a false sense of being economical about what I was buying. I knew I needed a jigsaw blade but was unsure of what kind. I knew I needed a 1/8th drill bit but the bits were cheaper in packs of twenty. I knew I needed a sander but wasn’t entirely certain on why a random orbit over a sheet sander and did not want to pay an extra $100 later when they were no longer on sale. All together, I spent about $240 for these four items. Had I stuck to my list it would have been $110. Trust and accept that purchase mistakes will be made, but when you first go shopping for tools you need for a project, ignore the sales and stick to your plan! It will save you more over time.
Keep your receipts
2021 Receipt Bag
I’ve never really kept receipts unless they were something important like a paid traffic ticket or a Powerball office pool. When I started woodworking I wanted to keep an accurate record of how much I was spending on tools, consumables, wood, etc. Whenever I get home from a new purchase the first thing I do is stick the receipt in a Zip-loc bag that’s marked with the current year. Later on, I itemize everything from a box of nails to a bandsaw in a spreadsheet, then do fun things with the data like pretty graphs and expense forecasting. What I have found is that woodworking bleeds you financially through the thousand cut method rather than the big ticket purchases. $16 for double sided tape, then $2.49 for a 3/8 drill bit; $180 for a lovely Walnut slab and $56 for some 4/4 White Oak. Individually, these purchases don’t seem like much but good grief do they add up rapidly. If you’re not tracking every woodworking expense, you will soon find yourself wondering why you don’t have the scratch for that new planer you really need; and maybe spending a few nights in the doghouse.
Beyond just capturing costs, keeping your receipts works like a golden ticket for any purchase mistakes. For the sheet sander that sat on a shelf in my garage for a few months, I was able to take it back and get that sweet in store credit that I then turned around and spent on a shop light. In that case, I was outside of the full refund window, but for other returns I got all of my greenbacks back. As an aside, for any big box store purchases, triple check you are getting what you think you are getting. I’ve purchased boxes of wood screws that were filled with nails and a circular saw that had been opened and returned minus the batteries. Cash maybe king for other purchases, but in the land of woodworking receipts reign supreme.
Think global, buy local
The majority of my online purchases have gone off without a hitch. However, the ones that went sideways, really went sideways. I had one company sell me a new sander then ship a used one. Another company would not help me find out where Fed Ex was holding a delivery, so it was returned to them after 5 days and I had to follow up to resolve the refund a couple of weeks later. A planer I purchased was damaged en route was a nightmare to return. All of these issues could have been avoided if I had just spent my money at the local woodworking stores in my area. It also affords the added benefit of having to go through the cash register ritual of paying for something which for some reason makes me a bit more frugal than simply clicking ‘add to cart’ and ‘submit order’ on a website. It’s like I feel the money rushing out of my account more so in store than online.
Buy it forever
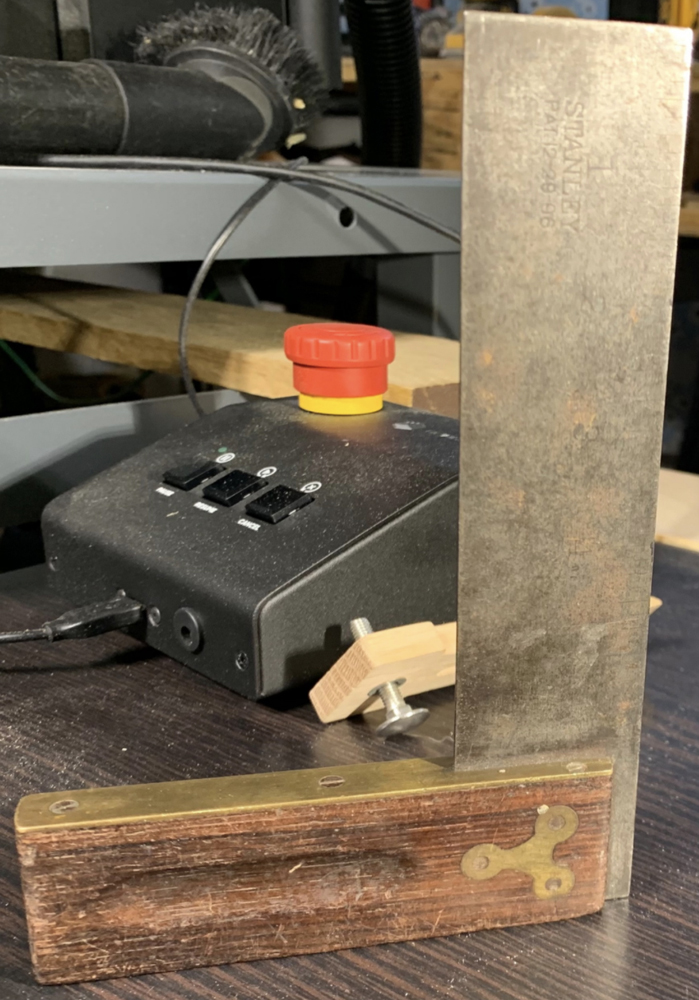
1896-1906 Stanley Try Square found at an estate sale for only $5!!
I’ve run across this notion a few times in my woodworking journey. Basically, it’s a recommendation to buy the ‘most’ or ‘best’ you can afford at the time. I have found this does not and should not apply to every purchase unless you really just hate having money in your pocket. Owing to not knowing much about woodworking, an obscene number of YouTube videos, and needing truly square measuring tools I ended up spending a lot more than I should have on the red stuff from Ohio. I justified each purchase with ‘I need this now’ and ‘buy it forever’ as my wayward guides. Nearly a year after my measuring binge, I have two of them that I use regularly. The others make things easier but given how rarely I use them, buying a ‘lesser’ 18” square would have made more sense. There are certainly tools where I still apply buy it forever to, but they are the tools I use on a regular and daily basis. For everything else, check your local estate sales. Seriously, there are really good deals to be found there.
Based in Atlanta, Travis can’t draw a straight line, cut a board or drill a hole without a healthy flow of electrons. Follow along as this lifelong video game enthusiast, professional introvert, and one time IT virtuoso leaves behind cyberspace for a hybrid world where binary fuses with boards to create a digital woodspace. You can contact him at digitalwoodspace@gmail.com.
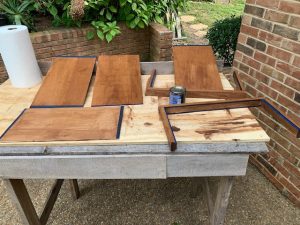
My first time staining something was a little over a year ago. Prior to that, the only experience I had wielding a brush involved off the shelf paint by the gallon in generic white, grey and greyer grey that went on a wall. My wife tasked me with replacing the rickety floating shelves she picked up on sale at Target a few years ago. I can’t count the number of times we’ve sent them careening to the floor with a casual inattentive bump on a weekly basis. Determined to fix something to the wall that neither moved and had the capacity for more than a couple of towels, I set out to design a shelf that, short of a tornado tearing our house down to its foundation, would support additional weight, match a mirror frame and shrug off even the most brutal bump. Naturally, I built them out of pine and poplar.
I used the pine to build a three-pronged support that stuck out from the wall like the devil’s pitchfork. I built the shelf carcass using the poplar, leaving one side open that would slide over the pine support. Oh, and for the top and bottom of the shelf I used pine plywood that sits in rabbets run along the poplar frame. I’m sure by now some of you see where this is going. Once everything was assembled, it was time to stain. I looked around YouTube and Pinterest for the sagest of staining advice and ended up going with a blog titled ‘How to Stain in 5 Easy Steps’. In hindsight, it could have just been shortened to three easy steps – open stain, brush on wood, repeat 2 times. By this time, I had put an embarrassing number of hours into this project so I could not wait to see how much these shelves would pop once the stain dried. The next morning, I inspected my handiwork and, once I laid eyes on it, heard Brando muttering ‘The horror, the horror’ at the end of Apocalypse Now.
What went wrong? Well, everything. The only thing that popped was the dried glue I did a miserable job of cleaning up. The pig tail swirls from sanding proudly announced their presence and the belle of the ball was how different the pine plywood took the stain against the poplar. Ready to be done with this project, I slotted the shelves on their supports, dejectedly called my wife in for her inspection, whereupon she whispered ‘what happened?’ I had no answer. Thankfully, she left it at that and there they hang to this day obfuscated by bright linens. Over the following months I simply avoided doing anything that would be better off stained or sealed and convinced myself natural always looks better anyway. Needless to say, I brought the barest of experience to Len Reinhardt’s ‘Making Wood Pop with Color’ online class, which is available through The Highland Woodworker Online Classroom.
I rated the first class in the two part finishing series as soft maple. This one has earned purpleheart; it’s quite a bit harder, it has a beauty that can be appreciated today, and what you get from it will change with time. Len does an excellent job of shattering any illusion that coloring wood can be summed up in a series of easy steps. That’s not to say that there isn’t a series of steps, rather that the steps will only become easy with a serious commitment to trial and error. I see years of fleeting success and rampant failure if I plan on taking my projects beyond wooden curiosities shared with family and friends to pieces that reside in the permanent collection at the High Museum. Measuring, cutting, assembling have a trick or two that can be learned, but finishing appears to be the real struggle and art of woodworking. As Dr. Strange would say ‘we’re in the endgame now.’
I like to wait a week after watching a course before I sit down to write these reviews so that what I really learned (if anything) has an opportunity to percolate from short lived enthusiasm to long term ardor. Frankly, I need to watch the class again. It’s not because I learned nothing, rather, so much of it was completely new to me that my smooth brain only retained a handful of fragments. What stands out as most important to me is that accurate coloring is achieved in layers. Layers of stain, layers of binders, layers of shellac, layers of cake for texture. Len’s examples of the layering process changed how I thought about coloring my projects.
Instead of thinking in terms of tedious and laborious coats, I now think of it in terms of the layers I use when building a design in Illustrator or the skin of a citrus fruit that when peeled back reveals a much sweeter layer lurking below the bitter skin. Each layer alone has some value but it’s only when they are well combined that an orange can travel a thousand miles without so much as a dent or a series of circles, triangles and squares can come together as a mandala. While my current projects could best be compared to the assembly of a series of lines to make a stick figure, I am beginning to see how I can give that stick figure a green top hat and a pair of brown shoes to bring out its beauty.
The second thing I got out of the course was to keep a record of the layers I use to color a project. I can’t recall if Len gave it a specific name, so I’ll just call it a layer board. To build it, you take a piece of wood from the project you are working on, cut lines every 2-3 inches, then use that to build your layers. The first square gets layer 1, the second layer 1+2, and so on. What you end up with is basically a tombstone for a project. It accounts for what wood was used, what color and in what order it was applied, and so on. Each square comes together as the epitaph for a finished project. I readily see the value of making this a habit, even if I use no coloring at all. If you leave a project natural, it will be a board with the screws, dowels, dimensions, etc. on it. At the moment, I don’t really keep any notes about my projects so I can’t begin to tell you how they came together without a good hard look and a tape measure.
Finally, and something I’m particularly excited to learn more about, mixing acetic acid with iron (or was it rust?) will give you a rich red color. What was fascinating to me wasn’t the formula for composing this color, but the fact that coloring wood has options beyond what’s found in the paint aisle at the local hardware store. Earlier, I joked about having a layer of cake for texture in a project, but the reality is that if you seal it on with shellac it might very well add that something special that’s missing! Probably not, but the point remains that coloring is really open to experimentation, and I see it becoming something that I will enjoy mucking around with. I’m getting ahead of myself. For now, I think I’ll re-watch the class and give staining a piece of poplar and a piece of pine a more deliberate shot. Perhaps, when called for floating shelves again, I will be ready to make the wood pop this time.
Based in Atlanta, Travis can’t draw a straight line, cut a board or drill a hole without a healthy flow of electrons. Follow along as this lifelong video game enthusiast, professional introvert, and one time IT virtuoso leaves behind cyberspace for a hybrid world where binary fuses with boards to create a digital woodspace. You can contact him at digitalwoodspace@gmail.com.
The first thing I did once I got my Highland Woodworker Online Class Membership was to channel surf the videos available. As I perused the selection, I was afraid a lot of the content would be above my woodworking experience level. I have a few projects completed that range from cutting boards to coffee tables, but nothing particularly challenging. Seeing classes about turning, carving, inlay, etc, I felt out of my depth and thought maybe these classes are better for more advanced woodworkers. Considering the course titles, I settled on ‘Foundations for a Great Finish’ taught by Len Reinhardt as I had a cutting board that I was in the process of finishing.
Before starting, my expectation was that the class would build on an accepted base of knowledge I probably did not have. I thought for sure the basics like how to sand, how to stain, would be glossed over or not mentioned at all. Boy was I wrong! Not only does the class cover those basic techniques, but after two hours I was beginning to completely re-think my approach to finishing which could be described as haphazard at best, and destructive at worse. I would sand too much, too little, round over edges, watch swirls really pop when stained, it was such a mess that I would do as little as possible when finishing. To my family and friends, those projects looked great! But really, would they ever say ‘this looks terrible; just look at those swirl marks!’
One of the simplest things I learned in Len’s class was how to sand without rounding over the edges. It turns out, if you keep 50% or more of the sander on the surface you are sanding, you’ll be hard pressed to go over the edge. For me, this was a revelation. I think I was on the verge of this discovery, and if I had to articulate it I would have said ‘keep most of the sander on the surface’, but having Len say ‘50% or more’ immediately gave me a rule I understood and could implement. Later that night, I went to my garage and started sanding the cutting board I was working on. Low and behold I could not curb my edges even if I tried following my newfound rule. Now this is the kind of stuff I desperately needed! Like Luke when he sent a shudder through his drowned X-Wing on Dagobah (nerdy Star Wars reference…), I was beginning to feel the force flow through me.
Another thing I learned is that there is a difference in sandpaper. The extent of my knowledge was grits existed and were to be worked through. I mean all of the YouTube creators talked about the grits. What they didn’t talk about was sandpaper quality. To my surprise it turns out that the Harbor Freight special works great for fun woodworking, but not so much for fine woodworking. Apparently, there are several sandpaper standards that are in a constant struggle for your allegiance with names like FEPA, CAMI, ANSI, Micron, etc. No joke, I used to pick out sandpaper purely based on what color it was so I would have all low grits as red, medium were blue, and the highest ones were gold. I thought that was a pretty great visual system for not using the wrong paper. The downside was that some of the grits were labeled ‘120’, others ‘P120’, and a handful had no discernible label at all. It hadn’t crossed my mind that each type of sandpaper had a variety of differences and that moving between standards willy-nilly would make finishing more difficult.
According to my notes, there were 17 other insights I picked up so I would say this first class was worth it. One thing unrelated to woodworking that I wanted to note is the camera work for the class. I had expected a single camera focused on Len the entire time in the traditional ‘sage on the stage’ format many digital classrooms still use. I’m happy to say that wasn’t at all how the class was shot. They had multiple cameras that provided visual variety throughout the class, and more importantly, had the ability to zoom in when Len called attention to things he was showing like grain pattern. The variety of shots, coupled with full screen legible slides, really creates an atmosphere as close to being in a classroom as you can with on demand content.
Overall, this was a really great class to start with. For a rating, I give it Soft Maple. It’s neither too hard nor soft, can be used by a variety of woodworkers, and it looks good when finished. While I couldn’t raise my hand and ask questions, that was an extremely minor tradeoff for what I gained watching this class and had I paid for the live class, would have been able to ask questions. I think the content of this course is especially valuable for woodworkers that have been at it for a year or so. Staying on the topic of finishing I’ll be writing about ‘Making Wood Pop with Color’ next, so stay tuned!
Based in Atlanta, Travis can’t draw a straight line, cut a board or drill a hole without a healthy flow of electrons. Follow along as this lifelong video game enthusiast, professional introvert, and one time IT virtuoso leaves behind cyberspace for a hybrid world where binary fuses with boards to create a digital woodspace. You can contact him at digitalwoodspace@gmail.com.
Over the past year I have learned that the world of woodcraft is populated with more tools than there are trees in Georgia. Everywhere I look, I find a tool for this and a tool for that with multiple types of tools for this and that. Take something as basic as cutting wood. Your options are a handsaw, bandsaw, circular saw, table saw, chainsaw, chop saw, miter saw… The cheapest option to start with is the handsaw, but then you get to decide if you need a back saw, fret saw, coping saw, jab saw, frame saw, hack saw, etc. Before too long, you begin to feel like Bubba in Forest Gump rattling off shrimp recipes.
Livin’ On a Prayer
Completely lost as to what tools I really needed, I looked to YouTube for help. A quick search returned a seemingly endless list of videos with titles like 5 Woodworking Tools for Beginners, 6 Essential Woodworking Tools for Beginners, 26 Basic Woodworking Tools for Beginners and so on. Since I really wanted to get started, but I wasn’t fully committed to woodworking, I started with the list of 5 tools. A few hundred dollars lighter, I had my tools and set to working up my first project plan. I started drawing my first flower box with a pen, paper, and an old notebook I had left over from college that wasn’t entirely filled with notes about ancient Greece. After about an hour of scribbling and pulling measurements out of thin air, I confidently marched to the garage and began cutting up the 2 and 4x4s the previous homeowner had generously left behind. With enough wood to piece together the first box I soon realized a foot is a good measurement for a sub sandwich, and not so good for a flower box meant to support a 4×4 with a string of lights attached to the top of it. Back to the drawing board.
Is This Love
In hindsight, I am glad I made such an extreme blunder with my first design. Had it just been a little off, I would have proceeded along with the build and done what I could to make it work; likely ending up with a mess on my patio when the first serious thunderstorm blew through. Since it was so far off as to be unusable, it lead to me discovering what I now consider to be the most important tool for any beginning woodworker – Computer-Aided Design or CAD software.
Historically (and even now), CAD software has been synonymous with professional level usage in architecture, engineering, and construction sporting a price tag well into the thousands of dollars. Around two decades ago, a small startup named @Last Software released a 3D modeling program named SketchUp for the relatively cheap price of $495. In 2006, a larger startup named Google purchased @Last and released a free version of SketchUp. The rest is digital history, but the major disruption to the CAD world was the democratization of CAD software. Even the CAD juggernaut Autodesk now offers free software for hobbyists. Nothing else I’ve purchased has had a greater impact on every aspect of woodworking as my CAD programs have. There really ought to be a YouTube video titled 1 Basic Woodworking Tool for Beginner Woodworkers essentially that stresses the value and importance of using CAD in woodworking.
Nobody Rides for Free
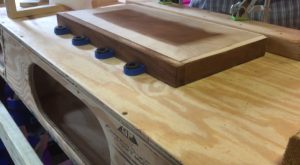
I have one of those virtual assistants in my garage shop that doubles as jukebox. I call her Siri or Alexa. While I work, I listen to random playlists. Movie scores for glue ups, electronica (techno!) for routing and hair metal for sawing. I guess because of the Geico commercial that came out last year RATT had a bump in popularity on the curated playlists which eventually found their way into my shop playlists. All of this to say that Nobody Rides for Free, in my opinion, really should be considered the anthem, or at least motto, for every woodworker out there. At every turn with woodworking it costs money. Heck, even turning is expensive when working with wood! Wood prices are at all time highs; tool prices are going up after a Covid induced price freeze; regular consumables like shop towels, sandpaper, blades, stain, etc. all add up quickly. Nobody rides for free indeed! As with every rule there is always an exception, and the only one I’ve found in woodworking is my CAD software. It helps me visualize, prototype, measure, cut, glue, stain all without spending a dime on a board of lumber or sheet of sandpaper. When I take these digital dreams into reality, I know exactly what consumables and tools I will need to realize my grand vision of an oak cutting board with a strip of walnut in the middle.
Look What the Cat Dragged In
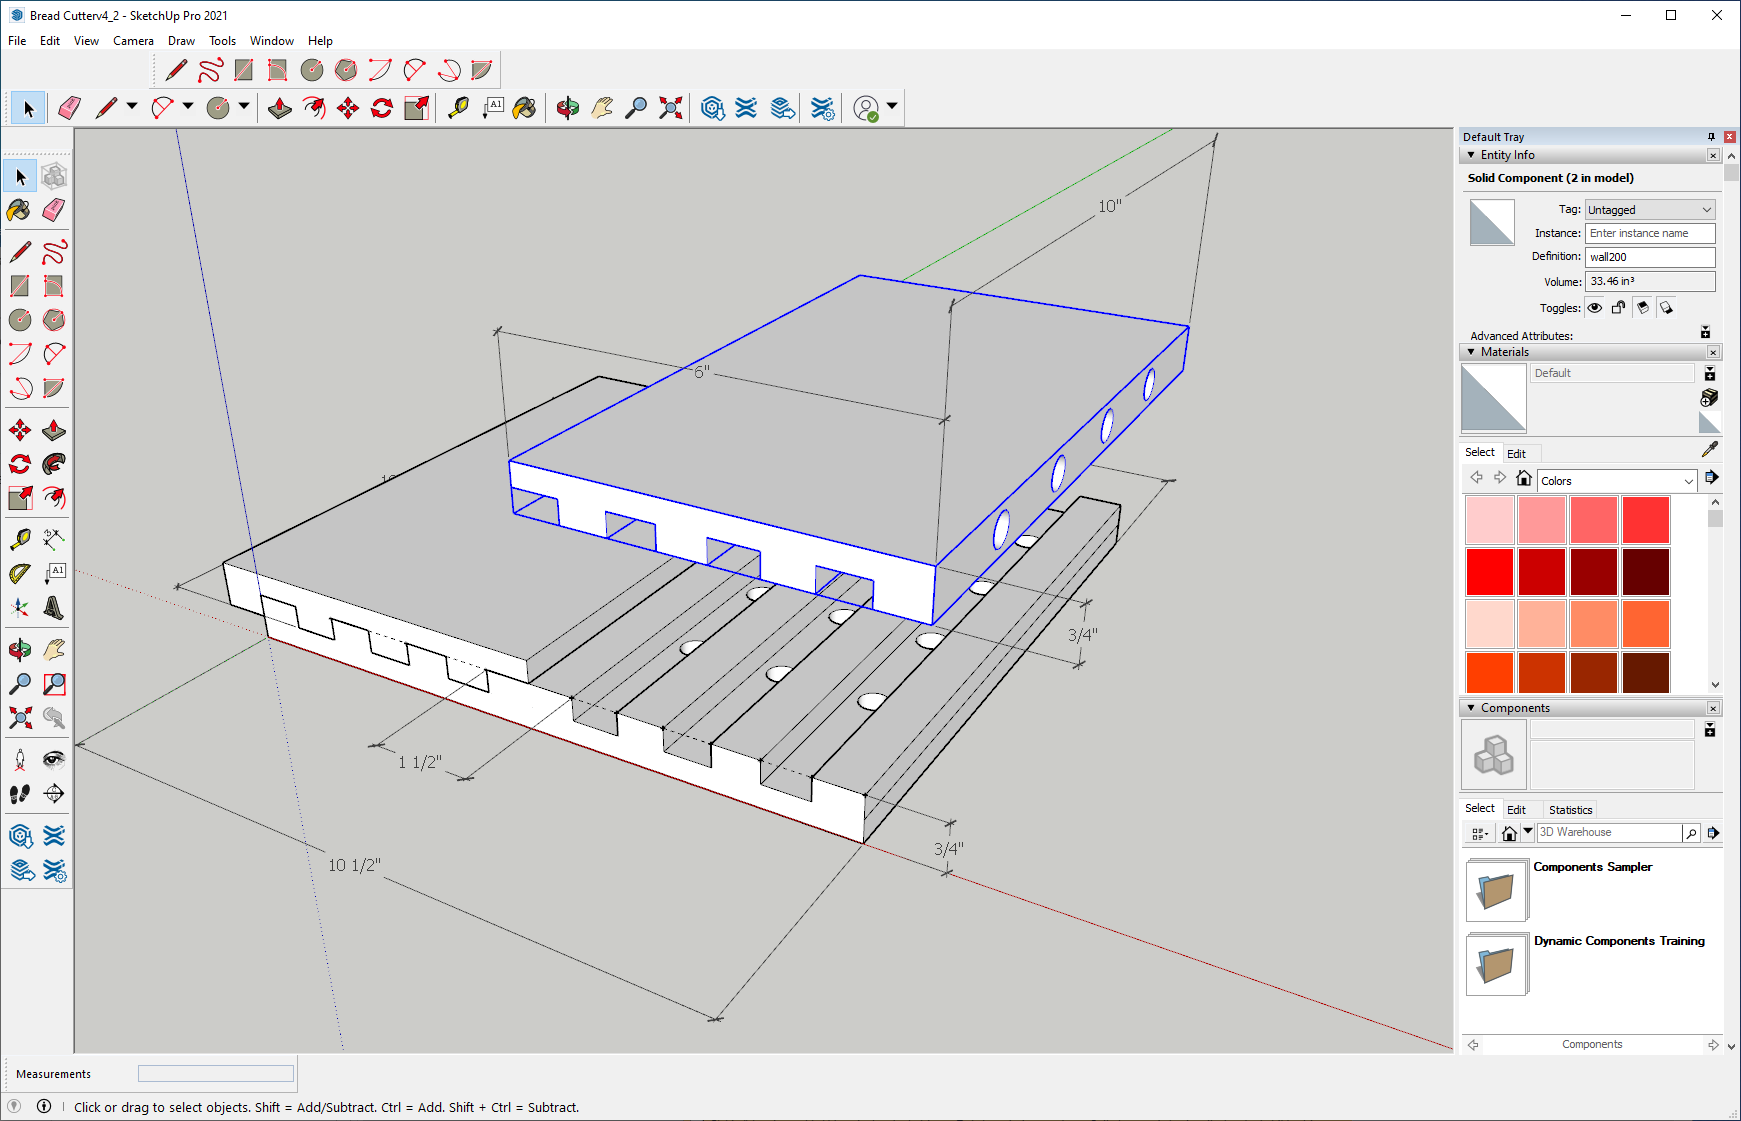
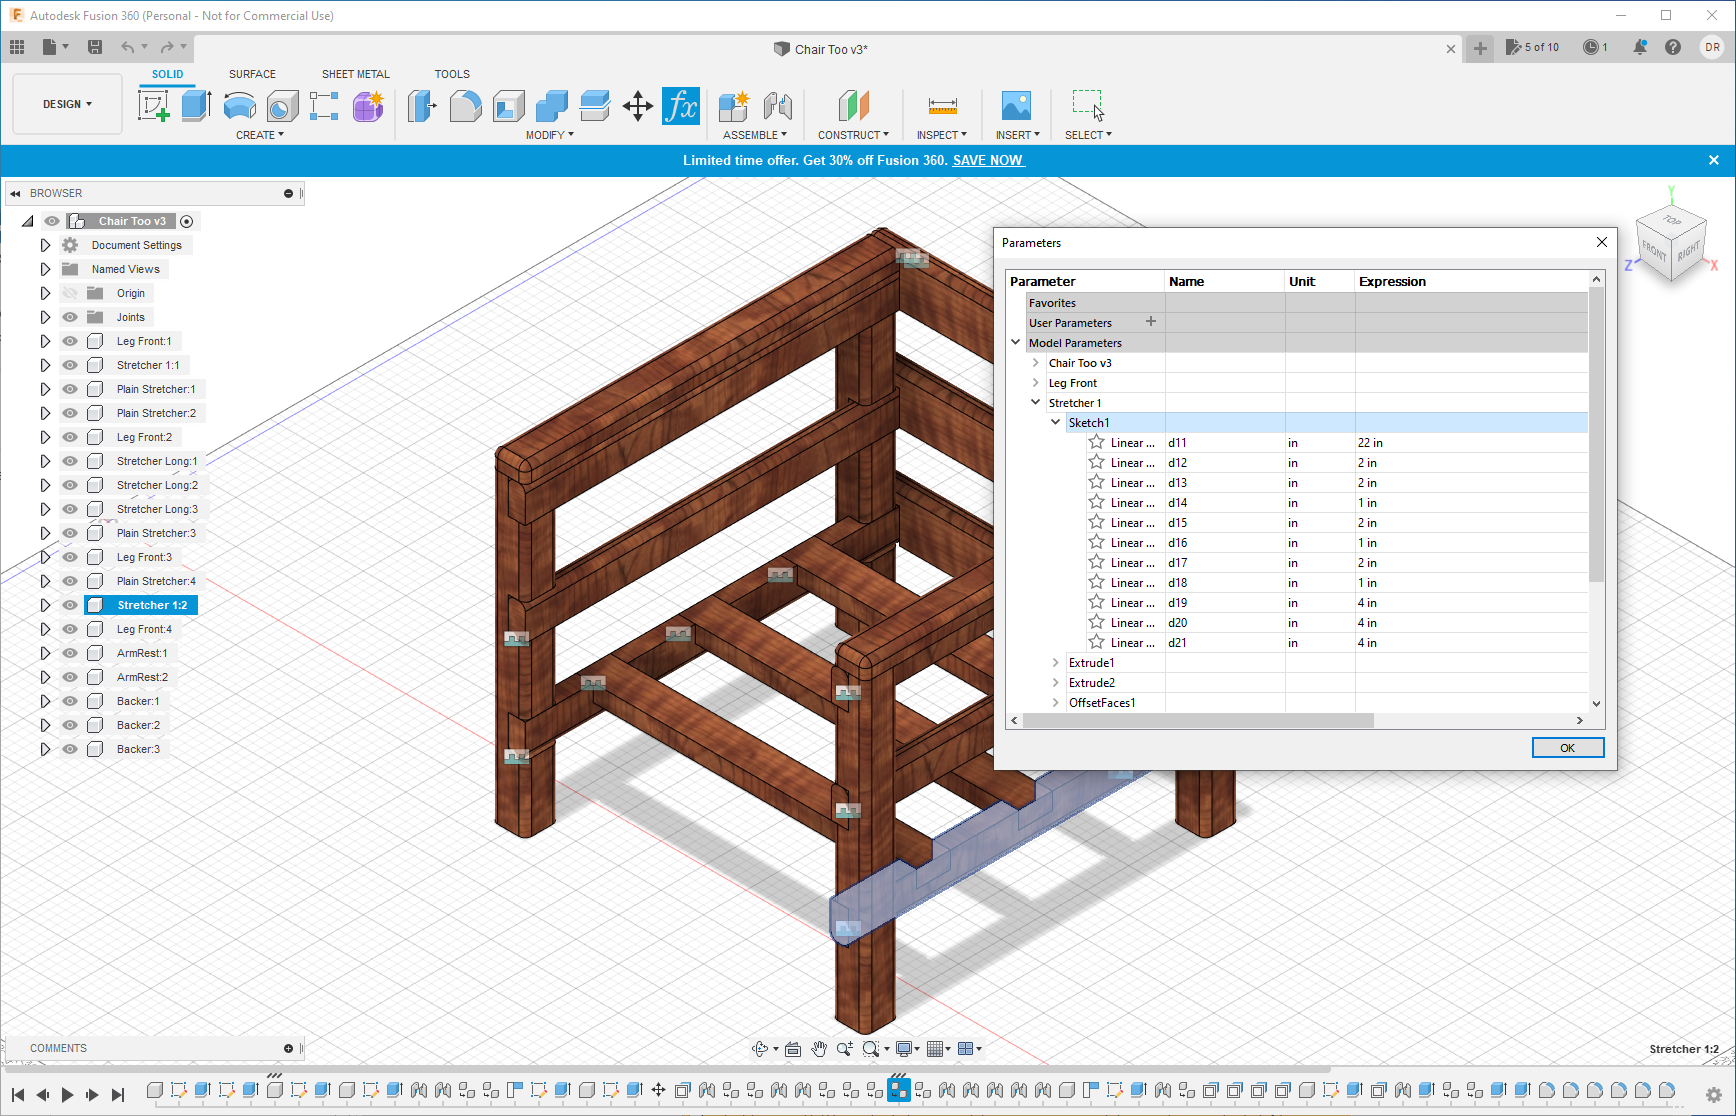
The two most popular programs I’ve found are SketchUp and Fusion 360. I started in SketchUp last year and picked up Fusion 360 a couple of months ago. Both offer free versions, both are easy to start basic designs with, and both produce a 3D model of what I’m building. How they get me from a blank X, Y, Z axis to a final model is wildly different. Pricing is similar for both. SketchUp has a free version that is entirely web based so while you listen to the latest The Highland Woodworker episode in this window you can start building your first 3D model in the tab next to it. Fusion 360 is a full desktop program where you certify at sign up that you are a hobbyist working on personal projects and, in turn, get the software for free. There are paid versions as well that I’m sure I’ll write about another time, but the free ones are enough to get started.
The major difference between the two is how you design projects: SketchUp uses direct modeling and Fusion 360 uses parametric modeling. Which workflow is easiest to pick up really depends on whether you were an A or C student in high school math. I was a D student, so SketchUp was much easier for me to get up and running in. If I want a board of a certain size, I just draw it. Then draw another and another and another and so on. It’s a lot like physically working with wood in a shop where your mouse replaces a tablesaw.
On the other hand, Fusion 360 works best by building parameters around a board and writing formulas to assemble those boards into a complete piece. There is a degree of direct modeling you can do, but it’s not as friendly as it is in SketchUp. Where it really shines is when you are building larger projects with a lot of boards. Using the parameters and formulas you’ve developed, it takes no time to assemble a design, adjust sizes, join pieces, export for CNC, etc.
As of this writing, I use SketchUp to take the chicken scratch I call drawing into the 3D world. Once there, I can play around with size, shape, fit, color, etc. without wasting money on wood and consumables. Once the design in SketchUp is finished, I open Fusion 360 and start building the same project there. I’ve found duplicating projects in both programs has really accelerated my trip up the learning curves of both programs. Even better, a natural feedback loop has developed where once I learn something in one program I then figure out how to do it in the other.
Every Rose has Its Thorn
My first project in SketchUp took weeks to finish. It became so frustrating at times that I would give up for stretches of days and sulk rather than spend the energy trying to find out if I was going about this the wrong way. In my mind, I had watched the equivalent of a semester’s worth of videos on how to use SketchUp so I should be well versed in how to use it. Much like my notes from the course on ancient Greece I took in college, all of the information was there, but I couldn’t begin to tell you what the Ionian Revolt was about other than an educated guess that it involved the Greeks and the Ions. My Icarian approach was not working. I had done all of the research and studying, my head jam packed with things like offset, orbit, pan, but it was really just a lukewarm term soup.
My breakthrough occurred when I gave up on the flower box I wanted to design and started over building a simple useless box. Unsurprisingly, googling ‘SketchUp box’ returns a number of videos that walk you through this Herculean task. Once I had found one I liked, I cued it up on my phone and opened SketchUp on my computer. I followed along, pausing and rewinding when something wasn’t working, and like a mindless mimic managed to build my first 3D box. I paused the video, deleted the file and started over. When I got stuck, I’d pull up the video and replay that section. What seemed nearly impossible to accomplish with consistency gradually became a walk in the park. After that I started experimenting with building a box of different dimensions, different joinery, stacking boxes to make bigger boxes, adding boxes inside boxes to make drawers, and so on until I felt I was reasonably capable of revisiting my flower box project. By that time, I had become so comfortable using the basics of SketchUp, that I ended up building a dimensionally accurate version of my patio to see how I should run the string lights and what the whole thing would look like.
Home Sweet Home
I am predominantly a visual learner. If I see something, I can say something. If I read something, I’m going to need a lot of repetition throughout to really pick it up. I know this post is a lot longer than I intended, but I felt it was incredibly important to write and write again how critical CAD software is to woodworking. There is no tool on the market that can beat its price, its countless uses, and its safety. You will never accidentally cut off a finger using a CAD program to cut up a 4’x 8’ sheet of plywood. I am sure there are people working in furniture design today that have never seen the inside of a woodshop, but you can find their furniture flat packed and ready to assemble at your local Target or Wal-Mart. There are already 3D printers on the market that can build objects using wood based filament so it’s entirely possible a new generation of woodworkers will arise where their only tools are a CAD program and a printer.
But I like the feel of a board moving smoothly against a sharp saw, the smell of fresh woodchips, the sharp whine of a power tool and I feel real good because I am a craftsman and that means I can use my mind and my hands to create. Of course, I don’t know if I’d ever tell my buddies all of this because sometimes they laugh when you tell them things like this. So whether you are a digital dodo or evangelist; whether your power comes from the Southern Company or a waterwheel and horse; learning a CAD program today will give you the plan and path to build with any tool from the past, present and future.
Based in Atlanta, Travis can’t draw a straight line, cut a board or drill a hole without a healthy flow of electrons. Follow along as this lifelong video game enthusiast, professional introvert, and one time IT virtuoso leaves behind cyberspace for a hybrid world where binary fuses with boards to create a digital woodspace. You can contact him at digitalwoodspace@gmail.com.