George T. (Terry) Chapman

Terry Chapman is a Professional Engineer (Civil) and Land Surveyor who lives south of Atlanta. He has done woodworking for many years and particularly enjoys bowl turning and making Windsor Chairs. He currently works as Site Development Manager for a local affiliate of Habitat for Humanity and has one son who pastors a Church in Connecticut. You can email him at cdeinc@mindspring.com.

Feb 132015
 

This is the 3rd part of a 3 part series.

To read Part 1, CLICK HERE

To read Part 2, CLICK HERE

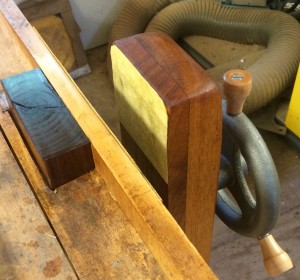
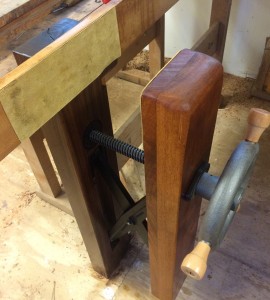
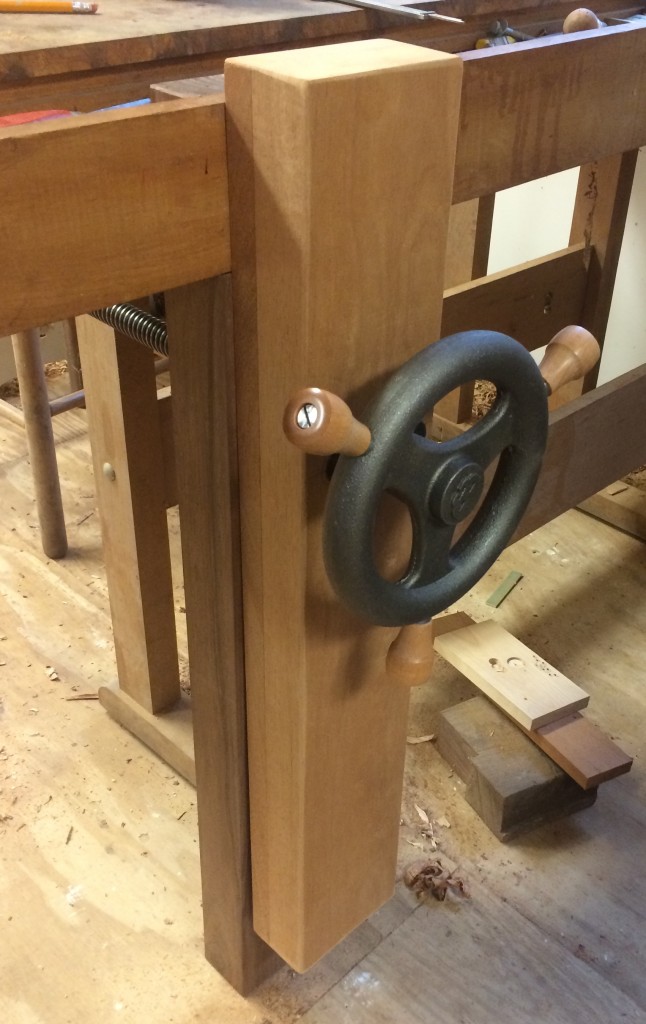
Yay!!! My new Leg Vise is complete.  I added two coats of finish and the suede pad and that boy is ready to work.

Suede and Finiish

Suede and Finish

If you have been following my installation, there is a Part 1 and a Part 2 and this is the last one.  To review, I picked out the hardware I needed after using the Flow Chart in Part 1 and then had to adapt the vise to the skinny legs of my bench.  Using some old pieces of lumber from the shop (who else would have a thick piece of air dried walnut just lying around?) I made the pieces I needed and then cut the mortises into them for the criss cross piece. I added the hardware and the wheel and it works like a champ.

Suede and Finish Redux

Suede and Finish Redux

Funny, I almost missed the suede in the box. I thought it was just packing material and I almost threw it away. I cut it to fit and glued it to the face of the vise and the side of the tool tray and it looks good.

I don’t mind telling you, I am so proud of this thing. It is actually fairly easy to install  — once you have done it.  I read the directions from Benchcrafted’s web site many times because they can be a little bit confusing. If I were to do it again, I bet I could do it in less than a day.

In fact, to really appreciate this leg vise, look at this very short video. No drooling!

CLICK HERE to find out more information on the Benchcrafted Leg Vise and to purchase your own.

Jan 232015
 

Ok Luddites, here is a new one for you and if you don’t at least try it, you are missing out on something pretty good.

If you are like me, on these cold winter days when you don’t want to walk to a freezing shop and wait for the heat to come up, you drop back to all the old magazines.  I have a big folder of clippings and torn out pages which I set aside for projects I intend to build one of these days.  If I see a good project, I rip the page out and throw away the rest of the magazine.   Who has room to store all the magazines, especially when you love the books even more and you have to have room to keep them too.

The folks at Highland suggested a few months ago that I investigate Pinterest, a web site which has gained a great deal of interest over the last few years.  Well, you know me, Mr Cool Know It All, Old Gray Headed Guy, I told them where they could put that “DIY” stuff and it probably was all about painting red barns and flowers on old circular saw blades and cutting plywood silhouettes of cowboys leaning against a fence post smoking a rolled cigarette.  For someone who really dislikes that kind of stuff and does not allow plywood in the shop, my perception of Pinterest was DIY crap, not the kind of stuff that Highland customers would want to see.  I was wrong.

imgres

I was bored yesterday and needed something to keep my mind occupied, so I tried it out.  I went to www.pinterest.com and it took about 30 seconds to sign up and get started.  You start by creating boards (manila folders for you old people) with titles for things you like.  My first one was “Woodworking Stuff”.  Basically, you type a subject in the search bar at the top and then look at all the things that pop up.  When you see something you like, you click on the “Pin It” button in the window (tear the page out of the magazine) and it adds it to your Board (Manila Folder).  The net result is you can end up with Boards which contain pictures and/or sites you like and want to remember for later.  You will find plans and pictures and videos and blogs and all kinds of good stuff.  You can spend hours on this thing.

Another way to add “pins” to your “boards” is by downloading the Pinterest Browser Button by clicking here. Once you have this button installed on your internet browser, you can go to any of your favorite websites (i.e. Highland Woodworking) and start pinning your favorite tools to your boards. Just scroll over the image of the product (or recipe) you want to pin, and the Pin It button will come up within the picture (see below):

pinteresthowto

Once you click it, a box will come up that allows you to write a description of your pin (i.e. I really want this tool for Christmas! or The best tool I’ve ever used), and then click which of your boards you want to post it on:

pintereststep2

Click the red Pinit button and then voila, the picture and link to the page will show up on your Pinterest board!

You can even make a “Wishlist” board that you can share with your friends and family who are looking to buy you a gift!

I was clicking around this morning and I put in my hometown and all kinds of things popped up.  To show you the scope, I found the recipe for potato pie from the restaurant we all went to growing up in that small town.

I think as I search through for different topics that “Woodworking Stuff” is too broad a topic.  I will probably go back and set up separate boards for Woodcarving, Bench Plans, Windsor Chairs, Bowl Turning, Wood Lathes, and other more narrow topics.

I think you will really enjoy this thing.  Go to www.pinterest.com and sign up. You can follow my boards by clicking here and then click on the “Follow” link on the upper right-hand corner. While you’re at it, be sure to follow the Highland Woodworking Pinterest page by clicking here.

Come on, people.  Time to move into the 21st Century, or at least the 20th Century.  You are going to like this thing.

Jan 132015
 

To read Part 1 of Terry’s Benchcrafted Leg Vise installation, CLICK HERE

I am still working on my Benchcrafted Leg Vise.  Going a little slow what with Thanksgiving, Christmas, and traveling to my son’s wedding up north, but the vise is probably further along than it seems at times.

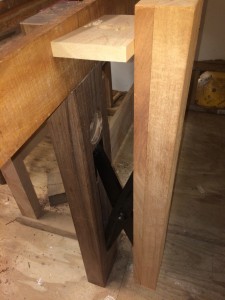
Since the last update I have mounted the vise to the right rear leg of my bench by cutting a hole in the tool tray and running the vise leg up through the bottom of the tray flush with the back rail.  I will attach it to the bench leg below and set a couple of screws through the rear board of the tool tray into the top of the vise.

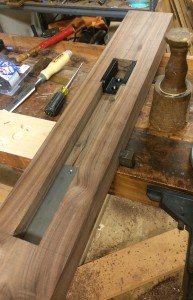
I spent a lot of time reading the instructions and making sure I had a good layout for the mortise slots for the criss-cross and the screw hole for the vise screw.  I only had one piece of thick walnut lumber for the leg and I did not want to screw that one up.  You will need a deep slot for the criss-cross to drop into, and a wider mortise at the top of the slot for the bracket which holds the criss-cross.  This slot is 1-7/16 inches deep which is why they recommend you use 2-1/2 inch thick stock.  Simple 4/4 stock will not do and the legs need to be at least 4 inches wide for the Retro.  You can glue up stock using 8/4 plus a 4/4 and put the joint on the up side so you cut the mortise through the glue line and the brackets are mounted in solid material.

Leg with Mortise

Leg with Mortise

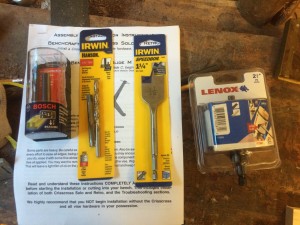
I ended up going to the local big box for a couple of odd (for me) tools.  I needed a spade bit with a 1-1/4 diameter, a hole saw at 2-5/8 diameter, and a 5/16-18 bottoming tap.  Taps are not something I normally keep, and tapping a screw hole in wood is outside my experience.  But hey, I’m game, so I headed to the store to get what I needed.  I asked three clerks and searched all over the tool section until I finally happened to ask the right guy.  He pointed me toward the display stand right in the aisle labeled “Tap and Die Sets” by Irwin.  It came in a set with the proper drill bit and cost just a few dollars.  I also needed a longer straight router bit to reach the full depth of the mortise.

Additional Tool Required

Additional Tools Required

I paid lots of attention to the layout for the criss-cross and its bracket.  I used my router with a fence to cut the mortise and then cleaned it up with chisels and a mallet.  I tested out my new tap set on a scrap piece of walnut and then marked the spots and drilled pilot holes to mount the brackets.  Time will tell, but when I put the screws into those wooden threads, it tightened up like I have not seen in a while.  You need to give it a try.  They offer extra directions in the download from the website, so it is easier than you think.

I cut a hole to fit in the bottom of the tool tray, unscrewed the bench from the shop floor and slipped the leg into place, complete with bracket and half the criss-cross.  I glued up the chop from some old African Mahogany (nasty wood if you have never tried it) lying around the shop and cut the mortise in it.  After mounting the bracket and the other half of the criss-cross, I put it together temporarily and it appears to work like a champ.

Glued-Up Chop with Temporary Mount

Glued-Up Chop with Temporary Mount

The next step is to mount the screw and nut and add the hand wheel to the chop.  Once I get it all aligned and tested according to the directions from Benchcrafted, I will add some shaping to the chop, trim the top flush and get some finish on it.  Note the small gap at the bottom which is built into the crisscross so the top will grasp thin pieces of wood.

Little more work to do and then I think it is going to be all right!

Mounted with Glide Wheel "C" Waiting for Final Trim

Mounted with Glide Wheel “C” Waiting for Final Trim

CLICK HERE to read Part 3

CLICK HERE to go back to Part 1

Jan 012015
 

Welcome to our 2015 Woodworking Resolutions blogger series. Every year we invite our bloggers to share their resolutions specific to their woodworking goals for the new year. Click each link below to read our bloggers resolutions!

Terry Chapman
It is the traditional time of the year to make Resolutions and we are no exception at Highland.  We do try to make them related to woodworking, however, since that is what we do.

In my profession as a Land Surveyor, I often was tasked to write a “Legal Description” of a parcel of land.  One technique regularly used is to reference a previously recorded plat drawing, which pulls everything from that drawing into the description.  I do that here by referring you to last year’s list of resolutions and incorporating them by reference.  I think that is a valid technique since very few of them have been completed.

Resolution #1.  I am going to finish something before I start another project.  There are these wonderful projects sitting all around the shop and most of them deserve to be finished.  The problem is that I want them to be perfect and they are not and my skills are not always up to the task.  Plus, I really do not like to throw out good wood cause I might finish the job one day.  Maybe.

Resolution #2.  I need to sweep the shop. Still. Really well. Once.

Resolution #3.  I want to take some more classes in woodworking this year.  I got so busy building houses with my Habitat Affiliate, that classes moved down the list for the last few months and I intend to correct that this year.

Resolution #4.  I intend to expand my Festool collection.  I broke the ice this year with a Track Saw and it is a wonderful piece of equipment.  Buying Festool may answer my built-in sense that getting things right one time and then not having to change is the best way to go.

Resolution #5.  I will continue to expand my tool sharpening skills.  Can it really be all that hard?

Resolution #6.  I may perhaps start considering possibly maybe eventually throwing some stuff out of the shop.  I look at pictures taken in the shop and quite often I can’t see the project for the stuff in the background.  What’s the old rule? — if you haven’t used it in 25 years, you probably are not going to use it and maybe perhaps you should consider throwing it out.

On second thought, perhaps that is a resolution for next year — what’s one more year after 25?

Did you make any woodworking resolutions this year?  Let us hear from you in the comments below!


Terry Chapman is a Professional Engineer (Civil) and Land Surveyor who lives south of Atlanta. He has done woodworking for many years and particularly enjoys bowl turning and making Windsor Chairs. He currently works as Site Development Manager for a local affiliate of Habitat for Humanity and has one son who pastors a Church in Connecticut. You can email him at cdeinc@mindspring.com.

Click below for more bloggers 2015 Woodworking Resolutions:

Dec 092014
 

I just bought the hardware for a new Benchcrafted Glide Leg Vise from Highland and I am working on getting it installed in my workbench. I have a workbench which I made myself out of rock maple about 30 years ago. The plans came from Tage Frid’s books on woodworking and the design is Danish or European style with an L-shaped vise on the right front and a shoulder vise on the left front.
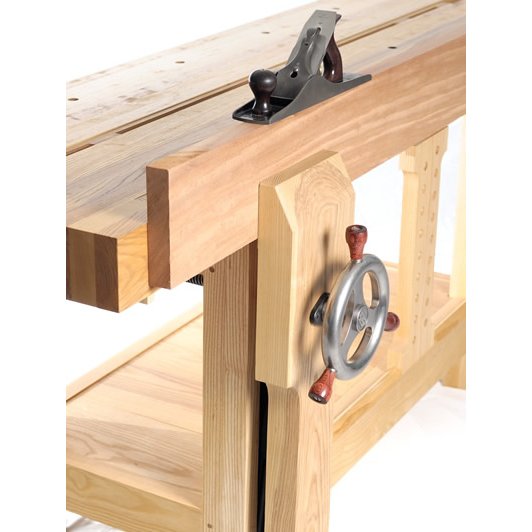
Benchcrafted Leg Vise (With Classic Handle)

Benchcrafted Glide Leg Vise

When I read up on the Benchcrafted Leg Vise and looked at the installation instructions, at first I was going to put it on the right front leg of my bench. I then realized if I put it there, it would always be in the way because that is where I stand about 90% of the time when using the bench. Because of where my bench is located in the shop, I don’t have a lot of flexibility on moving the bench. Note in the pictures the bench is up against the wall at its left end and fairly close to the table saw on the right end. If I move the bench, I will have to rearrange almost the whole shop, and that seems a bit like the tail wagging the dog.
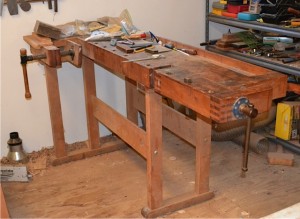
My Existing Workbench

My Existing Workbench

I got to looking at all the mounting options and decided I would mount it on the “rear” of the right end of the bench. That means the vise will be on the outside of the tool tray with an auxiliary leg to allow for the size and thickness requirements of mounting the vise.

As I thought about the vise and searched for information, I began to realize that to call it a bench leg vise is a bit of a misnomer. It could be mounted on a post in the middle of the shop since the only role of the workbench is to keep the vise from falling over. All the clamping is between the back piece (usually the bench leg) and the chop.

I think a little vocabulary lesson is in order here cause I know I struggled with the terminology. Am I the only one who did not know what a “chop” is? What the heck is a chop?! And why do they call it that?

Benchcrafted sells several different vises. Our topic is Leg Vises and there are several options for Leg Vise Hardware.  There is the Classic, the Crisscross where you can get a Classic Crisscross Solo, a Classic Crisscross Retro, or you can buy the Classic Hardware Only. Then there is the Glide M and the Glide C. I almost needed a decision flow chart to figure out which one to buy, but when I went to Highland, they pulled out the one they said I needed and it turned out to be the right one.
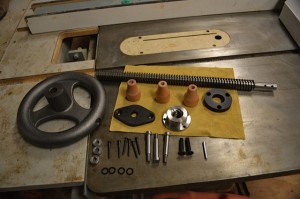
Glide C

Glide C

Let me see if I can simplify for you. The “chop” is the tall outside piece that moves when you clamp something in the leg vise. The chop does not rest on the floor so the weight of the chop is carried by the Crisscross, which is two cast iron pieces hinged in the center like an “X”. There is a Crisscross Solo and a Crisscross Retro. The Solo is generally mounted on a new bench because it has pins at the top which need to be drilled precisely for smooth action and is best done with a drill press. The Retro is more forgiving since it is mounted on two cast brackets set in a mortise in an existing bench leg.

The other part of the leg vise is the screw which moves the chop. You can make your own, buy someone else’s screw, make or buy a wooden screw, or you can buy the one from Benchcrafted. The traditional one from Benchcrafted is the Classic, a fast action screw with a straight bar handle. Old school.

There are two other screw handles besides the straight handle Classic. They are the Glide M and the Glide C, both shaped like a ship’s wheel. The only difference is the “M” is machined and polished with rosewood cocobolo knobs on the outside and the “C” is cast but not polished and has beech knobs. You pay about $70 additional for the polished wheel and rosewood knobs.

Click to see a larger version

So here is the flow chart: Decide if you are mounting to a new or existing bench. If it is a new bench and you can put the leg in a drill press, then get the Solo Crisscross. If it is going in an existing bench, get the Retro Crisscross and cut the mortise in the leg and the chop.

Then decide if you want a Classic straight bar handle or if you want a Glide wheel. If you want a wheel, decide if you want to pay $70 additional for polish and rosewood.

So there, it sounds so simple once you figure it out, but it took me a few days even with the information on the Benchcrafted Web site, to get it in my head.

We will continue next time as I mount the vise to my bench. There are no directions in the box when you buy the hardware, so you will need to go to their Web site to download the instructions. There are a lot of instructions, they go back and forth and you will need to read them several times to get what is needed to mount your vise. When you do get it mounted, it should be a real joy.

Autographed copies of my flow chart are available.

CLICK HERE to read Part 2

Nov 282014
 

Those of us who write for this Blog crave comments.  We celebrate when one appears and we hold our breath until we see what the reader has to say.  My personal record is the entry I wrote several years ago on The Zombie Apocalypse.  That one got upwards of 160 comments and I was ecstatic, giggling like a girl as they came in.  I don’t know if I will ever match that one.

Highland asks their bloggers to make a wish-list post this time of the year, all designed of course to get you to think about which tools you might want to purchase to add to your collection.

I was looking back over the last few weeks of blogs and the most comments recently went to “The Awesome Responsibility of Being a Woodworking Grandpa”.  I read most of them and there is a common theme.  Everyone remembers the woodworking experiences where someone spent some time in the shop with them.  It didn’t matter what they made, it was the time spent together.  Many people lament the time missed in the workshop with their kids and grandkids and hold out a desperate hope of the kids showing up one day.  Tools passed down through generations are treasured, always with the thought that the old ones are the really good ones.

When I was growing up my Dad had a farm and my brother and I spent many hours with him.  We had quite a hay-baling operation, where Daddy would cut the hay, I would rake it and my brother would run the hay baler.  Then we all hauled the bales to the barn together.  Later we had an egg farm, and picking up and processing eggs by hand several times a day certainly makes for lots of time together.  I suppose my love of woodworking first comes from Daddy’s skill at making slatted wooden bodies for his pickup trucks so he could haul livestock to the markets.  They were made from what I remember as 2-1/2” white oak strips, incredibly strong and bolted together with carriage bolts.  The other thing I remember is that Daddy never had all the tools he needed and sometimes had to borrow tools.  I suppose I was a little gotten off with about that, so now I make sure I have all the tools.  I don’t have to borrow tools but neither do I have any tools handed down from my Father.  I regret that.

My son has no interest in woodworking other than the bowls I make for him to give to the bridal couple when he performs a wedding ceremony.  There are no tools in the shop he wants me to save for him and I hold little hope of him joining me in the shop.  My best hope is apparently going to be some future grandchildren, or some “adopted” children.

So my Wish-List for you and for me for this year is a little different.  I wish for someone to share my skills with.  Someone I can teach to turn bowls and build Windsor chairs.  Someone to spend time with in the shop.  A guy named George summed it up in his comment:  “Recently I made a pretty music box for one of my granddaughters. When I finished it and played it for the first time I cried.”

That’s on my Wish-List for this year.

Nov 122014
 
big-divider-1d

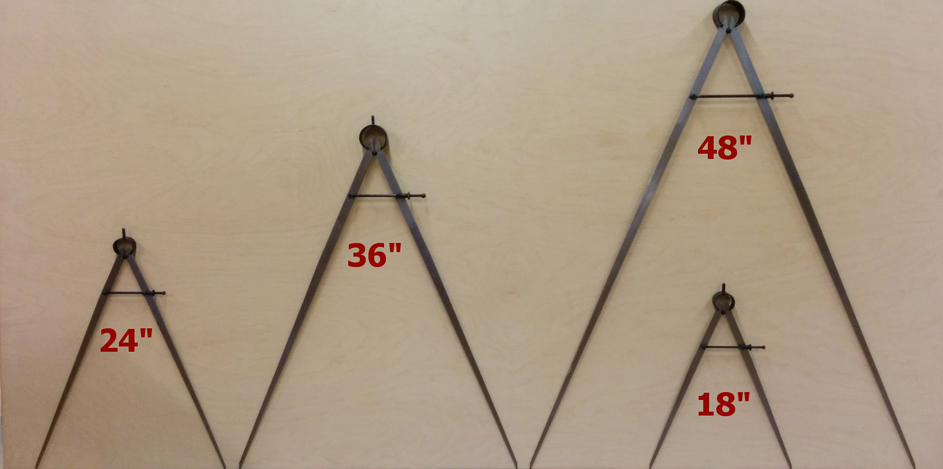
Big Dividers on a 4 by 8 Sheet of Plywood

Highland is selling large dividers and I got one this week to try it out. I think it is a test, because everybody knows that the only thing you can do with these things is draw, in this case, a very big circle.  The pair I have opens to 24-1/4 inches for a circle diameter of 48-1/2 inches and that is the next to small size.  The big one opens to 50 inches for a 100 inch (that is over 8 feet, Ralph!) circle.  They come with no pencil holder on the end, just two really sharp points, but you can tape a pencil, a pen, a very large crayon or a six inch paint brush to the end of the leg and you are right where you want to be.

I kept trying to think what I might use these things for and I started to do some research.  I suppose you could use them to do the navigation for a very large ship.  If you need to lay out rafters on a roof, you could step the 24 inch spacing for marking.  I remember in geometry learning how to set off a perpendicular to a line with only a divider.  When we lay out batter boards for a house, we could use this to make sure the house is square, though a 3, 4, 5 triangle would probably be better.  If I were a cooper, I could draw the top of my barrel with this tool.  If I were a wheelwright, I could step off the circumference of the felloes in my wagon wheel to see what length the steel rim needs to be.  How about painting a sign for the Lottery advertising a $100,000,000 prize?  How about making a decorative sunburst?   How about an arch for a kitchen entry inside your house? You can do a One-Centered Arch., a Two-Centered Gothic Arch, a Three-Centered Basket Handle Arch, a Four Centered Tudor Arch, a Segmental Arch,  a Pointed Segmental Arch, a Pseudo Three Centered Arch, and a Pseudo Four Centered Arch, all with dividers and a square.  How about an eyebrow dormer for your house?  How about a Traditional Tangent Handrail?

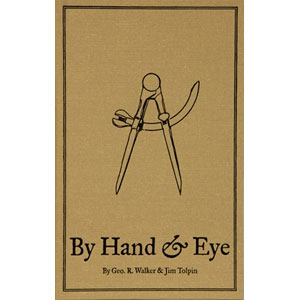
By Hand & Eye --  Walker and Tolpin

By Hand & Eye — Walker and Tolpin

Now if you want to see what a divider can really do in construction and woodworking, get yourself a copy of “By Hand and Eye” by Walker and Tolpin from Lost Art Press. Note the cover imprint if you want a sense of what this book is all about.  The main premise of the book is proportion. Our eye moves to proper proportion and we can learn to see good design in furniture and columns and buildings. It is amazing when you are able to quantify what you are seeing in design and much of it only requires dividers. Go to Section III of the book and learn a huge amount about constructing elements with a straight edge and a compass/divider.  You can also go to George Walker’s web site to see animated constructions of the elements. Join with the ancient Egyptians and the Masons and the Greeks and the Romans and the classical furniture makers of England and France and start using these ancient and wonderful tools.

Now I know you can design all this stuff in Sketch-Up, but let me see you find a printer big enough to make yourself a Four Centered Tudor Arch pattern to trace on the sheetrock for your kitchen wall. You can do it all with one of these honking compaii plus a straight edge. Besides, what kind of fun would it be to do it on a computer ?!!

I might even start a woodworking book publishing company and use it for a logo.

And you thought I was stumped.