George T. (Terry) Chapman

Terry Chapman is a Professional Engineer (Civil) and Land Surveyor who lives south of Atlanta. He has done woodworking for many years and particularly enjoys bowl turning and making Windsor Chairs. He currently works as Site Development Manager for a local affiliate of Habitat for Humanity and has one son who pastors a Church in Connecticut. You can email him at cdeinc@mindspring.com.

Jul 212015
 

We asked our bloggers which books they are looking forward to reading this summer, and they provided us with some great answers. See below for Terry Chapman’s summer reading list:

Like many of you, I have a stack of books sitting on the night stand waiting for me this summer. Though I have a Kindle and read many e-books, I still love the feel of a hard-bound book.

I should explain I have a unique view of this kind of thing. I like books and I particularly like woodworking books, so to encourage companies to publish more of what I like, I buy their products. I may not absolutely like every book a company publishes, but the only way to make sure they do get to the ones I like, is to buy stuff from them. Mike Dunbar up at the Windsor Institute explained this to me in detail when I went to a class at his school. He recommends a spoke shave made just over the mountain by Dave Wachnicki at Dave’s Shaves. Dave runs a small operation and as Mike explained, if nobody buys his products, then he will go get a job in a factory and stop making them and we will all be the poorer for it. Consequently, I have most of the books published by Lost Art Press.

On my reading list this summer:

Peter Galbert’s “Chairmaker’s Notebook I took a class from Peter a few years ago at Highland and made a child’s Windsor chair. (It’s on display at the Store, by the way. Look up front by the windows.) Peter is a wonderful teacher and passionate about his work. I like Windsor chairs and have made several. This book makes it look easy, which is an indication of Peter’s prowess as a writer, teacher and chairmaker. It only looks easy because he is so good at it.

Peter Korn’s “Why We Make Things and Why It Matters A verbalization of all those things you know instinctively about things you like and like to make, but cannot say out loud. Peter writes them down for you.

 Roy Underhill’s “Calvin Cobb, Radio Woodworker Roy’s first novel and it has measured drawings in it. Really. Everybody enjoys Roy and his woodworking and you would know he wrote this even if his name were not on the cover.

204745

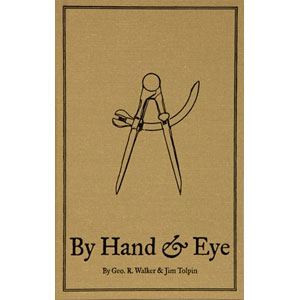
Geo. R. Walker & Jim Tolpin “By Hand and Eye” This is another one you know instinctively, but these guys wrote it down. They are able to quantify those things that many of us can see when we are looking at a nice piece of furniture or a building. I love being able to do things the old ways with the most basic of tools.

204728

Will Holladay’s “A Roof Cutter’s Secrets” Nerd city and not available from Highland.  In another lifetime, I would be a roof framer, but since it is too late in this life, this is my vicarious profession. I love the math and the practical aspect of the work and the fitting together of the puzzle. I have the greatest admiration for the old cutman with a fourth grade education sending perfectly cut rafters up top without ever climbing onto the roof. With a little apprenticeship, I could do that thirty years ago.

That’s my reading list. What’s yours?

May 012015
 

Friday, May 1st is Safety Day for Woodworkers.  Here are some safety ideas you can use.

  1. Make sure you have a way to get in touch with someone to help you if you get hurt.  My wife used to call down the basement stairs to my shop periodically to see if I could still answer.  One of my friends was in his basement shop when he had a stroke and laid on the floor for several hours before they found him.  He did not survive.  Now that I live alone, I make sure my phone is very close at hand in case I need to call someone.
  2. Get you one of those panic buttons you hang around your neck.
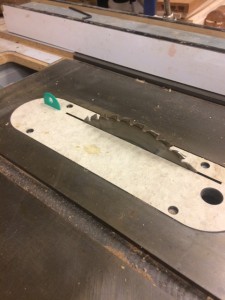
  3. Put a splitter back of the blade on your table saw.   Most kickbacks occur when a piece of wood twists into the back of the saw blade.  A splitter, either the one which came with your saw or an aftermarket device, will  prevent most kick-back accidents.
  4. Put the saw blade guard back on your saw.  Or get you one of those 3-D printers that are dropping in price and maybe you can print yourself some prosthetic fingers after you leave them on the saw table.  I ran a Land Surveying Company and one of my crew made wooden stakes to sell to the company.  We bought them a thousand at a time, so he spent his weekends making stakes.  He got complacent and left his right index finger laying on the saw table.

    Aftermarket Splitter

    Aftermarket Splitter

  5. Make sure you have a First Aid Kit close to hand.  And in case of a severe injury, it may be critical to have a trauma blood clotting bandage.  Better safe than sorry. Plus some of you old guys may take blood thinners, and if you cut yourself with those in your system, it will take a long time to clot.
  6. You realize that cell phones do not always transmit your address when you call 911, don’t you?  It sounds silly, but if you are lying on your shop floor in a pool of blood, can you keep your senses about you long enough to tell the dispatcher where you are located?  Might want to hang a sign with your address on the the wall.  Or at least tell the operator your address at the beginning of the call before you pass out.  And make sure they can see your address from the street.
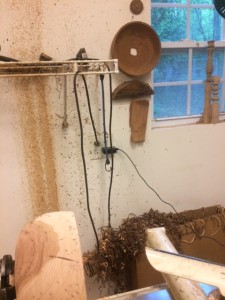
  7. Wear a face shield when you are turning.  Stuff flies off all the time.  Mike Mahoney was teaching a class a few years ago and one of his students lost his front teeth when a chunk of wood flew off the work.  I keep pieces which came off screwed to the wall behind the lathe so I can be reminded of what can happen.

    Missile Wall for Lathe

    Missile Wall for Lathe

Let’s be careful out there.

Apr 212015
 

One of the joys of taking a woodworking class is getting to do or see some technique you have read about and think you know, but have never actually done.

A good example was in the class I took at Highland a few weeks ago to build a Shaker Style End Table with instructor Jim Dillon.  Jim works at the carpentry shop at Fernbank Science Center in Atlanta and teaches classes in the evenings at Highland.  I don’t know if they let him work on the dinosaurs at Fernbank, but they probably should.

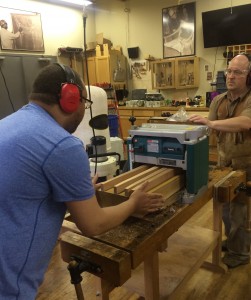
Stock Preparation

Stock Preparation

There are three big things I learned at the class with Jim :

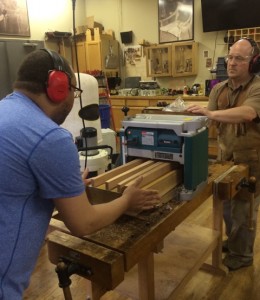
The first is the hand planes.  Now intellectually, I am very familiar with hand planes.  You may think the same thing, in that you have read lots of books, and seen lots of videos, and watched Roy Underhill for years, but until you have seen and HEARD! someone use a sharp plane on a piece of wood, let me tell you, Buford, you have no idea.  Most of us think the way you get a good finish on a piece of wood is to feed it through the electric thickness planer and then hit it with 320 sandpaper in the random orbit sander.  You really need to get in a class with someone who has a properly sharpened hand plane and see the shimmering sheen left by a hand plane and those read-a-newspaper-through-it shavings.  Once you can do that, there will be no sandpaper on your projects.  One and done as they say.

Tapering Jig at Work

Tapering Jig at Work

The second thing was the tapering jig we used to taper the table legs.  I have tapered legs before on the table saw with a tapering jig and it is not a comfortable situation.  My hands are a little too close to the blade and I always felt like it was one step from total disaster.  I wanted to call someone and say if you don’t get a call back from me in ten minutes, send the ambulance and the PortaJohn.  As you can see in the photo, we had a tapering platform we ran through the thickness planer.  It worked beautifully and is easily made.  Simply double sticky tape the legs to the jig and keep running the jig through until the cutter head reaches the flat where the side aprons land.  I think I remember it being 7/16” per foot taper.  I like this tapering jig.  No ambulance.  No PortaJohn.

Bevel Edge on the SawStop

Bevel Edge on the SawStop

The third thing was the bevel on the edge of the table.  We set this up so that the remainder edge on the table top was a quarter of an inch and then we wanted the bevel to be four inches wide.  Since we had all planed our table tops by hand, none of them were the same thickness.  There followed a pretty good discussion of how to make that work and the answer is the angle of the saw blade has to change slightly.  If you hold the quarter inch remainder plus the four inch bevel on different thicknesses, then the angle is the only variable.  You can see in the pictures that we set the table top on edge and clamped it to a fence riding jig for safety.  (And I am truly deeply sorry for that fleeting one hundredth of a second when I thought what a great blog entry if someone tripped the SawStop.)

Festool Domino Joiner

Festool Domino Joiner

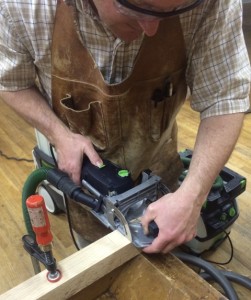
It was a real pleasure to use the SawStop Table Saw and the Festool DF 500 Q Domino Joiner, neither one of which I own or use.  If I ever trade my table saw, the SawStop is top of my list.  The Festool Joiner is more tool than I need in my little shop, but what a well-thought out, professional quality tool.  It has every adjustment you could ever need and the Dominos were almost a drive fit when we installed them.  The eighth inch reveal at the legs where the apron meets was a dial-in on the Festool and it worked perfectly.

Good class, well taught with good tools and techniques and well worth your money.  Watch the class schedule for the next one and join in.


Apr 152015
 

My son thinks I’m a little bit strange sometimes.  He calls me often (partially to see if I’m still living), but when he called today, I told him I was in the shop testing my new wood clamps on the old bath scale.  He says, right, sure you are.  I bought a new bath scale and I thought with nothing to lose, I could use the old scale to see how much pressure clamps could generate.

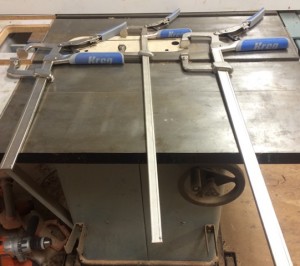
Testing Setup

Testing Setup

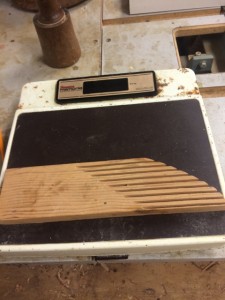
I have some of the new Kreg Automaxx Sliding Bar Clamps from Highland.  I set up a sophisticated testing platform and a rigid test procedure to see what they would do in a head to head comparison with some of my regular clamps.  To check out the clamps, I simply clamped the scale to the saw table and read the weight on the scale.  I guess it could have been more scientific sounding if I had changed it over to kilograms, but you will have to live with pounds.

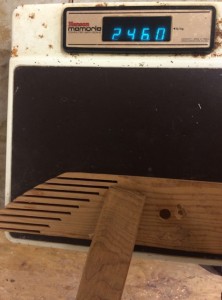
Cabinet-Maker's Clamp at 246 Pounds

Cabinet-Maker’s Clamp at 246 Pounds

My scale is rated at 300 pounds and when I cranked down with the Kreg, I had no problem at all pushing it over the top.  I tried a traditional cabinet-makers screw clamp, a cheap pipe clamp, a nice Jorgensen clamp, and just for funsies, my new leg clamp on the work bench.

I see clamps advertised as 500 pounds clamping pressure, but I never knew how different clamps compared.  Do you really need 500 pounds — I think that may squeeze the glue out of the joint.  And if it takes that much pressure to pull the joint closed you may need to refine your hand planing technique.

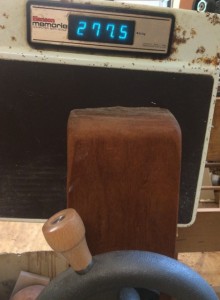
As you might expect, the cabinet-maker’s clamp took the most work to generate the high pressures.  The pipe clamp pushed it up there with no problem and the sliding handle at right angles is easy to twist.  Jorgensen clamps work just fine. And then my new leg vise hit 277 pounds without even cranking it down good and hard.

My New Leg Vise with Scale Clamped

My New Leg Vise with Scale Clamped

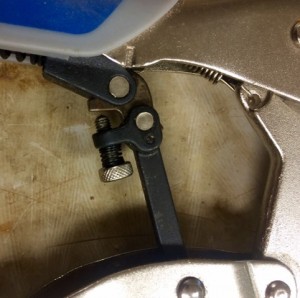
Kreg makes some good stuff, including my router table from Highland.  These Automaxx clamps are made like vise-grip pliers, but the unique feature is that you can adjust the grip to a pressure you like and then leave them set to that value.  To adjust the pressure, there is a little screw inside the handle.  If you back that screw off completely, the pressure goes all the way up to an error message on my scale, i.e., easily over 300 pounds.  If there is a problem, it is when I back the screw off completely, my hands will not fit over the handles and I could not close the clamp.  The way to use these things is to find that right spot and then leave it there — they are designed that way.

Adjustment Screw in Center of Handle

Adjustment Screw in Center of Handle

Kreg definitely makes some sweet clamps! Click here to get some of your own.

Kreg AutoMaxx Sliding Bar Clamps

Kreg AutoMaxx Sliding Bar Clamps

Apr 022015
 
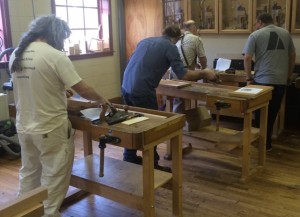
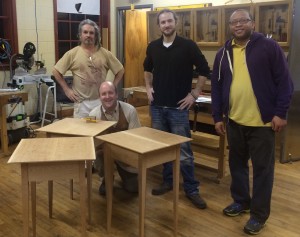
My Classmates and Instructor

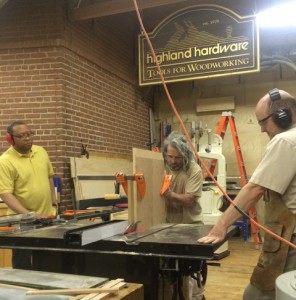
My Classmates and Jim Dillon, the instructor of the Build a Shaker Style End Table class

Funny how when I go to a class at Highland, I feel like I’m going home.  I like the old workbench signed by the instructors who have taught in the classroom.  I like the shaving horses hung up in the ceiling trusses.  I like the pictures on the walls.  I like the glass front cabinets around the walls filled with precision tools all in order, ready to use.  I like the SawStop Table Saw ready to use.  I like having a bench just for me.  I like kindred spirits in the class with me.  I like not having to travel 60 miles round trip to get a nice piece of lumber to make a project.  I like that if I decide to buy a new tool, I can walk down one flight of stairs and buy it.  I like the instructor being right there to push me through the project.  I like taking home a nice finished product at the end of the class.

Taper Jig with Tage Frid and Sam Maloof watching us work.

Taper Jig with Tage Frid and Sam Maloof watching us work from up on the walls.

I like walking down to my home shop before I go to work to see if it still looks as good as I remember.  I like showing the project to my friends and my co-workers.  I like it when they want to touch it and smell it and they all want to take it home.  I like my end table, made by me for me to keep for a long time.  I like my signature on the bottom of my table.  I like classes at Highland, and if you have the chance to take one, I’m sure you will too!

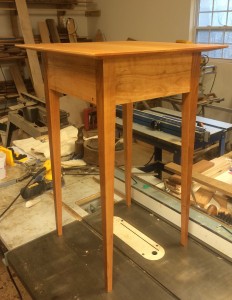
Did I say I like my table?

Did I say I like my table?

Mar 192015
 

Magswitch has come up with new saw guides, feather boards and hold down jigs.  I picked up a set at Highland and gave them a try.

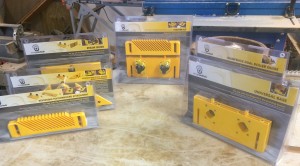
The system is designed in a series of pieces beginning with a Universal Base.  The Base holds two very strong magnets which can be switched on and off by twisting a toggle on top of the magnet.  The magnets are rated at either 95 pounds or 150 pounds breakaway force and they are really strong.  You can attach various pieces to the Base and have either a Featherboard, a Roller Guide, a Resaw Guide, or a Thin Stock Jig and Rip Guide.

The Magswitch Products

The Magswitch Products

The system works by dropping the magnets into the base and attaching one of the elements.  By flipping the magnet switches and setting the Base on a metal surface,  the Base becomes essentially unmovable.

When I first saw the elements, I thought the various pieces were quickly and easily transferred to and from the Base.  That is not the case— they are attached with Phillips head screws and some are not easy to reach.  It turns out one way to make the system much easier to use is to have several Bases with elements attached and then swap the magnets from piece to piece.  As an alternative, one could buy several magnets and leave them permanently attached to different bases.

In use, the Featherboard works like a champ.  Once attached to the Base, and magnets transferred into place, it is a very simple matter to place and adjust the board.  If the Base needs to be moved, a quick twist of the knob on top of the magnet releases or sets the Base and you are on your way.

There are two Roller Guides available — one straight with two sets of bearings for the table saw and another made for resawing on the bandsaw, having one set of bearings in the center and the sides sloped away.  Both can be adjusted so the fence is vertical.

Band Saw Roller Guide

Band Saw Roller Guide

Funny thing, I cussed the Roller Guides pretty good because the magnets would not fit into the holes provided.  Took me longer than it should have to see the removable plastic bushings to adapt to the bigger/stronger magnets.

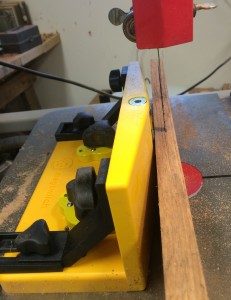
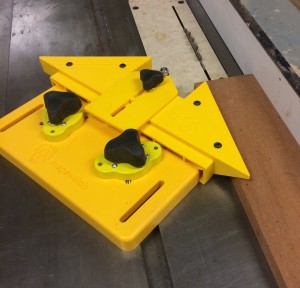
The Thin Stock Jig and Rip Guide is one of the odder pieces.  It is designed to hold down thin stock on the table saw using the same Base and magnets as in all of the other pieces.  The trick with this one is it has to be set at an angle so the edge is parallel to the fence.  There are several different thicknesses for ripping depending on which edge you face toward the fence.

IMG_1580If there is an issue with the Magswitch system, it is how best to configure the combination of Bases and magnets to fit your needs.  It is probably best to buy a Starter Kit, and then decide which unit is most important for you and how much trouble you are willing to stand to switch the magnets around.  Bases are about $19, but magnets are either $25 or $35 each and you need two for each Base.  Once you get set up, they work very well indeed.

Mar 032015
 

I built my wood shop workbench about 25 years ago and the hardest thing about it was not having a bench to build the bench. Sometimes holding your work is one of the things which takes up as much effort as the work.

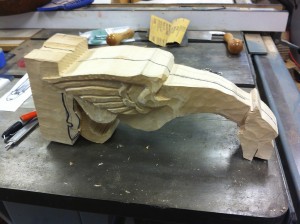
I started carving a gargoyle a while back (do you have one? Don’t judge me) and holding that thing was a real chore.

Gargoyle

Gargoyle

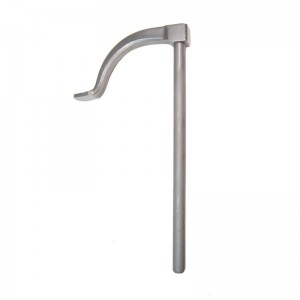
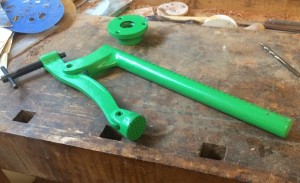
One thing I added to my bench recently is a holdfast.  The traditional forged ones simply drive into a hole in the top of your bench a little bit like whack-a -mole with your bench mallet.  They have a flat hook on the end and the sideways pressure in the hole locks it in place. You loosen it by whacking the shaft sideways. Works like a champ and sometimes you can find a local blacksmith to make one for you.

Forged Holdfast

Forged Holdfast

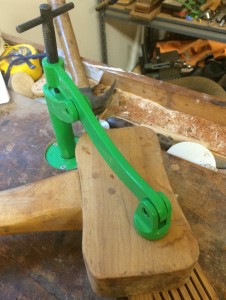
A more modern version has a small screw on top of the clamp part, and fits into a metal bracket set in the top of the bench.  It is related to the traditional style in that it locks into place with a sideways warp in the bracket.  To use this clamp, just drop it in the hole in the center of the bracket and then a quick twist to the screw puts a large amount of pressure on the work.  To release the clamp, loosen the screw and then pull up on the top of the shaft.  The grooves on the shaft release from the grooves in the bracket and it is free.

New Holdfast

New Holdfast

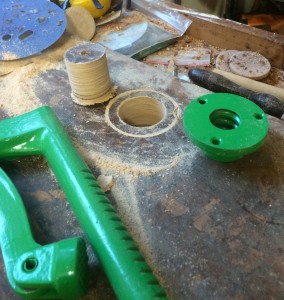
Installation is simple once you decide where it needs to go to be most useful. You can use a simple straight hole in the bench and it will work fine, but the better installation is with the bracket. I drilled a pilot hole in the top of my bench, and then used a larger hole saw to drill in the depth of the bracket flange, plus a little bit. Then without removing any wood, I used a smaller hole saw to drill all the way through the top of the bench still using the same pilot hole. That way I had concentric holes and could chisel out the flange depth by hand.  Worked like a champ after I dropped the bracket in place and added some screws.

Holes drilled for bracket

Holes drilled for bracket

Between the new holdfast, my new leg vise, the shoulder vise on the end of the bench, the bench dogs on the top of the bench, the bench “L” vice on the end with two clamping points, and various and sundry other pipe clamps, I bet I could clamp a herd of cats.

Finished Installation

Finished Installation