George T. (Terry) Chapman

Terry Chapman is a Professional Engineer (Civil) and Land Surveyor who lives south of Atlanta. He has done woodworking for many years and particularly enjoys bowl turning and making Windsor Chairs. He currently works as Site Development Manager for a local affiliate of Habitat for Humanity and has one son who pastors a Church in Connecticut. You can email him at cdeinc@mindspring.com.

Oct 172012
 

Well, I am in North Carolina taking a class at John Campbell Folk School. I wanted to get out of town for a few days and take a class somewhere, so I ended up here at the School making a split bamboo fly rod.

Can you say obsessive, detailed, fanatic, “are you kidding me”? If you have a dime in your pocket, turn it over and look at the “o” in “of America” and the center is 0.070 inches. That is 70 thousandths of an inch, the size of the end of a good fly rod which is built up of six perfectly shaped equilateral pieces, all of which are half the thickness of the “o”. And then five inches further up the rod, it is 0.005 thousandths thicker. The rod tapers from one end to the other and the taper determines the action of the rod when casting. People can tell you the name of a particular taper and what kind of action it will provide.

Planing Taper Form and Bamboo Blanks

Fly rods are made of a particular bamboo imported from southwest China. It takes seven years to grow big enough to be split and made into a fly rod. Suitable bamboo only grows on the south facing slopes of alternate hills facing a river and can only be harvested by unmarried Chinese maidens. It is then shipped to the US by a select few importers and sold to fly rod makers all over the States. Some of that I made up, but from what I see so far, all of it is believable.

Let me tell you one thing I know for sure after two days of hand planing bamboo strips in metal taper forms. The guy who invented bamboo shoots under the skin as torture was likely making a bamboo fly rod. This stuff is sharp!! First class I have ever been to where on the second day half the class brought their own box of Band-Aids. When the whole school eats lunch family style, our table mates know what class we have because we all wear bandages on our fingers.

Tomorrow we will glue up one section and continue planing the other section. After that we can make the handle and add the ferrules and the line guides and all the other stuff which I have yet to learn. Wish me luck. I may still have to go buy another box of Band-Aids even at that. I will post a picture when I get done.

Oct 052012
 

I am reading three books right now. The first is Larry Haun’s memoir “A Carpenter’s Life — as told by houses”, published by The Taunton Press. It covers the arc of his life through the houses he lived in and houses he built during a lifetime as a carpenter. Haun would probably come in third behind Joseph of Nazareth and Tom Silva of “This Old House” if people were asked to name their favorite carpenter. He is especially well known in my personal circles as the guy who wrote the standard in the field for Habitat for Humanity on building houses. His book is a very personal memoir with a great deal of his own philosophy of life incorporated into it. I particularly like his ideas on efficiency in construction and how to speed up the process of building a house. On the other hand, I found a bit of a disconnect between his life in building large numbers of tract homes and his ideas on saving the environment. I do enjoy his homespun style and I have used his books on construction for many years. Haun passed away last year.

Mouldings in Practice

The second book I am reading is from Lost Art Press, Chris Schwarz’ delightful new specialty publishing company. “Mouldings in Practice” is written by Matthew Sheldon Bickford, he of the popular blog “Musings from Big Pink.” The book is fascinating and is not as much about tools and hand work as it is about freeing up your mind and your work. The author starts out by pointing out that most of us either buy mouldings ready made or by finding a router bit at the store that matches the shape we need and running our stock through the router table. When we do either of these things, we are severely limited in the shapes we can make or use. And if you want to change a profile you have to go back to the store and buy another bit or find another profile. With just a few moulding planes, you can make a virtually unlimited number of shapes and match any shape you see. Subtle changes in shapes and profiles are easily accomplished. Didn’t you ever wonder how they used to do it before electricity and hand held routers? I know I did. I couldn’t help but laugh when someone suggested that the initial reaction to this book by most people is “Oh crap, now I want to buy those stupid planes.” It is so obvious and so simple and so flexible that anybody above beginning woodworker will look at this and jump on it. This book is highly recommended, not just for the woodworking but for the new approach to your woodworking life.

The third book has nothing to do with woodworking, but since I am scheduled for a class at John Campbell Folk School on split bamboo fly rod making, I wanted to re-read “A River Runs Through It” by Norman Maclean, the essential classic on fly fishing. Many people have seen the movie made from the book a few years back, but as is often the case, the movie cannot provide a full appreciation of the skill of the author. Whatever writing skill I have was gained by practice and by reading, and I am not sure that writing can be learned anyway. As the old saying goes, “Either you got it or you ain’t”. This guy had all the skills and when you sit and read a sentence over and over and ponder the injustice of why he can do that and you can’t, then you appreciate real genius. I will offer some insights on bamboo fly rod making and the John C. Campbell Folk School in North Carolina in a few days.

Winter is coming. Better get these books so you will have something to read when the nights get cold and long.

Sep 192012
 

I am always looking for pretty little turning projects. I like fairly small projects and something which will turn out to be delicate and beautiful. My friends Tom and Sue traveled to Wales recently to get out of the Georgia heat and came back with a beautiful and elegant turning project.

Tom and Sue toured an exhibition hall in the small village of Beaumaris, Wales, where  exhibitors were selling donated wood turnings to benefit the local fire brigade. This small vessel (a tooth box) came with a card which had the following poem:

The Tooth Fairy
The tooth fairy comes in the middle of the night
While you’re asleep with your eyes shut tight
She sits on the toadstool on the top of the box
And thinks of a way to give you a shock

She then does something rather funny
She takes your tooth and leaves you some MONEY.

It would be a great gift for someone who has a child of the age to lose a baby tooth. They are about 1.5 inches wide & 2 inches high and were turned by Cath Stanley.  Tom said he bought them for the equivalent of  $3.50 each. He and I agree that this is a great little project and would make a fine gift. Don’t you know someone who would like one of these?

Jun 132012
 

I have been tied up pretty good the last few weeks coordinating a large project for my Habitat Chapter. We are building five town home condominiums just south of Atlanta, all sponsored by a major corporate donor who sends many volunteers to the site to help with construction. We sub-contract all the trades and use volunteer amateurs to do everything else we can. It makes for a very interesting situation, but the enthusiasm and joy from the volunteers is what makes it really fun.

My current Habitat project.

This construction brings up two thoughts for wood workers. The first is about tolerances. One of the hardest lessons I had to learn as a newbie engineer many moons ago, was how many decimal places were required in a calculation. If the first decimal place cost ten dollars to calculate, the next one was a hundred dollars and the third one a thousand dollars, how much is the answer worth to you? When you are just starting out, that is not a simple question, but must be learned by hard experience and practice.

Sometimes I just want to work to the nearest inch, you know, sledge hammer type work. I was showing someone today how to read a tape measure (yes, there are people on site who cannot read a tape measure). I explained the inch, the half inch, the quarter inch, and the eighth inch marks and then told her that on this site today, you will not need to use marks smaller than the eighth inch marks. Even my experienced people on site sometimes over think things and spend too much time getting something to a 16th when a half will do.

Now, when I am making furniture, I am such a perfectionist that a 32nd or a 64th of an inch crack will haunt me every time I walk by the piece. And that brings up the next thought. Look over to the right of this missive and check out that square box of squiggly stuff. Do you know what that is? It is called a QR code, which stands for “Quick Response” code. It’s used like the bar code (I once knew a zebra named “Bar Code”) on your groceries to transmit information. If you have a smart phone, you can download an app (that’s an “application” for you Luddites) which will read the QR and act on the information contained in it. In the case of the one to the upper right, it sends you to the Highland Woodworking blog site on your smart phone so you can read about Highland any time any place. Maybe even buy some tools.

I have embedded a QR code in this blog for you to try. Ask your kids or grandkids to help you with it — they already know. See if you can figure it out. This same one hangs on my office door at Habitat and I have actually become quite well known for it. It combines the two thoughts above as to what tolerance is required on any project and is the distillation of many years of engineering experience and practice and of working on at least 85 Habitat homes. I think it sums it up pretty well. See what you think and let me know. Write your answer on the back of a twenty dollar bill and send it to me in care of Highland.

Apr 272012
 

Some things don’t need fixing. Witness “New Coke” in Atlanta about 25 years ago — somebody thought they could fix Coca-Cola. Duh!! How would you improve a ’57 Chevy? Did anybody give Elvis singing lessons? Who would have stopped Fred Astaire and Ginger Rogers and said “Wait, you’re doing that all wrong: you dance backwards and let her dance forward, and by the way, lose the top hat and cane.”?

I have been working on a Shaker Candle Stand the last few days and I Googled it for some reason. Do you know how many people think they can improve on the original? Listen, Homer, it is done. It is completed. Do not sit down and say, “I think I will re-design the Shaker Candle Stand — I can do better.”

My Candle Stand

You cannot add ball and claw feet to this thing. You cannot carve deep philosophical thoughts into the top of it. Do not add fancy gingerbread brackets to the underside of the table. If you simply cannot resist, then go carve clown faces in your hope chest. The candle stand was completed 200 years ago and it is done. I don’t have a problem with trying to improve your technique, make the dovetails better, upgrade your skew skills on the post, that sort of thing. But nobody has improved on it in 200 years and I can tell you, Ralph, you are not going to help it.

Go watch the Roy Underhill video on making one of these babies and listen to St. Roy expound on the shape of that marvelous center post. I love this little table, it is probably my favorite thing to try to make and I have parts of one going nearly all the time in my shop. The dovetails are difficult for me, but I will get better.

Hancock Shaker Village Table

A couple of years ago I went to New England to take a class and

Translucent seen transformed it while there I went by the Hancock Shaker Village for a tour. They have a beautiful Candle Stand there and it is the one I try to make each time. If my effort does not match this beautiful example, it is a lack of skill on my part, not because I think I can improve on it.

What do you think? Let me hear from you.

Mar 262012
 

Everybody needs their own gargoyle.

I bought some basswood at the wood store a few months ago and about two weeks ago, went to the High and got a six piece set of Flexcut carving tools. I found a pattern I like in a book and decided to go after it. After roughing it out on the band saw, I went after it with the carving tools. I really like it.

Just off the Band Saw – what do you think?

Still a ways to go, but not too bad for the first gargoyle. Least it’s not rock.

One Side Roughed Out

Mar 162012
 

I have been thinking about dipping into spoon making (Wow, did anybody not see that one coming?) for a long time. A couple of months ago, I finally did it and I think I like it.

Several things got me started — Peter Galbert on his website shows how he makes spoons during those long cold winter nights by the fireplace up there in far north Massachusetts. Then he sells them to benefit a favorite charity. Go to http://chairnotes.blogspot.com and search for spoons in the list at the bottom right or click “Spoons for Hunger” at the top right of his page. His spoons are beautiful and painful to me as I am reminded of how far I have to go.

Another source for spoon making ideas is Robin Wood in England.  Go to http://www.robin-wood.co.uk/ and see what he has to offer. If I lived in England and did wood working, I would call myself Robin Wood. I love his bowls, too. He uses a foot-powered lathe to make bowls and you saw them in that recent Robin Hood movie with Russell Crowe, the one with the medieval wooden Higgins boats the French used to invade England. I laughed out loud. Robin gives classes and next time you cross the pond, you can sign up. He does beautiful work which is also painful to me.

Try Roy Underhill’s “The Woodwright’s Shop” for show #3108 with Peter Follansbee on carving Swedish spoons. The main thing I learned from this one is to use green wood (duh!). I mean I did not get that when I started. I was picking up old chunks of wood from around the shop and then dust was flying everywhere and I never got it done, and my admiration for spoon carving was rising all the time. I was about to give it up as too hard and too much trouble when I watched Roy and Peter and they set me on the green wood path.

The fourth source is Drew Langsner over at Country Workshops in North Carolina. Go to countryworkshops.org and check out his videos and maybe you can sign up for a class.

When I first started looking and learning, all the instructors used traditional tools to carve spoons. You start out with an axe and then move to a carving knife and a curved hook knife, a spoke shave and anything else with a edge that will remove wood. Took me about three days of effort before I discarded some of that junk. I finally went to the band saw, a hand grinder and the spindle sander — anything to get that wood off there. If I could make the chain saw do it, I would.

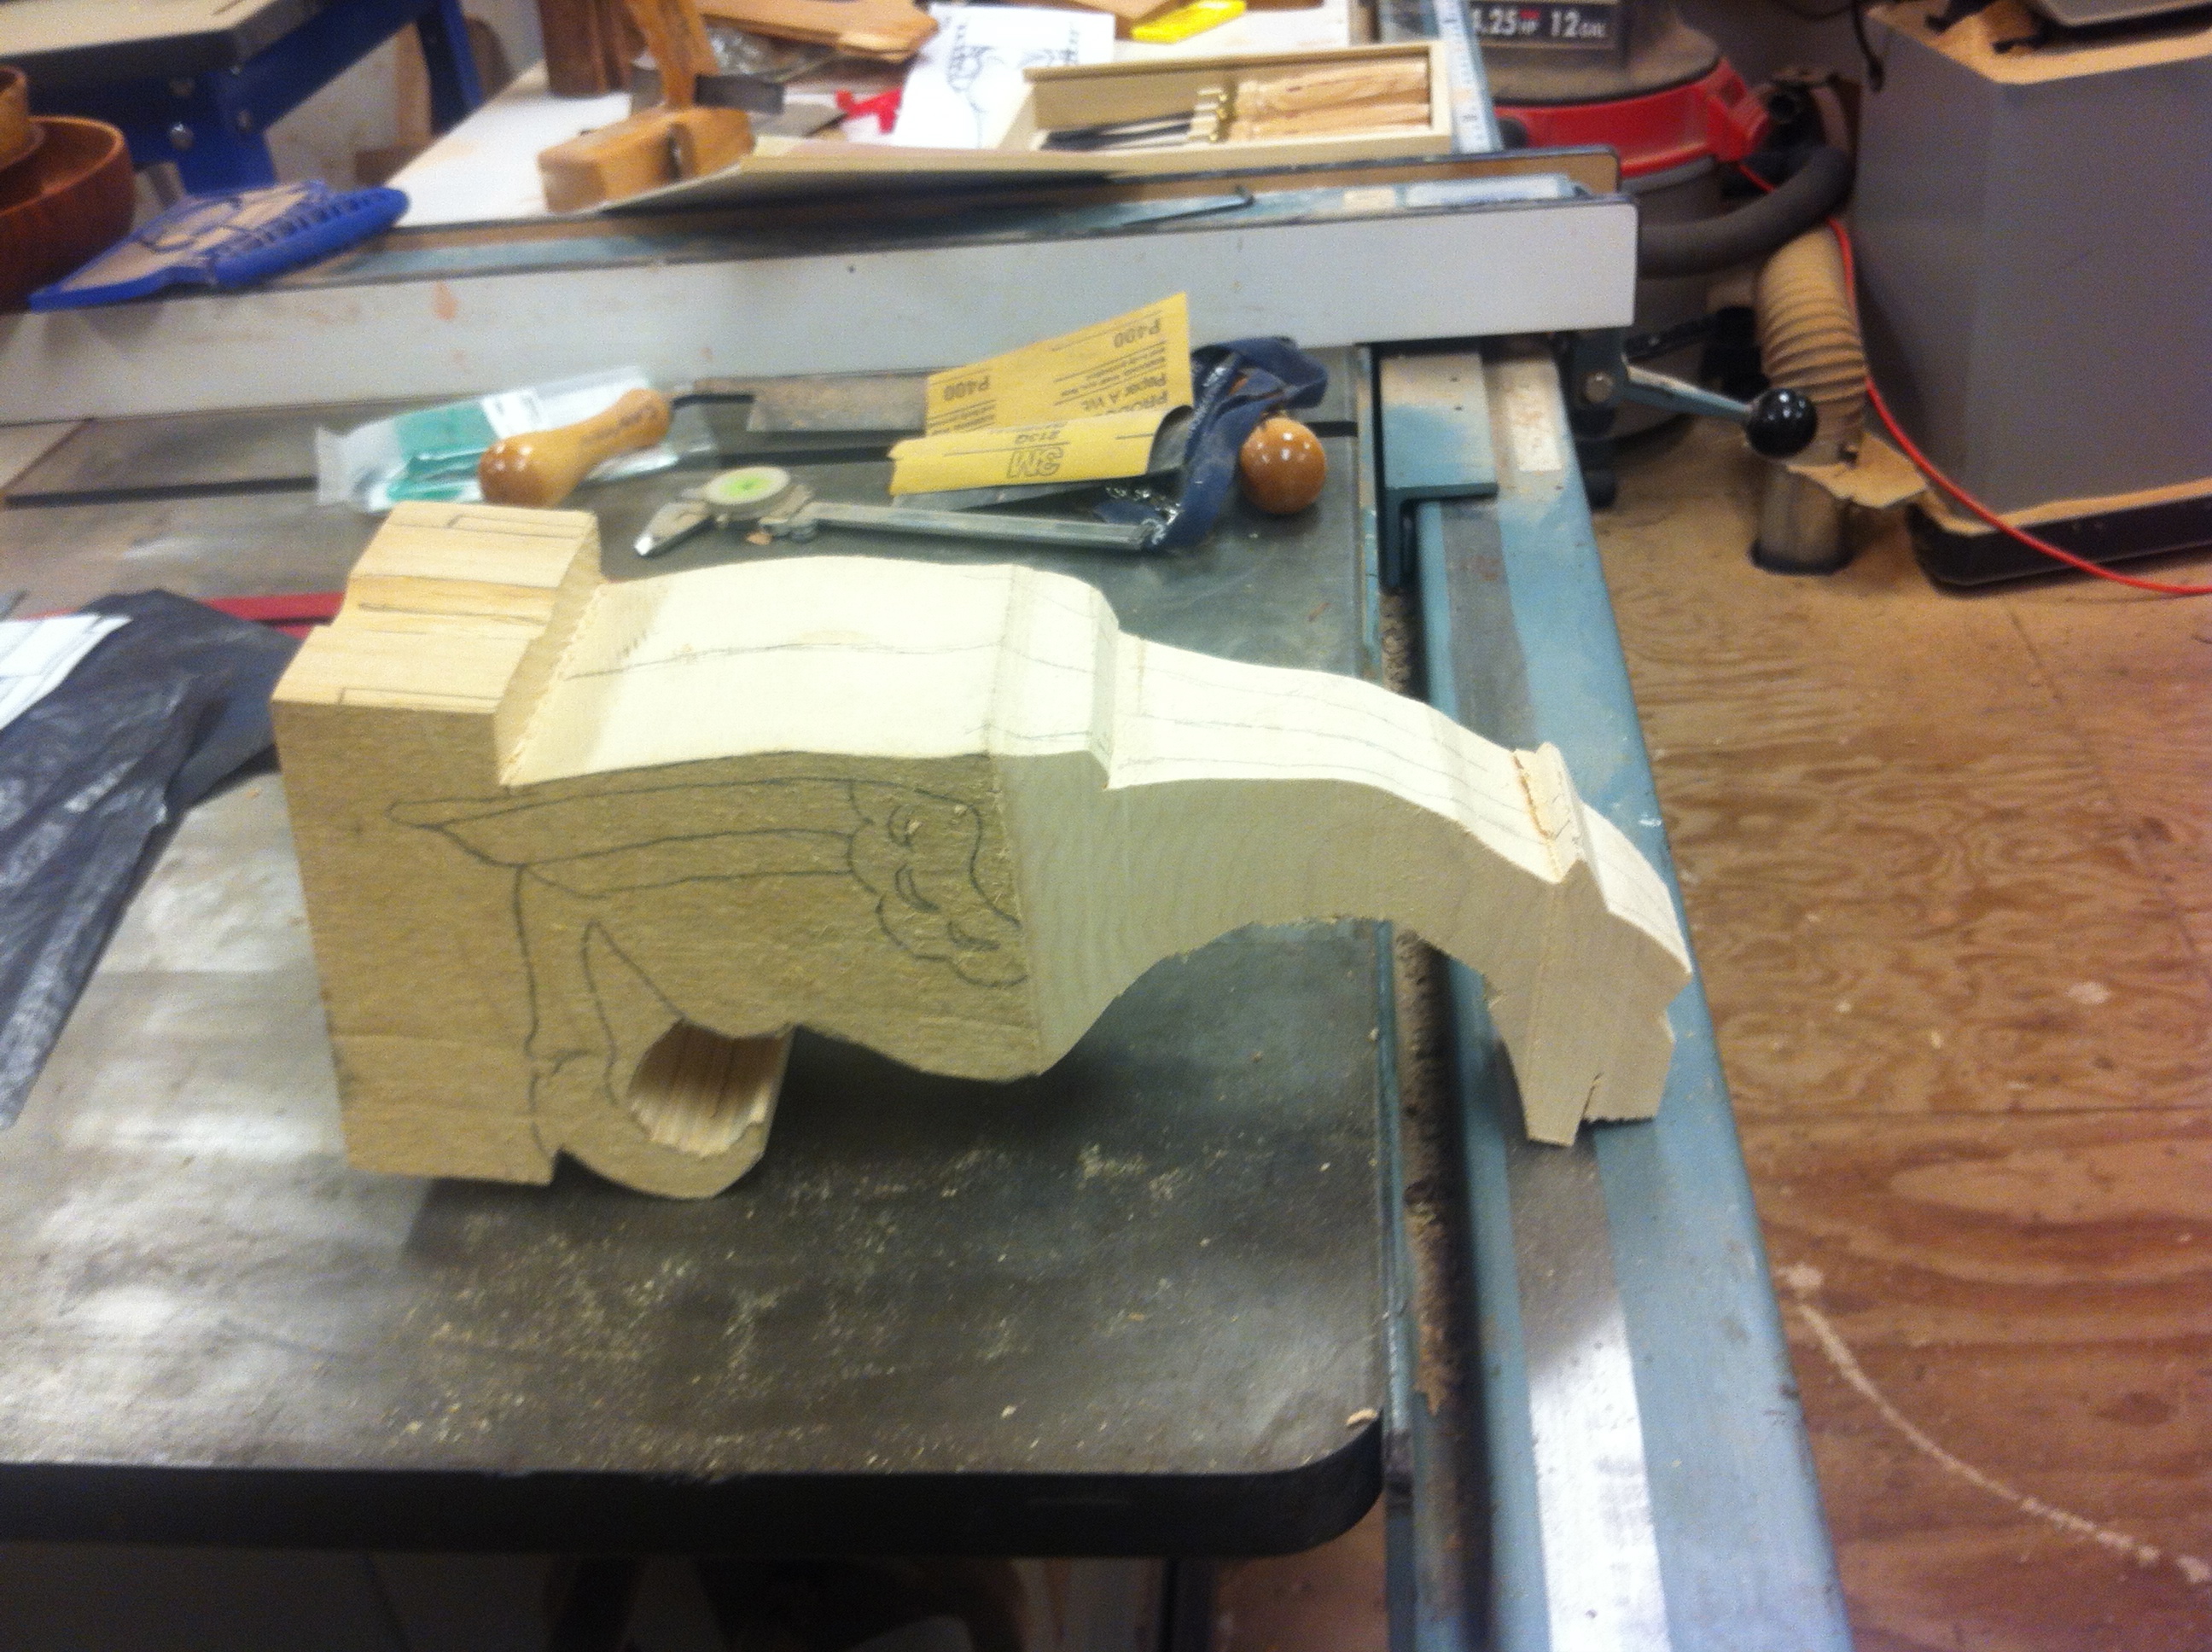
Splitting the spoon blank.

I had some green Bradford pear wood that I got when a tree blew over at the office. I split it out to a suitable blank and sketched a shape I liked from one side and then from the top and put it on the band saw to get the basic shape. I moved to the axe (from Highland) and a stump (from the yard) and started hacking away. Surprising how much wood (or fingers) you can take off with an axe while still maintaining control of the work. I found the trick to a good spoon is getting it thin enough to make it look delicate while leaving it thick enough to be strong. I like a shape which is wide horizontally at the handle and tall vertically near the bowl. The transition between the two is lovely when done right.

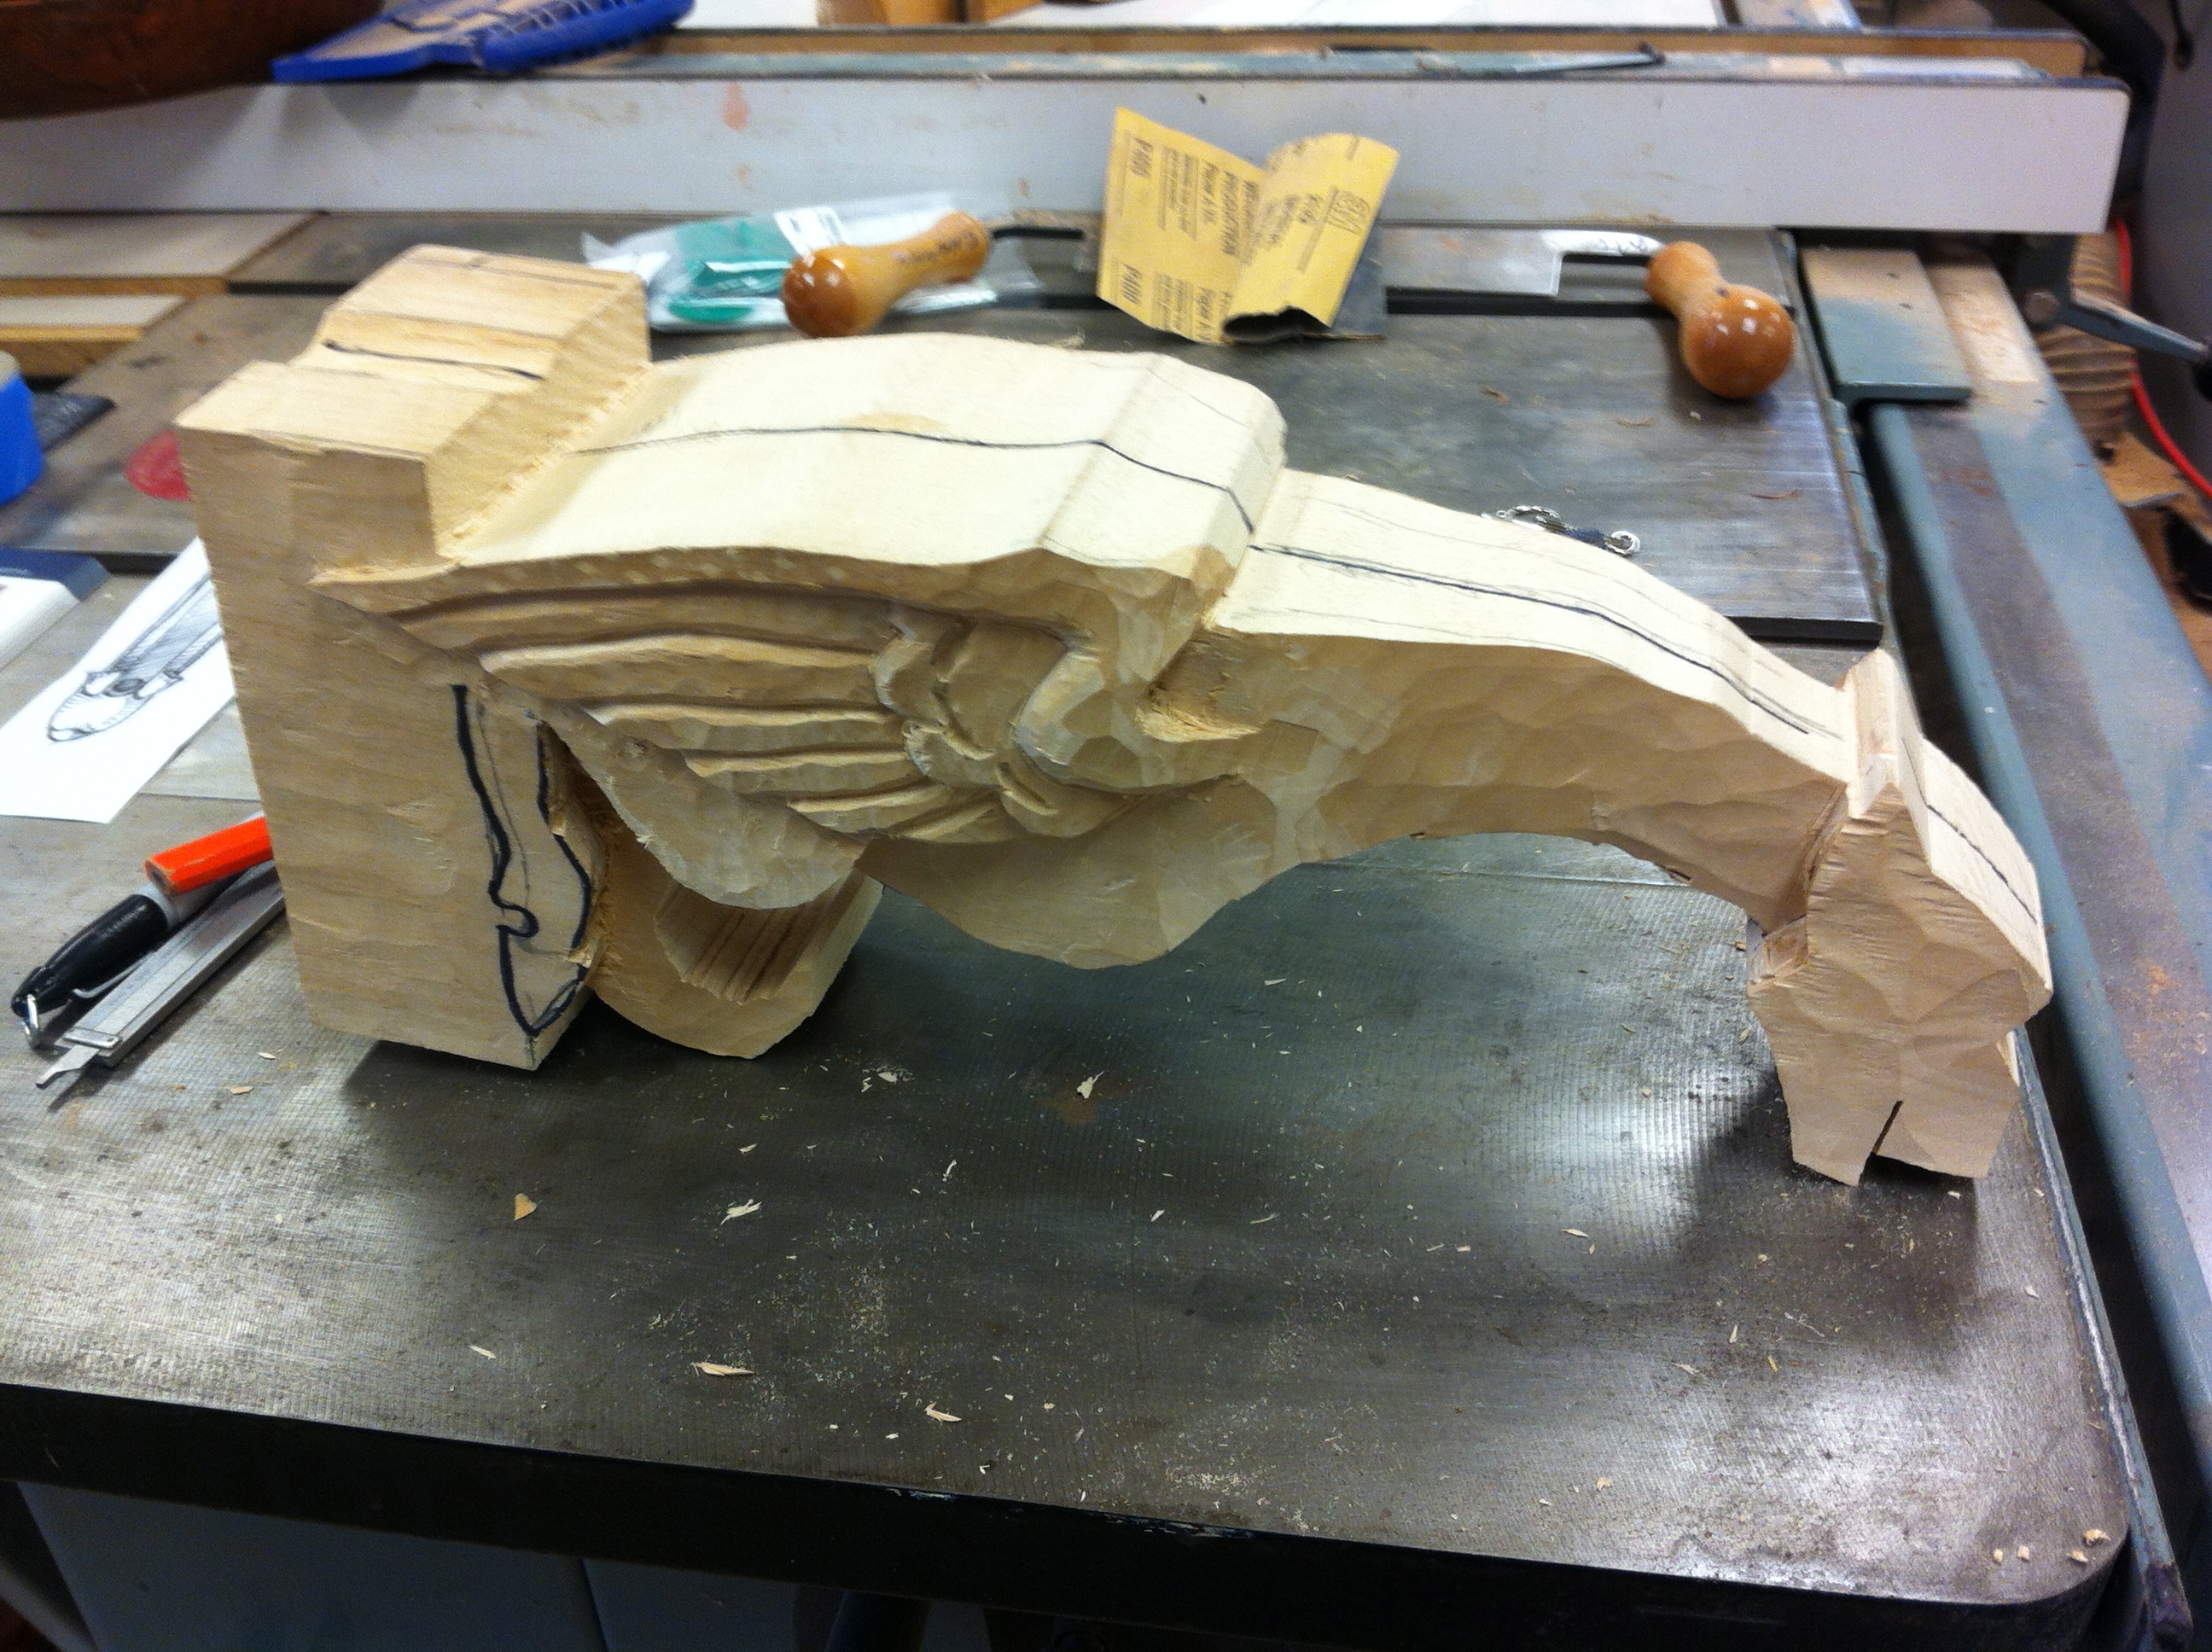
Roughed out on bandsaw

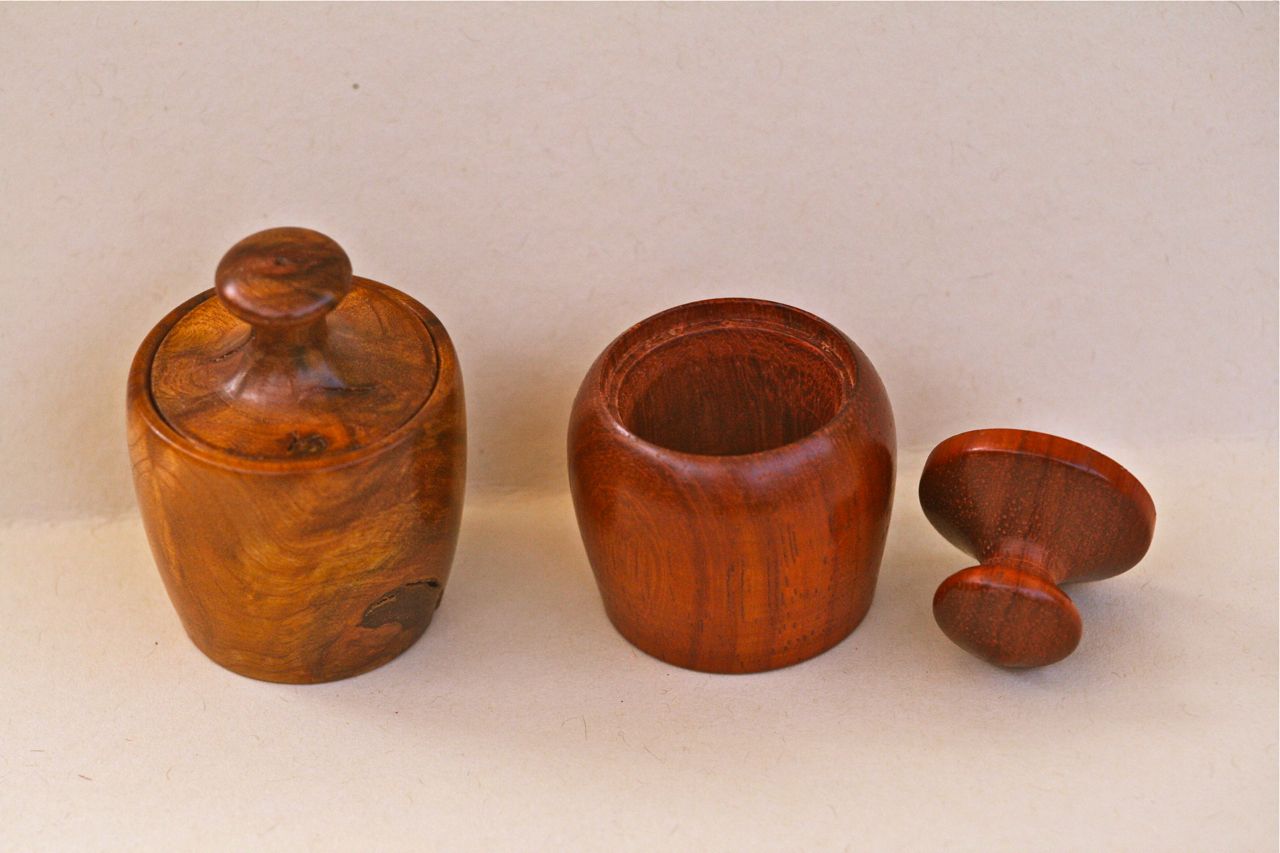
The tools I used are some I already had around the shop including the short axe, and a spoke shave. The other odd group of tools is a set of Exacto hobby tools which are small and very sharp, and include a small spoke shave which is marvelous for final shaping, and a round head cutter sharpened on one side. I went to Highland and bought two new tools which are really nice for the work. One is a small carving knife which came very sharp with no need for honing. It works like a champ. The other is a curved hook knife which is used for hollowing out the bowl of the spoon. I was surprised at how well that little knife worked. You can see all the tools in the picture.

The single biggest problem is holding the work so you can carve on it. Roy Underhill showed how you actually carve the bowl first since it is the hardest to shape. Plus you can clamp the square handle in the bench vise so you can work the bowl. I found there is a delicate balance between holding and carving, and eventually you end up holding the whole thing against your chest while you carve. One of these days I will have to make a shaving horse which I think will work better without breaking the spoon.
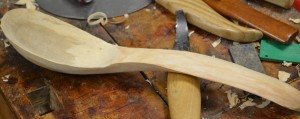
Almost ready to go.

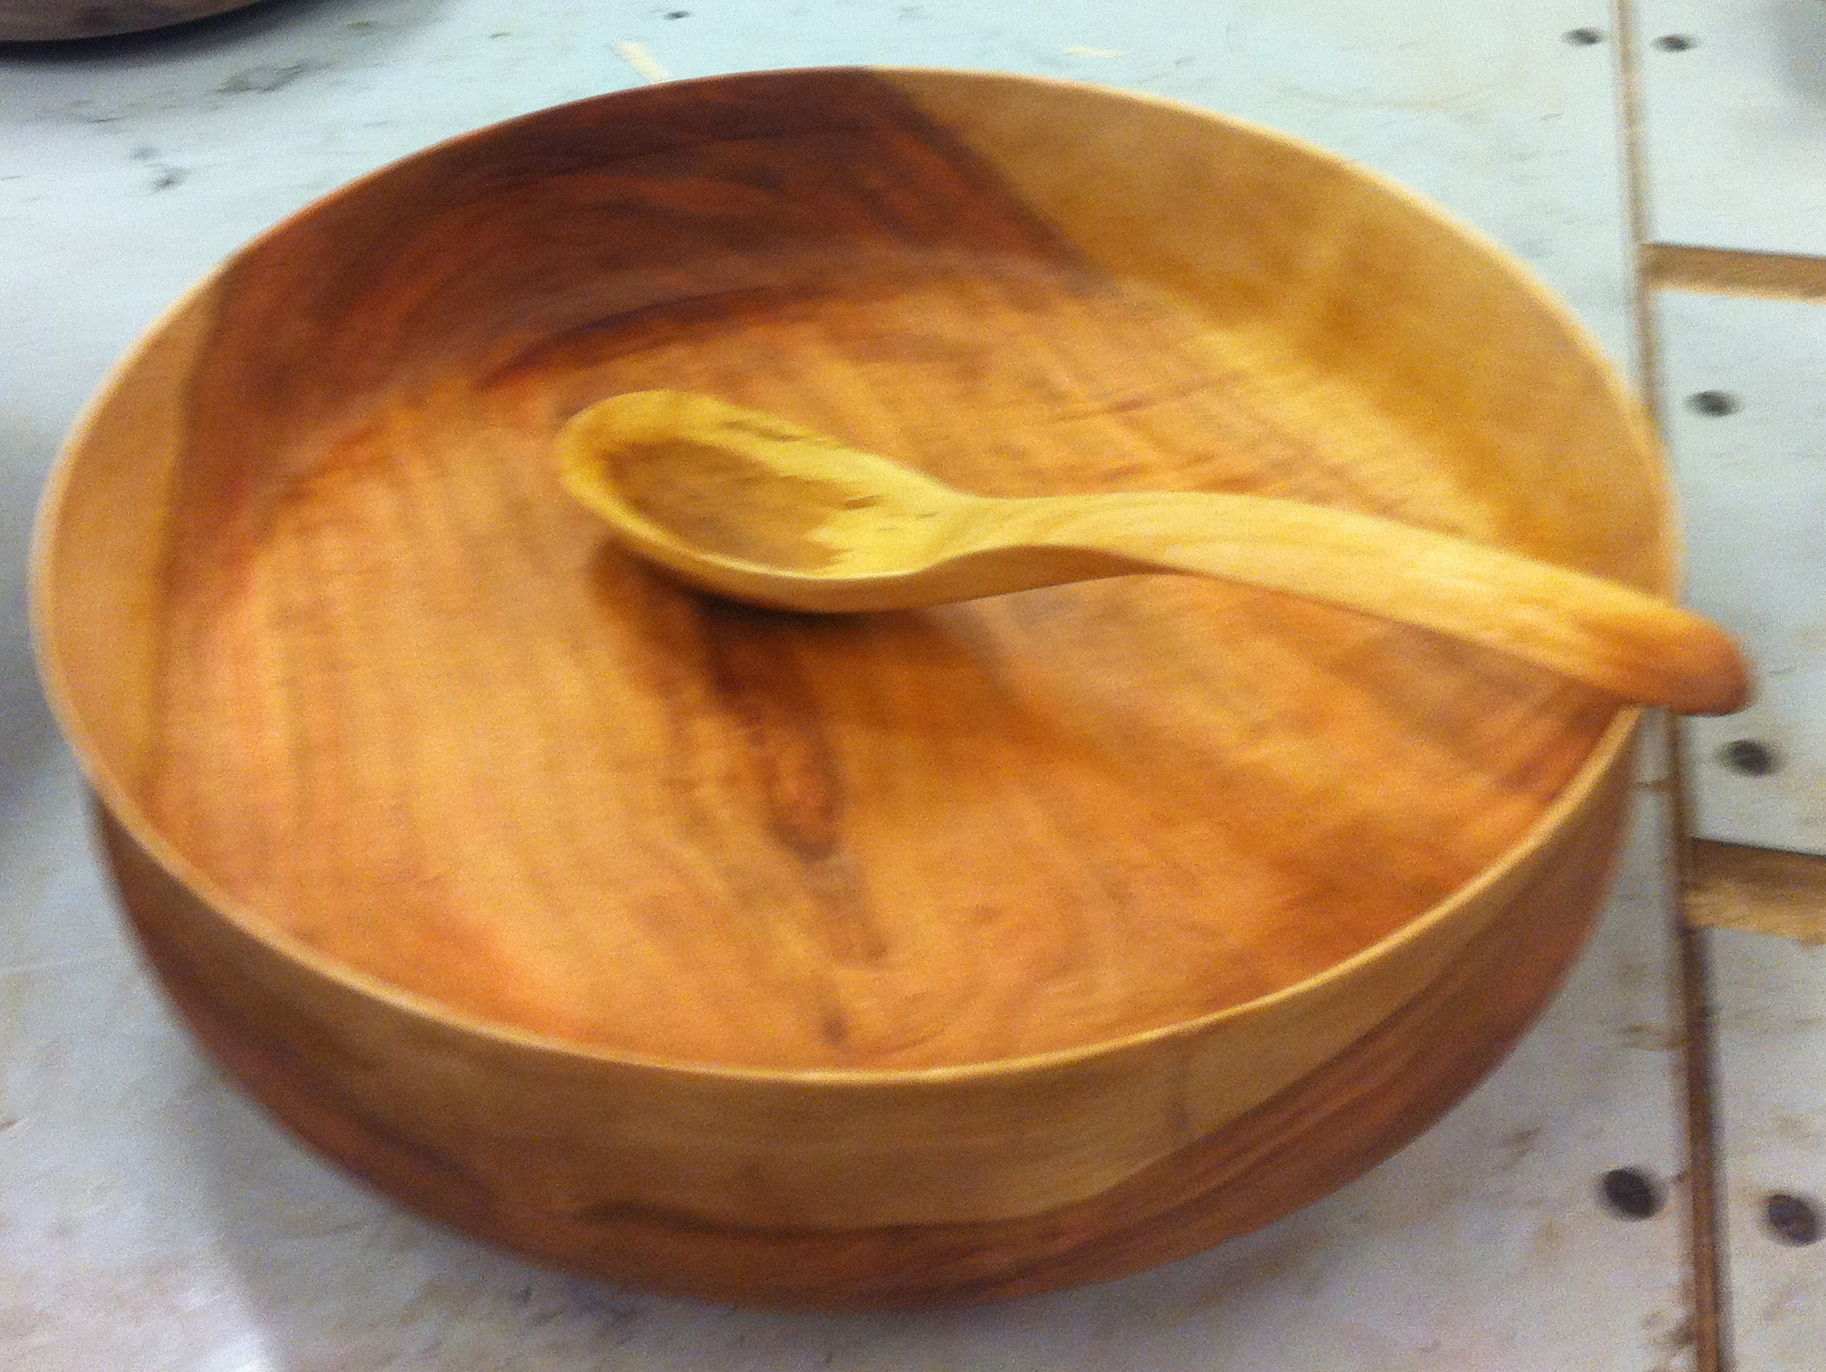
As I said, I am not proud and I will use any power tools I have to get the wood off. I did learn to wrap the unfinished piece in kitchen plastic wrap to keep it from drying out until I get back to it the next day. So far it takes me about four or five hours over a couple of day to get one done, but I think I will get faster. I have done about four spoons so far and the last one was pretty good. I had a bowl out of cherry that looked really nice and I noticed the spoon matched the bowl, even though they are different species. It made a really nice bridal gift.
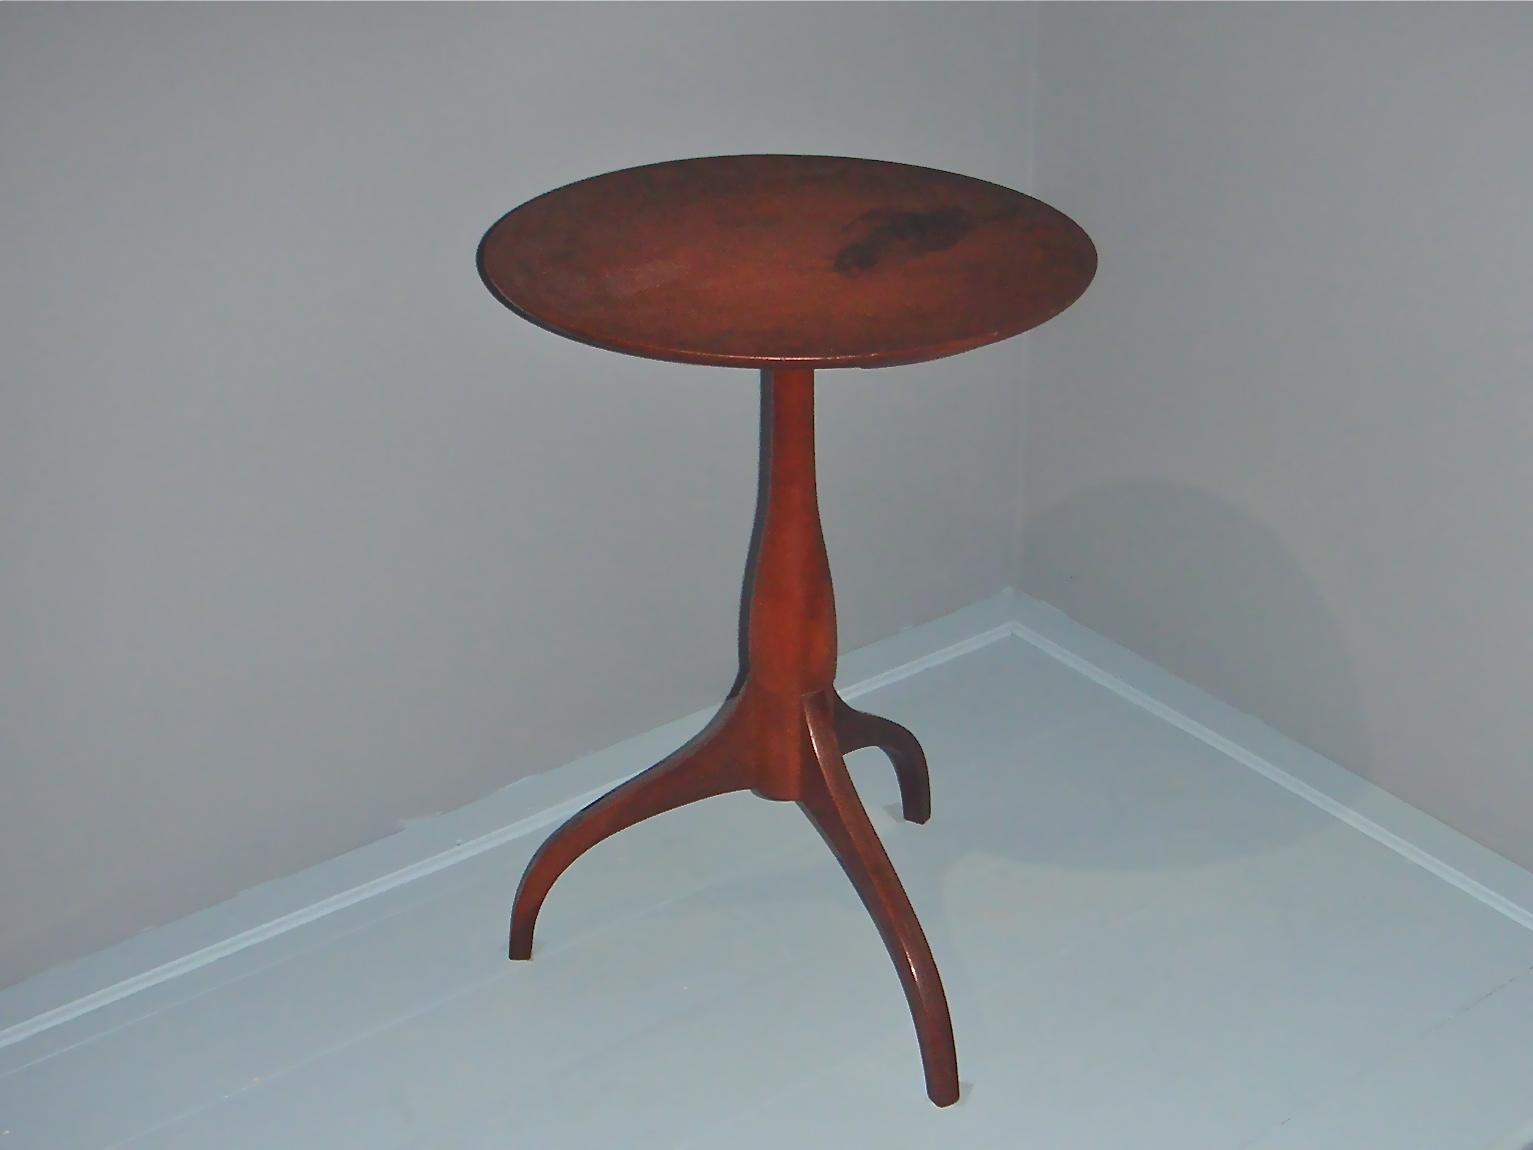
The bridal gift.

Think you might like to make a spoon one day?