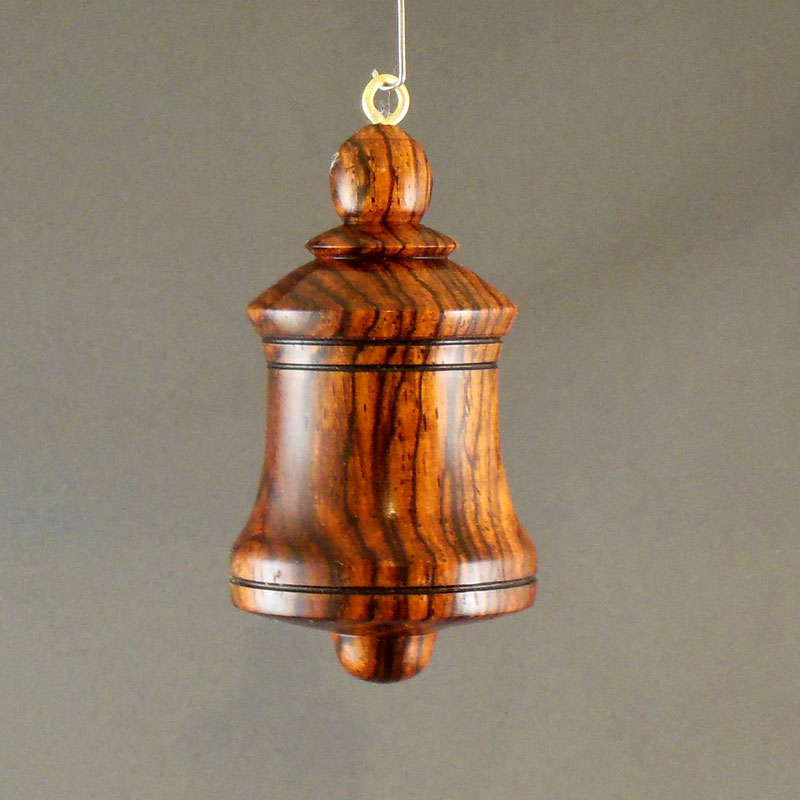
In the first part of this article, I showed how to make a Christmas tree ornament shaped like a snowman (see Figure 1). In this part, I’ll show you how to turn a bell ornament (Figure 2).
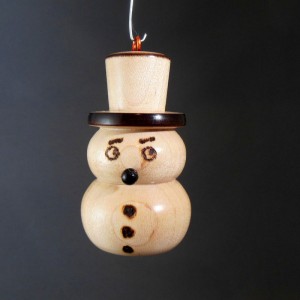
Figure 1 – The Snowman Ornament

Figure 2 – The Bell Ornament
Ornament Sizes
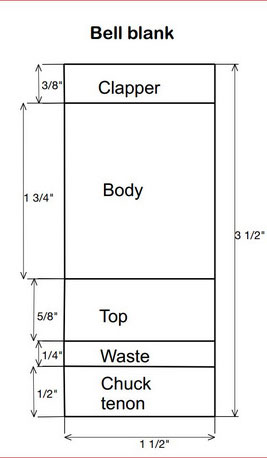
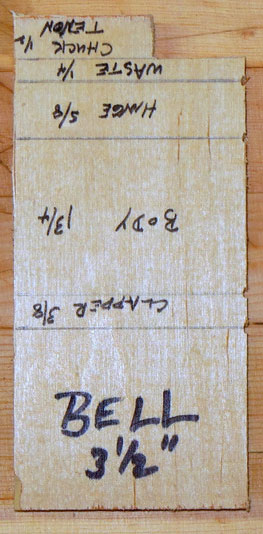
Figure 3 below shows the size of the blanks for the bell ornament, and details the location of each major division of the piece.
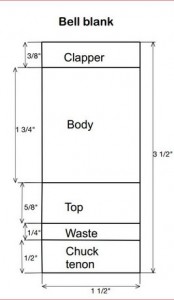
Figure 3 – Ornament Sizing
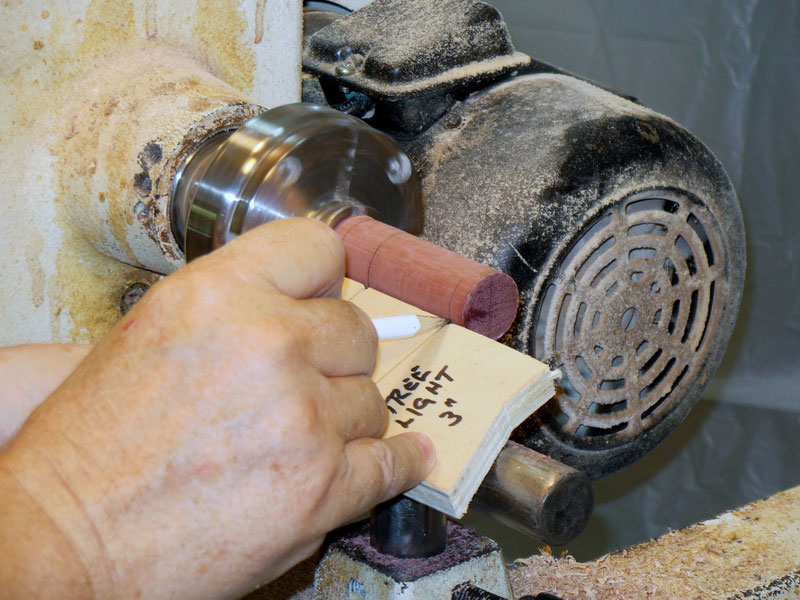
If you, like me, are making lots of these ornaments for Christmas gifts, I suggest making a sizing template for each ornament (Figure 4). This makes it much faster to lay out each new blank when you’re ready to turn it.

Figure 4 – Template for the Bell Ornament
Preparing the Blanks
Part 1 of this article has more detailed instructions on preparing the blanks for the ornaments, so I won’t repeat them here.
For the bell ornaments, cut lengths of 1 ½ square spindles to 3 ½ inches; for the bulb ornaments, cut lengths of 1 inch square spindles to 3 inches. Mark the ends for center, mount them between centers, and rough them down to round. On one end, cut a ½ inch long tenon to fit whatever chuck you’re using.
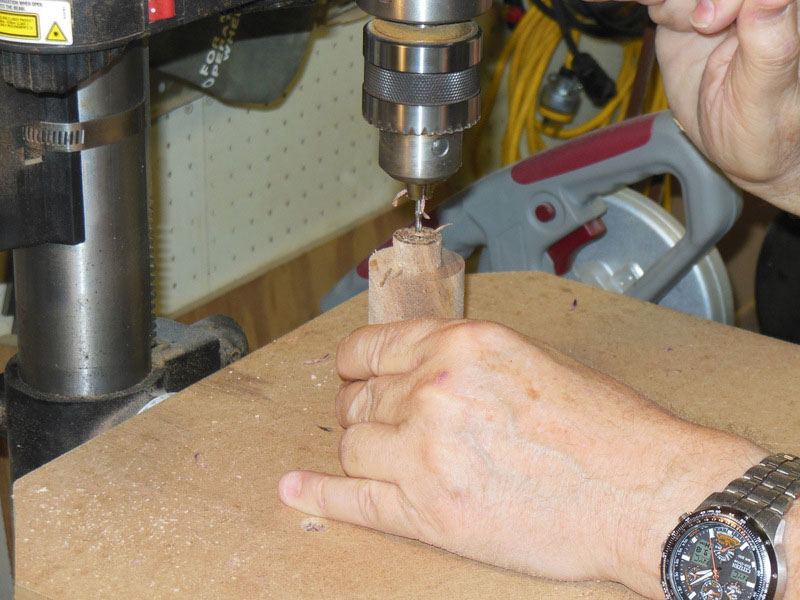
You may wish to drill a hole for the hanger right now (Figure 5); it’s easier to do it now, rather than waiting until the ornament has been turned and doesn’t have a flat surface to sit on. Remember that for the bell and bulb ornaments, the top of the ornament is on the chuck end, so the hole needs to be at least an inch deep (to account for the tenon which is parted off).

Figure 5 – Drill a hole for the hanger on the top of the ornament, either before turning (shown) or after
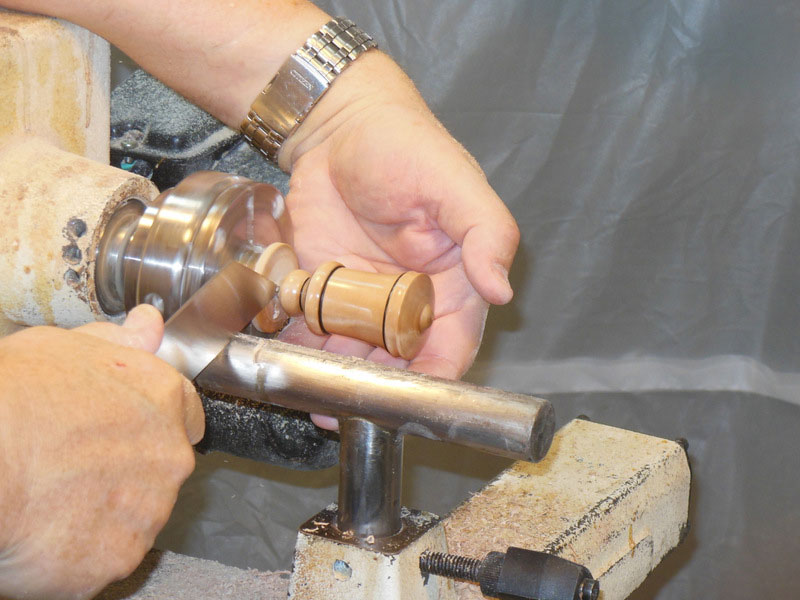
Making the bell ornament
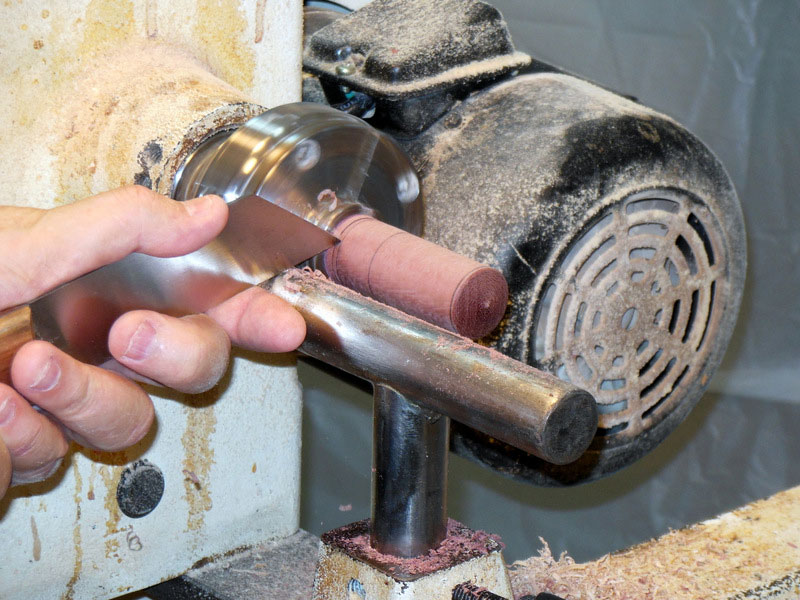
To make the bell ornament, take one of the bell blanks and mount it in the chuck. Then use the bell template to mark off the parts of the bell (Figure 6). Use a parting tool to cut in a half inch or so at the first line (in the waste area) to mark the end of the turning (Figure 7)

Figure 6 – Use the bell template to mark off the sections of the bell ornament

Figure 7 – Use a parting tool to delineate the top of the ornament
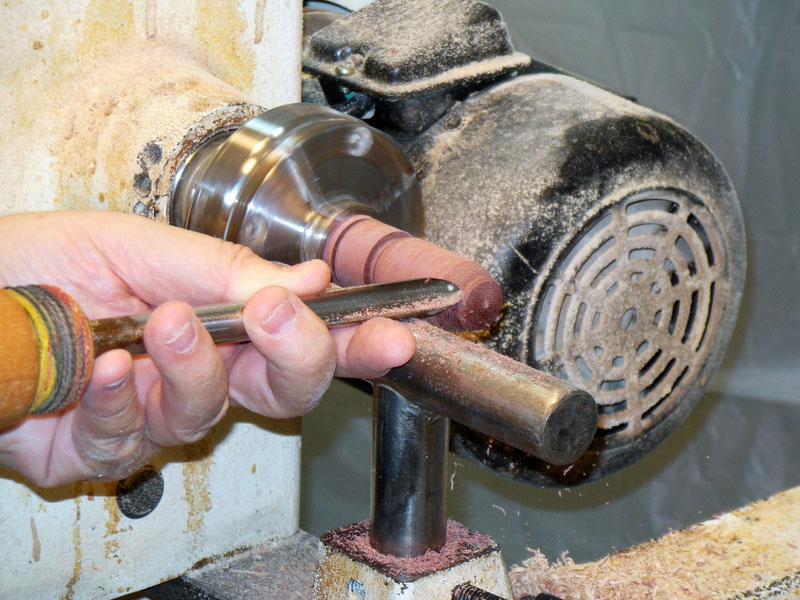
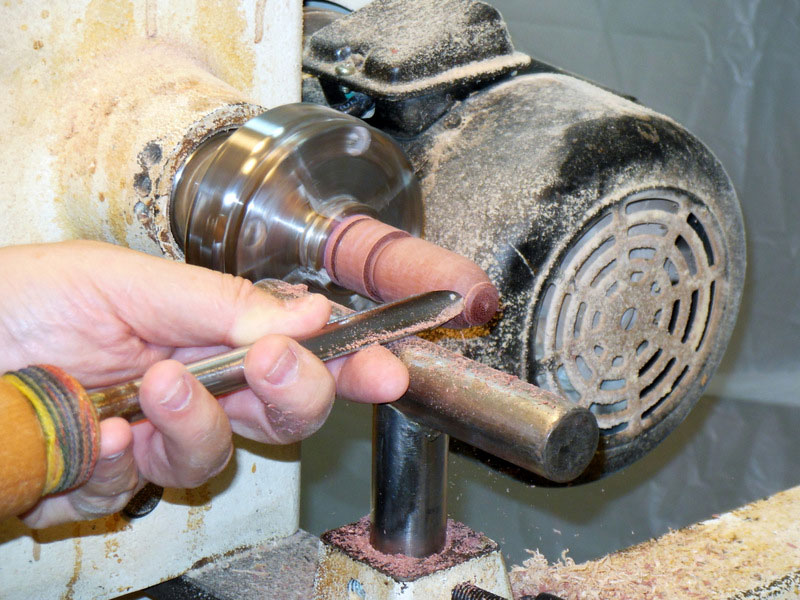
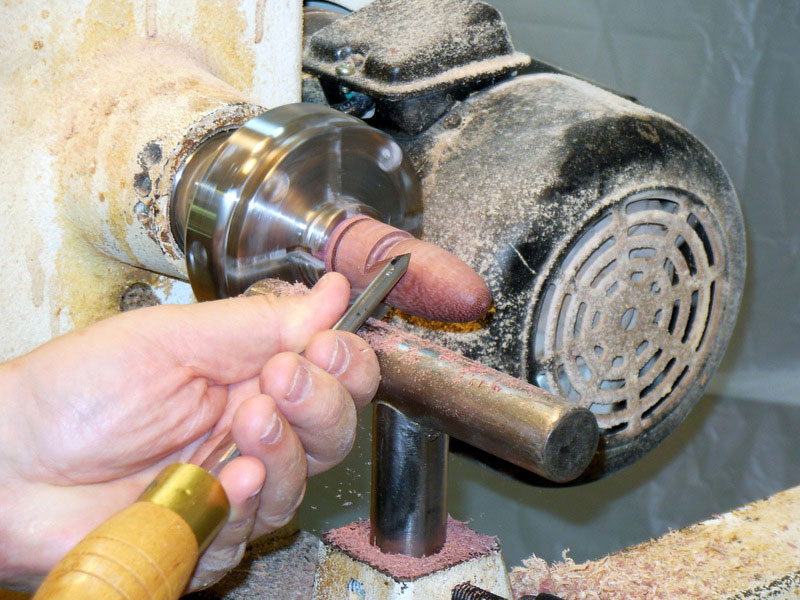
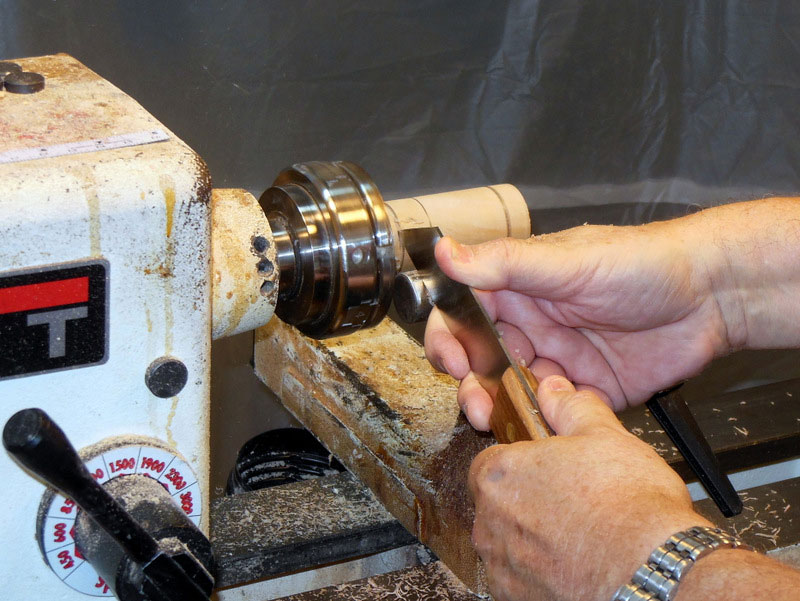
The bell ornament is laid out so that the bottom of the ornament is toward the tailstock. After making shallow cuts at the marked lines, I start by working on the bottom, cutting a shallow curve across, going in about 2/3 of the diameter, and then, right in the center, turning a small “bump” (Figures 8 and 9), which is the clapper of the bell, just visible below the bell’s body.
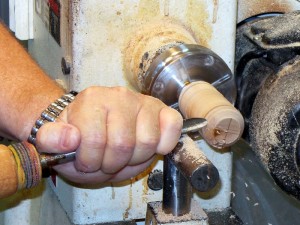
Figure 8 – Using a spindle gouge, start a shallow curve on the bottom (rightmost) part of the bell
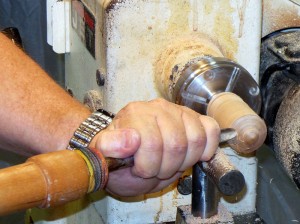
Figure 9 – Cut in about 2/3 of the diameter, to leave a rounded “bump” on the bottom
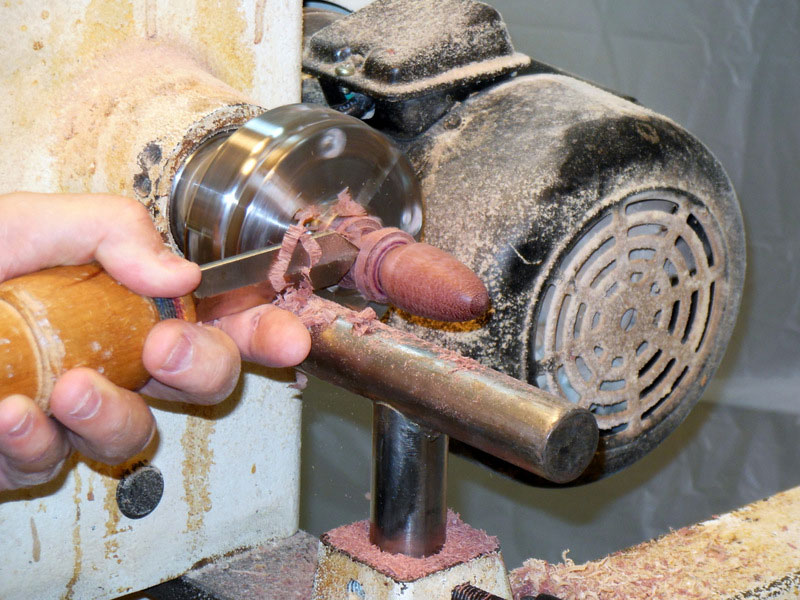
With the clapper shaped, move left to the body of the bell. Using the spindle gouge, begin cutting a slope from the bottom edge to the marked line to the left, which is the top edge of the body. For a decoration, leave a raised flat area at both the bottom and top edges of the body.
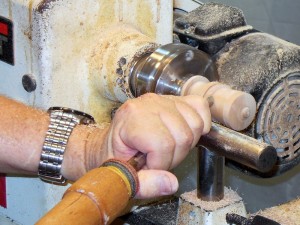
Figure 10- Start turning the body of the bell

Figure 11 – Slope the body from the bottom (right) to the top (left)
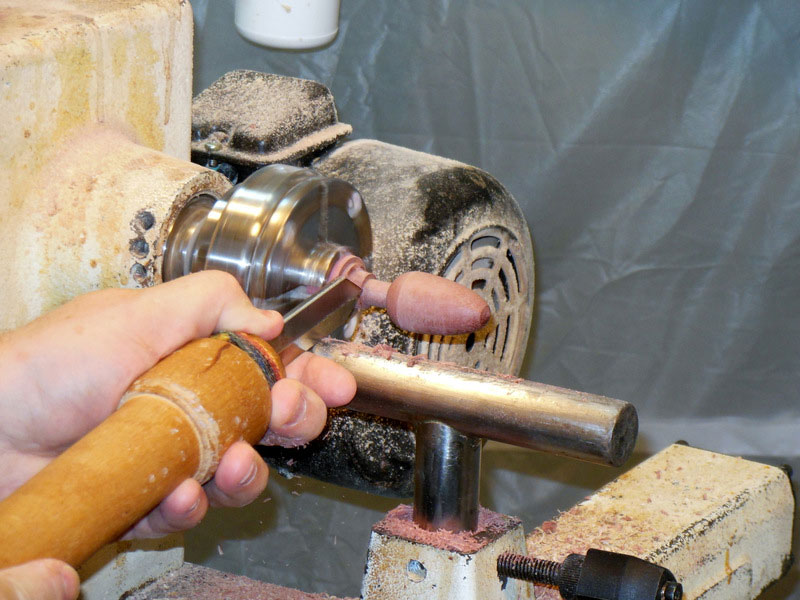
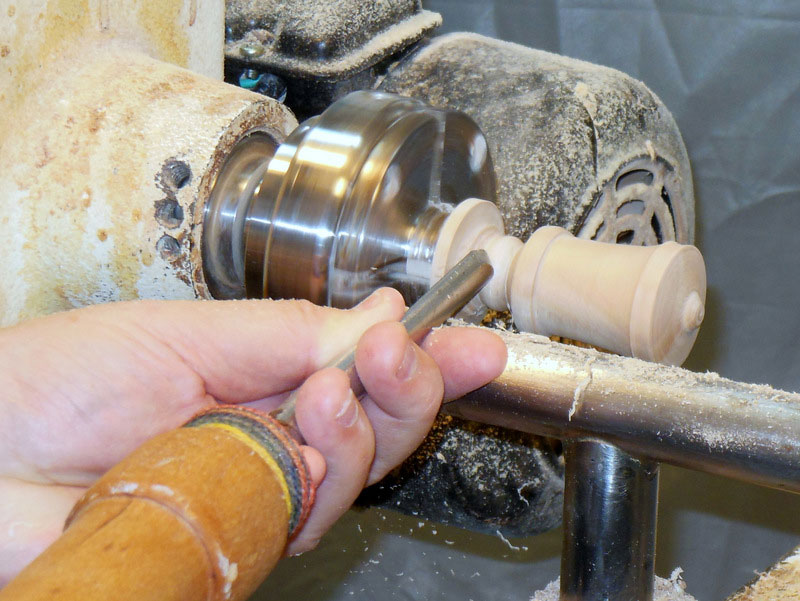
After shaping the body as desired, move left again to the crown of the bell (between the waste cutoff and the body). Turn a large bead in this area.
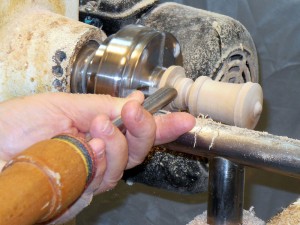
Figure 12 – Begin shaping the crown of the bell

Figure 13 – This is turned as a rather fat bead
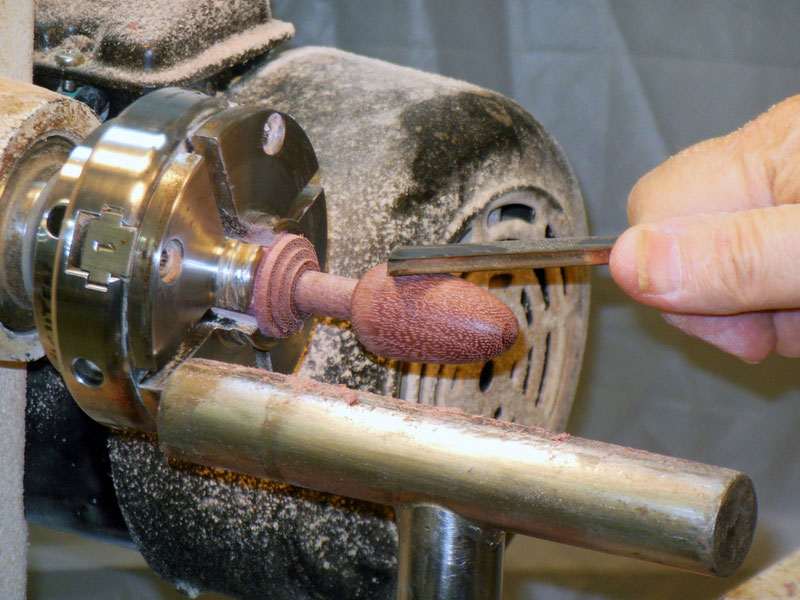
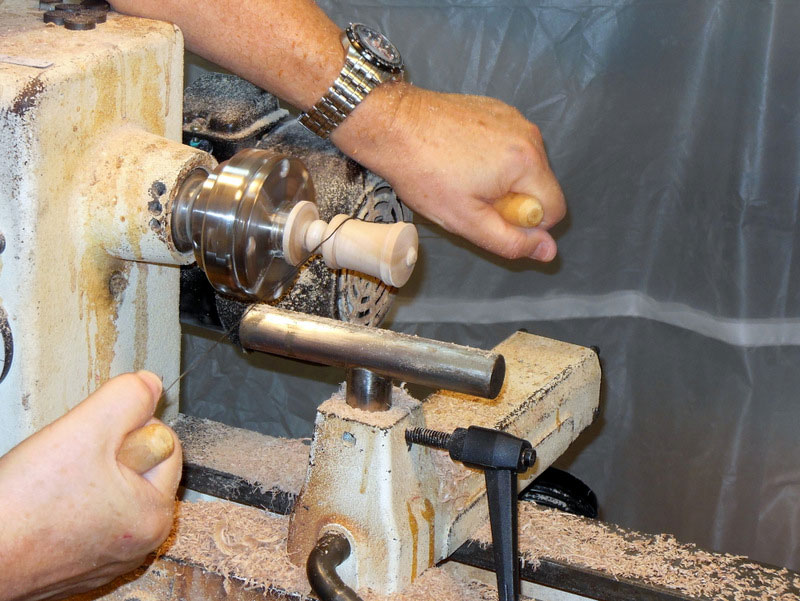
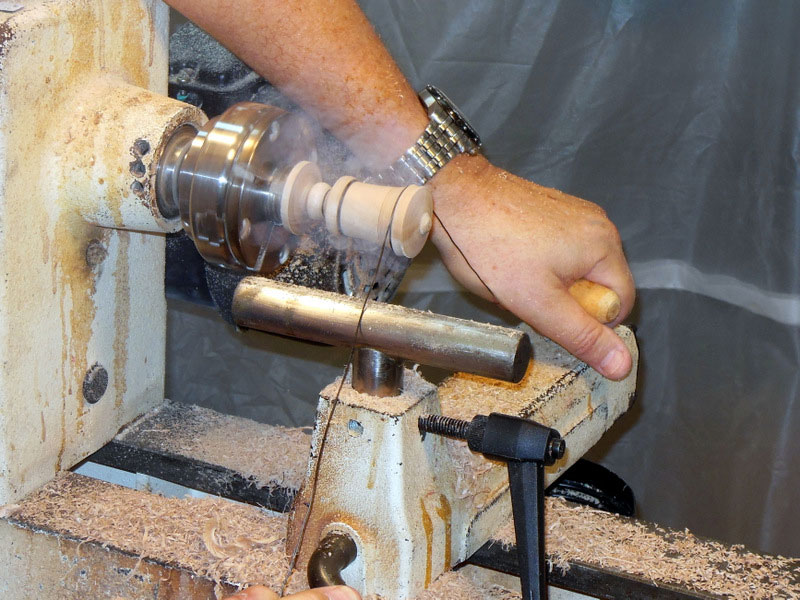
Using a narrow parting tool or the toe of a skew, cut a couple of very shallow lines at the top and bottom of the body, and use a burning wire (a length of steel wire with a small handle on each end – homemade of course, although you can buy them) to burn in two dark black lines for decoration (Figure 14). You might want to increase the speed of the lathe up to 1500 or 1900 if you’re having trouble getting a burn. Be aware, you’ll get smoke, as shown in Figure 15.

Figure 14 – Burn a line at the top of the body

Figure 15 – And burn a line at the bottom of the body
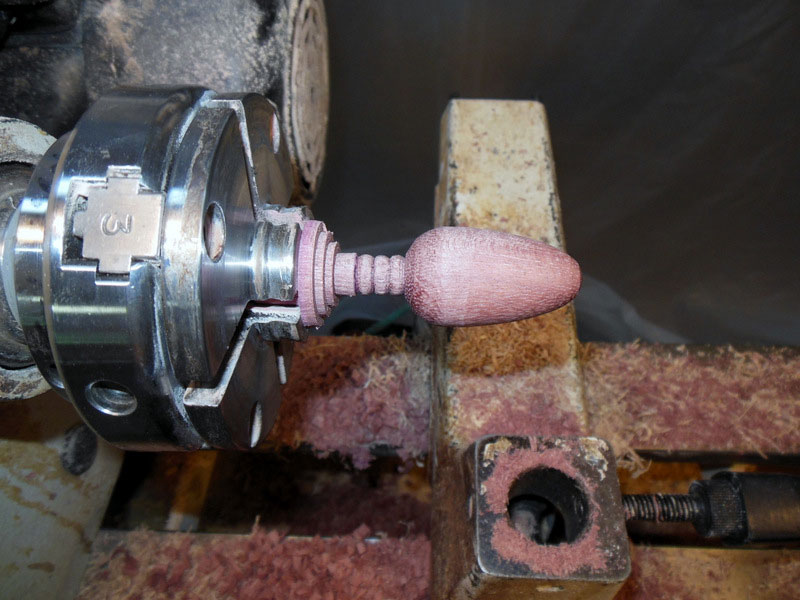
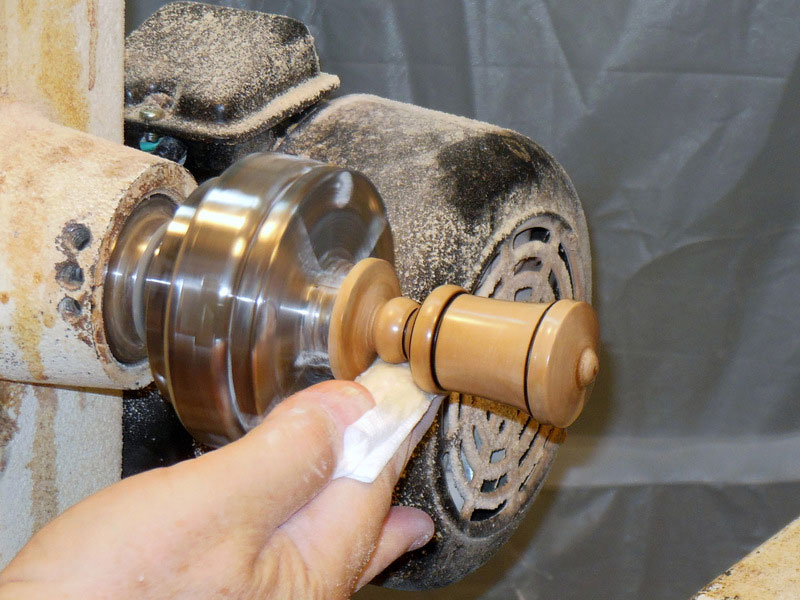
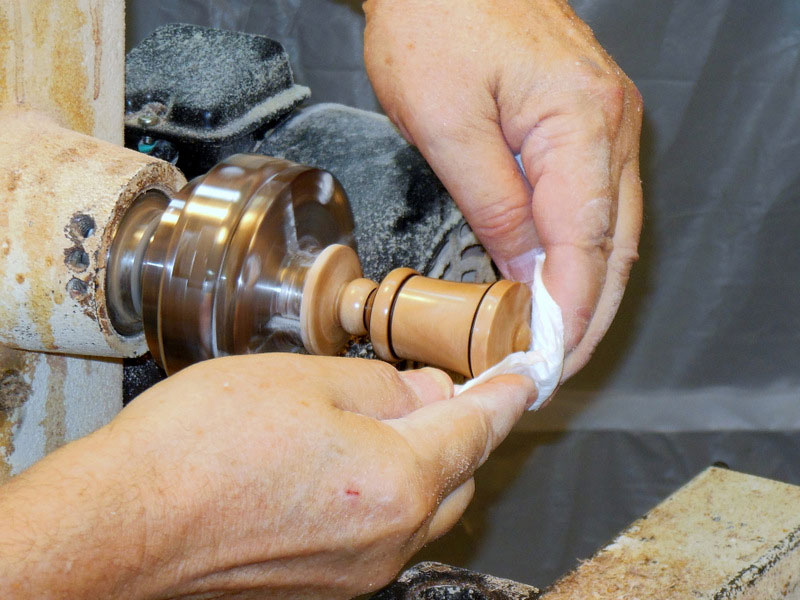
Unless you want to do more decoration, the bell ornament is ready for finishing. As with the snowman ornament, put on a coat of friction polish with the lathe off, polish it with the application cloth, put on some wax with the lathe on, and polish it with the wax applicator cloth (or paper towel).

Figure 16 – Apply a friction polish…

Figure 17 – …and a coat of wax
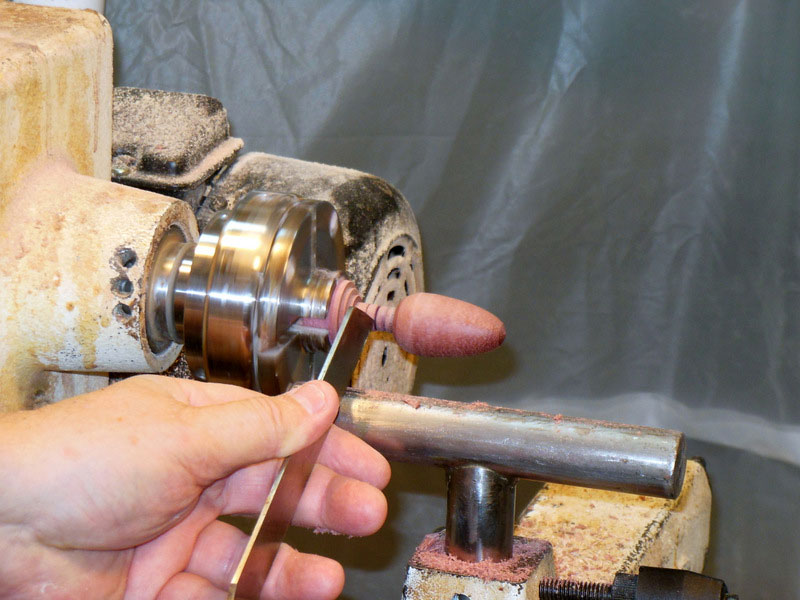
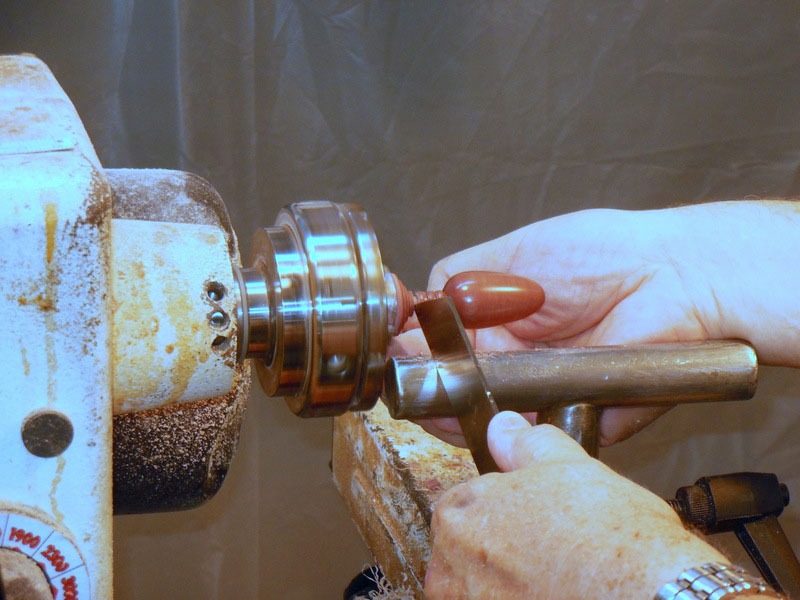
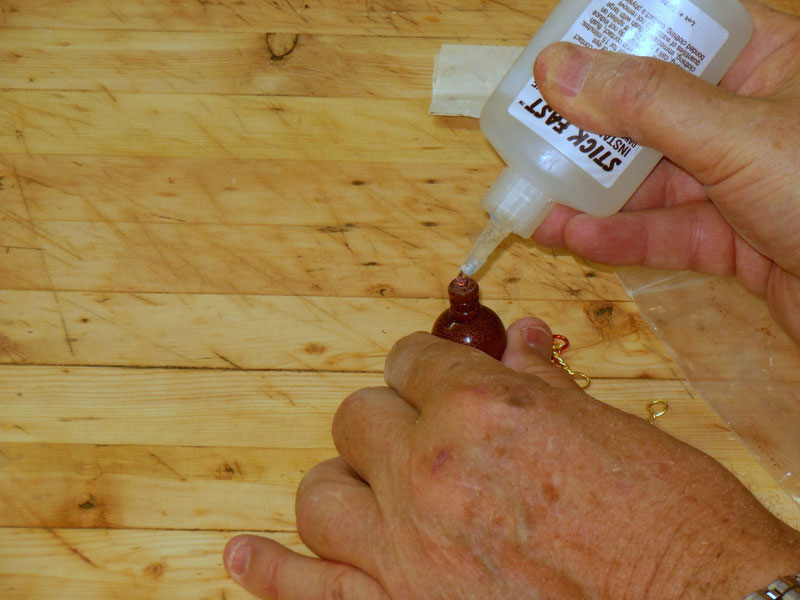
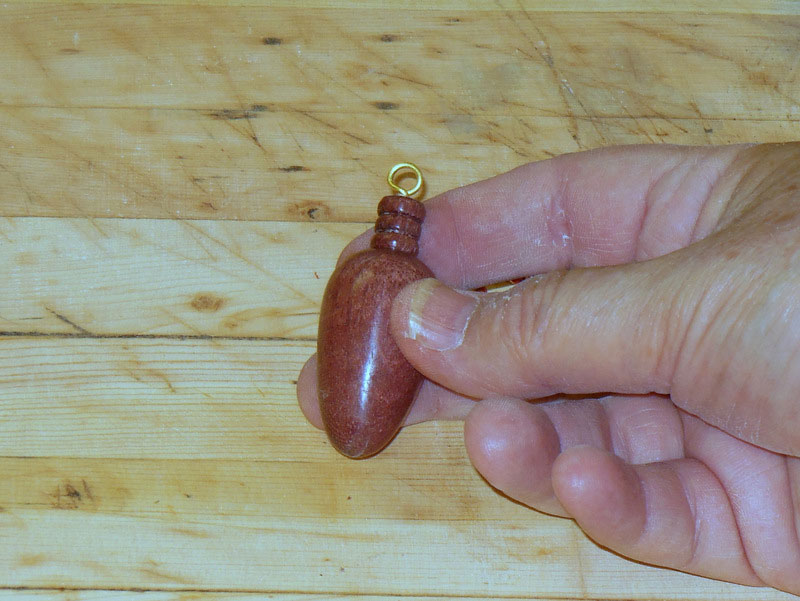
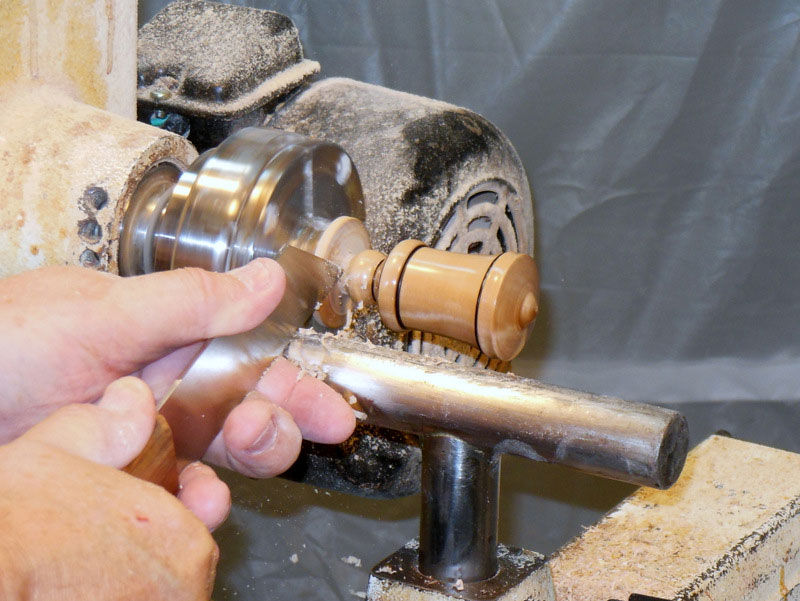
Part the bell ornament off (Figure 18), and in the same manner as the snowman ornament, attach a hanger on the top.

Figure 18 – Part off the bell ornament
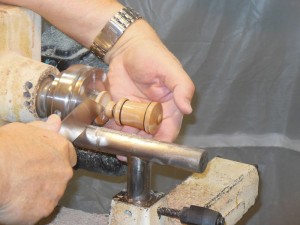
Figure 19 – Be sure to catch the piece as you part it off
(If you haven’t already drilled the hanger hole, you’ll have to do that first, of course.) If you’re mass-producing, however, set the ornament aside, turn all the other bells, then drill all of them for the hanger.
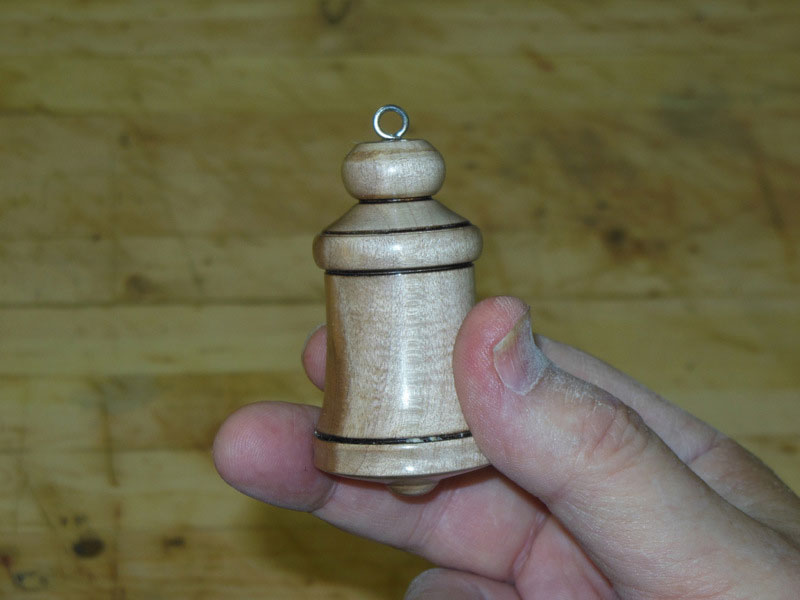
The bell ornament is finished!
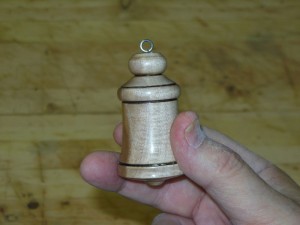
Figure 20 – The completed bell ornament
CLICK HERE for Part 3 – The Christmas Tree Light Bulb (seen below)
The Christmas Tree Light Bulb