Lee Laird

Lee Laird has enjoyed woodworking for over30 years. He is retired from the U.S.P.S. and works for Lie-Nielsen Toolworks as a show staff member, demonstrating tools and training customers. You can email him at lee@lie-nielsen.com or follow him on Twitter at twitter.com/is9582

Jun 032013
 

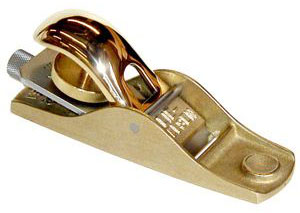
034205The Lie-Nielsen No. 102 is a low-angle bevel-up Block Plane, with the body available in Manganese Bronze.  The bronze body will not rust. The blade is made from A2 Tool Steel hardened to Rockwell 60-62, which holds a sharp edge for a long time. The No. 102 is 5 ¼” long and the blade is 1 ¼” wide and 1/8” thick.

The size of this block plane is one inch shorter than Lie-Nielsen’s No. 60-1/2 Adjustable Mouth Block Plane, and is a perfect fit in my hand, which could account for at least one of the reasons I reach for it so often. The No. 102 is amazingly solid and works wonderfully. I enjoy the added heft of the Manganese Bronze, as
I’ve observed that heavier planes have a much greater tendency to run on what I might call autopilot. Obviously, adding extra weight to a plane presumes the design is nicely balanced, or the additional weight could easily be counter-productive, but that is certainly not an issue on the No. 102. The extra mass helps keep the plane moving through the cut, with seemingly less effort once you get it started on its path. On planes with as small of a body as the No. 102, the added weight from the Manganese Bronze will have less of an effect than on the larger frames, but it is still an added benefit.

The low-angle Block Plane was originally designed for endgrain work, so it is no surprise that the Lie-Nielsen No. 102 is exceptional working on endgrain. To prevent accidentally chipping out or splintering the far edge of a board when working the endgrain, I always make sure to create a small chamfer on that edge. The chamfer is a very effective method to prevent these issues, without much work or loss of material. Start small, as you can always apply a bit more chamfer if you need to take more shavings, but it is hard to remove one that is too deep.

The small format of the No. 102 is also good for touching up a small isolated spot, even if the surface isn’t completely flat, as the length and width of the plane body can sometimes allow access that other planes could not reach. I even used my No. 102 on some of the outside curved edges on the Les Paul guitar I built, as some areas of those edges were endgrain, and also on the back side of the neck.

As with most bevel-up planes, the No. 102 has a great deal of flexibility relative to adjusting the cutting angle the wood will “see”. I’ll explain what I mean by providing a short example: The blade on the No. 102 comes from the Toolworks with a 25 degree bevel and is bedded at 12 degrees, which provides an effective cutting angle of 37 degrees. If you find the wood you’re working doesn’t respond well to this angle, you could apply a micro bevel from 1 degree all the way up to just shy of 53 degrees (since that added to the earlier 37 degrees would put it at 90 degrees), although I’d work my way up starting with a 10 degree microbevel and adding a slightly higher angle incrementally until I found the “sweet spot” for a specific wood. As info, this level of adjustment is not easily obtained on standard bench planes that have the blade’s bevel down. If you regularly transition between easier to work woods and woods that behave best with a higher cutting angle, it would make a great deal of sense to purchase a spare blade to leave with the higher microbevel, rather than repeatedly changing the angle from low to high and back.

There is also another replacement blade available, which is the Toothing Blade. This blade has small .030” teeth spaced .030” apart. This is very useful when working extremely figured wood that needs a decent amount removed. When dealing with wood of this type, it is extremely likely a regular blade will cause heavy tearout, if set to take even a somewhat heavy cut. With the Toothing Blade, the wood fibers aren’t allowed to work together against the blade, since each of the small teeth separate the sections from each other, ending with what looks like a lot of very small chips. The ending surface is very ridged and not at all like you might otherwise expect, but it is still very close to perfection. Reinstall a freshly sharpened regular blade and set for a very light shaving by using a thin piece of wood to verify the intended shaving thickness at each edge of the plane. Remember to trust your blade setting when you start to take passes over the toothed board, as it can seem like there is less happening initially, and a tendancy is to start advancing the blade. If you do that, you may end up overshooting and again have unintended tearout.

The Lie-Nielsen No. 102 is a great addition to any kit and I think you’ll find yourself using it perhaps even more than you might have anticipated. With the reasonable pricing for such a nice plane, you might want to get a second one for that friend that likes to borrow your tools, so yours will always be at hand.

I hope you enjoyed the article and please let me know if you have any questions or comments.


Lee Laird has enjoyed woodworking for over 20 years. He is retired from the U.S.P.S.

Mar 012013
 

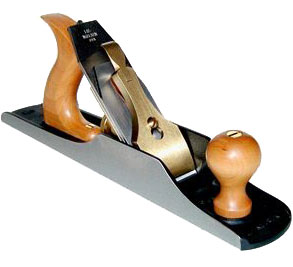
034236This month my focus is on Lie-Nielsen’s No. 5 Jack Plane. As the frequent readers of this Blog likely already know, the “bench” planes start at the No. 1 (incredibly small) and sequentially work up to the No. 8, which is the jointer and the largest in the group. As you can readily tell by the numbers, the No. 5 is pretty close to center of the pack, in sequence as well as in size. The dimensions and materials of the No. 5 are as follows: 14” long and made from ductile iron, a 2” wide iron made from A2 steel that is .125” thick, and overall the plane weighs 5 1/2 lbs. The bronze lever cap is both extremely strong and beautiful, while the cherry tote and knob feel wonderful in your hands and add elegant warmth to the plane.

The frog (45 degrees) and body on this plane have a fully milled fit so they mate solidly and hold the iron rigidly, leading to a predictable and controlled shaving. The mouth opening is user adjustable, without removing either the lever cap or iron/chip breaker from the frog. Operation is simple, yet robust. Unlock the two lateral locking screws, and then adjust the centralized adjuster screw clockwise (to move the frog forward, closing the mouth) or counter-clockwise (to open the mouth). Always make sure to monitor the leading edge of the iron when you close the mouth, so it doesn’t accidentally contact the front of the mouth, nicking or blunting your nicely sharpened iron. When you have the mouth opening you desire, engage the two locking screws, and then verify the intended shaving thickness can fit through the new mouth size.

The functionality of the No. 5 can range from that of a larger format smoother to that of a rapid stock removal tool. For the first scenario as a smoother, I prefer to sharpen the iron with a barely perceptible camber, which reduces the chance of either corner digging into the wood. I use David Charlesworth’s technique of using a basic honing guide on water stones, and utilizing focused finger pressure on different areas of the iron along with additional passes on the stone, to regulate the removal of steel towards each corner. In this shaping/honing procedure I use a 1000 grit stone for the slight shaping, and then finish up by honing on the 8000 grit stone. The iron is held in the guide at 35 degrees (a 10 degree micro bevel, since the base angle is 25 degrees), for both stones. If you haven’t ever used a plane with a cambered iron, you should give this a try. Since there is such a small amount of steel removed when creating this slight camber, you can very quickly revert back to a straight cutting edge, simply by going back to your 1000 grit stone and following your old routine. If you decide to give the cambered shape a try, you can check out the DVD: “Hand Tool Techniques Part 1: Plane Sharpening”, by David Charlesworth, which provides excellent instruction. You can also stop by one of the Lie-Nielsen Hand Tool Events, and see the crew sharpen first-hand, as well as ask any questions that might arise. As a side note, the late (and great) Alan Peters chose to use his No. 7 (a much larger plane than the No. 5) as his smoother, which demonstrates quite a bit of flexibility in these planes.

In the second scenario, where the plane functions as a rapid stock removal tool, I apply a more pronounced camber (but still relatively slight, especially compared to a scrub plane iron’s camber) to the iron, which certainly generates a more narrow focused wood removal area compared to the cambered smoothing iron’s shape. The corners on these irons are back from the leading edge by around 1/32” – 1/16”, so the shape gradually drops off from the center of the iron, out towards each corner. When I initially prepare this type of iron, I use my grinder to efficiently remove the excess metal, as even this seemingly small amount would take a fair amount of time and effort if you used only sharpening stones. I always make sure to use a very light touch on the grinder, so I don’t accidentally overheat the iron’s steel. I grind the iron freehand, moving its cutting edge through an arc on the grinder’s rest, mimicking the same 25-degree bevel as is original on the iron. I like to place a sharpie mark in the center of the back of the iron, and then about 1/32” – 1/16” down from the corners, on each side and draw a shallow curve connecting the points. This provides a visual target for my grinding, so I don’t go too far or take more off one side than the other. If I notice I’ve reached a nice, smooth looking curve across the iron, I’ll stop even if I’m not all the way to the full depth at the corners. Since I know I’m taking the iron to my honing stones next, there is really nothing dictating a specified shape, as long as it is a smooth continuous curve. The honing that follows will be at 35 degrees (again, a 10 degree micro bevel), and also uses the standard honing guide. You can readily work the full width of the iron in the honing guide, if you take your time and focus on smoothly transitioning across the curved iron. If your corners are left untouched on the honing stones, it just indicates the camber is a little more pronounced. This is nothing at all to worry about, as the corners on this shape of iron really never even touch the wood.

The length of the No. 5 is such that it can also perform the role of a “jointer”, if you are working on smallish pieces of wood, perhaps for little boxes or the like. This is yet another example of seeing a tool’s full potential. You might even compare this type of thinking to putting William “The Refrigerator” Perry into the backfield as a running back for the Chicago Bears football team, even though he was by title a defensive lineman. I think we can occasionally pigeonhole ourselves (and our tools) and forget we have freedom to ultimately decide how we wish to best utilize our skills and tools.

For each of these roles, I set the plane’s mouth so its minimum opening is just slightly wider than the shaving I intend to remove, thus preventing a jam. In the smoothing role, the mouth is usually quite tight, since the expected shaving is very thin (on the order of .001” – .003”). As you probably expect, I open the mouth wider for the rapid removal role, so the thicker shavings easily pass through. For the jointer role it is much more similar to the smoothing operation’s mouth, as the shaving is less thick, but the shaving still dictates the opening.

There are additional accessories you can purchase that are geared to keeping the plane ready to use, such as the frog adjuster screwdriver, chipbreaker screwdriver and plane socks to help prevent rust.

I think you’ll find the Lie-Nielsen No. 5 Jack Plane is a very flexible and handy sized plane to have in your kit. Come out to a Lie-Nielsen Hand Tool Event and test this plane first-hand, as well as see what else might be missing from your shop.

I hope you enjoyed the article and please let me know if you have any questions or comments.


Lee Laird has enjoyed woodworking for over 20 years. He is retired from the U.S.P.S. and works for Lie-Nielsen Toolworks as a show staff member, demonstrating tools and training customers. You can email him at lee@lie-nielsen.com or follow him on Twitter at twitter.com/is9582
Feb 062013
 

Ok, so lets talk about what you need to get started woodworking.

Obviously, you need some sort of tools for woodworking, but it isn’t the quality of tool that truly dictates the end result. Preparation and skill are the two components that greatly overshadow any other component.

So what exactly do I mean by preparation and skill? On the preparation part, I’m talking about sharpening and setting up hand planes, hand saws, and chisels …Looking back at my initial woodworking, and comparing it to present, this really seems to be the main difference. Learning to sharpen isn’t difficult, but it is something that can be difficult to assess. When you first start, it’s easy to read the “hows” of sharpening, and even to go through the steps as described, but for many, it’s hard to know your end results match the target results. I suggest either finding someone who is willing to spend a little time teaching in person, or attend one of our Lie-Nielsen Hand Tool Events, where all of our staff are glad to walk you through the sharpening process. Heck, we do these demonstrations over and over each day of our events.

The setup of your tool is also very important, as you can have a sharp iron in a plane, and still struggle with your results if you don’t get comfortable with the tool setup. This is something that may seem obvious to those who excel with all things mechanical, yet the reality is there are still huge numbers of woodworkers who are anything but comfortable with this aspect. The answer to this issue is almost identical to the sharpening portion; in that someone that already knows how to accomplish setting up his or her tools can share that information in a short afternoon get together. If you don’t know anyone that fits this requirement, our Lie-Nielsen Hand Tool Events can again assist. This is another regular topic at our events and we are glad to take the tools apart so you better understand what makes them tick, and hopefully fill in the blanks so you will be successful.

Ok, so lets say you’ve made it this far through the process. Now let’s talk a bit about tools you might want to have in your “kit”. This is where the sky is the limit. As I mentioned earlier, the quality of the tool isn’t usually an issue. Having said this, there are some tools out there that are poorly made and some that just won’t work. On some tools like chisels, the only thing that really will cause a major problem is the steel itself. If someone makes a tool (or at least the cutting portion of a tool) out of inferior steel, it may not hold an edge strong enough to cut butter. Of course, I’m exaggerating, but it’s not too far from reality. I once had a chisel whose cutting edge would roll over almost as soon as it touched wood. Some chisels may have a very small area of their cutting edge that is treated differently from the remaining tool. Some require you remove between 1/16” and 1/8” of metal before you get to the good stuff. If you remove that much and it still won’t hold an edge, I’d take the tool back if it is new. Now that we’ve discussed potential problems, lets look at specific tool types for your kit:

Chisels – bevel edged – these are available at multiple sites new or you can find some older tools that may require some additional time to setup, but probably won’t hit your pocket as deeply. I’d want at least a couple of chisels (1/8”, 1/4”, 1/2”, 1” or something along these lines. One or two narrow chisels and one or two wider chisels allow you to handle many tasks.

Hand Planes – This is another area you can either buy new or if you make sure you get a good older tool, they can last for generations. Older tools again have less initial cost, but can require extra setup to work well. It isn’t a bad thing to put some sweat into your tools. I did this when I first started, and it allowed me to have more tools and flexibility without killing my budget. In my spare evenings, I’d spend time working on the soles of my planes, rather than out finding other ways of spending the cash I didn’t have. Also remember the irons are replaceable, so a tool without a long iron is something you can fix without too much outlay. I’d want an adjustable mouth low angle block plane, a bevel up low angle jack plane and either a #4 bench plane or a #8 jointer plane. These last two depend on the size of the woodworking projects you plan to make. A #8 is great if you need to flatten a bench, for example.

Hand Saw(s) – decent second-hand saws are all over the place, and usually cheap. It would be good to do some research to find the companies that made good old stuff and look for that, if you don’t want to spend the cash for the new good stuff. And for new good stuff, I’m not talking about going to the local hardware store, either. Besides learning to use a hand saw, you also should learn to sharpen them, too. This is something that almost anyone can do, but it does take some practice and research. Oh yeah, if you’re looking to pick up an older saw, make sure the handle has curves that feel good in your hand. When you pick up a saw that doesn’t work, you can usually detect the blocky-bulky feeling handle that gives you blisters in about five minutes. I’d want a large full-sized rip saw (4 – 7 teeth per inch (tpi)), a large cross cut saw (11-15 tpi), a dovetail saw (15+ tpi) and a crosscut backsaw (15+ tpi).

I built my first bench out of 2×4 type lumber and used three layers of plywood for the top. It wasn’t glamorous, but it was sturdy. Not too long after that bench, I built another with 4×4 redwood legs, and ended up with a double-layer of beech pre-prepared tops, glued and screwed together to make a solid top surface. It was shocking how much wood needed to go from the top to make it flat. That jointer plane and I became good friends. The bench also has a quick-release face vise, but that isn’t a necessity. I also added on different stops I could push my boards against when planing. I’m planning to build a full-sized bench soon, but that plan has been following me around for almost 25 years. As you can see, it’s not a necessity, but it is nice to have, when or if you can afford it. A heavy bench that doesn’t walk around the shop when you plane is necessary. Luckily, you can always add weight to a light bench, or bolt it to the floor, so you can again avoid the big price tags if it’s not feasible.

Sharpening – so there are a number of choices out there for sharpening. I personally like waterstones (1000 & 8000) but there are other options if your budget is tight. A sheet of plate glass as your flat base, along with sheets of sandpaper can get you sharp. This ends up getting costly if you do it for a long time, but as a stop gap it works. When you get some stones, make sure you keep them flat. You can cause all sorts of troubles for yourself if you don’t know or pay attention to this.

Now the most important thing in woodworking: Get off the sidelines and make something!! It’s way too easy to read about projects and do anything and everything but actually make a project. Even if you think it’s above your ability level, you can likely do pretty well, if you think about the project and plan things out. Remember the old adage of measure twice and cut once? That’s just thinking things through and making sure you haven’t missed something

Always make sure you and anyone else in the room are safe when doing woodworking. It’s a great hobby/profession and can be very rewarding, but knowing your tools/machines and being safe with everything is extremely important. If you ever get that feeling that you’re about to do something crazy/stupid, step away from the tool/machine and find someone that can teach it to you, or is willing to safely do it for you. Please don’t let this enjoyable pastime ruin your day, or worse.

Thanks for reading my article and I hope you’ll give woodworking a try. Let me know if you have any questions of comments.


Lee Laird has enjoyed woodworking for over 20 years. He is retired from the U.S.P.S. and works for Lie-Nielsen Toolworks as a show staff member, demonstrating tools and training customers. You can email him at lee@lie-nielsen.com or follow him on Twitter at twitter.com/is9582

Jan 252013
 

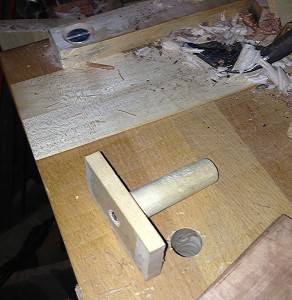
A while ago I wrote an article describing how I was about to do a planing demonstration, but the site couldn’t find any bench dogs that fit the holes in their bench. As a very short recap, I screwed together a dowel and a thin piece of wood, which effectively took the place of a bench dog, and I continued my demo.

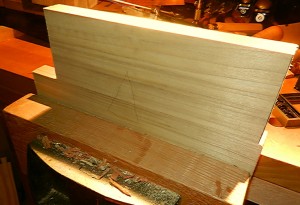
This morning, I planned to plane some small cherry boards I’d resawn a couple of days ago. I wanted to plane away any saw marks, and get it down to a smooth surface. I decided I’d use my old shop-made bench stop, since the stop portion is thinner than the boards I needed to plane. After a couple of strokes with my plane, I was fighting the stop , as it was rotating off to the side.

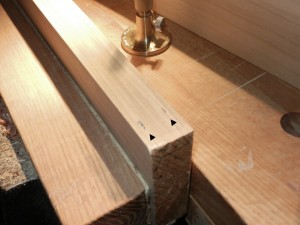
Since the bench has round holes, and the vertical piece of the stop is a round dowel, there is nothing to prevent this rotation. I have a taller stop attached to the end area of my bench, but it is too tall, and isn’t adjustable in height. I also have a very thin piece of maple attached to the permanent stop with a hold-fast, but the plane would hit the taller stop before reaching the end of the board.

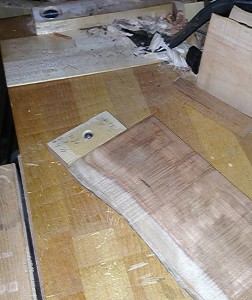
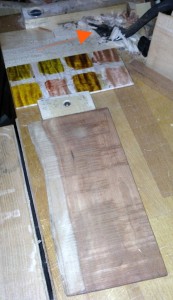
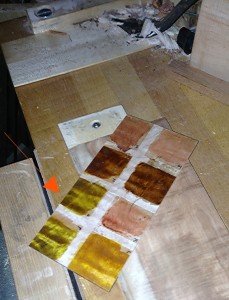
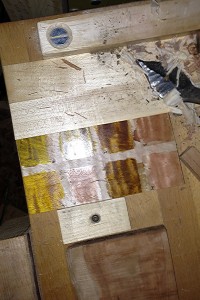
Unfortunately, there was also a fair amount of room between the thin maple piece and the back of my rotating stop. I found another thin maple board in the shop that I could use to fill this extra space. I had used it as a tester for some dyes on an upcoming finishing job on a guitar I’m building, but since I’ve already decided what color I plan to use, I no longer needed to retain my color-testing board.

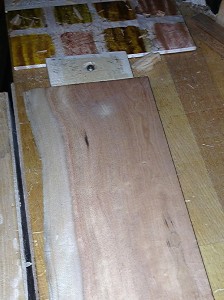
I checked to see if this thin board would fit between the rotating stop and the other maple board. The new board was about 1/4” too wide. I quickly set my bandsaw fence and ran the board through the blade, taking off the excess wood. When tested, the newly dimensioned board fit perfectly between the shop-made stop and the existing thin maple board.

I again put one of my cherry boards against my shop-made stop and I was able to plane the full width of the board, without it rotating wildly. In a couple minutes, I’d planed both sides of the three cherry boards, with no further issues. Success!

While this specific situation may not ever occur in your shop, I hope this article might plant a seed, as it is great to come up with your own low-cost solution to a problem. I’m sure you’ll find just as much enjoyment discovering a solution as I did.

Let me know if you have any questions or have a cool solution to a problem.


Lee Laird has enjoyed woodworking for over 20 years. He is retired from the U.S.P.S. and works for Lie-Nielsen Toolworks as a show staff member, demonstrating tools and training customers. You can email him at lee@lie-nielsen.com or follow him on Twitter at twitter.com/is9582

Jan 142013
 

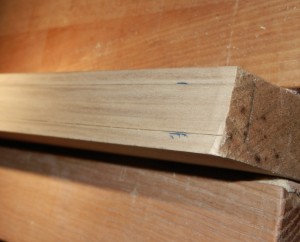
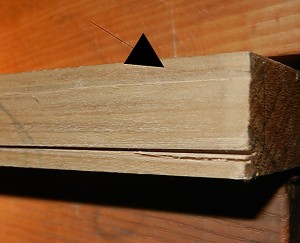
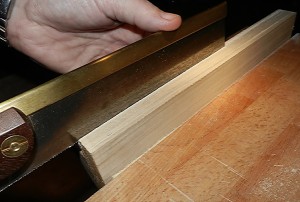
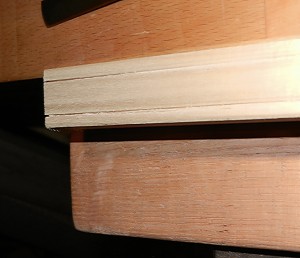
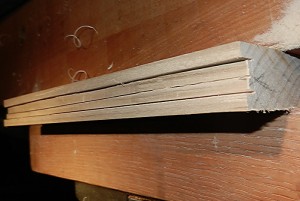
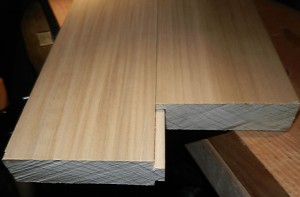
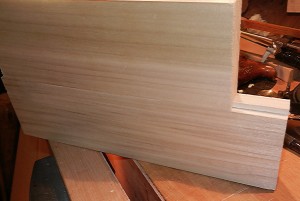
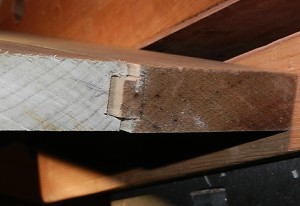
In an earlier article, I mentioned how I had an alternate method to create tongue and groove joints with a backsaw, but recall I did suggest this option is really for those with good or better than average sawing skills. I just re-read my earlier article, and have to admit the four cuts I mentioned are only for the tongue. The groove will still require some additional work, including something to evacuate the wood for the groove, like a chisel or more preferably a router plane. One last pointer for this method, is to use a saw where the handle does not hang below, or even close to the teeth. This will limit your access on boards over twice the length of the saw plate. So let’s get started.

Starting Boards

First determine what you’ll use to remove the wood from the groove section of this joint. This will ultimately determine the minimum size of the groove. I even go so far as to place the evacuation tool on the wood, where I’ll create the tongue, and with it centered, make a small pen or pencil mark on each side of the cutting tool.

Next get your marking gauge, and set it so the cutter is on the mark, with the fence against the face of the wood. Before beginning to mark, check the gauge setting against both marks. If the marking gauge is outside of the second mark, use your current setting. If it is inside of the second mark, change the gauge so it references from the second mark. If you originally centered the evacuation tool well, then both marks will be the same, but it’s not critical, even though it helps to be somewhat close.

Once set, make a light mark with the marking gauge fence up against both faces. Come back and take multiple passes until the gauge line is fairly deep. Determine the planned length of the tongue, and mark similarly the depth on the two face sides and both ends.

Channel for Saw

If you’ve set your marks for the tongue wide enough so you will have some extra width in your tongue, you can just place your saw into your gauge lines and slowly work from each end, working towards the middle. Once the saw is tracking the full length of the board, you can make full strokes. (If you don’t think the tongue will have the extra width, use a chisel to remove a small wedge just outside both gauge lines, creating a channel for the saw.) Repeat the same sawing process on the opposite side of the tongue, until you’ve reached the full depth on both sides. Now, flip the board onto one of the sides, and using the saw, follow the marking gauge line to full shoulder depth. Repeat on the other face side.

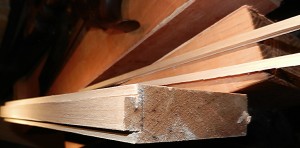
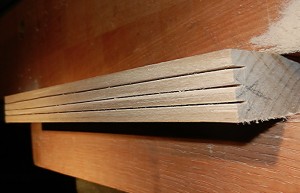
One Side Done

Second tongue side done

Both sides finished

Tongue finished

Now it’s time to mark out our groove. If both joining boards are the same thickness, I base the groove width directly off of tongue thickness, minus just a bit. Truly, I never measure this difference, but once the marking gauge is set to reach a side of the tongue, adjust the micrometer no more than 1/8 of a turn deeper. Mark the groove board from both face sides, lightly at first, then deeper after the line is established. Saw the gauge lines to full depth, and then make one more saw kerf down the middle of the waste, again to full depth. I like to use a narrow chisel to work away some of the excess wood, making sure to pay close attention to grain direction. This is not the time you want to accidentally dive too deep, and have the grain catch for a huge split.

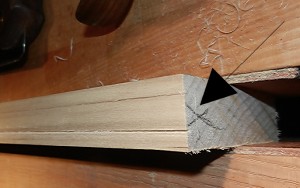
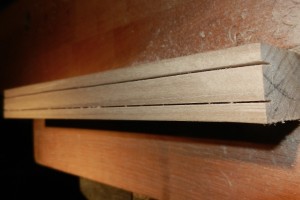
Groove marked with depth

Side saw cuts

Third saw cut

Ready for router plane!

Now I like to move the board into my face vise, and set the edge even with the bench top. I use the bench as my reference surface for my router plane, so all the weight of the plane is over the handle riding on the bench. Set the depth of cut by moving the iron up to the board to see how much you want to take in a pass. Shallow passes can take a while, but they usually don’t cause any problems. If I have a 1/4” or more to evacuate, then I’ll take a shaving similar in thickness to my fingernail. As long as you watch the grain direction, and make sure your board is level in the vise, you should be fine. This is what I did with this piece, but you might want to take a more cautious route. Continue this process until all of the excess wood is removed.

Check the fit of the tongue and groove. If everything fits great, thank your lucky stars and move on to the next part of your project. If not, don’t worry. We can fix anything! If the tongue is too thick, use the router plane, referencing the plane off of the face side of the board. This allows you to accurately remove very small shavings of wood, ultimately finding the perfect fit. If the fit is too loose, then another method is in order. In this case, you’ll glue some very thin pieces of wood onto both sides of the tongue. Since you’ll again use the router plane to make it fit perfectly, it’s a good idea to pay attention to the grain direction of the glued-on pieces. Wait until the glue dries completely before trying to size the tongue.  Once the glue has dried, take extremely thin shavings until the fit is to your liking. This potion of the fitting is based on the width of both the tongue and groove. If the tongue happens to be too long, just trim it back until it is the correct length, again with very small increments.

This method of making tongue and groove joints is doable, but you do have to take your time. Rushing can cause all sorts of problems.


Lee Laird has enjoyed woodworking for over 20 years. He is retired from the U.S.P.S. and works for Lie-Nielsen Toolworks as a show staff member, demonstrating tools and training customers. You can email him at lee@lie-nielsen.com or follow him on Twitter at twitter.com/is9582

Jan 022013
 

I’m sure most of you don’t know I had major back surgery in March. I’ll at least toss that out there, so you can have a reason to potentially give me mercy, when assessing my last year’s resolutions.

1. I have been working slowly on building a replica of a Gibson Les Paul guitar for quite a bit longer than is truly needed. I resolve to have it in playing shape by the end of March 2012 2013, at the latest. **I’m sure the year in my last resolution must have been a typo! 😉 Alright, it’s presently in some level of playing shape, but the March date is my expectation on having a completed/finished guitar. Just wait, I’m sure I’ll make this one!

2. It’s high time that I really learned how to spray a good finish on a project! I’ll practice with my brand new Earlex 5500 for the next week or so, and finally move up from 99% rag-applied oils to the big-boy finishes. You probably picked up on the fact that my guitar is waiting for a finish, huh? Ok, ok, right now that is the pressing issue as to why I need to learn to spray a great finish. But, once learned, I’ll never go back, unless I have a commission that demands that warm, friendly and refreshable finish. 😉

3. I’m planning to build a hanging tool cabinet, so I can both be more efficient, having my most-used tools close at hand and also getting my hand planes and other tools away from some dust. I plan to build this before the Lie-Nielsen Open House in July.

4. This last one is just barely on the fringe of woodworking. I will continue my physical training, to strengthen my body and to primarily regain my old walking gait. At first, it was an impossibility to do any woodworking, as I had to completely re-learn how to walk. I’m finally back to the point where I am spending multiple hours in my shop at a time, hand-planing, sharpening, building…you get the idea. With the continued treadmill and BowFlex work, it won’t be long until you mostly won’t be able to tell I even had surgery.
5. Ok, I know, I know, I said #4 was the last one, but I want to include one more from last year. I will continue to strive for progress in my writings (Blog articles, both Highland and personal), and hopefully provide valuable information and entertainment.

Happy Holidays to everyone!

To read more woodworking resolutions for 2013, CLICK HERE


Lee Laird has enjoyed woodworking for over 20 years. He is retired from the U.S.P.S. and works for Lie-Nielsen Toolworks as a show staff member, demonstrating tools and training customers. You can email him at lee@lie-nielsen.com or follow him on Twitter at twitter.com/is9582

Dec 282012
 

If you’re anything like me, you’ve probably at least had thoughts of trying your hand at a woodworking project that breaks away from the square/rectangular form. You may have even gone so far as to buy an old used spokeshave, only to find an ill-fitting replacement blade, or even more likely, a mouth as wide as the Grand Canyon. Ok, maybe not quite that wide, but it behaves like that is the case.

I’ve been there and done that as well. I have a number of old spokeshaves still hanging around from years gone by, where some had bits of odd replacement parts, a super wide mouth, and just never worked very well. Enter Lie-Nielsen’s collaboration with Brian Boggs on spokeshaves. There are three distinct versions (Flat, Curved & Concave) of these spokeshaves, but I will focus on the Flat spokeshave in this article.

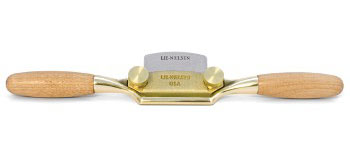
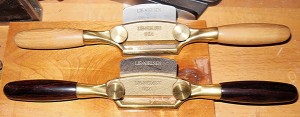
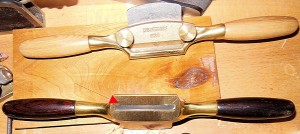
The Boggs Flat spokeshave is a truly awesome tool that not only works wonderfully, but is also both beautiful and balanced in the hands. Amazingly, while this tool is 10” long, it weighs in at only 12 ounces. This is mainly due to the bronze body and cap. The iron in this spokeshave is A2 tool steel, comes with a 25-degree bevel from the factory, and is bedded at 40 degrees with the bevel down. The handles are made from hickory, but cocobolo is sometimes available (I upgraded my Flat spokeshave to cocobolo, so I could tell the curved sole from the flat version with a quick glance), at an additional charge. The mouth of the spokeshave is extremely fine and set up to handle a shaving in the .008” – .010” range.

My Flat Boggs with cocobolo handles and the curved sole Boggs with hickory

When I first received my Boggs spokeshaves, I was amazed at just how tiny the mouth-size looked when compared to any of my old “beaters”. If I hadn’t already known the tool was set up, I’d have thought the mouth was too tight. That is, until I put it to work. This truly is a perfect sized mouth for really fine work.

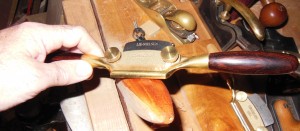
Here is a look at the mouth, with the blade at cutting depth. Is that tight, or what?

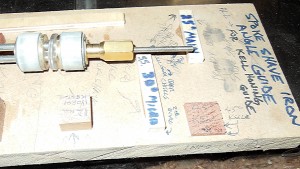
The spokeshave’s A2 iron, with its short edge-to-back stature, can cause sharpening troubles for some. I use my Kell jig, which readily clamps onto the sides of the iron, while still projecting the proper amount of iron. I also made a Kell sharpening setup jig, based along the lines of the Lie-Nielsen plane/chisel angle setting jig, designed by Deneb Puchalski. Different brands of honing guides have different amounts of iron projection needed, to end up with the same honing angle. I made two stops on this jig for the Lie-Nielsen spokeshave irons. One so I can apply a 10-degree micro-bevel, and the other to refresh the 25-degree baseline bevel, after the micro-bevel has grown too large to be efficient.

Once the iron is sharpened, it is extremely easy to set up the spokeshave for work. I carefully feed the iron up through the bottom of the sole, so I’m less likely to ding the just-sharpened edge. Once the iron is up in the spokeshave body, I hold the iron while I set the sole on a piece of wood I know to be flat. I hold the sole down while putting very light pressure on the center-back portion of the iron. I then snug up the two thumbscrews, to hold the iron in place. It’s not necessary to put a lot of force on these, as you just need it to keep the iron in place during use. I would certainly avoid using any wrench or pliers to tighten these down. Now it’s time to see how the spokeshave performs. If you want a completely even depth of cut across the iron, you can lightly tap the iron laterally, as needed. Depending on the thickness of the material I’m working (if the material is fairly thick, I prefer to keep the iron set for an equal depth of cut all the way across), I will adjust the iron so one side projects out further than the other. When doing this, I aim for a very light cut on one side, and a slightly deeper cut on the other. Remember, the max depth of cut is only about .010”. This still allows me to quickly remove wood from an area that needs a bit more taken off, while coming back in with the other side of the iron and taking final finish shavings.

The Boggs Flat spokeshave is primarily used on the outside of curves, or when you need to take a straight square piece to round or oval.

Since the sole is only 1” deep, you CAN get into some very shallow inside curves, but the curved version is better geared for this work. Even with the tight mouth opening, I still try to work with the grain, but some woods can still be a bit cantankerous. If this is the case, some skewing of the spokeshave will usually help create better results. I also find a light touch with the spokeshave works much better than applying too much pressure. When the iron is nice and sharp, the spokeshave’s own weight is sufficient to obtain the best surface, and control.

I hope you enjoyed the article, and let me know if you have any questions.

Click to take a closer look at the Lie-Nielsen Boggs Flat Spokeshave.

Click to see Highland Woodworking’s entire selection of Lie-Nielsen hand tools.


Lee Laird has enjoyed woodworking for over 20 years. He is retired from the U.S.P.S. and works for Lie-Nielsen Toolworks as a show staff member, demonstrating tools and training customers. You can email him at lee@lie-nielsen.com or follow him on Twitter at twitter.com/is9582