Everyone loves to get a new hand plane whether it is still sealed from a retail store, or happens to have over 100 years of work under its belt. Unfortunately, there is always a chance that something can happen to cause some accidental damage to the tool. Many types of damage are such that you can recover from them and again use your plane, but there are a few types of damage =that are game enders.
I’ve had a number of woodworkers over the years ask me what they could do to fix a number of different problems, so I’ll talk about a couple of the different types of damage that you may find on a previously owned tool, or that you may have already experienced yourself, and what I’d do next:
1. “I thought that finishing nail was set low enough” or “I have a scratch on the sole of my plane that leaves a mark on the wood when I plane.” – This is a relatively easy fix, but it does require a little extra focus in the process. When I’ve had this problem on a plane’s sole, I’d get a sheet of either 100-grit or 150-grit ( or perhaps even 60-grit for a bit deeper scratch) along with my known-flat granite plate, but know that you can also use a piece of float-glass, a table saw’s table or anything else that is truly flat. If you don’t know it is actually flat then check before you start working so you can save a lot of extra work. I will either use a little tape to hold the sandpaper on my flat surface, or if I’m working on my granite plate I could just do a very light spritz of water and the surface tension holds the paper in place, or just use a light spray of adhesive. Before moving the plane to the sandpaper, make sure to wind the blade back into the body of the plane, 1/8” or so. You don’t want to have the blade hit the sandpaper, but you do need it in the plane and tensioned just like you work. It is important to pay close attention to the amount of pressure you apply to the plane and keep the pressure evenly distributed.
Depending on the plane’s shape, you may have no choice but to hold it by the tote and the knob. I prefer to hold it closer to the center of the body, if that is in any way possible. During my strokes on the sandpaper, I try to keep my shoulders above the plane at all times, so the pressure doesn’t shift towards the end of the plane closest to me. I also work the plane in the forward stroke only, and directly away from my hips! This seems to make it much easier to keep my body in tune with what I’m doing, and the straight forward movement is better for keeping the sole square rather than standing to the side of the plane and moving the arms across the body. I feel like I tend to get a little loose when working in both directions, and the arcing movement when moving the arms across the body can be very difficult to have an even removal of material.
No matter which grit of paper I start with, I usually work up through at least 220-grit, and then apply a little paste wax when I’m done. I also check to see if there are any remnants from the scratch at the end of the sole. There are times where the scratch started at, or ended at one end, and then ends up leaving a sharp section. If I find this is the case, I pick up one of my smallest smoothing files and lightly blend the problem area into the surrounding area. Even if the scratch at the toe won’t damage the wood, blending out any sharp areas will feel better when you handle the plane. While checking the toe/heel do the same thing at the mouth of the plane just to make sure nothing is overlooked.
With the plane’s body back in working condition, make sure you examine your blade for any damage. Depending on the orientation of the plane’s stroke to the foreign object, you may also have a nick in the blade. If you do find there is damage to your blade, assess whether it is small enough so you might work it out fairly quickly on your 1000-grit stone. If it’s deeper than what you could expect to remove in less than 5-minutes, I’d either move to my coarse diamond plate, or to my powered grinder. If it does require some time on the powered grinder, remember to dress your wheel first so that it cuts as quickly and as cool as possible. Put on your eye protection, no matter if it is just a quick grind, or an extended session! Use a very light touch when grinding and don’t spend too much time directly over the nicked section. Work in from one side and grind all the way across to the other side. If your blade is square, work to keep it square during your grinding. If you want a visual to help with that portion, using a black Sharpie and with a good square, mark a line all the way across the back of the blade, just behind where the nick ends. With this you can tell if you are accidentally applying more pressure to part of it, or if the metal between the edge and your line is consistent. After you finish grinding, it’s time for your usual sharpening routine to get your plane back into service.
2. If you buy, have, or are given an older used plane and it just won’t work, this might help: I’ve seen some used planes that no matter how incrementally it was adjusted, it would go from nothing at all to taking a chunk out of the board in the very slightest of adjuster movements. While there are planes that you can tell from across the room that the sole isn’t flat, there are others that look decent enough to the naked eye. If your plane is behaving like this scenario, take a dark marker and cover the sole of the plane. Take a piece of 220-grit (or higher) sandpaper and put it on a known flat surface (see above). With the blade in the plane (backed up so it can’t hit the sandpaper), apply light, even pressure to the plane and make one pass across the paper. Take a look at the sole of your plane. What you are likely to see is a couple of areas showing signs of touching the paper. **Note: If the areas that were touching show all the way across at the toe, immediately in front of the blade, and at the heel then the sole is not the problem. While most new quality planes would touch on all parts of their sole, the previous example will work just fine and is the standard setup for Japanese wooden planes.
Now if the sole has a different pattern of removed ink, you will likely need to work on flattening the sole of your plane. Depending on how severe the issue is on your plane, you can decide if it is worth your effort. I’ve actually seen an old plane that I was told they believed had been in a fire. While I didn’t measure the distance of the toe and heel out from the mouth, I’m not sure it would have had a lot of metal left at the two ends if they had tried to flatten it or had a machinist mill away the high areas. But, assuming your plane’s sole is reasonable, you can start with as coarse of a grit as 60-grit (if you have quite a bit to remove) or perhaps 100-grit (if it isn’t too dramatic). Either way you go, just make sure to follow the same advice as I gave in #1 above, pay close attention to the pressure you apply to the plane during your work, and have patience. When I was early in my woodworking, the times that I made the biggest mistakes were mostly due to my lack of patience. I’d start speeding up to make the end come quicker, only to find I made more work for myself and was farther from the finish line. And while I’m sure that most of you who are reading this will probably want to work the sole until it dead flat and perfect, below is a photo of one of my elderly Stanley #3 planes. This plane works beautifully, and can keep up with many of the new quality planes, even though it’s sole looks like this:

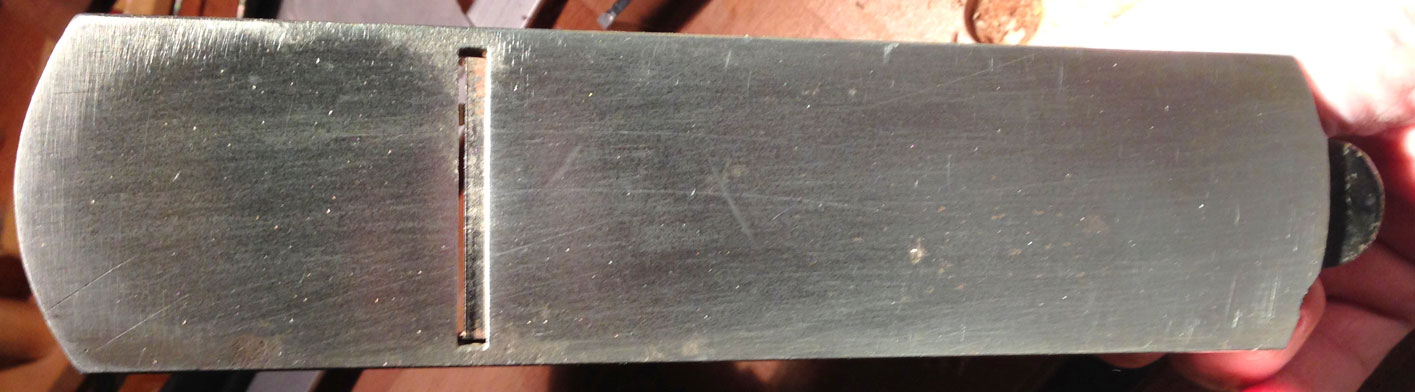
You can see the toe portion of the plane and how the outside edges are all lower than the mid-section

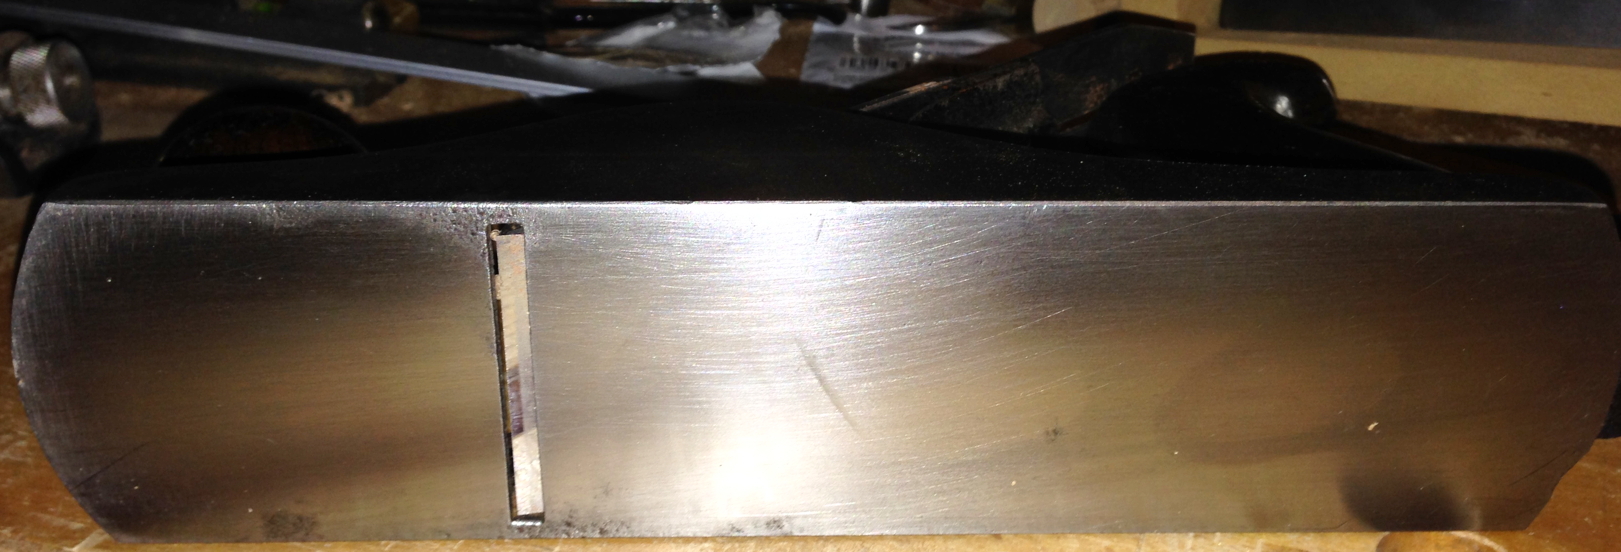
From this view it is easier to see the rough area on each side of the mouth. It is a lower surface so it doesn’t impact the cut. I have put a radius on the blade so it stops cutting there, too.
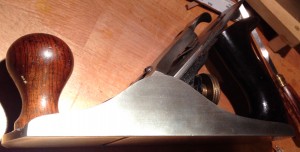
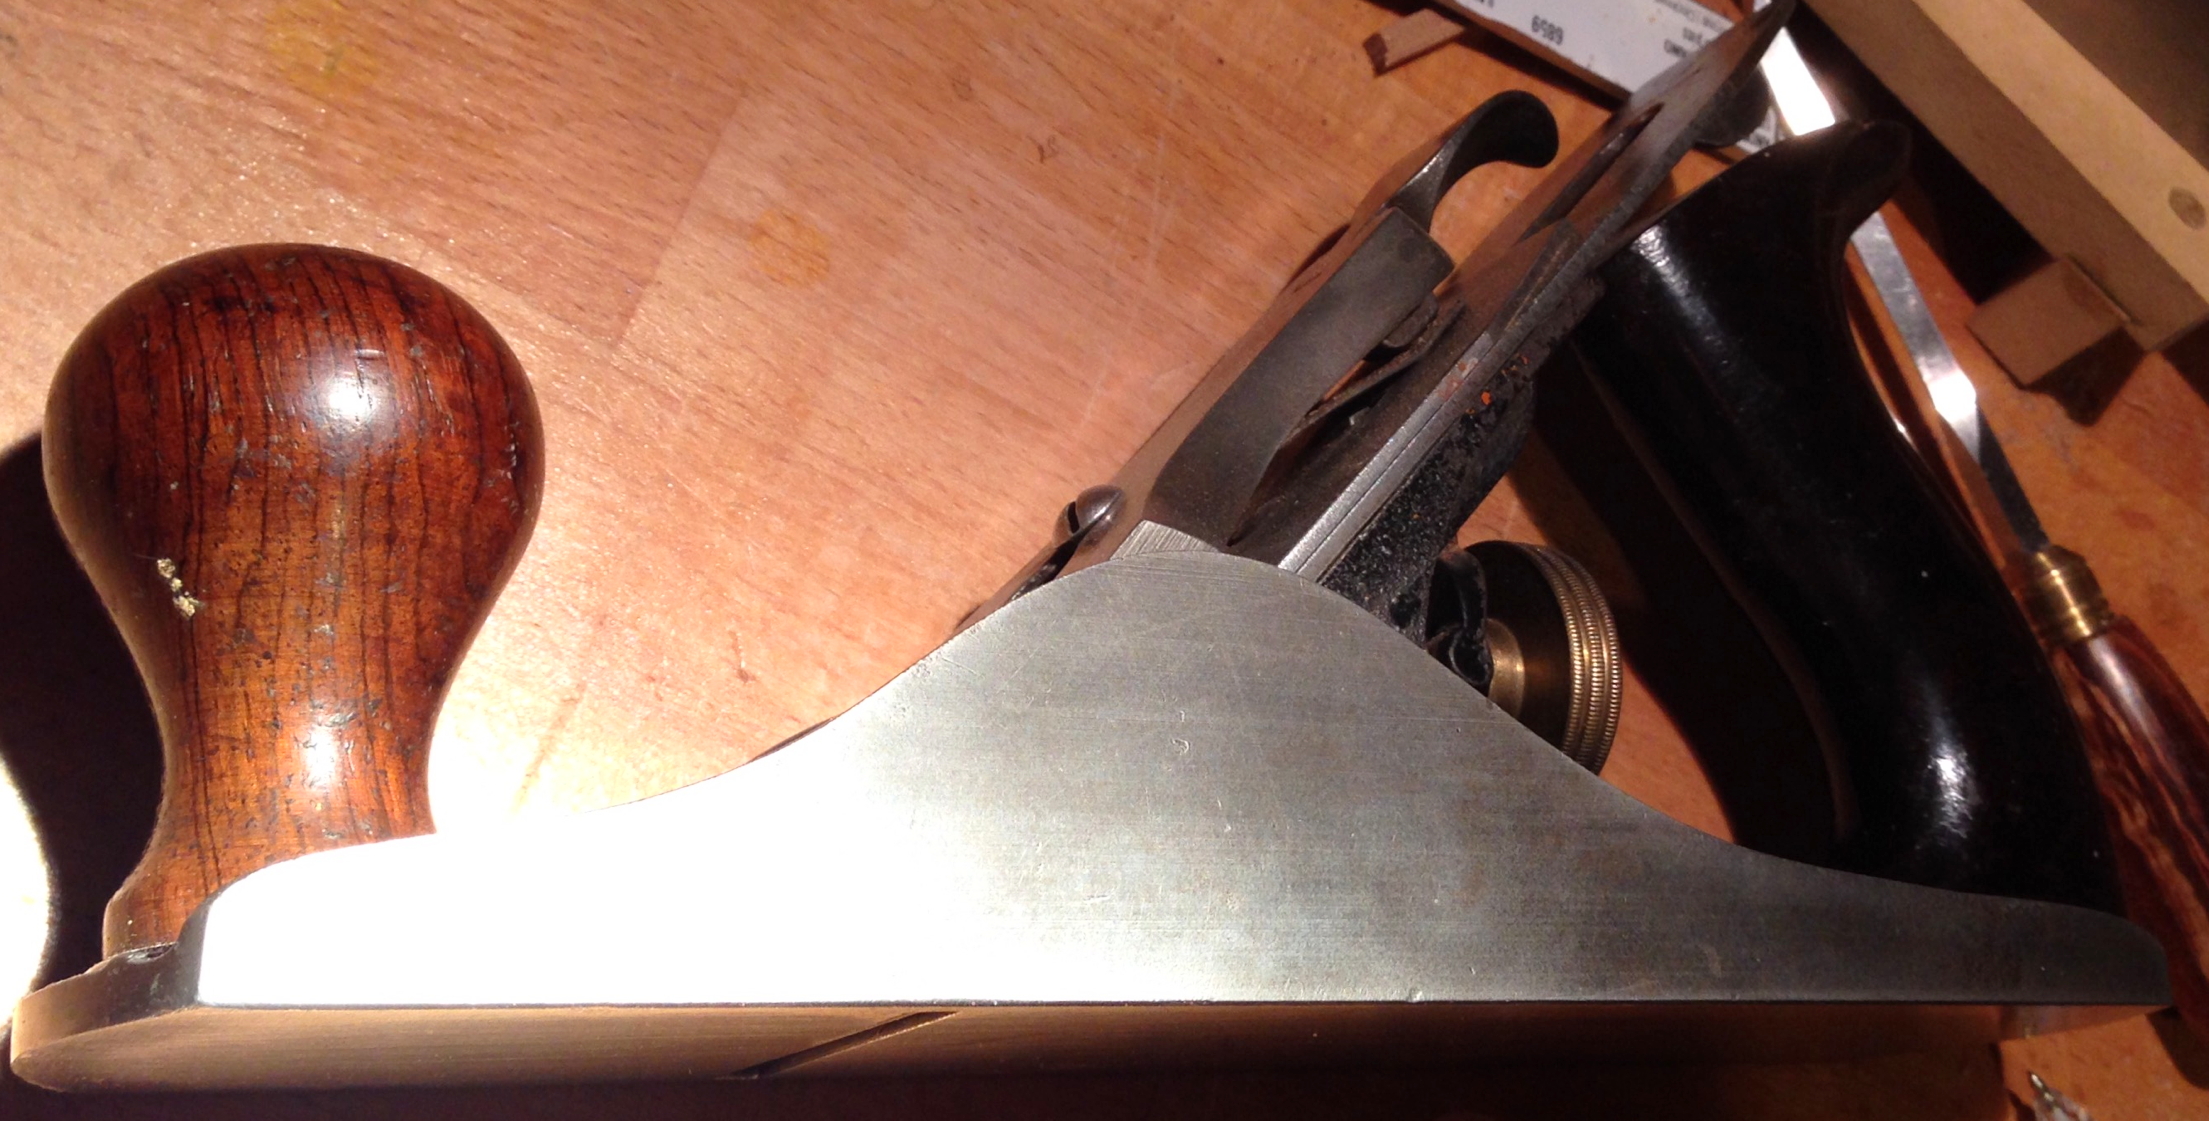
A different view so I could show the beautiful knob on this CA 1905, or so plane.
Part of the reason it works as well as it does, without having the full sole flat, is that it has enough of the sole flat(ish). When I first got it home years ago, my inclination was to put in the work to make the sole perfect. Well, luckily I decided to sharpen the blade and do a full setup. Then I tried it and wow! I immediately saw it was unnecessary for me to spend my time, energy and even my supplies (like my sandpaper) to make it take a nice, fine shaving. It would seem that there are different levels of perfect. Some are perfect looking, but some that don’t quite look as good can still be perfect workers! Decide what part is the most important for you and go for it. Remember, everyone is different in how they get their enjoyment.
I hope that one of these tips will help your planes. Even though I wrote this with the slant of an older plane that has some problems vs. a new perfect plane, these tips apply to all planes.
I will have other “tip” entries in the near future. Stay tuned.
As always, let me know if you have any questions or comments. Thanks for checking out the blog.