Kelley Bagby

I grew up around woodworking tools (see picture, age 4-5ish) but only recently started doing some of my own woodworking.

Jul 252011
 

Only a few more days to enter the Stanley Sweetheart Giveaway at Highland Woodworking.

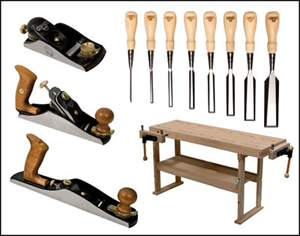
If you don’t know, Highland Woodworking is giving a single winner an incredible assortment of Stanley Sweetheart Tools as well as our European Workbench (not a Stanley product). The total value of this giveaway is over $1000!

Go enter now! The deadline is this Sunday, July 31st!

Visit our complete collection of Stanley Sweetheart Hand Tools!

Jul 212011
 

Hello Woodworking & Woodturning World!

The July issue of the Highland Woodturner just went out, and this month we’ve got ALL NEW articles, product deals and great woodturning information. If you’ve ever looked at a baseball bat and wondered how you could make your own, wonder no longer – we’ve got an article from one of our readers on how he turned his own baseball bat, and it offers steps so you can do it too!

We’ve also got a fascinating history of the woodworking lathe by former Highland staffer Elena Vega, as well as some really cool turned pieces by Michael C. Borg and another great woodturning tip from Phil Colson about keeping green bowl rims from cracking.

Take a look at all of this and some great new products, and ENJOY!


Jul 152011
 

If you are in or near Atlanta, or looking for an excuse to make the trip, this weekend is the time to do it! Our summer one day sale is happening tomorrow, i.e. Saturday, July 16th, and it is a big one! Check out our sale flier (click the picture for a closer look!) for a few examples of the great discounts we are offering in-store, and print out a copy and bring it in to receive 25% off one one single item*.

If you’ve heard about our Atlanta retail store and have always wanted to visit, now’s the time. We would love to see you on Saturday!

*unfortunately exclusions do apply – please see the flier for more details.
Jul 112011
 

This is the second post in a series – to read the first entry in the series, click here.

Today was an endurance day. A Windsor Chair Kit sanding endurance day. I knew the sanding would require a lot of effort, and even more patience, and now that I’ve made some headway, I feel like I’ve run a marathon.

As a beginner woodworker, I was not confident about how best to approach the sanding. It seems like when I sand something, it goes very quickly from “not done” to “overdone” and I am perhaps not paying close enough attention at every stage to stop before I’ve created a sanding divot. Does a woodworker eventually gain a ‘sanding eye’? Is this one of the downfalls of using a power sander that I would not have to deal with if I were instead sanding by hand?

I emailed Chris Benner, the maker of these chair kits, for some advice on sanding the chair. These were his comments:

This is the most labor intensive part of the build. I start with a super heavy grit to get the router lines out, 36 or 40 grit. I know that is rough stuff but all the lines need to come out, or they will show though the paint, or stain. Even when they seem to be gone, take a wet rag and wet it down. If they are not gone the water will raise the grain and they will show. The most difficult part of this sanding is the fact that the legs are hard maple and the seat is pine. As you are sanding the legs the pine is going to want to dip out. Once I know all the router lines are out I move to 80 then 120 and finish with that if I’m painting the chair. I go to 180 to 220 if I’m going to stain it.

When sanding the sides and bottom, I usually do this before the chair is put together. Sand them starting with 80 grit then work your way up.

Look here for more clear pictures on how much they sanded the seat:  www.windsorchaironline.com.

The instructions also mention the option of planing the base of the seat if you want to go the more traditional route, but I feel like that is another few steps down my path to more experienced woodworking, and I stick with my non-traditional Festool power sander.

Once the base and sides look smooth and finished to my untrained eye (but feel much better to my semi-trained hands), I turn off the sander and focus on the next step: gluing up the base. I did a dryfit of this operation last time, and I feel somewhat prepared, and only a little bit nervous.

Unfortunately, I’ve saved this part for after dinner, and then end up putting it off until even later, thinking it will be a fine process to do right before heading up to bed. Once I actually get started down in the shop, I realize how incorrect this assessment was: driving the legs into the stretcher assembly and the base requires some hard (and therefore quite loud) hits with a mallet, and once the legs are in and through the base, driving the wedges into the pre-split legs is also not a quiet process. But the glue is drying, so I soldier on, believing apologies later will be easier than dealing with a half-glued project.

The last step after I drive the wedges as far as they will go with the mallet is to use a chisel to drive the wedges in even further, and then cut off the leg and the wedge as close to the seat as possible. This is where my saw improvisation skills will really come in handy. I start with the most-nearby-to-my-project saw, a Crown Dovetail saw. This saw is not made for this task. I really should practice Frank Klausz’s method of handcutting dovetails that I viewed at Woodworking in America last year and give this saw a real workout that it can excel at, but instead I’m trying to cut off a piece of hard maple at an awkward angle at 10:45pm. After 5 minutes of struggling with what is certainly the wrong tool, I switch to a standard coping saw and have much more success.

When I step back and take a look at my day’s work, it occurs to me that it is actually starting to take shape and look like an actual chair. When the glue is dry and the seat is sanded, I may give it a sit and get re-inspired. There really is something about making something you can pick up with your hands that is incredibly satisfying. I think I’m starting to see what all the woodworking excitement is all about.

This is the second post in a series – to read the next entry, click here. To read the first entry in the series, click here.

Jul 102011
 

The Highland Woodworking Youtube channel has three brand new video product tours for July!

Morton is back to walk you through the sometimes daunting process of sharpening your chisels using a grinder, a set of Norton waterstones, and a DMT Dia-Flat lapping plate. You can view it here:

Morton also provides a thorough review of the Woodworker’s 6″ Dial Caliper, a great tool that every shop should have.

And finally, we’ve got a tour of the Easy Wood Tools Mini series – a great set of woodturning tools for use on smaller turning projects, and perfect for the beginner turner. Take a look!

Jul 072011
 

Hello Woodworkers!

The July 2011 edition of Highland Woodworking’s Wood News Online is out and ready to read. This month we’ve got even more great woodworking deals, stories and tips than ever.

In the July issue we are kicking off our new woodcarving column, Show Us Your Woodcarving. This column will have varying purposes every month – displaying your work, talking about woodcarving methods and techniques and getting tips from experienced woodcarvers. Check out the column and let us know what you would like to see!

We’ve also got John Moore’s Wimberley, Texas workshop with its stunning shaker peg rail design, Gary Smith’s fascinating miniature chuck wagons in our Show Us Your Stuff column and a wonderful article from Charles Brock about helping preserve a woodworker’s legacy.

Three new product tours on our Youtube channel with Morton, a new Down to Earth Woodworker column and a great article from Peter Galbert on what motivated him to focus on Windsor Chair design are also included, along with a whole lot of great deals! Go check it out and ENJOY!


Jul 012011
 

I’m going to build a Windsor Chair.
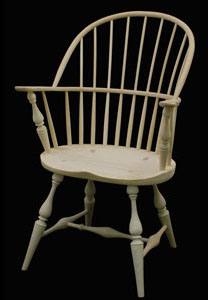
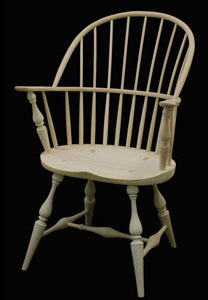
I have no right to say those words. I am a newbie, a rank beginner, one with little to no woodworking experience. But thanks to my new Sackback Windsor Chair Kit, I will be able to cross this great woodworking frontier, something so many woodworkers have on their list of projects to do, in hopefully less than a week. I’m giving myself four planned partial shop days, but knowing how these things usually go, I fully expect it to extend beyond that timeframe. An intermediate woodworker should be able to complete this chair in 10 hours, says the description. Well, I don’t qualify for intermediate, but maybe I’ll be a little closer if I finish this chair.

I would call myself an ‘improvisational woodworker’. Perhaps this category fits more woodworkers than I think. I have a decent selection of tools in my basement workshop, but I probably don’t use the best tool for pretty much any task I try I do. I use the one that is closest. And if I find that my regular saw is not cutting as easily as I’d like, I have no problem switching to the coping saw. I do try to read instructions thoroughly, but even the best instructions have gaps in logic, jumps that might be considered obvious to anyone who has done a lick of woodworking, but that seem like chasms of knowledge to someone like myself. So when the instructions don’t tell me exactly what comes next, I improvise.

So it is with that attitude that I approach my Windsor Chair Kit. Excited, a little nervous, ready for everything to go wrong, and hopeful that I’ll get most of it close to right.

Day 1: Getting Familiar with the Kit

Today I’m easing myself in: reviewing the parts that come with the kit, learning some new lingo, and reading the instructions from start to finish at least twice. And maybe a couple small steps at the beginning to get my feet wet.

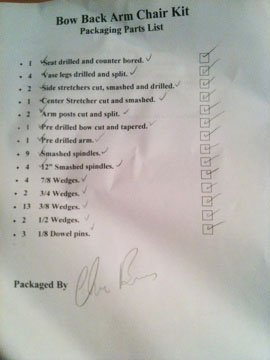
The kit provides a checklist for the parts, so I run through it, learn some new uses for old words (i.e. “smashed”) and make sure I understand what part of the chair each piece corresponds to.
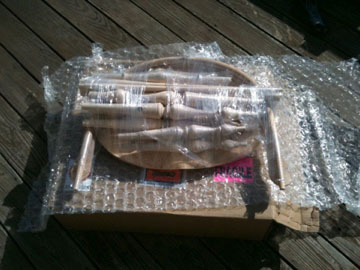
Still all packaged up.
List of All Parts

Alright, everything’s here. Time to take my first step in chairbuilding: dryfit the stretcher.

I identify the three parts that make up the stretcher, fit them together, and stand back to admire my work. Now the instructions want me to…glue these pieces together?? The permanence of that next step terrifies me a bit, but I push forward. I apply the glue, fit the parts, and done! And it even looks very much like the picture in the instructions!
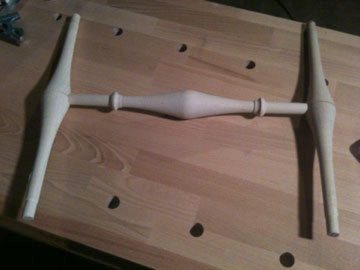
Feeling braver, I proceed to the next step: Sanding the seat base and edges.

Sanding is even more permanent than gluing, so I think to myself maybe I’ll just read a little further down and then come back to the sanding when my heartrate is back to normal.

The next step is complicated – fitting and gluing the stretcher to the legs, and then gluing the legs to the base. The instructions don’t say to do it, but I go ahead and dry fit the legs and the stretcher system to make sure I am thinking about it right. I’ve always been a very visual worker…and it’s a good thing I do this practice run, because I put the stretcher in backwards at first. After figuring out my mistake, I switch it, and decide this might be a good place to finish my first day.
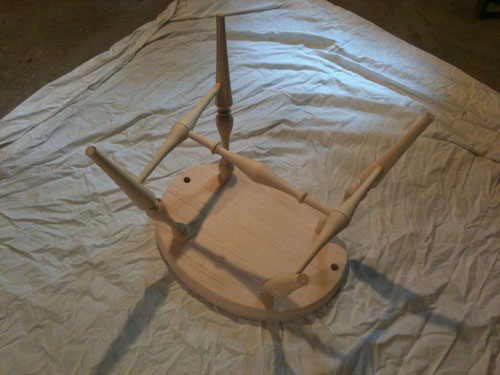
Check in next time for sanding, sanding and more sanding! Also, I will be completing the leg assembly which means more terrifying glue-up time as well as driving some wedges and some of that improvisational sawing I mentioned earlier.

This is the first post in a series – to read the next entry, click here.