J. Norman Reid

Jun 022016
 

D810B-171

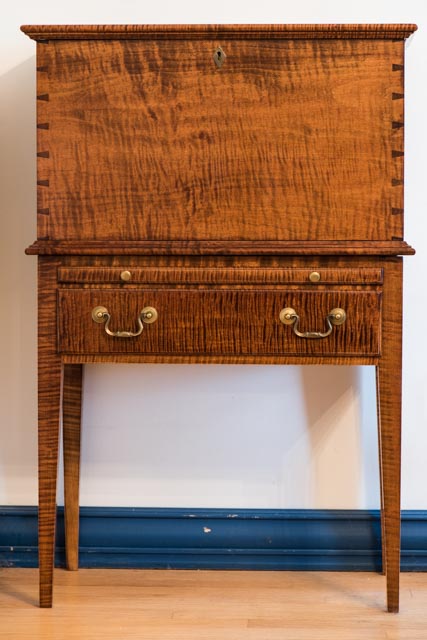
A common feature in colonial American houses and taverns was the pipe box.  A tall slender box, often featuring ornamentation on its top edges and sometimes incorporating a drawer for matches and sundries, it could hold a half dozen or so long-stemmed clay pipes ready for use.  I really like the looks of these pipe boxes and though I won’t use them for pipes, decided to make one for my home, and it looked to be a fun woodworking project.

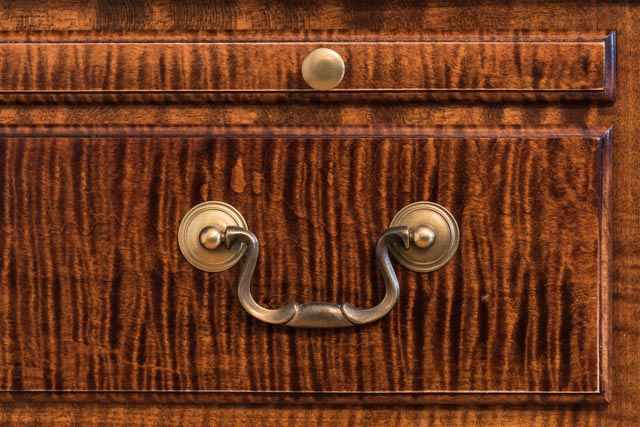
If you check on Pinterest, you’ll find them in a variety of shapes and finishes.  Some were simple in design, others quite ornate.  Most older ones were painted.  I chose to make a fishtail design, a fairly common pattern with moderate ornamentation, that I obtained from Charles Neil’s Mastering Woodworking web site.

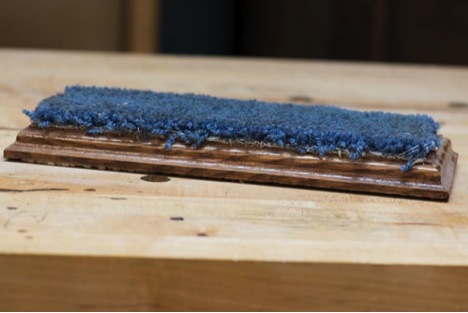
I began by resawing some curly maple boards to 1/4” thickness.  Then I made 1/8” plywood templates for the top and side pattern.  I traced the patterns onto the maple and cut out the top edges of the box on the scroll saw.  You could use a jig saw, turning saw or fret saw for this if you don’t have a scroll saw.  I then trace-coated the maple with General Finishes Medium Brown dye, sanded it to 120 grit, and repeated this trace coating process before sanding to 180 grit.  I sanded the end grain edges to 600 grit, smoothing the curves cut by the scroll saw as I did.

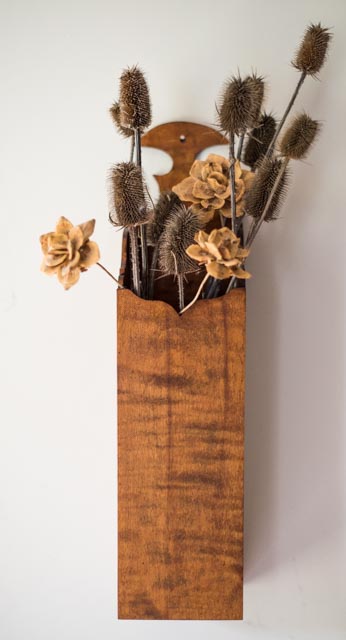
I decided to make my box without a drawer at the bottom.  I cut the parts to final length and assembled them with glue and pin nails.  Once the glue was dry, I applied a mixture of 3 parts General Finishes Medium Brown to 1 part Orange water-based dye.  When dry, I sprayed the piece with three coats of matte lacquer finish.  If you prefer, you could use a less expensive wood such as poplar and coat it with Milk Paint for an authentic period look.

Since we don’t smoke, we’ll use the box to display dried flowers.  It would make a nice gift or holiday project.  And, I’m told that these boxes can make good sellers in the craft marketplace.


Norm Reid is a woodworker, writer, and woodworking instructor living in Virginia’s Blue Ridge Mountains with his wife, a woodshop full of power and hand tools and five cats who think they are cabinetmaker’s assistants.  He is the author of Choosing and Using Handplanes: All You Need to Know to Get Started Planing by Hand.  He can be contacted at nreid@fcc.net.

Jan 022016
 

Welcome to our 2016 Woodworking Resolutions blogger series. Every year we invite our bloggers to share their resolutions specific to their woodworking goals for the new year. Click each link below to read our bloggers’ resolutions!

Well, it’s that time of year again, when we—like the two-faced Roman god Janus for whom January is named—take a look back at what we’ve accomplished (or not!) and then look ahead to what we resolve to achieve in the coming year.

My biggest accomplishment, despite a damaged ankle that will soon require surgery, was to finally complete a pair of oak bedside tables. These Stickley-inspired pieces will soon rest in the bedroom of my step-son, where I hope they’ll bring great joy. But aside from small things—a fishtail pipe box of curly maple, for instance—I didn’t accomplish nearly all I wanted to do, or that I’m capable of doing. My resolutions for 2016 are intended to correct that.

One reason I did so much less than I wanted in 2015 was the disorder in my woodshop. I don’t have enough storage space and the space I do have is not used to best advantage. So my first set of resolutions is intended to help me be more efficient and productive in the shop. I’ll start by decluttering my space so it is ready for work whenever I walk into it. I resolve also to reorganize the layout of my tools and work stations to enhance my workflow. And I plan to build some things to improve my organization—a joinery bench with the Benchcrafted Moxon vise that’s waiting to be installed, a saw till to replace the one that’s too small for my collection, a hand tool storage cabinet so my chisels and planes have a better place to live than on my bench top, and a mobile storage cart that combines space for sheet goods, boards and prized shorts and offcuts.

My power tools merit attention as well. I resolve to set aside regular time for maintenance so my tools get the servicing they need before problems arise. I also resolve to get an Elipse P100 dust mask and filters and really use it to protect my lungs. And 2016 just may be the year I upgrade my Sawstop with the new sliding table.

As a co-owner of Shenandoah Tool Works, I resolve to increase my production of our ever-popular birdcage awls by improving my efficiency at the lathe. And just maybe, my partner and I will introduce a new tool for this year, incorporating the same fine hardwood handles as our mallets and awls. But, shhh, it’s too soon to talk about that.

All of this prep work is intended to result in some completed projects. Sure, I’ll lose two months’ shop time after my ankle surgery, but since I’ll be more efficient, I should get more done, right? So I hereby resolve to build the following things in 2016:

  • A Queen Anne dressing table for my wife Betsy out of some figured walnut I’ve got stored
  • A chair to go with the dressing table, maybe?
  • A dining table for my step-daughter
  • A Shaker-inspired coffee table for my sister
  • Some boxes using the figured walnut and ash I’ve been saving up
  • Bowls and hollow forms at my lathe
  • Some natural edge coffee tables out of figured slabs I’ve been hoarding
  • A Chippendale secretary of figured cherry that I started years ago
  • A mahogany lap desk (or two) like the one used by Thomas Jefferson
  • A bookshelf to tame my burgeoning library of woodworking volumes
  • A cupboard to store canned goods in the kitchen
  • Some knife handles for Ron Hock kitchen knife blades
  • Wine bottle stoppers, pens and other small turned objects
  • And I’m so forgetful, I’m sure I’ve left something off this list, but it’ll probably come to me later

Oh my, as I look at it now, I wonder what I’ll think about this list when next year comes around? I suspect I’ll say to myself, “what in the world was I thinking”?

May 2016 be kind to you and your family and may your woodworking time be productive and, most important, fulfilling.

Dec 172015
 

Only a few years ago, I was new to woodworking. Recently retired, I found the time to pursue a long-deferred interest, making things with my favorite medium, wood. I began by taking classes offered locally. Then began the inevitable progression of tool acquisitions, power tools at first, then hand tools, especially planes. The problem with planes, though, was the fact that I barely knew how to use them. Frankly, I was frightened into believing that sharpening was a skill that would forever remain beyond my capacity.

Then I discovered a class on hand planes in the Marc Adams School catalog. Chris Schwarz and Tom Lie-Nielsen were the instructors for the weekend class and I decided to learn from the best. So, with my best friend in tow, I headed for Indianapolis. That class was all I’d hoped it would be and more. In two days, I learned the basics of planing and sharpening and how to set up my planes for use in my own woodshop. Though hardly yet an expert, I nonetheless felt equipped for the next step in my woodworking growth.

I came back from that class full of enthusiasm, perhaps more than was then warranted. I quickly leaped to the assumption that now I knew enough about hand planes to teach a class of my own. So I applied to teach a local class and, to my naïve delight, was accepted.

Only later did the moment of truth arrive. Petrified is not too strong a word for how I felt. Fear of failure drove me to read back over my class notes obsessively, gleaning every bit of knowledge I could from my classroom experience. And I read everything I could get my hands on, Chris Schwarz’ Handplane Essentials and Garrett Hack’s The Handplane Book being the most informative and useful sources. Still, I felt only half prepared and wished as hard as I could that I had never volunteered to teach at all.

Teaching day came and went and all my worry went for naught. My preparations pulled me through and the first class went very well. The students got a lot out of it and none of the anticipated complaints materialized. Yet while I could see that the students learned a lot, it was clear that I had gotten even more than they did from the experience.

It seems there’s nothing like the pressure to prepare for teaching to burn a new skill or bit of knowledge into your brain. Since that first class, I’ve taught hand planes classes maybe a couple dozen times. And always when I teach, I learn something new. I no longer need to study before each class. My learning takes a different pathway now. Always students ask questions I never thought to ask myself, prompting me to delve into knowledge lying below the surface of my mind or to think through issues for the first time. Sometimes, the questions prompt research after class that leads to entirely new learning.

My students’ progress during the day-long class and the excitement and confidence that builds on their faces show me I’ve given them all I can squeeze into a single day. At the same time, I know I’ve learned more to deepen my own knowledge and skills than I ever could by taking a class or reading alone. I think I qualify as an expert hand plane user now. That’s an outcome I might never have achieved if I hadn’t decided to delve into learning by teaching.

Norm Reid is a woodworker, writer, and woodworking instructor living in Virginia’s Blue Ridge Mountains with his wife, a woodshop full of power and hand tools and four cats who think they are cabinetmaker’s assistants. He is the author of the forthcoming book, Choosing and Using Handplanes. He can be contacted at nreid@fcc.net.

Dec 082015
 

In my experience, fear of failure is the biggest obstacle to being creative or productive in my woodshop. It’s certainly not a lack of tools; I’ve got plenty of those. Nor is it a dearth of ideas; I’m literally bursting with them as well. What slows me down most, and sometimes stops me dead in my tracks, is the fear that whatever I’m trying to do will end up a failure.

Fear of failing is the biggest obstacle to moving forward on projects I long to build. Even projects well underway can be delayed for uncounted weeks, months or years as I wait for the “right time” to pick them up again. That’s the case with a set of bedside tables that have lain unfinished for far too long. Instead of plowing through to completion, other interests—in my case photography or even new woodworking projects—have sprung up to divert me from the need to finish the tables.

These fears also stifle creativity. We each carry around inspiration—perhaps hidden—for unique ways to express ourselves in our chosen media, be it woodworking or some other venue. But fearing failure, often coming as internal criticism, we may silence our own voices to prevent what seems like inevitable embarrassment. In my case, it convinces me that my own ideas can’t possibly stand alongside other designers’ creations as worthy of expression.

As a rule, our fear of failing results from old messages we received as children. Cautionary or critical comments by parents, teachers and other persons significant to our development often had the unintended consequence of convincing us that success lies beyond our grasp. In extreme cases, we may have learned to believe we lacked even the right to succeed and that we should not even try.

But these messages belie the truth. While unavoidable, failure is a normal part of life. Failing is no more than one result from an experiment. It is a key process by which we learn and perhaps the most reliable source of information available to us. And its consequences need not be inescapable. I learned this when I tried to join two pieces of teak with pocket hole screws, only to watch the teak split apart in every attempt. But because I tested the joinery on scrap pieces, I avoided destroying my project and things turned out just fine.

The hardest lesson to learn is that failure is, in fact, only about a trial and error method. It reflects only on our practice, our technique, our effort. It does not relate to us and our worth as persons. Failing does not mean that somehow it is we who are bad, only that something we tested did not work.

In the end, the only person who can define our success is ourselves. No one else can do it for us, and we should not let them try. To seek approval from outside sources—be it money or laudatory comments—is to subject ourselves to continued domination by the old message that we are not really good enough, that we do not have the right to succeed.

So here’s my advice—and I’m speaking now primarily for myself, for whom these lessons have come very hard. Give yourself permission to try and fail. Not only will it teach you useful things about what works and what doesn’t, but—even better—it is bound to unleash unexpected creativity and productivity in whatever you choose to undertake.

Nov 232015
 

Although my woodshop is pretty well stocked with lumber and the tools to work it, there always seems to be something else I need, or if not need, then that I want. Mrs. Santa is always looking for ideas about what to get me, so here are some suggestions for what might end up under the tree this year.

  • Top on my list is the Sawstop sliding table. Sure, I have a large plywood sled that’s done good work for me over the years, but that sliding table sure is slick. It would make crosscutting a lot easier, especially for oversized pieces like the dressing table top I’m planning for Mrs. Santa in the coming year. She really ought to consider it.
  • I’ve got a goodly collection of handplanes—both new and old—but it seems like I can always use at least one more. How about a Lie-Nielsen #5? That would just about round out my collection. Won’t I be needing it to plane the figured walnut for her dressing table?
  • I also like the looks of the Lie-Nielsen small router plane. Together with the adjustment kit, that would help me with those smaller jobs like lock installation.
  • I’m eager to try my hand at turning a hollow vessel but a hollowing tool is one that I don’t have in my arsenal. Please, Mrs. Santa, give some thought to that.
  • Let’s don’t forget those household repair jobs I’ll need to be doing. I think the Fein Multimaster Top model would just about fill the bill. I’ve seen them in operation, and they are top of the line. What about that, Dear?
  • Maybe we could use some new kitchen knives. How about a set of Ron Hock knife blades? That way I could have fun in the shop making them and produce something Mrs. Santa would like at the same time.
  • I know she’s concerned about my safety in the shop, and one of the hidden dangers is, of course, dust in the air. I hear the Elipse P100 dust mask is great for cutting down on those micro-particles we breathe. Perhaps I could persuade her that this would make a good stocking stuffer.
  • OK, so maybe Mrs. Santa doesn’t want to pop for a Sawstop sliding table or a handplane. There are always Highland logo T-shirts, which would be great to wear in the shop or for that matter just about anywhere.

In the end, maybe the most useful thing would be a nice big Highland gift certificate. That way I could pick out what I want, er, need the most.


Norm Reid is a woodworker, writer, and woodworking instructor living in the Blue Ridge Mountains with his wife, a woodshop full of power and hand tools and four cats who think they are cabinetmaker’s assistants. He is the author of the forthcoming book Choosing and Using Handplanes. He can be contacted at nreid@fcc.net.

Aug 202015
 

The figure in tiger, or curly, maple is a feature of great potential beauty. But how can you finish it to bring out its full loveliness?

You can, of course, give it a clear finish—like General Finishes Arm-R-Seal or a water-based finish such as General Finishes High Performance. This will reveal the curl as a lightly shimmering variation in a tone that adds subtle elegance to a project. To make the figure pop a little more, apply a first coat of General Finishes Seal-A-Cell before completing with Arm-R-Seal.

But what if you want to apply a dye to stain your project a deeper color? In that case, trace coating your project with a dark dye opens up some good possibilities. Trace coating is a process I learned from Charles Neil that involves applying a light coat of dye to the wood before sanding so you can tell when sanding is complete.

Following Neil’s procedure, I finished a tiger maple sugar chest using the trace coating process. Here’s how I did it. I wiped on a coat of General Finishes Medium Brown Dye Stain—in this case full strength—to the case and other parts. Then I sanded them to 120 grit until much, but not all, of the dye was removed. I wanted the dye to remain in the curl, which is the more absorbent part of the wood. Then I applied a second coat of Medium Brown Dye Stain, this time sanding to 180 grit. Again, I left dark patches in the curl, rather than sanding all of it away, so it looked a bit like a zebra.

Finally, I applied a mixture of General Finishes Orange and Light Brown Dye in a 3:1 ratio, which gave the piece an overall deep orange-brown color but left the curl highlighted in darker brown. I completed my finishing by spraying several coats of General Finishes High Performance Polyurethane Topcoat and then buffing with ultra-fine sanding pads after the finish was dry. The photos show the result, which is especially good for period furniture pieces.

Tiger Maple finish-21148

There are alternatives to this method and you may want to develop your own processes through experimentation, something that’s always recommended before finishing any project. For example, to create even darker curl patterns, consider using Dark Brown or even Black dye for the trace coating, or Light Brown if you want to lighten the shadowing effect. And of course the overall color can be changed by using different mixtures of dyes. In the course of your experimentation, you may come to define your own signature style for coloration of your tiger maple pieces.


Norm Reid is a woodworker, writer, and woodworking instructor living in the Blue Ridge Mountains of Virginia with his wife, a woodshop full of power and hand tools and four cats who think they are cabinetmaker’s assistants. He is the author of the forthcoming book Choosing and Using Handplanes. He can be contacted at nreid@fcc.net.

Jul 282015
 

Hand planes work best when they can glide easily across the surface of the wood. Lubricating the plane’s sole can make a dramatic difference in the amount of effort expended in planing. There are several ways to do this. You can make X marks or scribbles on the sole with paraffin, beeswax or candle wax.

NORM1

Or you can use imported camellia oil, jojoba oil—a domestic product—or mutton tallow.

NORM2

If you do a lot of planing, you may find it convenient to make a plane oiler. Prepare a board or piece of MDF of about 4″ X 12” and attach a piece of carpet remnant with contact cement. Also glue a piece of non-skid material such as drawer liner to the bottom to hold the oiler in place during use. While the cement is drying, clamp the oiler in a vise or between a pair of boards; the pressure will help the cement to adhere firmly.

NORM3

To use the oiler, spray the carpet lightly with camellia oil or jojoba oil. Then, draw the plane across the oiler, backwards so the blade does not catch the fabric. This will put a light coat of oil on the plane’s sole. The plane should only need to be lubricated every couple of boards, or whenever resistance against the wood begins to build. The oil will not affect the finish you apply to your project.

The author is a woodworker, writer, and woodworking instructor living in the Blue Ridge Mountains with his wife, a woodshop full of power and hand tools and four cats who think they are cabinetmaker’s assistants. He is the author of the forthcoming book Choosing and Using Handplanes. He can be contacted at nreid@fcc.net.