Jim Randolph

Apr 032018
 

No Southern-fried Southern boy wants to be called a Yankee, but we share the characteristics of shrewdness and thrift. Thus, each month we include a money-saving tip. It’s OK if you call me “cheap.

Back in the day, can openers created a sharp-edged disk of metal that was at least as dangerous as a Ninja star.

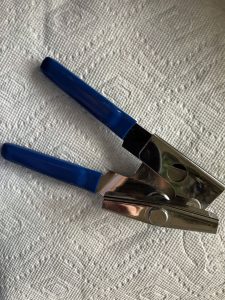
Old School can opener.

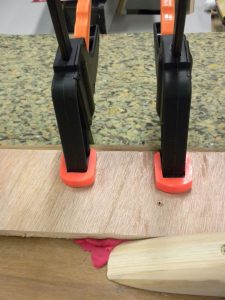
There is no telling how many people have been stitched up from handling those. Today, modern can openers cut the lids in such a way that there are no sharp edges.

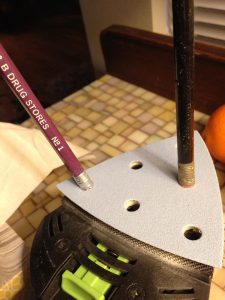
New School can opener.

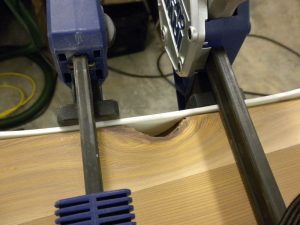
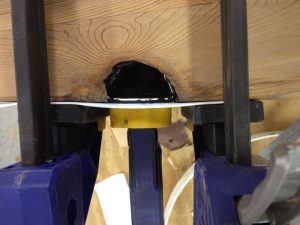
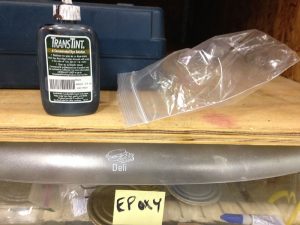
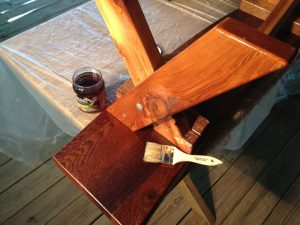
But, there is yet another benefit. The flat, safe surface is perfect for mixing epoxy. It is dished just enough to make a little depression to contain the epoxy, and you can mix it with a little stick. Just be sure to wash and dry it well before using it.

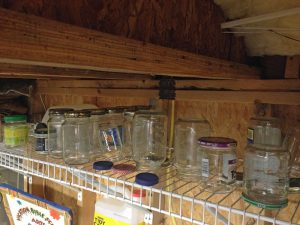
I store epoxy and clean can lids together, along with some old credit cards to cut up for disposable, recyclable stirring sticks and cups for mixing liquid epoxy. Tin snips cut the cards cleanly, and you can make wide or narrow stirrers, according to your needs. In addition to TransTint, I have used concrete coloring powder to color epoxy. Solids accelerate curing.


Jim Randolph is a veterinarian in Long Beach, Mississippi. His earlier careers as lawn mower, dairy farmer, automobile mechanic, microwave communications electronics instructor and journeyman carpenter all influence his approach to woodworking. His favorite projects are furniture built for his wife, Brenda, and for their children and grandchildren. His and Brenda’s home, nicknamed Sticks-In-The-Mud, is built on pilings (sticks) near the wetlands (mud) on a bayou off Jourdan River. His shop is in the lower level of their home.Questions and comments on woodworking may be written below in the comments section. Questions about pet care should be directed to his blog on pet care, www.MyPetsDoctor.com. We regret that, because of high volume, not all inquiries can be answered personally.

Apr 022018
 

Welcome to “Tips From Sticks-In-The-Mud Woodshop.” I am a hobbyist who loves woodworking and writing for those who also love the craft. I have found some ways to accomplish tasks in the workshop that might be helpful to you, and I enjoy hearing your own problem-solving ideasPlease share them in the COMMENTS section of each tip.  If, in the process, I can also make you laugh, I have achieved 100% of my goals.

When working with cedar, you must be prepared to deal with the defects. Of course, there are knots on every surface.

One look at a cedar tree and you see why there are so many knots: limbs everywhere.

You can celebrate the defects by leaving them au naturel, or you can celebrate them in the way you fix them, or you can disguise them with, say, a Dutchman.

I didn’t want any rough or sharp edges that might catch tender little grandbaby skin, so I made sure to fill each one. A Dutchman would have been fine, but this project had run long already.

As something of a trademark, I incorporate black-tinted epoxy into many of my projects. Here are the steps I used:

First, you need epoxy, and you have options. If you buy large containers of epoxy you might spend a good bit up front, but, stored properly, it will keep for years and years. The resin and hardener are separate and very stable.

If you’re only wanting to dabble in a little epoxy, good ol’ two-part syringe epoxy is perfectly fine. Don’t purchase the fast-curing kind if you’re adding amendments because the additions speed curing further and even one drop of dye or small amounts of sawdust will harden it faster.

Have your surfaces prepared in advance: clean, dry, no grease and no paint. No epoxies have a long “open” time.

Always work in small aliquots. If your defect is deep, fill it in layers no thicker than 1/8″ each.

To fill the knothole in the edge of this bench I cut a dam from a 5-gallon plastic bucket and clamped the dam with squeeze clamps.

To ensure no epoxy ran out from the bottom, I made an additional dam out of PlayDoh and clamped a plywood scrap on for reinforcement. Now, patiently fill the defect in 1/8″ layers. It’s not necessary for each lamination to cure completely between applications but each should be allowed to cool thoroughly.

Make your last layer thinner, which will allow bubbles to escape more easily.

One drop of Transtint Dye will darkly color a large quantity of epoxy. I suspect this bottle might last me a lifetime. I store it in a used zipper-locking bag in case of spills.


Jim Randolph is a veterinarian in Long Beach, Mississippi. His earlier careers as lawn mower, dairy farmer, automobile mechanic, microwave communications electronics instructor and journeyman carpenter all influence his approach to woodworking. His favorite projects are furniture built for his wife, Brenda, and for their children and grandchildren. His and Brenda’s home, nicknamed Sticks-In-The-Mud, is built on pilings (sticks) near the wetlands (mud) on a bayou off Jourdan River. His shop is in the lower level of their home.Questions and comments on woodworking may be written below in the comments section. Questions about pet care should be directed to his blog on pet care, www.MyPetsDoctor.com. We regret that, because of high volume, not all inquiries can be answered personally.

Mar 052018


Record-setting cold has plagued much of the nation this winter.

I don’t recall the exact year, but the last time I recall snow on the Mississippi Gulf Coast was in the early 1990s. A group of us, we called ourselves “TTLB,” The Thursday Lunch Bunch, had been to Edgewater Mall in Biloxi. We met every Thursday at O’Charley’s Restaurant. Not only was this before Katrina, it was before casinos, and I could drive to Biloxi from Long Beach, have a leisurely lunch and still be back at work for 2:00 PM. Today, it’s an ordeal to drive to the mall, and it takes forever.

Californians and New Yorkers are not sympathizing.

This particular day we got through with lunch and were shocked to walk outside to a winter wonderland. The snow was fresh and powdery and several inches thick. Everything was silent. Driving down Highway 90 was magical. The beach was, well, snow white. There were hardly any cars on the road and the medians and yards were pristine.

This year, we had not one but two snows, about a week apart, although both of them together wouldn’t have been a good covering.

Did I mention it snowed? Oh, not to mislead you, this was in Wisconsin.

Still, it has been cold here. We had many days in the 20s, pipes that were protected but froze anyway and weeks of thermal underwear.

New Yorkers are not sympathizing.

Still, that’s rare for us. We normally enjoy balmy weather. In fact, I don’t have any permanent heat in my shop, although I’m not above taking one or both bathroom heaters downstairs to warm things up.

“Two bathroom heaters” you say? Yes, have I mentioned that I’m the world’s most cold-natured person?

If I’m going to the shop on a cold day, I might have innumerable layers on, and I might not come out of many of them in the course of the day.

On the coldest day I’ve worked in 22 years in this house, I’ve never run the electric heater more than an hour. I’m inclined to being cold, but the process of stirring around in the garage warms me up pretty rapidly. If it’s really cold, I’ll leave the shutters closed for a bit of window insulation, even though I miss the beautiful view.

With a picture this pretty, one could be distracted, even from woodworking.

Which got me wondering, “What do people in other parts of the country do for heat in their shops?” Between reading Show Us Your Shop and woodworking videos, I know heat sources run the gamut.

I’m just glad I don’t have to deal with that.


Jim Randolph is a veterinarian in Long Beach, Mississippi. His earlier careers as lawn mower, dairy farmer, automobile mechanic, microwave communications electronics instructor and journeyman carpenter all influence his approach to woodworking. His favorite projects are furniture built for his wife, Brenda, and for their children and grandchildren. His and Brenda’s home, nicknamed Sticks-In-The-Mud, is built on pilings (sticks) near the wetlands (mud) on a bayou off Jourdan River. His shop is in the lower level of their home.Questions and comments on woodworking may be written below in the comments section. Questions about pet care should be directed to his blog on pet care, www.MyPetsDoctor.com. We regret that, because of high volume, not all inquiries can be answered personally.

Mar 032018
 

No Southern-fried Southern boy wants to be called a Yankee, but we share the characteristics of shrewdness and thrift. Thus, each month we include a money-saving tip. It’s OK if you call me “cheap.

Because the round cedar picnic table project was going to sit outdoors in hot Kentucky summers and brutally cold winters, I wanted the cedar to have all the protection I could provide. I started with CPES: Clear Penetrating Epoxy Sealer, two coats. From there, I added several coats of Epifanes varnish, all clear gloss except matte for the last two coats. However, I found Epifanes to be so thick that it required serial dilution.

This is where the cheap part comes in. Saved salsa jars allowed me to pour in some Epifanes plus a diluent. It was easy to fill a jar 25%, then add an equal amount of thinner for 50:50 dilution, or 2:1 or 3:1, depending on how thin I wanted it.

Having been reared by five children of the Depression, I can throw away almost nothing. That goes for jars, too. Jars of all sizes and shapes. If we empty a jar, Brenda gives it to me straight out of the dishwasher. From there, the jar-saving process goes through the steps pictured below.

Ventilated shelving allows the jars to dry completely with good air circulation. The accompanying lid is close by. Regular readers won’t be surprised that I “salvaged” this shelving on trash pickup day. I have over 100 feet of this shelving in various areas around the garage. Frequently, I find the brackets included with it. About $300.00 retail value. After a while, defined as “when I get around to it,” the lids go on the jars to keep them dust free. However, dust doesn’t rise well, so, as long as the jar is upside down, it’s going to stay clean.

Above, I’m using a salsa jar to mix Epifanes and mineral spirits to finish this bench. The mouth is wide enough for a generously-sized brush. With diluted varnish, you can keep using the jar, adding more finish or more thinner, according to your needs. A shot of Bloxygen and it’s good for a long time. I put a square of waxed paper over the mouth of the jar before closing the lid


Jim Randolph is a veterinarian in Long Beach, Mississippi. His earlier careers as lawn mower, dairy farmer, automobile mechanic, microwave communications electronics instructor and journeyman carpenter all influence his approach to woodworking. His favorite projects are furniture built for his wife, Brenda, and for their children and grandchildren. His and Brenda’s home, nicknamed Sticks-In-The-Mud, is built on pilings (sticks) near the wetlands (mud) on a bayou off Jourdan River. His shop is in the lower level of their home.Questions and comments on woodworking may be written below in the comments section. Questions about pet care should be directed to his blog on pet care, www.MyPetsDoctor.com. We regret that, because of high volume, not all inquiries can be answered personally.

Mar 022018
 

Welcome to “Tips From Sticks-In-The-Mud Woodshop.” I am a hobbyist who loves woodworking and writing for those who also love the craft. I have found some ways to accomplish tasks in the workshop that might be helpful to you, and I enjoy hearing your own problem-solving ideasPlease share them in the COMMENTS section of each tip.  If, in the process, I can also make you laugh, I have achieved 100% of my goals.

Not long after I cut my first Domino mortise with my Festool Domino Jointer, a realization hit me, “This is a slot.”

Right about now you’re probably thinking, “This guy’s a genius.” Just wait. Believe it or not, there’s more.

I was working on the youngest grandbabies’ round picnic table, cutting mortises to use Dominos to edge-join the boards for the top. While doing that, I was thinking ahead about attaching the cleats on the underside.

That’s when it hit me: “The Domino mortiser makes slots!” I figured I could make screw holes in the cleats with the Domino, using its built-in depth settings to make the slots go half way through the 2″ lumber. The slots would allow for wood movement, and there would be no risk of breaking drill bits, as frequently happens when making slots. And, even though the slots would be hidden, it would give me a warm feeling knowing that the holes would be neat and uniform.

Because screw heads are going to show, you want your Domino slots uniformly spaced. Use the Domino mortise depth setting to cut them halfway through, more or less. Because the Domino has a setting for slot width, you can provide for as much expansion as you think you might need.

But, if the slots are set to go only half way through, how will that work with attaching screws? The second part does involve a drill bit. After making the mortises, go back with the appropriate-sized bit, right in the middle of the slot, to make the opening for the screw to go in. Using this technique also allows you to perfectly center your screw hole in the slot.

Your drill bit should be sized for a slightly snug fit as your screw passes through the resulting hole. You can countersink the head a little, if you prefer.

Because you’re coming out onto your finished surface, be careful to drill through slowly so you avoid a blowout.

You see the handsome effect of carefully placing holes for screws. The stainless steel heads are arranged like soldiers in a line.


Jim Randolph is a veterinarian in Long Beach, Mississippi. His earlier careers as lawn mower, dairy farmer, automobile mechanic, microwave communications electronics instructor and journeyman carpenter all influence his approach to woodworking. His favorite projects are furniture built for his wife, Brenda, and for their children and grandchildren. His and Brenda’s home, nicknamed Sticks-In-The-Mud, is built on pilings (sticks) near the wetlands (mud) on a bayou off Jourdan River. His shop is in the lower level of their home.Questions and comments on woodworking may be written below in the comments section. Questions about pet care should be directed to his blog on pet care, www.MyPetsDoctor.com. We regret that, because of high volume, not all inquiries can be answered personally.

Feb 062018
 

I’d like to take a vacation, but who has time?
I’d like to take a day off, but who has time?
I’d like to have an afternoon to work on a stool I started four months ago, but who has time?

It seems we’re a busy people, always on the go.

I get up at 4:45am every morning and walk three miles. I get ready for work and arrive a little before 8 AM. At lunch, I work on Sunday School lessons two to four days a week (some go quickly, some go slowly), and the other days I write for this or that magazine assignment. I go back to work and stay until 7 PM.

8 to 12 Noon on Saturdays.

On rare occasions, I take a break during lunch and watch a woodworking video, which are very popular these days throughout the woodworking community. Sometimes I watch part of a woodworking video when I’m assembling and stirring one of the five or six lunch salads I eat each week, before I settle in to writing.

Those moments are precious, and I want to make the most of them. That’s why I ask the question, “Do you like music in your woodworking videos?”

I think it’s a waste.

Don’t get me wrong. I like music. I have 13 gigabytes of music on my phone. I have so much music on my phone that, when I had a 16-gigabyte iPhone, I was limited to taking no more than three photographs at a time before I had to email those to myself and erase them before the storage could fit more.

But, who has time? It typically takes me about four minutes to assemble and stir a salad at lunchtime. After that, it’s down to work. I simply don’t want to spend two of those minutes (or 30 seconds, for that matter) listening to music. Just take me right to the meat of the woodworking project, if you please. In fact, if there is music and/or an introductory section to the video, I’ll often fast forward a bit. As often as not I’ll overshoot, which ends up costing me more time, but, I can’t help it, I have no patience.

I get some looks, but I take this bowl to lunch with me when I’m eating a salad, so I can dump the fast-food ingredients into the bowl and mix them without spilling the makings all over the place, as would happen with the low-capacity containers the salads come in. Besides, I like my dressing uniformly spread throughout the salad. What can I say? I like what I like.

Now, is the music going to make me stop watching? Hardly.

Will I troll someone’s videos because they have music in them? Would I write to a fellow woodworker to ask him or her to eliminate the music?

Who has time?

Feb 052018
 

No Southern-fried Southern boy wants to be called a Yankee, but we share the characteristics of shrewdness and thrift. Thus, each month we include a money-saving tip. It’s OK if you call me “cheap.

There is one thing contrarian about the Festool RO90: the dust collection holes are not the same size as other Festool sanding disks and pads. I’ve written before about using disposable foam paint pad handles as guides for installing sanding pads.  A 3/8″ dowel works the same. The RO90’s holes are smaller, so I looked for the perfect guide and settled on a good old #2 pencil. Now, you’re probably not lucky enough to have a good old #1 Katz & Besthoff pencil, because K&B Drugstores got bought out in 1997 by RiteAid. But Brenda, seeing the end of the classic purple pencils coming, stocked up.

No, I won’t tell you where her stash is.

A standard pencil allows you to line up the dust collection holes perfectly on your RO90, whether using the round or triangular attachment.


Jim Randolph is a veterinarian in Long Beach, Mississippi. His earlier careers as lawn mower, dairy farmer, automobile mechanic, microwave communications electronics instructor and journeyman carpenter all influence his approach to woodworking. His favorite projects are furniture built for his wife, Brenda, and for their children and grandchildren. His and Brenda’s home, nicknamed Sticks-In-The-Mud, is built on pilings (sticks) near the wetlands (mud) on a bayou off Jourdan River. His shop is in the lower level of their home.Questions and comments on woodworking may be written below in the comments section. Questions about pet care should be directed to his blog on pet care, www.MyPetsDoctor.com. We regret that, because of high volume, not all inquiries can be answered personally.