Jim Randolph

Jun 052018
 

This is all the cooling I need in my shop. It’s nice being nearly immune to the heat.

Do you have air conditioning in your shop?
Do you run it a lot?
Before Hurricane Katrina, I had a little 5000 BTU window unit that I would occasionally put in a casement for temporary use, but I had to be desperate. As a fan of hot weather, I don’t see the need for it often, even in our South Mississippi heat and humidity.

After Katrina, the point was moot, as the AC was sitting on the floor of the shop when the flood waters came, and few things electronic survived that horrible, nasty, hypersaline water.

For a couple of years after that, I would pass a certain house on my way to work where the garage door was always open. They had an identical unit sitting on the concrete, and I was tempted daily to stop and say, “If you’re not going to use that …”

One day, it was gone.

Not that I couldn’t afford to buy one; I think they are under $100. But, what isn’t sweeter when it’s free?

A while back I built the squirrel-cage fan “window unit”  that installs in 2 minutes and 4 seconds. I’m fortunate, though, I’m not affected much by the heat, and don’t even use the exhaust fan often.

Which means Lowe’s shouldn’t hold its breath waiting for me to come and pick up one of those $100 loss leaders.

Jun 042018
 

No Southern-fried Southern boy wants to be called a Yankee, but we share the characteristics of shrewdness and thrift. Thus, each month we include a money-saving tip. It’s OK if you call me “cheap.

This project might not be for everyone, but, if you’re tight like me (Alan, are you paying attention?), it will be right up your alley.

We live on the Mississippi Gulf Coast. For the purpose of this article, the key word is “Coast.” Think “flat.” When we get rain, there is nowhere for it to go, because we’re already near sea level.

As a result, we frequently experience flooding in the yard between my garage at work and the back door of the clinic, requiring me to wear knee-high rubber boots to navigate the trail. When I get inside, I have to take off my boots for work, so I can either carry my dress shoes, along with all of the other paraphernalia I tote in, or I can keep a pair of “emergency” shoes indoors.

For years, maybe decades, I’ve had a pair of black Reeboks under my desk for such emergencies. Because they don’t get used much, and I never wear them outside the clinic, they still look much like the day I bought them.

That is, they did, until one day I put them on and realized the sole of the right one had become unattached from the upper. I flopped around the hospital the rest of the day, vowing to figure out a way to save these otherwise perfectly good shoes.

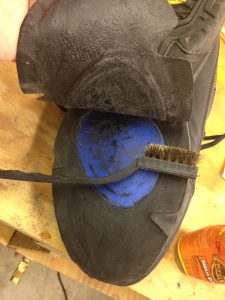
A bronze-bristled wire brush made short work of cleaning the sole and upper mating surfaces.

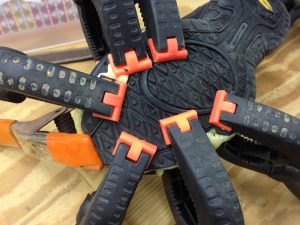
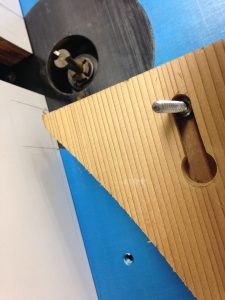
Some dry-fitting allowed me to see where the spring clamps needed to be in order to put the flexible sole in perfect contact with the upper. Then, it was just a matter of wetting one side, applying glue to the other, and, voila!

With clamp placement already worked out, it was a simple matter to position clamps accurately after applying glue.

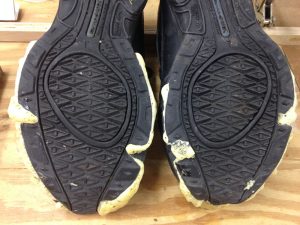
Clearly, I couldn’t see patients in these shoes anymore, but they cleaned up nicely with a rasp and wire wheel, followed by some Magic Marker to paint the Gorilla Glue black.

Well, it was voila! for a while. A few weeks later, the back half of the sole came loose. The challenges were different here. In the front, clamp position is easy and the sole is thin and flexible. In the back, the upper and the sole both become thicker and less flexible. Some edges simply were not going to lie down where they belonged.

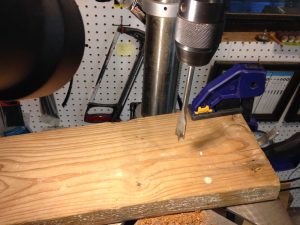
Enter screw gun and drywall screws. That thick, thick upper allowed the screws deep purchase and made perfect positioning of the sole possible.

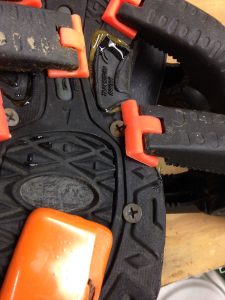
The steps were: 1, apply glue. 2, drive the drywall screws through the sole, holding in the upper. 3, apply spring clamps to hold down edges for a good final appearance. 4, wait.

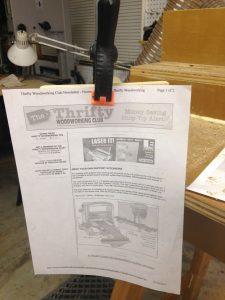
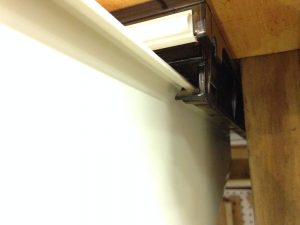
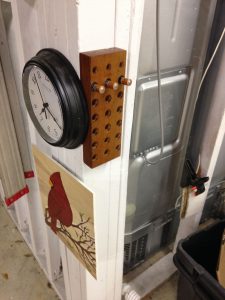
There isn’t a better paper clip in the world for holding your building plans.

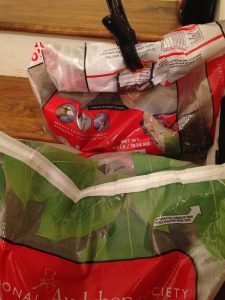
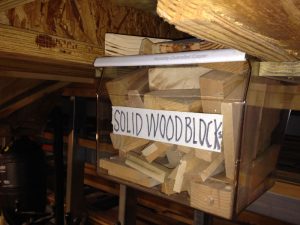
What else will they hold? Any sort of bag, like these bags containing black oil sunflower bird seed.

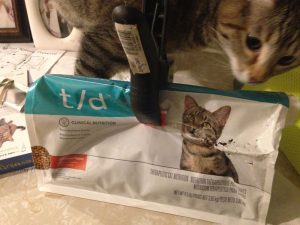
They’re good for pet food bags, too, but they won’t keep the kitty from chewing holes in the bag if you forget to put it back on its high shelf.

Talk about cheap: I bought these at the jot-em-down store, a dozen in a mesh bag for a few bucks. I’ve had them for 40 years. They were flooded in Katrina and still work fine.


Jim Randolph is a veterinarian in Long Beach, Mississippi. His earlier careers as lawn mower, dairy farmer, automobile mechanic, microwave communications electronics instructor and journeyman carpenter all influence his approach to woodworking. His favorite projects are furniture built for his wife, Brenda, and for their children and grandchildren. His and Brenda’s home, nicknamed Sticks-In-The-Mud, is built on pilings (sticks) near the wetlands (mud) on a bayou off Jourdan River. His shop is in the lower level of their home.Questions and comments on woodworking may be written below in the comments section. Questions about pet care should be directed to his blog on pet care, www.MyPetsDoctor.com. We regret that, because of high volume, not all inquiries can be answered personally.

Jun 012018
 

Welcome to “Tips From Sticks-In-The-Mud Woodshop.” I am a hobbyist who loves woodworking and writing for those who also love the craft. I have found some ways to accomplish tasks in the workshop that might be helpful to you, and I enjoy hearing your own problem-solving ideasPlease share them in the COMMENTS section of each tip.  If, in the process, I can also make you laugh, I have achieved 100% of my goals.

Spring clamps.

Are they, for you, like me, the clamps you love to hate?

I never have figured out how to apply spring clamps to hold two pieces and not make one or both workpieces move. Besides that small conundrum, I think they’re great!

I especially like to use them for holding things other than work. For example, I have a ceiling-mounted ShopVac Hangup attached to a ceiling- mounted cyclone separator. Its long, long hose will reach my worktable area easily. But, when I’m working further away, the hose wants to recoil. To keep it close, I hold it in place with a clamp big enough to allow the small-diameter hose to avoid restriction, which means it’s close by when I need some vacuum. A remote control allows me to turn it on and off right from where I’m working.

A spring clamp to hold a spring clamp. Funny, but it works. It might take two hands to compress this big boy, but the space in the jaws allows the 1-1/4″ hose to stay in one place, yet still pass plenty of air.

I also use spring clamps to hold a 4″ dust collector hose on the table of my drill press when I’m sanding. At high RPM, this technique can generate a lot of dust, and the high volume of the dust collector can catch it all.

When I was salvaging these perfectly good Reeboks I glued the soles back onto the uppers with glue. These spring clamps were invaluable.


Jim Randolph is a veterinarian in Long Beach, Mississippi. His earlier careers as lawn mower, dairy farmer, automobile mechanic, microwave communications electronics instructor and journeyman carpenter all influence his approach to woodworking. His favorite projects are furniture built for his wife, Brenda, and for their children and grandchildren. His and Brenda’s home, nicknamed Sticks-In-The-Mud, is built on pilings (sticks) near the wetlands (mud) on a bayou off Jourdan River. His shop is in the lower level of their home.Questions and comments on woodworking may be written below in the comments section. Questions about pet care should be directed to his blog on pet care, www.MyPetsDoctor.com. We regret that, because of high volume, not all inquiries can be answered personally.

May 082018


Spring cleaning.

It’s almost a cliché.

Even the City of Long Beach is having a Spring Cleaning event.

Sometimes, it’s a joke, laughing about the cleaning we should be doing in the spring, even as we put it off.

We’ve discussed before how much I like cleaning my shop. Right now, because of the painting project,  almost everything in the shop is on hold, as I’m trying to finish painting completely so I can have that behind me.

That means the shop, indeed, my entire garage, is a huge mess.

I have a brand new Tormek T-8 that I’m dying to use and write about, and I’ve had time to take it out of the box, put it on my sharpening table and do the initial setup. There’s been no time to do much beyond that. I hope to have that article for you soon.

Meanwhile, the shop is just a mess, which is a problem for me, because I have to see it every morning when I leave for work and every evening when I get home.

When I do get to it, I like to vacuum with the Festool Dust Extractor. A separator ahead of your vacuum, regardless of brand, is a great way to save on replacement filter bags and HEPA filter elements. Highland carries a unit you can put on top of your metal garbage can, and another that works on a 5-gallon bucket.

I don’t believe there is a vacuum cleaner made that will clean the air coming out of it better than the Festool units (the Mirka is a rival), but a separator is terrific for everything from Shop Vac to Craftsman. Even the canister filters in those aren’t cheap.

A separator works by catching both large and fine particles before they get to your suction-producing unit. You could think of it as a filter ahead of a filter, except the separator has no parts (filters) that ever need replacing. Periodically, you just empty all of the refuse from the separator’s container, reassemble and go back to work.

Oh, well, I will get it done someday. Meanwhile, I’ll just apply the old saying, “This, too, shall pass.”


Jim Randolph is a veterinarian in Long Beach, Mississippi. His earlier careers as lawn mower, dairy farmer, automobile mechanic, microwave communications electronics instructor and journeyman carpenter all influence his approach to woodworking. His favorite projects are furniture built for his wife, Brenda, and for their children and grandchildren. His and Brenda’s home, nicknamed Sticks-In-The-Mud, is built on pilings (sticks) near the wetlands (mud) on a bayou off Jourdan River. His shop is in the lower level of their home.Questions and comments on woodworking may be written below in the comments section. Questions about pet care should be directed to his blog on pet care, www.MyPetsDoctor.com. We regret that, because of high volume, not all inquiries can be answered personally.

May 072018
 

No Southern-fried Southern boy wants to be called a Yankee, but we share the characteristics of shrewdness and thrift. Thus, each month we include a money-saving tip. It’s OK if you call me “cheap.

When I went to look for scraps for the battery storage project, I didn’t have to look far.

And, I didn’t spend much on storage for those scraps. Whenever one of our refrigerators dies, I always save the old drawers and shelves. I keep the standards and runners, too, although sometimes it works out to use those and sometimes it doesn’t. Below, I’ve pictured some places in the garage I’ve installed this free storage and some of the things I’ve squirreled away.

Save the runners for the drawers and you can use them just like they were still in the refrigerator. This one glides as easily as the day it came off the Kenmore assembly line.

Sometimes the original equipment requires a shim to fit.

For this drawer to fit between joists, all that was required was a couple of scraps of plywood to act as runners.

I use these three drawers for scraps that make good cauls and shims, handy to the table I work from most.

Old refrigerator shelves are handy, too. I used the original standards and supports. This tile storage in Brenda’s ceramic studio demonstrates that they can hold a tremendous amount of weight.


Jim Randolph is a veterinarian in Long Beach, Mississippi. His earlier careers as lawn mower, dairy farmer, automobile mechanic, microwave communications electronics instructor and journeyman carpenter all influence his approach to woodworking. His favorite projects are furniture built for his wife, Brenda, and for their children and grandchildren. His and Brenda’s home, nicknamed Sticks-In-The-Mud, is built on pilings (sticks) near the wetlands (mud) on a bayou off Jourdan River. His shop is in the lower level of their home.Questions and comments on woodworking may be written below in the comments section. Questions about pet care should be directed to his blog on pet care, www.MyPetsDoctor.com. We regret that, because of high volume, not all inquiries can be answered personally.

May 042018
 

Welcome to “Tips From Sticks-In-The-Mud Woodshop.” I am a hobbyist who loves woodworking and writing for those who also love the craft. I have found some ways to accomplish tasks in the workshop that might be helpful to you, and I enjoy hearing your own problem-solving ideasPlease share them in the COMMENTS section of each tip.  If, in the process, I can also make you laugh, I have achieved 100% of my goals.

Recently, I was having trouble with my indoor/outdoor weather station, and I thought low battery power in the outdoor unit might have been the problem. A computer reminder triggers routine preemptive changing of the batteries so that corrosion doesn’t damage the unit. The reminder still had a few months to go, but it has been such a brutally cold winter, I thought the batteries might have aged prematurely.

As it turned out, that wasn’t the problem, which left me with a dilemma: what do I do with these batteries that are probably still good?

Now, the last thing I wanted to do was put them in something that might be destroyed by them. Still, several options existed.

I needed to use a device that would tell me when the batteries were dead, and wouldn’t get missed, allowing the corrosion to ruin the device.

My first thought was a clock. Or clocks. I have several in the garage, so I’m never far from knowing the time. I like staying on schedule, and, even on my time off, my activities are pretty regimented. When a clock with a second hand goes dead, it’s pretty obvious.

Another option was the garage stairs “dinger.” It’s the alert system I use to let me know when visitors are coming down the stairs, a safety system that prevents me from being startled while operating machinery. I’d hate for the table saw blade to spew blood all over company.

Then came another question, “What do I do with these batteries while I’m waiting for them to be used?” I’d have to come up with a storage system.

Previously, I’d made some battery holders for new batteries. The holders are mounted in our laundry room. The garage storage system needn’t use such nice wood, but the job still needed to be done well. Also, I’d have no use for “C,” “D” storage in this system, so a “AAA” and “AA”-only unit would be a quick and easy project. Here’s how I made it:

I made this battery storage for our laundry room. Someday, I should put some finish on it. A couple of coats of varnish would look nice.

Of course, to keep the project cheap, I chose a scrap piece of wood. My first thought was to use treated pine, but I considered that the chemicals might be corrosive to the batteries or their intended device. The slab needs to be at least 1-1⁄2″ thick to provide sufficient hole depth to prevent the batteries from falling out on their own, or if vibrations shake the wall.

Step two was to decide on a good angle. The Woodpecker’s 12-in-1 Tool says 10i worked well on the previous holder.

Set the drill press table to 10i with a support you can drill into if necessary. I wanted a long board to support the entire project length.

A sharp Forstner bit makes a clean hole with a flat bottom.

Take the holes to a depth of 1-1/4” for all sizes except D, which needs full-thickness. The depth stop makes for quick and accurate work.

Use 7/16″ diameter for AAA batteries, 5/8″ for AA, 1″ for C and 1-3/8″ for D. You can chisel a rectangular hole for 9-volt batteries, or they will fit in a 1-3/8″ round hole. If there are sizes for which you have no Forstner bit, a spade bit will do, but the hole might not be quite as pretty.

A keyhole bit in the router table makes for an elegant, hidden mounting method.

And, the final product, a miniature of the original, right next to one of the clocks its batteries will one day electrify.


Jim Randolph is a veterinarian in Long Beach, Mississippi. His earlier careers as lawn mower, dairy farmer, automobile mechanic, microwave communications electronics instructor and journeyman carpenter all influence his approach to woodworking. His favorite projects are furniture built for his wife, Brenda, and for their children and grandchildren. His and Brenda’s home, nicknamed Sticks-In-The-Mud, is built on pilings (sticks) near the wetlands (mud) on a bayou off Jourdan River. His shop is in the lower level of their home.Questions and comments on woodworking may be written below in the comments section. Questions about pet care should be directed to his blog on pet care, www.MyPetsDoctor.com. We regret that, because of high volume, not all inquiries can be answered personally.

Apr 042018


Measure twice, cut once.

Such sayings are legendary, sage advice.

We all know that accuracy is one of the most important factors in a good woodworking outcome. Usually, it’s a matter of “taking the time.” Taking time to mark accurately, line up a cut accurately, and execute the cut accurately.

Whether a butt joint or miter, few aspects of your work can make it look uglier than an ill-fitting intersection.

A perfectly-executed half-lap joint by Marc Spagnuolo.

There are plenty of ways you can enhance accuracy. Marking your cutlines with a knife instead of a pencil, for example.

Many woodworkers intentionally cut their pieces long and fine-tune after.

Picture framers often “shave” their miter cuts for accuracy to the thousandth.

When nothing less than perfection will do, nothing beats making one’s cuts a tad long and improving them with this miter trimmer. Highland provides a handy product tour.

The same principle is provided by a hand plane and shooting board. In both cases, the blades must be extremely sharp to prevent tearout.

Shooting boards. I suppose they’ve been around almost as long as hand planes.

A modern invention intended to enhance accuracy is the laser. You can find them on your power miter box, your drill press, your band saw, and even some handheld drills have them.

The laser guide on this Kapex is quite good, although I usually still cut and test.

Some would argue that accuracy isn’t improved, even though most people would say speed is. This month’s poll asks about your preferences regarding lasers.


Jim Randolph is a veterinarian in Long Beach, Mississippi. His earlier careers as lawn mower, dairy farmer, automobile mechanic, microwave communications electronics instructor and journeyman carpenter all influence his approach to woodworking. His favorite projects are furniture built for his wife, Brenda, and for their children and grandchildren. His and Brenda’s home, nicknamed Sticks-In-The-Mud, is built on pilings (sticks) near the wetlands (mud) on a bayou off Jourdan River. His shop is in the lower level of their home.Questions and comments on woodworking may be written below in the comments section. Questions about pet care should be directed to his blog on pet care, www.MyPetsDoctor.com. We regret that, because of high volume, not all inquiries can be answered personally.