Jim Randolph

Jun 022019
 

Welcome to “Tips From Sticks-In-The-Mud Woodshop.” I am a hobbyist who loves woodworking and writing for those who also love the craft. I have found some ways to accomplish tasks in the workshop that might be helpful to you, and I enjoy hearing your own problem-solving ideasPlease share them in the COMMENTS section of each tip.  If, in the process, I can also make you laugh, I have achieved 100% of my goals.

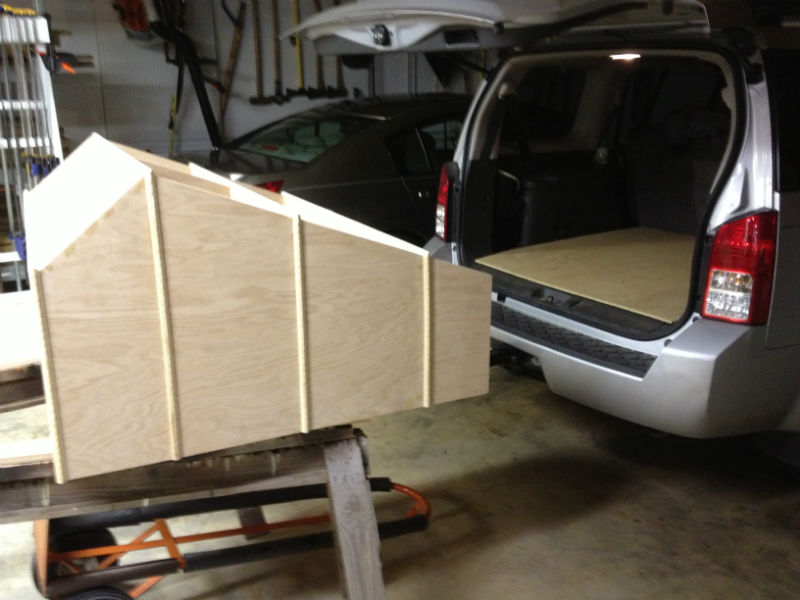
Welcome to Part 2 of “How I make panels from used oak flooring.” You can read Part 1 in last month’s tips.

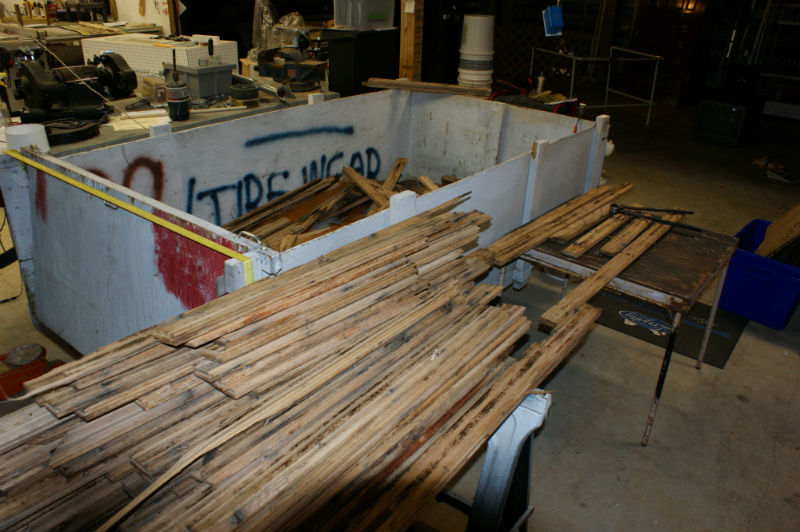
Theoretically, one could make a panel simply by using a substrate, such as particle board or plywood, and nailing the boards’ tongues into grooves, just as you would cover a floor. However, I’ve never seen used boards that were sufficiently straight for that. Warping is a common problem. Also, your panel would be quite heavy, which wouldn’t matter if it were the top of a piece of furniture, never to be moved.

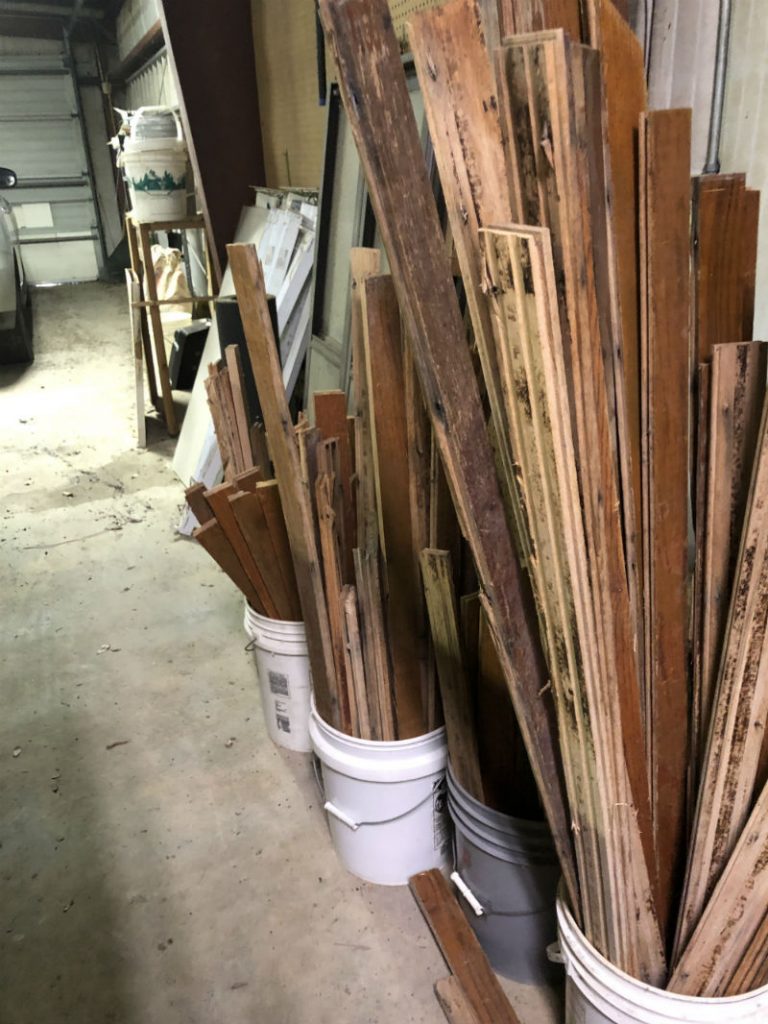
Our project calls for light weight, so we’re going to start by cleaning off the dirt, especially from the grooves and tongues, before we saw them off.

See the dirt on these tongues? It’s on the top edge, and represents decades of dirt and allergens pounded into the space between boards. The importance of a dust mask can’t be overemphasized. Notice that the first pass of nail removal didn’t catch this little broken fragment to the left. We will scan with the metal detector again before sawing.
After scraping as much dirt off as you can, a wire brush will take off even more. Be sure to use eye protection along with your dust mask. I had a tiny piece of wire in my right eye once. It was no fun. Neither was removal.

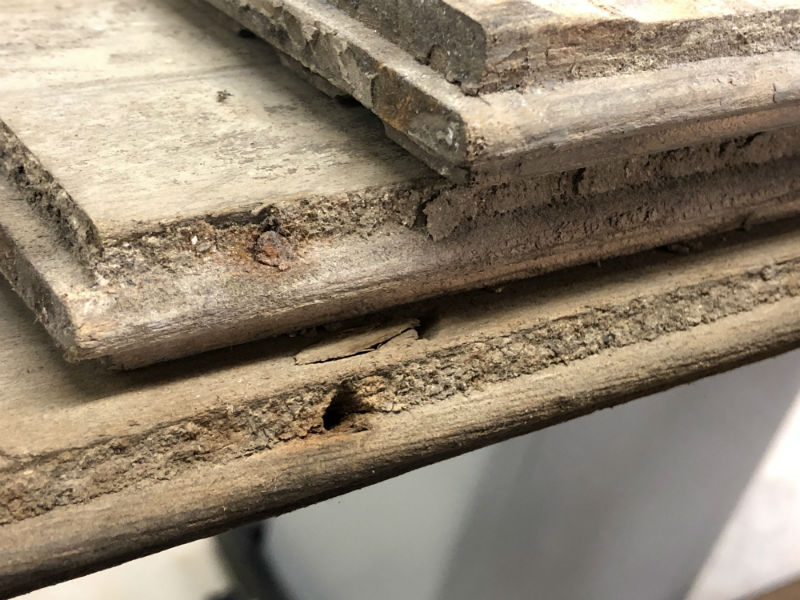
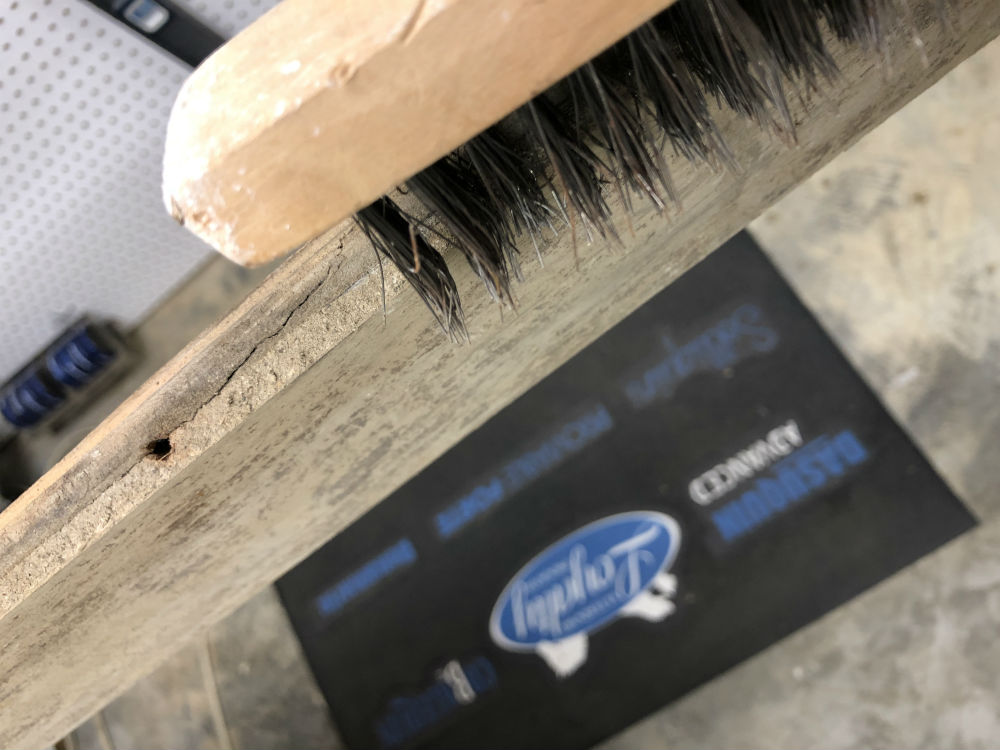
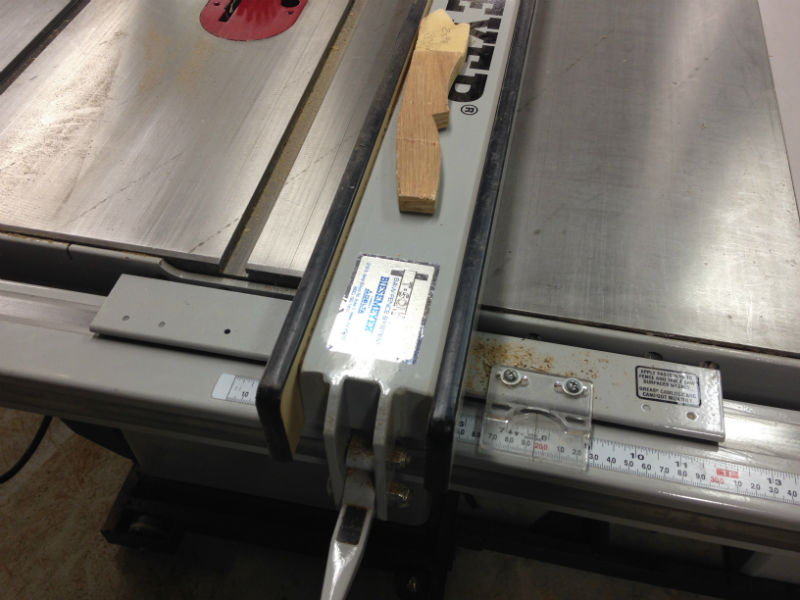
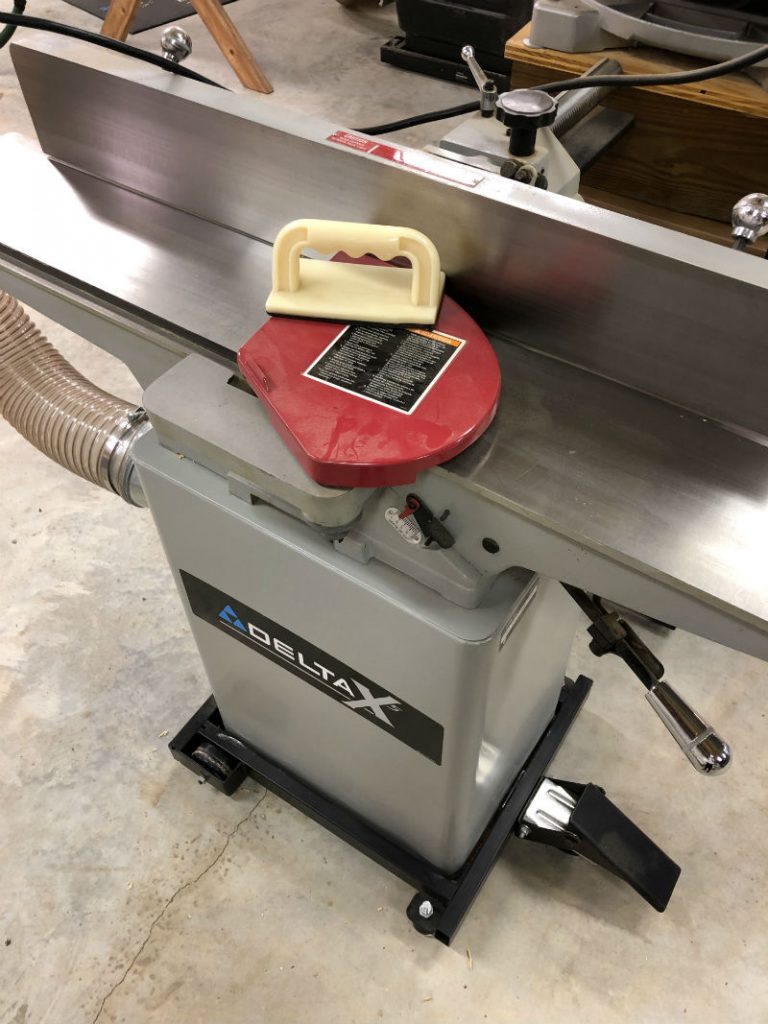
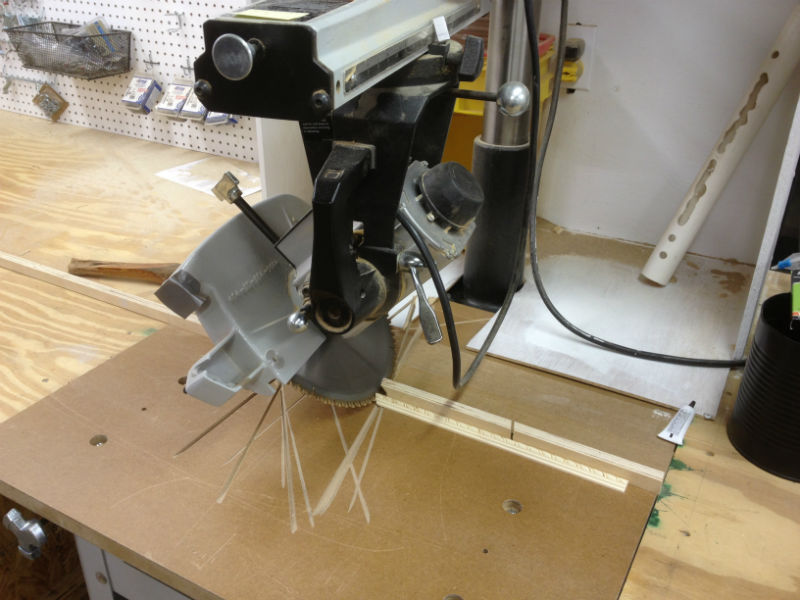
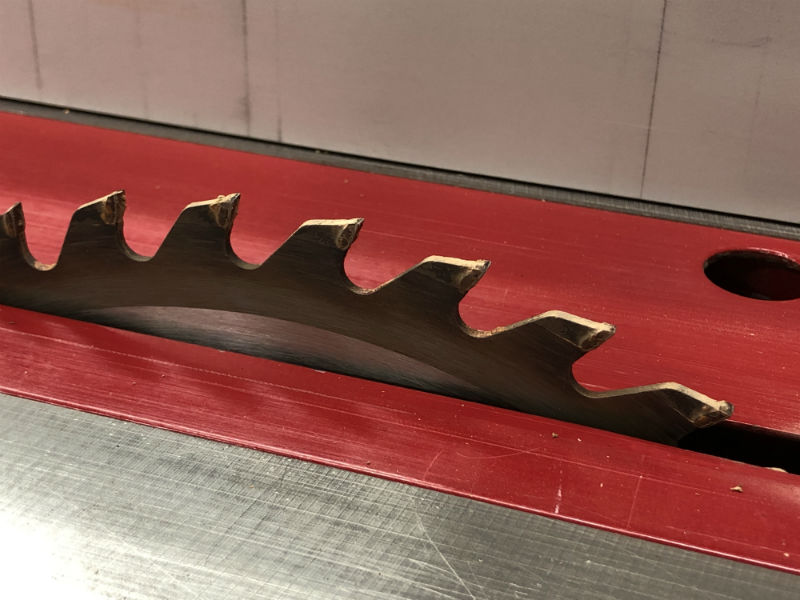
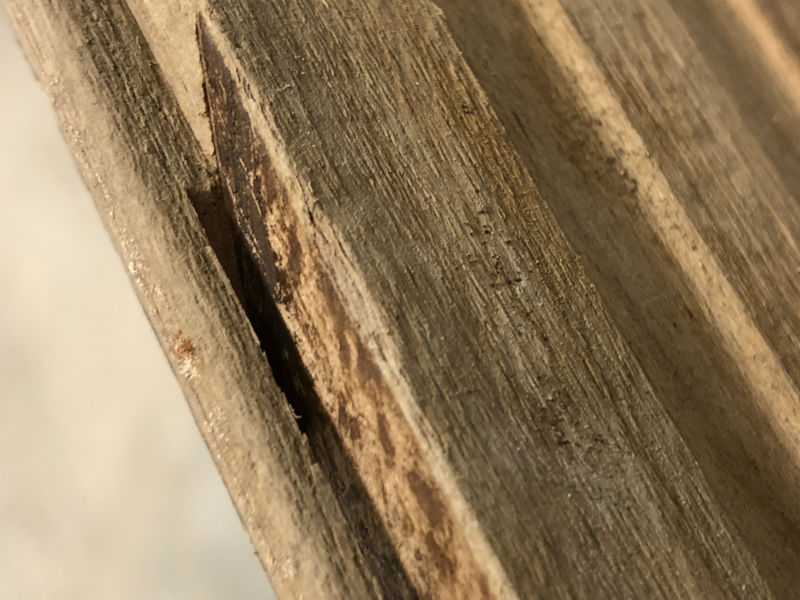
I have a coarse rip blade to take off the grooves and tongues. No matter how much you scrape and brush, it’s still going to be dirty, so there is no point in exposing your Forrest Woodworker II to that. I usually find the groove side to be straightest, which means you’ll remove the tongues first.

This old Craftsman blade does a good job of rough cutting, and it’s so coarse there’s no bogging it down. Every once in a while you’ll find a board so wonky it won’t feed through your table saw. Don’t risk it! Use the band saw, or, better yet, just put it in the burn pile. You probably won’t get it to lie flat for your panel anyway. In fact, while you don’t want to be wasteful with your “free” wood, it’s worthwhile preparing extra boards at this stage because bow, twist and warp will cause you to reject one-third or more of your boards.

Cut deep enough to create a smooth edge for gluing. If needed, you can cut most of the tongue on one coarse pass, then cut that edge again with a good blade, or make a light pass on your jointer. If your boards are really bent, you can straighten them with a straight-edge jig on your table saw.

If your project calls for uniform board width, pay attention as you go. Most boards start at 2-1/4″ wide; you don’t have a lot to play with.

See how the blade has barely cut into the board? Fine-tune your rip to maximize board width, unless your design calls for narrow strips.
After ripping tongues from four boards, I cut this one the same width, which didn’t take all of the tongue off. Because I’m going for a uniform-width look, I moved the fence 1/32″, re-cut this board and re-cut those first four on the tongue side, too.

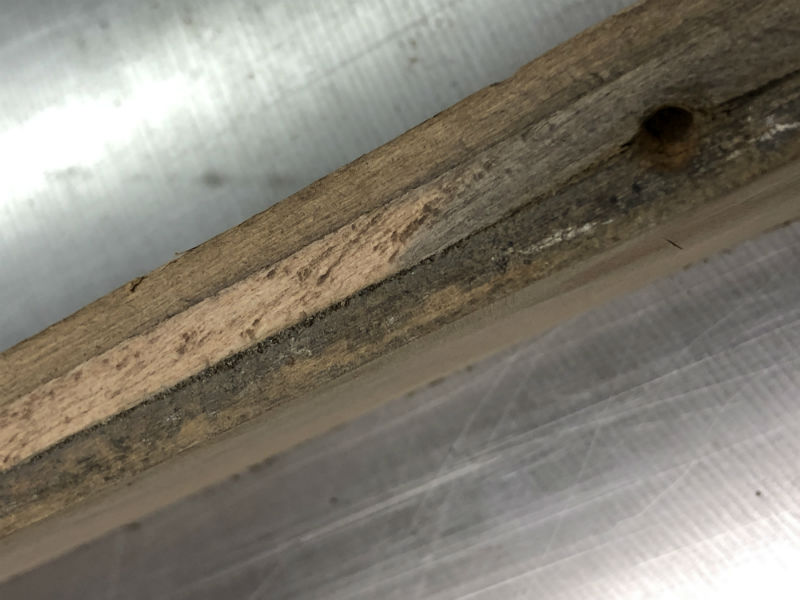
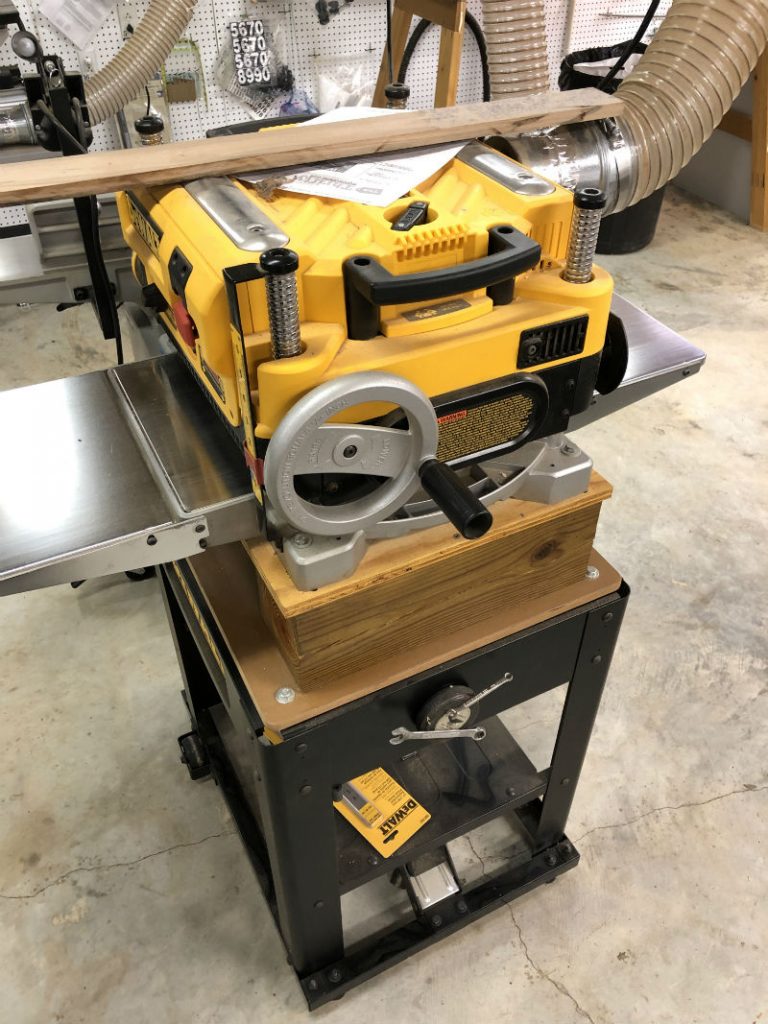
You have the option to plane off the ridges on the bottom of the boards, which are called “absorption strips” and are intended to reduce cupping. If you are installing an edge on your panel you can leave those; otherwise, the irregularity will show from the side.

In making this panel, I doubled the boards to give the impression of a thicker top. For better stability you could stagger the joints, make the panel a little bigger than you need, then trim to size.

You will want to be efficient with this process, especially if your panel is any size, or if you are making multiple panels. To minimize excessive fence adjustments, cut all of the tongues off, then evaluate all of the boards to see which is likely to need the most cut off the groove side. If you’re lucky, you won’t need to change the fence a third time and you can zip through the remaining boards, simultaneously leaving them all the same width. Be watchful that you are not having so much fun running board after board through the table saw that you fail to attend to safety.

Here are some additional considerations.

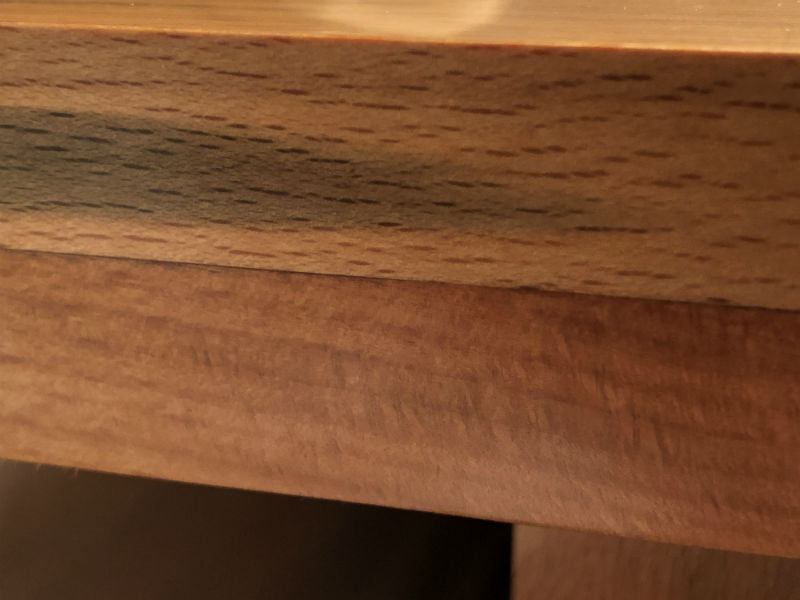
The bottom matters only if your project shows the bottom. If you don’t have to machine the underside, your panel will have more thickness. However, that works only if the panel is fixed to a spot. If there are defects on the bottom, and there is any chance the panel can be picked up, the underneath may be seen, in which case you should plane out those defects. Or, cut the edge back to remove the fault.

In a panel with a hidden bottom, this board is perfectly acceptable, as this defect will never be seen.

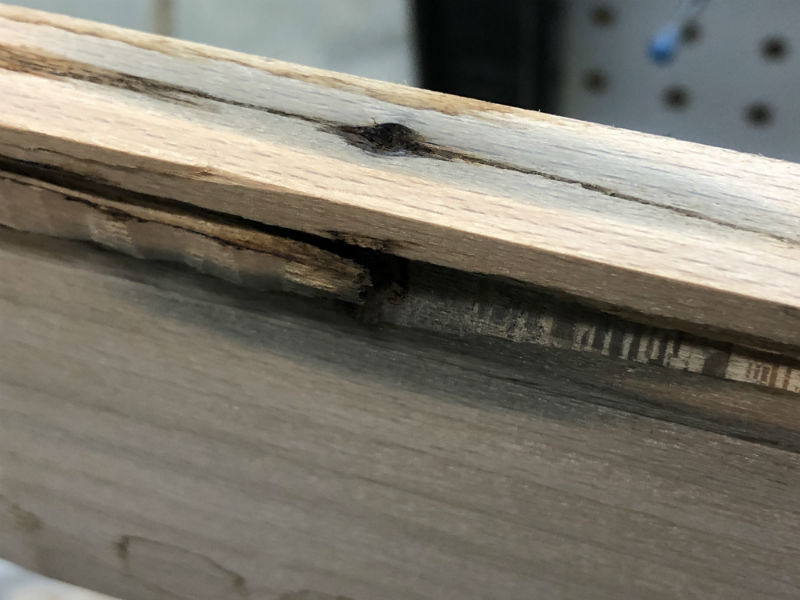
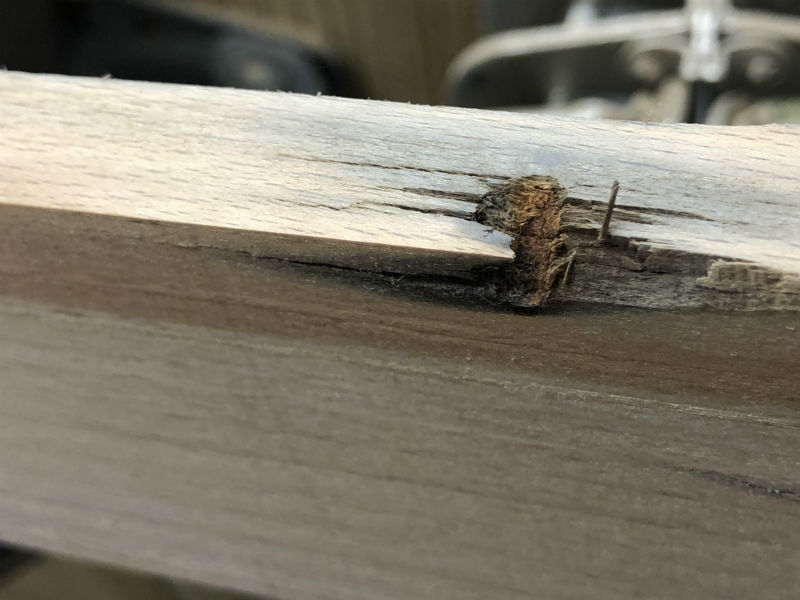
The only edges that matter are the ones that show. This edge defect makes a minor flaw in the bottom, which might not even matter. It certainly doesn’t affect the integrity of the edge joint.

Sand out the little snag on the bottom of this board into a crescent and it’s as good as any.

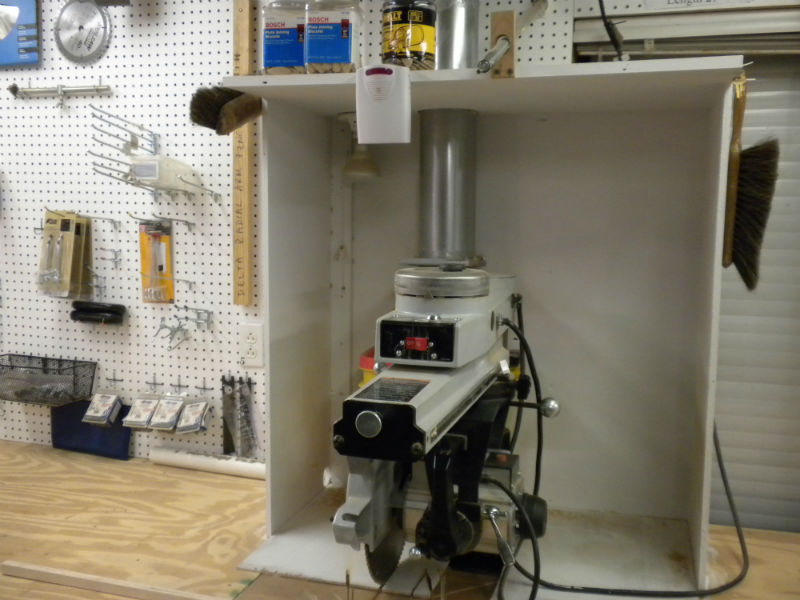
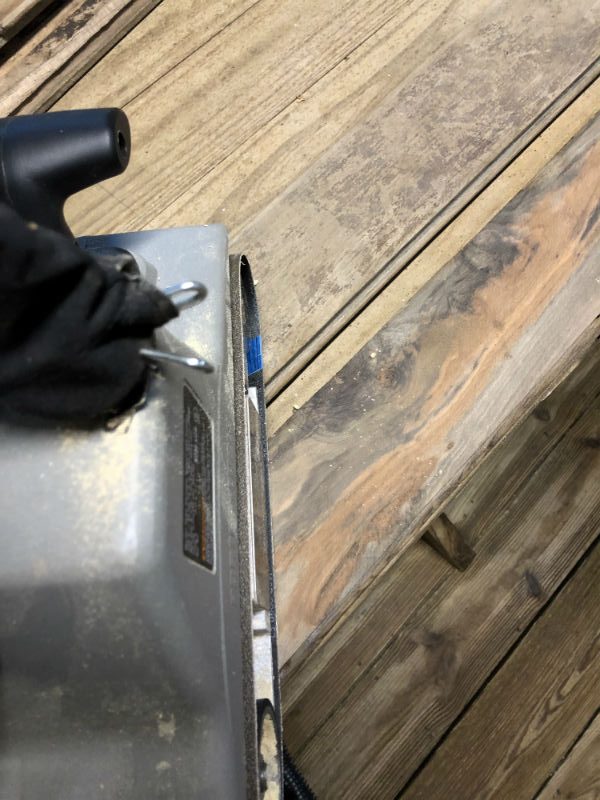
If there is dirt on the top or bottom surfaces, it’s going to wreak havoc on your planer blades. A paint scraper is good for removing that. A putty knife can help, too. You could even wash it, or pressure-wash it, and start the drying process all over again. But, there’s a cheaper, easier way. Belt sanding. It’s quick and it’s efficient.

Sand on a bias. First one 45-degree angle, then the other. It’s much faster than going with the grain. Use 80-120 grit sandpaper. You’re not trying to remove wood, and any scratches you make will be resolved in the planing process.

Here you see sanding on a bias, before and after. You can see how much dirt is on the surface of the board on the left, waiting to ruin your planer blades. The board on the right cleaned up nicely, revealing severe water damage and staining. One more reason to prepare extra boards.

Next month we will cover layout, joinery and glue-up.


Jim Randolph is a veterinarian in Long Beach, Mississippi. His earlier careers as lawn mower, dairy farmer, automobile mechanic, microwave communications electronics instructor and journeyman carpenter all influence his approach to woodworking. His favorite projects are furniture built for his wife, Brenda, and for their children and grandchildren. His and Brenda’s home, nicknamed Sticks-In-The-Mud, is built on pilings (sticks) near the wetlands (mud) on a bayou off Jourdan River. His shop is in the lower level of their home.Questions and comments on woodworking may be written below in the comments section. Questions about pet care should be directed to his blog on pet care, www.MyPetsDoctor.com. We regret that, because of high volume, not all inquiries can be answered personally.

May 062019
 

No Southern-fried Southern boy wants to be called a Yankee, but we share the characteristics of shrewdness and thrift. Thus, each month we include a money-saving tip from Sticks in the Mud woodworker, Jim Randolph. It’s OK if you call him “cheap.”

We’ve written a number of times about all of the good stuff that can be had on the side of the road, especially on garbage and refuse pickup days. Click here for free stuff. And here. And here.

Now, garbage piles are not the only place to find good stuff for your woodshop.

Dumpsters can be good. A family was building a pool house on my walking path a couple of years ago and the cedar scraps I got from there were fabulous. Commercial construction dumpsters can be lucrative, too. I once collected (and sold) enough scrap steel from one to buy a new tool. Huge pieces of wood that you and I would treasure, many commercial builders just throw away.

Two new homes are going up right down the street from our house. Now, there won’t be any nice wood until the trim process begins, but the framers are already tossing out nice-sized pieces of spruce, or, “whitewood,” as the industry likes to call it now. You might find it useful as unseen interior wood in furniture, or in repair and maintenance projects around the house.

You must constantly think safety when looking for discards. You could
put a nail through your shoe, you could fall from the dumpster and break your head open, you could fall into the dumpster and get hurt.

Still, the rewards can be terrific.

Not everything that gets ordered for a new home gets incorporated. In addition to thinking safety, think courtesy. And legality. Don’t trespass. Don’t take anything without permission. Don’t take anything that could still be used to build the house unless it’s in the dumpster. When I passed this house on my predawn Monday morning walk today, there were spruce 2x4s everywhere. Anything 14-½” or longer could be used for blocking in the walls.
This contractor made his own trash container. I’m eager to see how he’s going to empty it.
Meanwhile, there is a lot of good, usable wood in here. I’ll be talking to the contractor soon to get permission to “dig.”

Jim Randolph is a veterinarian in Long Beach, Mississippi. His earlier careers as lawn mower, dairy farmer, automobile mechanic, microwave communications electronics instructor and journeyman carpenter all influence his approach to woodworking. His favorite projects are furniture built for his wife, Brenda, and for their children and grandchildren. His and Brenda’s home, nicknamed Sticks-In-The-Mud, is built on pilings (sticks) near the wetlands (mud) on a bayou off Jourdan River. His shop is in the lower level of their home.Questions and comments on woodworking may be written below in the comments section. Questions about pet care should be directed to his blog on pet care, www.MyPetsDoctor.com. We regret that, because of high volume, not all inquiries can be answered personally.

May 032019
 

Welcome to “Tips From Sticks-In-The-Mud Woodshop.” I am a hobbyist who loves woodworking and writing for those who also love the craft. I have found some ways to accomplish tasks in the workshop that might be helpful to you, and I enjoy hearing your own problem-solving ideasPlease share them in the COMMENTS section of each tip.  If, in the process, I can also make you laugh, I have achieved 100% of my goals.

Over the next few posts and columns we’re going to look at how I make panels from used oak flooring.

Ever since I first made a project with used oak flooring, I’ve been in love with it.

About a year ago a pile of it appeared in front of a house I pass twice every day going to and from work. I’ve always been interested in that house because it has a gigantic garage/workshop combination in the back yard. A few years ago, when it was for sale, I was tempted to get an appointment to look, just for curiosity, but I never did.

This seems to be a great house. It has changed hands only once during the 25 years I’ve been driving past it. The building in the back appears to be a spacious shop and garage.

According to the county contract, debris on the side of the road is supposed to be picked up every week. It rarely happens that way. When these folks got new wood floors, the old stuff sat on the side of the road for weeks. And weeks. I’d pass it and think, “I have no use for that wood. Why would I clog up my wood storage with something I don’t even have a plan for?”

But, day after day went by, then week after week, and I longed to “save” that wood. (Who was going to save me from craving it?)

Finally, one rainy day, I took my little utility trailer to work with me, left the office a little early, and stopped on the side of the road in front of the house.

”Man!” I thought. “This wood is a lot rougher than it looked driving by.”

When I pulled up to load this wood, I discovered it was rough. Did
the contractor pull it up with a Bobcat?

Still, I was committed. I must have looked pretty funny to people passing on the busy country road, a guy in a long-sleeved dress shirt and tie picking up
trash on the roadside.

Not only was the lumber rougher than it looked initially, there was a lot more of it once I began picking up. I couldn’t throw it in the trailer fast enough.

By the time I got home, supper was on the table. I disconnected the trailer, aimed my big, rescued fan at the wet pile and went upstairs. It had been rained on for weeks, it could take a few more weeks to dry.

Finally, I needed my trailer for another job, so I began to empty it and organize. “I might as well remove nails as I go,” I thought. I try not to talk to myself when I’m in the garage. Brenda already thinks I’m a little nutso, there’s no point in giving her more ammunition.

As I took out nails I also sorted by length, tore off loose splinters and tossed into the burn pile any boards that were obviously useless. It was soon evident that there was a lot of wood here, and, even with the recently-renovated wood storage, I wasn’t going to be able to keep it at home. Off to work it went.

Vertically stored, this oak flooring can sit here at work, out of the way, until I need it.

Jim Randolph is a veterinarian in Long Beach, Mississippi. His earlier careers as lawn mower, dairy farmer, automobile mechanic, microwave communications electronics instructor and journeyman carpenter all influence his approach to woodworking. His favorite projects are furniture built for his wife, Brenda, and for their children and grandchildren. His and Brenda’s home, nicknamed Sticks-In-The-Mud, is built on pilings (sticks) near the wetlands (mud) on a bayou off Jourdan River. His shop is in the lower level of their home.Questions and comments on woodworking may be written below in the comments section. Questions about pet care should be directed to his blog on pet care, www.MyPetsDoctor.com. We regret that, because of high volume, not all inquiries can be answered personally.

May 012019
 

Set it and forget it.

That’s probably the way most of us treat calibration of our large power tools.

When my Delta Unisaw arrived, I spent days setting it up. Got the tables perfectly coplanar, squared the Biesemeyer fence just a hair out of perfect to reduce the risk of kickback, made the rule as accurate as I could, then lubricated every moving part with spray graphite. Since then, except for periodic adjustments to the fence, I don’t think I’ve lifted a finger to adjust anything.

The Delta Unisaw is a beast of a workhorse. Not much need for recalibration, though it never hurts to check one’s alignment.

And, that was 13 years ago.

Band saw? The fence gets squared often because it has to be taken completely off the saw to cut anything without it. You can’t just push it out of the way. The blade gets tensioned and detensioned. I do adjust the guide rollers fairly often, although I don’t understand how they get out of alignment. The drive belt suffered terminal rot last year, also after about 13 years. (I had to get all new tools after Katrina’s flood.)

Drill press? I check the squareness of the table to the drill bit once or twice a year, usually when I’m inspired that a hole has to be perfectly square to a board’s surface.

I can’t remember the last time I checked any settings on either miter saw, or the radial arm saw. That sucker is built like a deuce-and-a-half truck.

Speaking of beasts … since no 18-wheelers have been in my shop to run over this beast, I don’t worry much about it getting out of alignment.

What about you?

Jim Randolph is a veterinarian in Long Beach, Mississippi. His earlier careers as lawn mower, dairy farmer, automobile mechanic, microwave communications electronics instructor and journeyman carpenter all influence his approach to woodworking. His favorite projects are furniture built for his wife, Brenda, and for their children and grandchildren. His and Brenda’s home, nicknamed Sticks-In-The-Mud, is built on pilings (sticks) near the wetlands (mud) on a bayou off Jourdan River. His shop is in the lower level of their home.Questions and comments on woodworking may be written below in the comments section. Questions about pet care should be directed to his blog on pet care, www.MyPetsDoctor.com. We regret that, because of high volume, not all inquiries can be answered personally.

Apr 032019
 

No Southern-fried Southern boy wants to be called a Yankee, but we share the characteristics of shrewdness and thrift. Thus, each month we include a money-saving tip. It’s OK if you call me “cheap.”

I know I’m not the only cheap woodworker around. Alan Noel is a self-avowed cheapskate.

That means we go to the big chains, blue or orange, when we need lumber that doesn’t have to be special. Or straight. Or pretty.

However, there are times we just have to put the price behind us and go to a real lumber yard where we can get good lumber, exotics and specialty items.

You might call them your “hardwood dealer,” although such places often have pine and cedar and cypress, even plywood, as well. Usually the material isn’t dimensional, rather, it’s “random widths and lengths, one
edge straight.”

I find such trips to be inspiring. Of course, I’m usually already a little inspired because I’m there to buy some special wood for a special project, often for a special person.

Walking among the boards of white oak, red oak, walnut, cherry, quartersawn pine, ipe, and all the others just makes one’s imagination go wild.

Need some inspiration? Take a trip down to your hardwood dealer or real, old-timey lumber yard. Walk through the stacks and be inspired.

And, stay away from the wrong kind of lumber yard. Years ago several of us made a trip to Belize for fishing and exploring Mayan ruins. Eating was a bit of a challenge because we wanted to avoid Montezuma’s Revenge. At first, I was drinking iced tea because it had been boiled. Or Coca Cola because it was sterile. Or American beer because I assumed it had been bottled in the States. Then, it occurred to me, “All beer is sterile, even local beer made with local water.” American beer was “imported,” and I was paying a premium for it. Local beer was cheaper, and perfectly safe. Perfect combination for a cheapskate.

We felt safe eating at the hotel. One day we got brave enough to stroll down the street near the hotel and found a lumber yard. Well, actually, a Lumbaa Yaaad, as the locals would say it. But, this lumber yard no longer sold wood. It had been converted to a food and drink establishment. While we were feeling brave we decided to go in and eat and drink. I Googled “Lumbaa Yaaad” + “Belize City,” and some variations, and the only hits I got were domestic, one a bar in Seattle and one an actual lumber yard. It seems our one-time watering hole no longer exists.

Need some cheap inspiration? Visit your local or nearby fine wood dealer.


Jim Randolph is a veterinarian in Long Beach, Mississippi. His earlier careers as lawn mower, dairy farmer, automobile mechanic, microwave communications electronics instructor and journeyman carpenter all influence his approach to woodworking. His favorite projects are furniture built for his wife, Brenda, and for their children and grandchildren. His and Brenda’s home, nicknamed Sticks-In-The-Mud, is built on pilings (sticks) near the wetlands (mud) on a bayou off Jourdan River. His shop is in the lower level of their home.Questions and comments on woodworking may be written below in the comments section. Questions about pet care should be directed to his blog on pet care, www.MyPetsDoctor.com. We regret that, because of high volume, not all inquiries can be answered personally.

Apr 022019
 

Welcome to “Tips From Sticks-In-The-Mud Woodshop.” I am a hobbyist who loves woodworking and writing for those who also love the craft. I have found some ways to accomplish tasks in the workshop that might be helpful to you, and I enjoy hearing your own problem-solving ideasPlease share them in the COMMENTS section of each tip.  If, in the process, I can also make you laugh, I have achieved 100% of my goals.

Wheels.

What did the invention of the wheel mean to mankind’s development? The significance can’t be overstated.

Nor can wheels’ value be overstated in the one-man woodshop. In mine, everything is on wheels.

It starts with the UniSaw. I was about to order mine without the optional mobile base, when the lady on the phone said, “I deal with this all day long. Someone calls for a part, and they don’t have the model number. The shops with saws sitting on the floor have to stop everyone’s work to move the saw and extension table. The shops with wheels? ‘OK, I’ll be right back.’ And, in 15 seconds, they have the model number.”

I was sold.

It worked out so well that I ordered my Delta jointer with the factory mobile base.

The factory Delta jointer wheeled base is a nice, custom look. If only I’d waited and gotten the 8″ jointer!

Then, when I bought a DeWalt planer I sprang for the factory base, which is really a platform. I could have started with a universal mobile base and just built a cabinet, and, if I had to do it over, I would probably do that. I’m tall, and I found that adding some height made using the planer much, much easier. I ended up adding 6 x 6s plus a sheet of 3/4″ plywood to make the height comfortable.

As professional and custom as the jointer base is, the DeWalt planer base was, too, until I got hold of it and began customizing it to suit my height.

Click here to read the story of these bedside tables. When I delivered the new tables to the bedroom I couldn’t bring myself to put these on the burn pile, so I turned them into useful shop furniture and storage. Not pretty, just useful.

The trusty Craftsman spindle sander on top, random orbit sanding disks inside, a bedside table on a universal base makes a pretty good sanding center.
A mortising machine is mostly useless unless it’s immobile. The old bedside table fills the bill and makes it portable, too. When it’s not being immobile.

Ditto for the yet-unfinished Norm Abram Router Station.

Well, I say the router station is unfinished, but, the fact is, I never made the drawers for the bottom and I probably never will, so maybe it’s as finished as it will ever be. I’ve discovered that I like being able to slide the routers, in their boxes, in and out of the bottom storage area. I fail to see the advantage of hiding them in drawers. One of these days I need to remove the drawer slides. And, figure out where the other half of the slides is. Actually, they are safely stored in PVC pipes.

The best thing about having tools on wheels is that the infrequently-used tools can be in a different part of the shop and not clutter the main working area. It’s both safer and neater.

Think of this area as a little farm, a parking area for power tools that can quickly and easily be moved into the main shop area, or can be used right where they are if the task is small and quick.

Jim Randolph is a veterinarian in Long Beach, Mississippi. His earlier careers as lawn mower, dairy farmer, automobile mechanic, microwave communications electronics instructor and journeyman carpenter all influence his approach to woodworking. His favorite projects are furniture built for his wife, Brenda, and for their children and grandchildren. His and Brenda’s home, nicknamed Sticks-In-The-Mud, is built on pilings (sticks) near the wetlands (mud) on a bayou off Jourdan River. His shop is in the lower level of their home.Questions and comments on woodworking may be written below in the comments section. Questions about pet care should be directed to his blog on pet care, www.MyPetsDoctor.com. We regret that, because of high volume, not all inquiries can be answered personally.

Apr 012019
 

Rhythm. Momentum. There’s a lot in favor of getting started and keeping going.

Clearly, that applies to writing. Lots of writers suffer from writer’s block. My cure is to just start writing. I can begin typing total nonsense and, pretty soon, it will turn into something usable, just from getting started.

However, it’s different when you have a storyline going and, all of a sudden, “Uh-oh! What the heck comes next?”

That can happen in a woodworking project, too, and I’m betting many of you have experienced it.

I was making a “bench” for grandson Owen when it hit me. It was a plywood project because of the intersections and because Owen lives in a part of the country where temperature and humidity swings are horrendous. Wood movement ruled out making solid-wood panels that would shrink in winter and swell in summer.

Iron-on wood veneer covered the exposed edges of ply on the sides and top. Even though the shelves sat in dados, I wanted them secured with screws, which meant the screw heads either had to be celebrated or covered. I elected to countersink them and cover the holes with rope molding.

That’s where I ran into trouble.

It was obvious that a simple miter wasn’t going to make the sides and the front meet and close the gap. I first tried cutting some quarter-round with a hand saw, rather than waste the rope molding as I experimented. That wasn’t working, so I began to experiment with compound angles.

Could this compound setting make the angle I was looking for?

It took a while, but I finally made it work.

Before that, though, when a bit of experimentation didn’t pay off, I got frustrated, threw up my hands and quit.

For a while. I felt defeated. Frustration made me feel stupid. How hard could these angles be? Surely someone who made As in geometry and trigonometry could figure this out.

And, I did, but not before taking an extended break to heal from the feeling of being beaten down.

All’s well that ends well. Owen is so happy it made him applaud. That’s all the approval a grandfather needs.
Did we have more frustration after solving the molding problem? You bet! The dimensions Owen’s mom gave me wouldn’t quite fit in my Pathfinder.
That meant it was off to the U-Haul Store for delivery. Here we are in Timbuktu, getting gas. At least the trailer didn’t have to make the return trip.

What about you? After you log your vote, use the Comment section to tell us how you overcome frustration, defeat and setbacks.