
Return to the June 2016 issue of Wood News Online
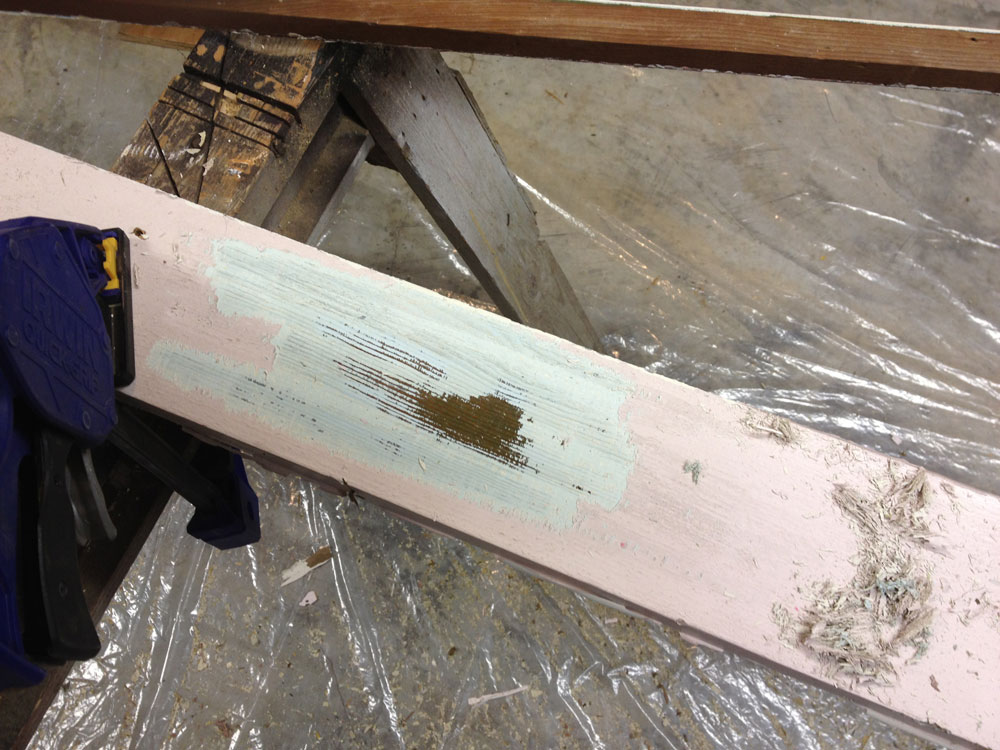
Step one with these 100+-year-old baseboards was getting the years of finish off. There was the pink phase, the white phase and the original varnish phase.
After paint remover and scraping the varnish stood up and said, “I’m here to stay.” To which I replied, “Here planer, planer!”
Nasty, annoying swirls. And, no extra time for messing around to find a fix.
Resin? We’ve got resin to spare!
No Southern-fried Southern boy wants to be called a Yankee, but we share the characteristics of shrewdness and thrift. Thus, each month we include a money-saving tip. It’s OK if you call me “cheap.”
When I first got my Festool Sander, an ETS 125, followed several months later by a 5″ Rotex RO 125 FEQ, I immediately noticed how much longer Festool Abrasives last, compared to other name brands I’ve used. Because of their longevity, and the associated cost, I hoped to use some again. However, I was flinging used disks with no particular pattern.
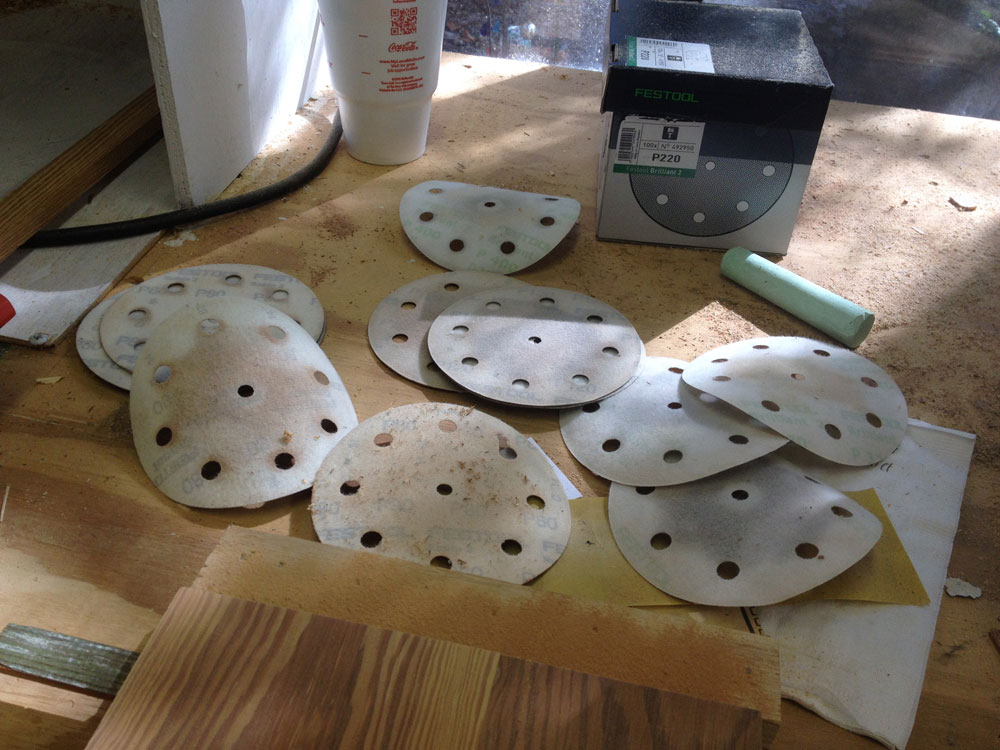
This random orbit disk random flinging technique wasn’t getting it. Some organization was needed.
When working on a small project, like this stool, I usually sand all the panels with one grit before moving to a higher number.
My new routine is to keep one of my sandpaper-slicing jigs handy and, as a disk dies, slap it scratchy-side-down onto the jig with the three middle holes lined up on a scoring groove.
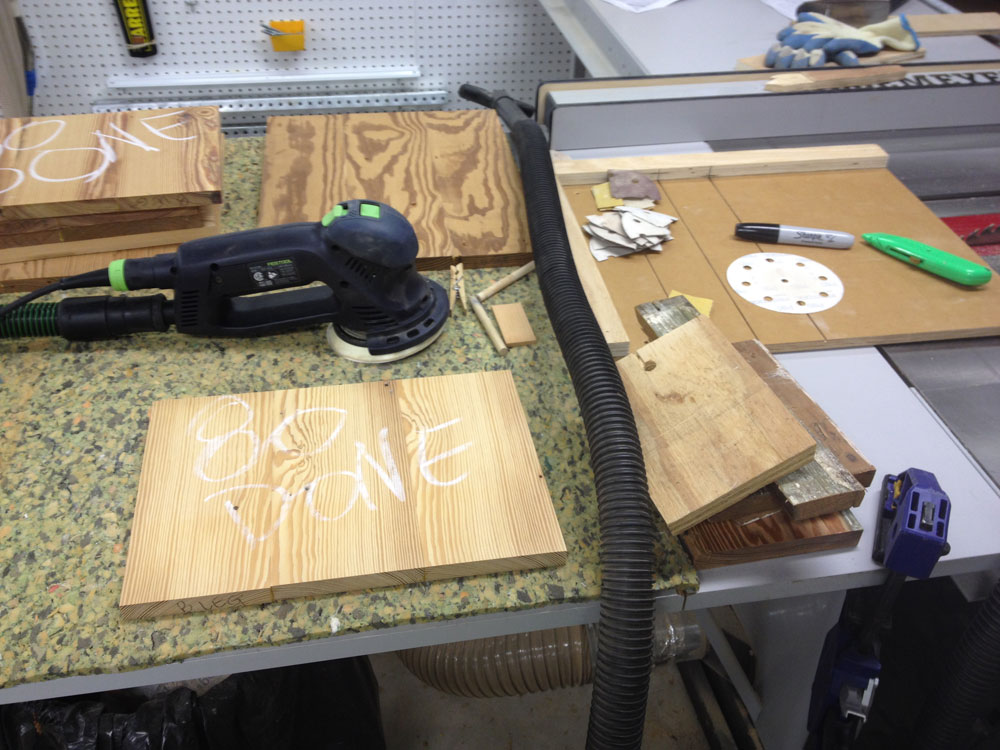
Using the jig you use to cut sandpaper for your quarter-sheet sanding pad, just line it up and follow the dado. Haven’t made that jig yet? Click here to follow the steps.
Flip out the retractable knife and cut it in half, rotate 90?, cut again and you have four little pieces of sandpaper that can be used for hand-sanding.
If one is too worn out, you’ll know quickly, and you can pitch it. This technique eliminates using tired, old disks that might otherwise get into your “good, but used” stack.
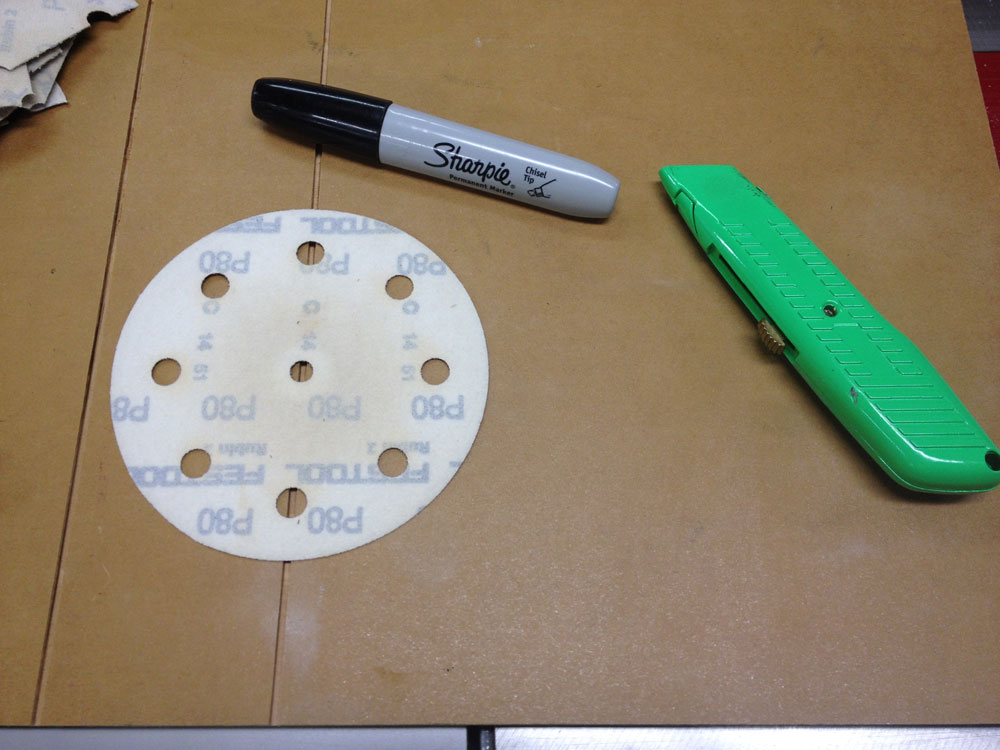
If one of your cut-up sandpaper remnants doesn’t have the grit imprinted, take a few seconds to jot it on the back. You’ll be glad you did!
Jim Randolph is a veterinarian in Long Beach, Mississippi. His earlier careers as lawn mower, dairy farmer, automobile mechanic, microwave communications electronics instructor and journeyman carpenter all influence his approach to woodworking. His favorite projects are furniture built for his wife, Brenda, and for their children and grandchildren. His and Brenda’s home, nicknamed Sticks-In-The-Mud, is built on pilings (sticks) near the wetlands (mud) on a bayou off Jourdan River. His shop is in the lower level of their home. Questions and comments on woodworking may be written below in the comments section. Questions about pet care should be directed to his blog on pet care, www.MyPetsDoctor.com. We regret that, because of high volume, not all inquiries can be answered personally.
Welcome to “Tips From Sticks-In-The-Mud Woodshop.” I am a hobbyist, not a professional, someone who loves woodworking, just like you do. I have found some better ways to accomplish tasks in the workshop and look forward to sharing those with you each month, as well as hearing your problem-solving ideas.
The building in which our clinic is housed is over 125 years old. That is evident when we climb into the attic, as the framing members are visibly full-dimensioned two-bys.
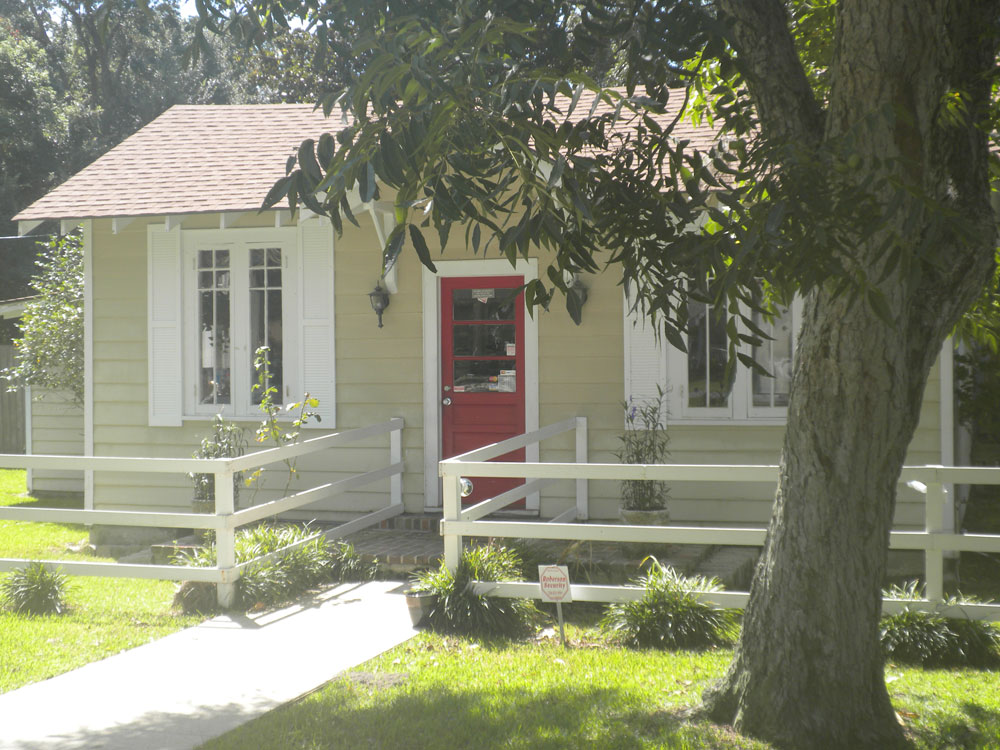
At only 824 square feet, we’re not expansive, we’re cozy. Our clients and patients feel right at home when they visit.
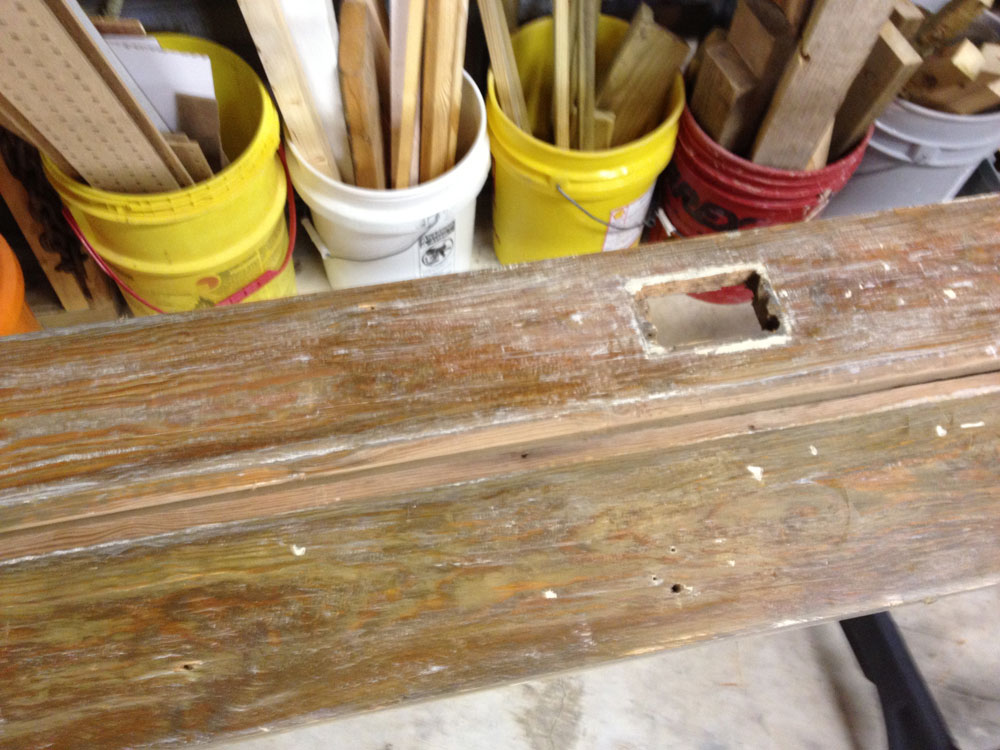
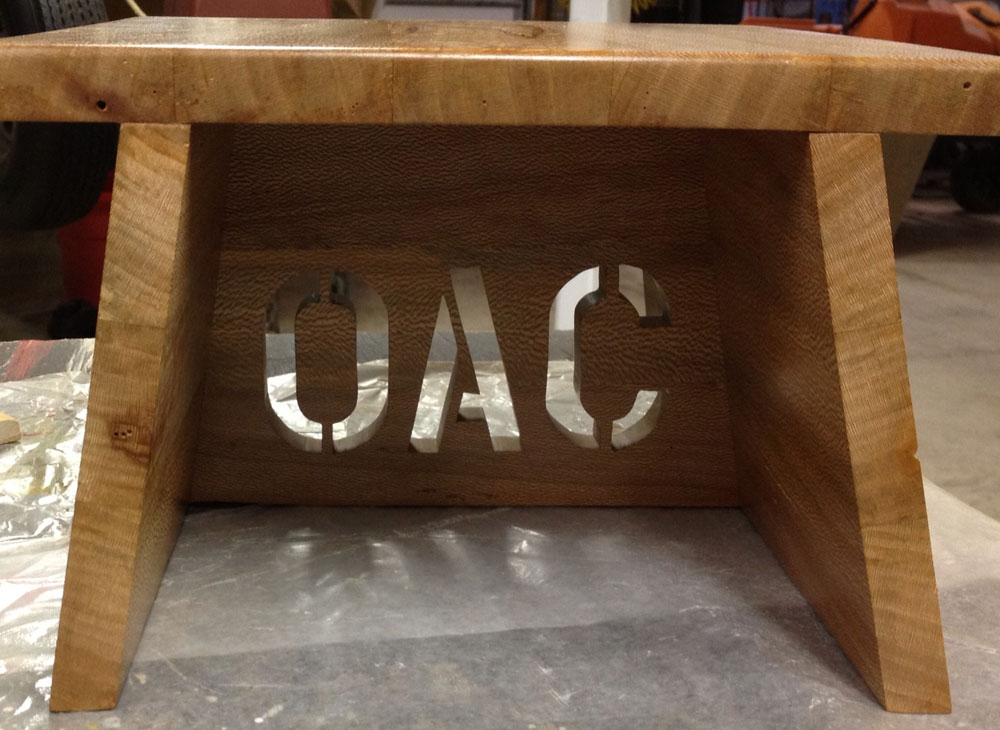
During one of the many times I’ve painted in 36 years of ownership, I took up the baseboards and replaced them with new boards. The varnish on the old boards was simply impossible to clean up, so it was much easier to just start from scratch. I couldn’t bring myself to throw them out and now I’m using those boards to make children’s stools for the two sons of our receptionist. I like using wood with a connection to the project. Their age is exhibited in grain that one cannot buy in today’s pine.
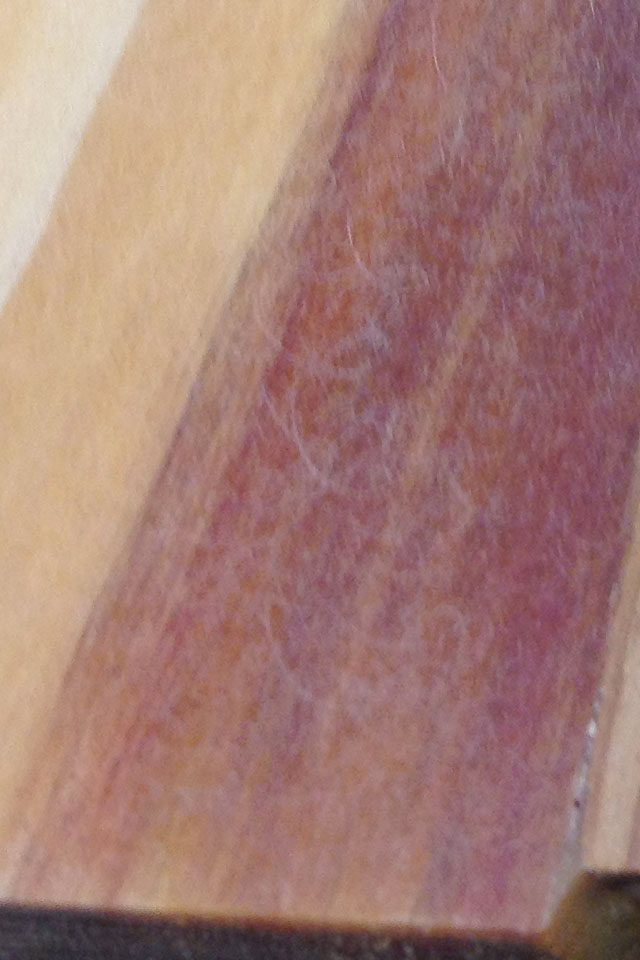
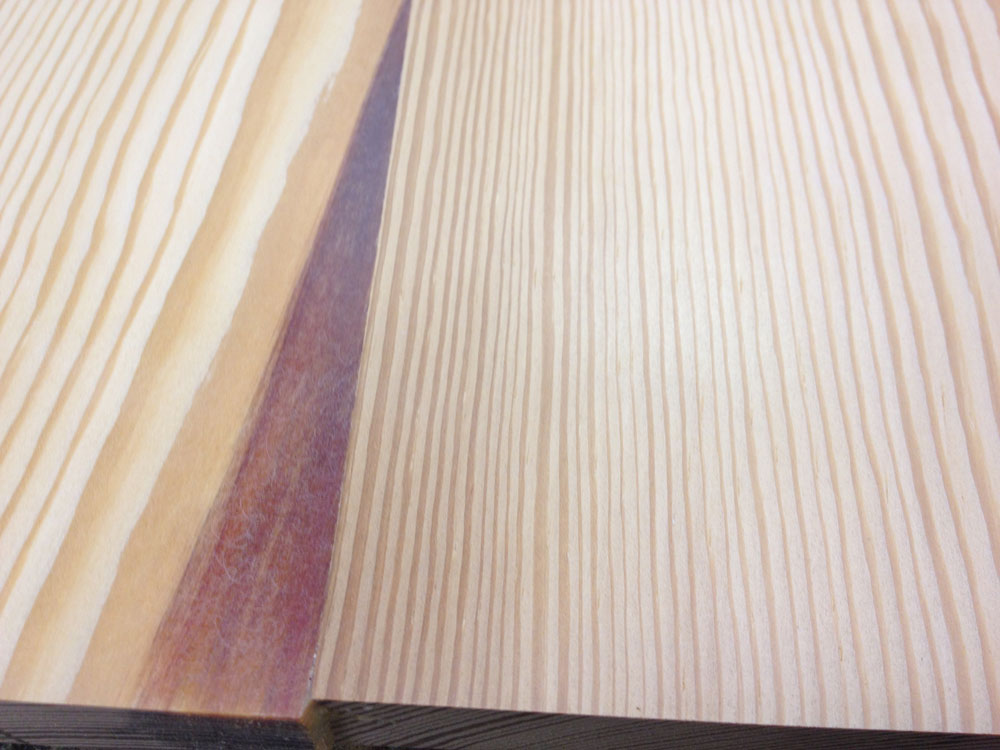
The wood cleaned up beautifully with a little planing, after which I began gluing up panels. The Festool Domino made panel component alignment simple, after which I began sanding. I began with Festool Rubin 60 and determined the panels would need four passes on each side, alternating between vertical and horizontal patterns.
Between watching a decidedly un-presidential debate and the evening news, I found the mindlessness of sanding needed just a bit more mindfulness. I couldn’t seem to remember how many passes I’d made. To remedy that problem, I found some scratch paper on the table and tore it into four roughly equal-sized pieces, writing on them “1,” “2,” “3” and “4.” Now all I had to do was remember to flip over a number at the end of a pass.
Or, was it at the beginning of the pass?
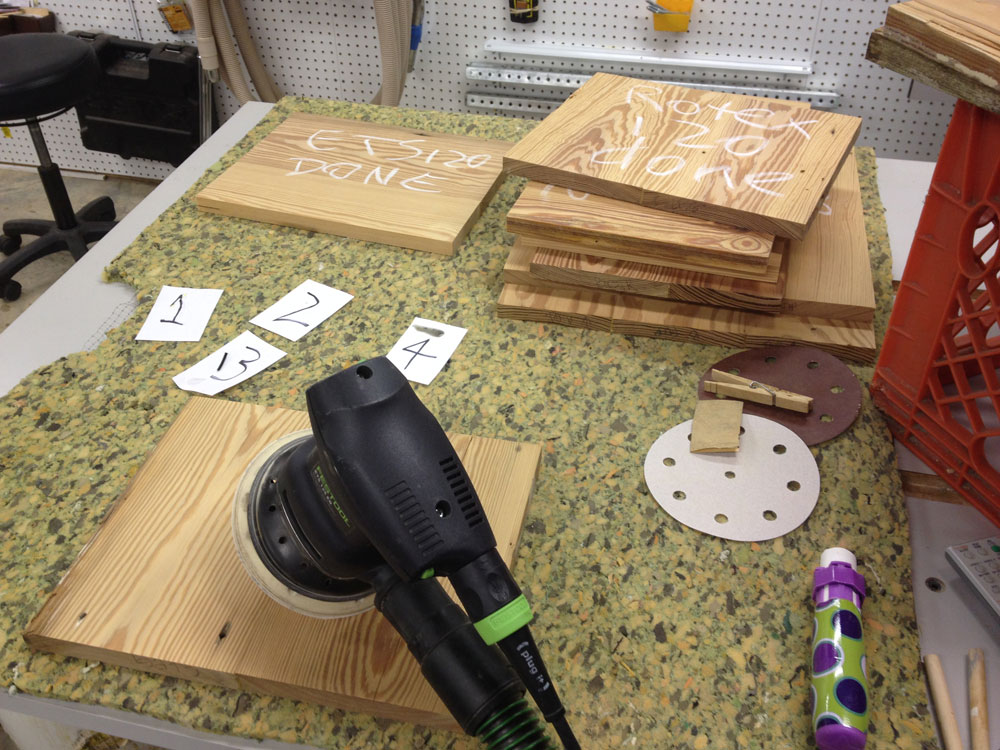
Four little scraps of paper. Save ‘em for next time if you’re really cheap, like me. Or, make new ones next time and it’s one less thing to remember where you put them!
Jim Randolph is a veterinarian in Long Beach, Mississippi. His earlier careers as lawn mower, dairy farmer, automobile mechanic, microwave communications electronics instructor and journeyman carpenter all influence his approach to woodworking. His favorite projects are furniture built for his wife, Brenda, and for their children and grandchildren. His and Brenda’s home, nicknamed Sticks-In-The-Mud, is built on pilings (sticks) near the wetlands (mud) on a bayou off Jourdan River. His shop is in the lower level of their home.Questions and comments on woodworking may be written below in the comments section. Questions about pet care should be directed to his blog on pet care, www.MyPetsDoctor.com. We regret that, because of high volume, not all inquiries can be answered personally.
The germ of this post comes from Steven Johnson. You’ve heard of him. If not, get to know him by clicking here to learn more about the Down To Earth Woodworker.
Steve wanted to know what music you and I have on our “workshop playlists,” what music puts us in the mood for woodworking and gets us going.
After you answer the poll, leave us a comment and tell us whether you take the term “playlist” literally. On your phone or MP3 player, do you have a playlist, a set of songs, that you reserve for woodworking music time?
Or, do you, like me, listen to different music at different times?
Though I’m not a trained musician like The Renaissance Woodworker, Shannon Rogers, music has always been hugely important to me. Growing up in the 50s and 60s, I feel we had some of the greatest music ever written. There were phases in which I favored Pop/Top 40/Rock and Roll, but I had several country music phases, too. Back then, I went back and forth. Today, I’m likely to listen to oldies one day and country the next.

I built this shelf to get my stereo as far from dust generation as I could, and added the old CRT television when it was replaced upstairs by a flat screen. I like to catch the evening news while I’m working.
Our kids got me a 7.1 Surround Sound system for my shop, which I love and still use. But, as a child of the 60s who grew up with music that was REALLY LOUD, I just had to have big 3-way speakers to make A LOT of noise.
There are no music-less spots in our garage. Even the saw table is surrounded by speakers.
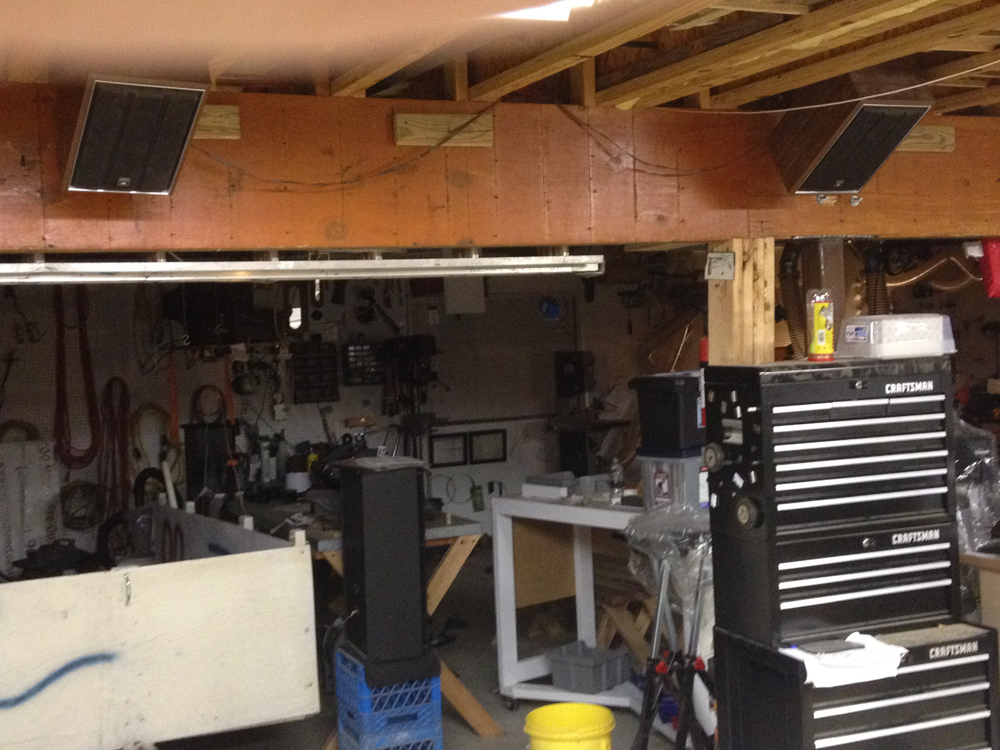
In this area where I usually do finishing work, I found I couldn’t be so far from music, so I dug up these old speakers from storage to soundstage this area, too.
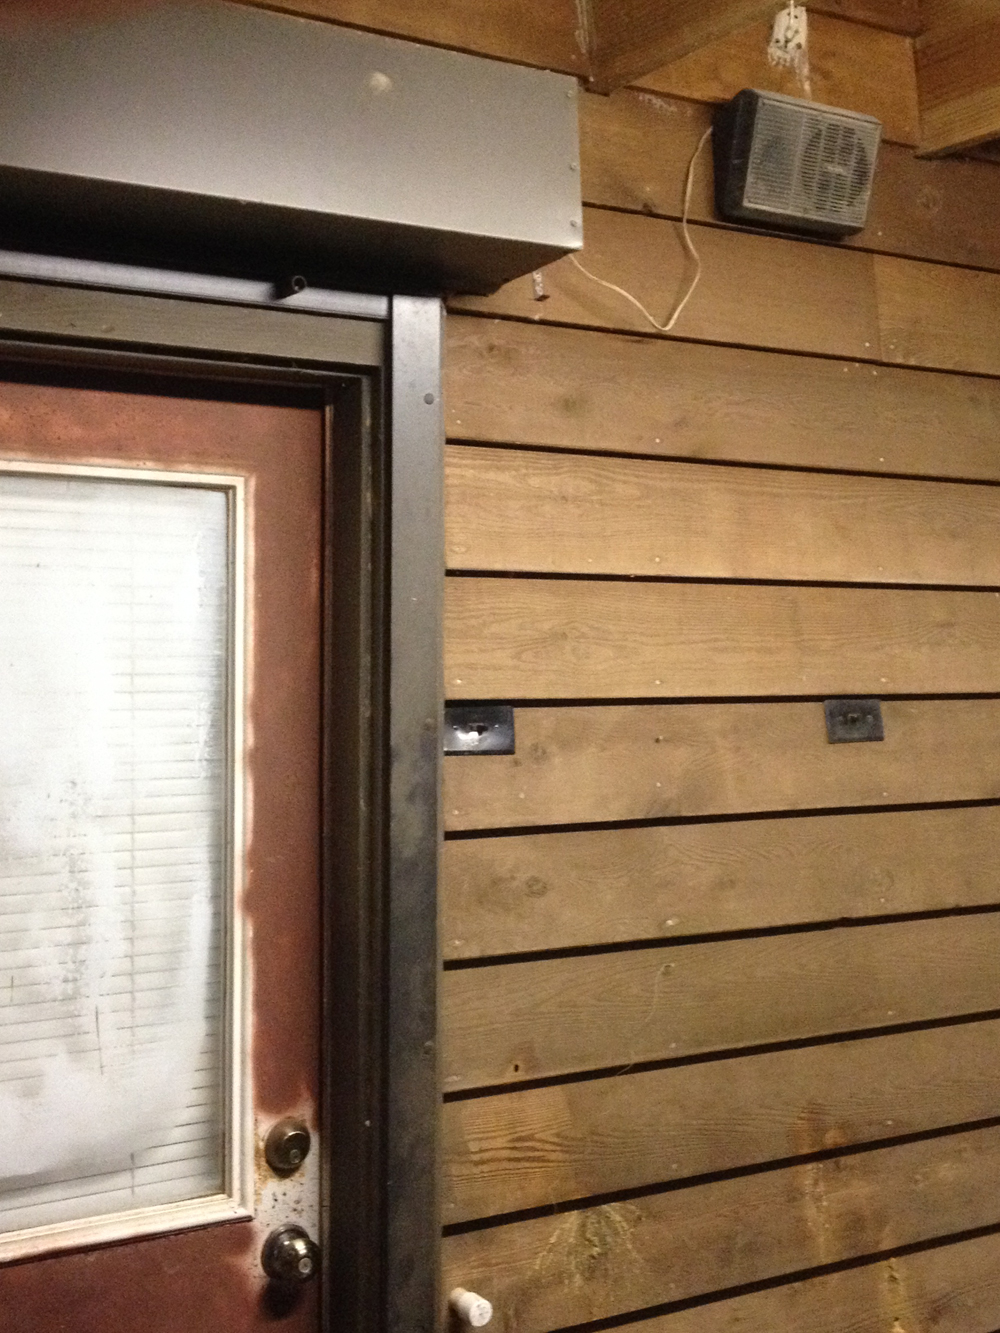
If I’m enjoying the great outdoors, such as sanding a big project, I have to have music here, too. There is another identical stereo speaker to the left. These are some old Realistic Radio Shack speakers I bought to put in my 1977 Toyota pickup, which is why I don’t mind them staying outdoors. This area is rain-protected by a screened porch above.
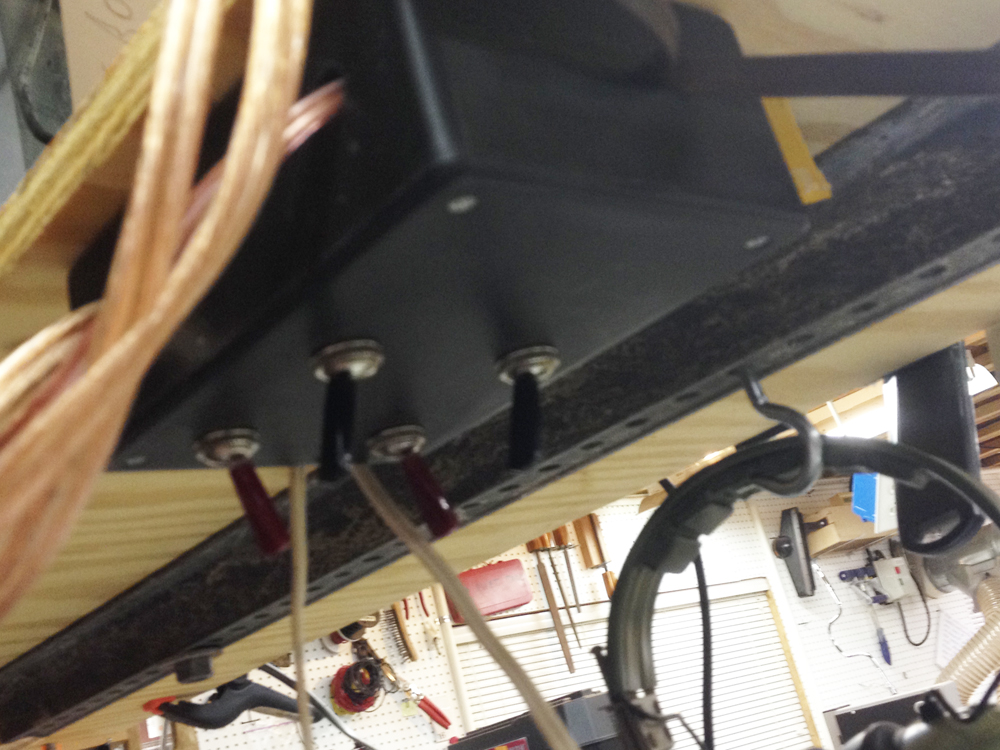
To route the music where I am, I used my US Air Force electronics training to build this and/or gate.
Now, we know what Steve likes, as he expounded on the cultured music he listens to in this post.
No Southern-fried Southern boy wants to be called a Yankee, but we share the characteristics of shrewdness and thrift. Thus, each month we include a money-saving tip. It’s OK if you call me “cheap.”
This is actually a Steven Johnson trick, but I’m pretty sure he gave it to me because he knows I’m constitutionally incapable of throwing anything away.
I’m known for quite a few quirks, and one of them is that I want all of the socks in my drawer to match. That way, I don’t have to worry about pairing them, I just reach in the drawer, grab two, and I’m on my way. It requires purchasing quite a number of pairs at a time; otherwise they don’t fade at the same rate and thus won’t match.
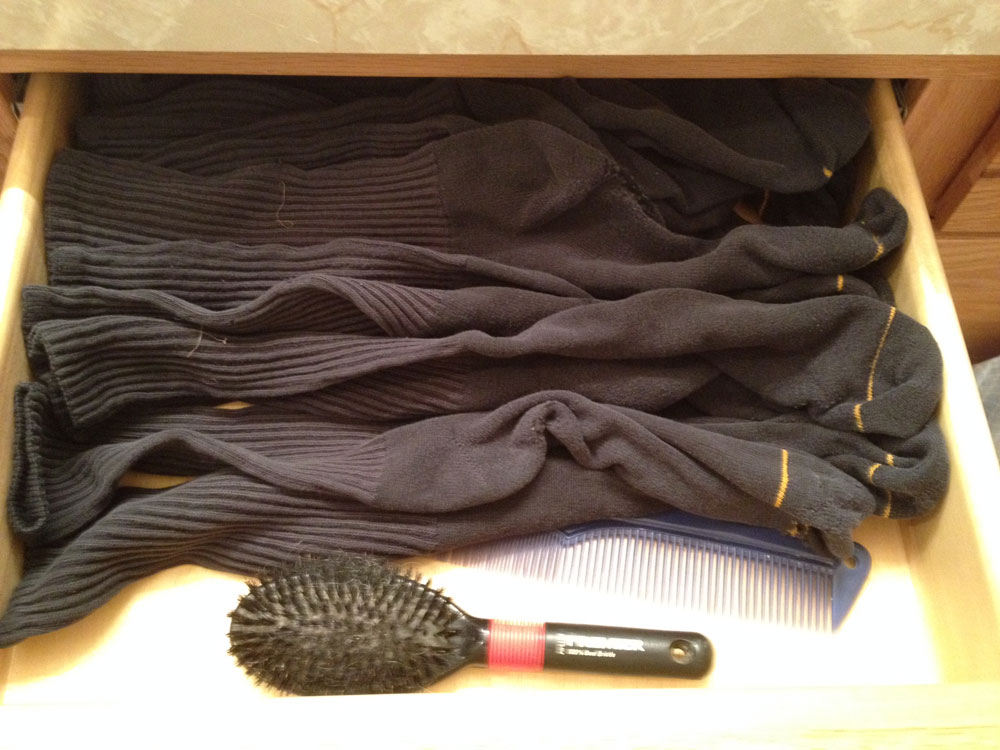
Grab and run. Every sock in the drawer matches and they all fade and age at the same rate. When the bottom wears out, it becomes a polishing rag, finish application rag, or cleaning aid. Rotate your stock,” as they say at the grocery store, and they mostly wear out at the same time, too.
Steve’s sock tip is: “Cut the elastic upper part of an old sock, put it over your wrists to span the area between a glove and your cuff, especially handy when installing insulation.”
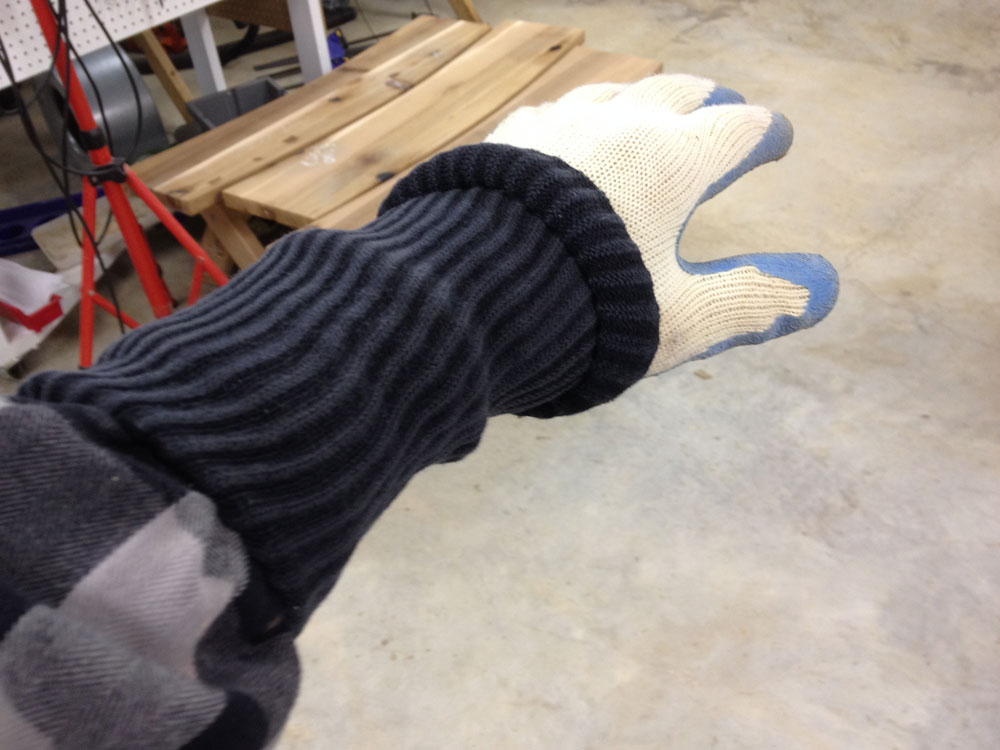
First the shirt, then the roll up the elastic part of the sock, put on the glove. Now, span the connection between the shirt and glove with the sock by rolling it out. Add tape if it makes you feel more secure.
If that boy sticks with me I might be able to teach him something about frugality!
Jim Randolph is a veterinarian in Long Beach, Mississippi. His earlier careers as lawn mower, dairy farmer, automobile mechanic, microwave communications electronics instructor and journeyman carpenter all influence his approach to woodworking. His favorite projects are furniture built for his wife, Brenda, and for their children and grandchildren. His and Brenda’s home, nicknamed Sticks-In-The-Mud, is built on pilings (sticks) near the wetlands (mud) on a bayou off Jourdan River. His shop is in the lower level of their home. Questions and comments on woodworking may be written below in the comments section. Questions about pet care should be directed to his blog on pet care, www.MyPetsDoctor.com. We regret that, because of high volume, not all inquiries can be answered personally.
Welcome to “Tips From Sticks-In-The-Mud Woodshop.” I am a hobbyist, not a professional, someone who loves woodworking, just like you do. I have found some better ways to accomplish tasks in the workshop and look forward to sharing those with you each month, as well as hearing your problem-solving ideas.
I’m not sure whether this problem occurs because of reaching a “certain age,” or whether it’s something inherent in the design of these thumbscrews. Whatever the cause, I hadn’t owned this Dewalt scroll saw long before I realized that loosening these blade-holding devices was going to be a challenge for me.
It might be me. I’ve never been strong. Once, when I was in high school, we were running track during PE and the coach asked someone to go inside and get a calendar to time me.
OK, so I have emotional scars. I didn’t let that hold me back. Being an athlete was never on my radar.
Now, there are at least a dozen ways to get around this challenge:
Regardless of the approach, resist the temptation to over-do your leverage, lest you strip threads or otherwise break a crucial part of the saw.
Here’s how I made my little wrench:
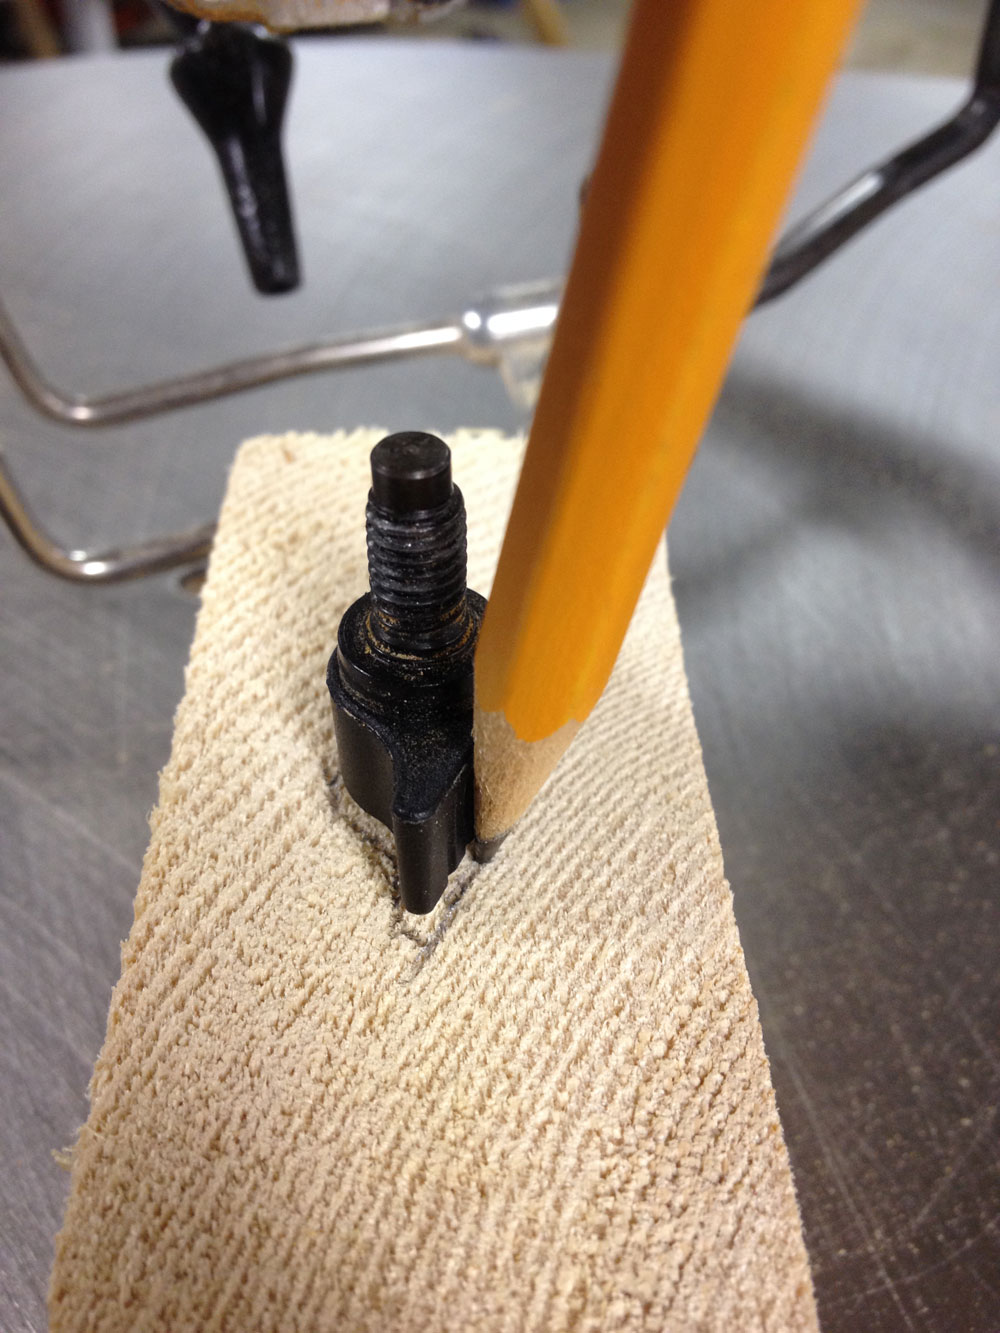
I started by removing the thumbscrew from the saw, drawing the outline of its head on a scrap spruce block. You want some degree of accuracy here. The fit needn’t be too tight, or it’s hard to get on and off. But, you don’t want it sloppy, either.

A few passes into the outline on the drill press removed the bulk of the material…
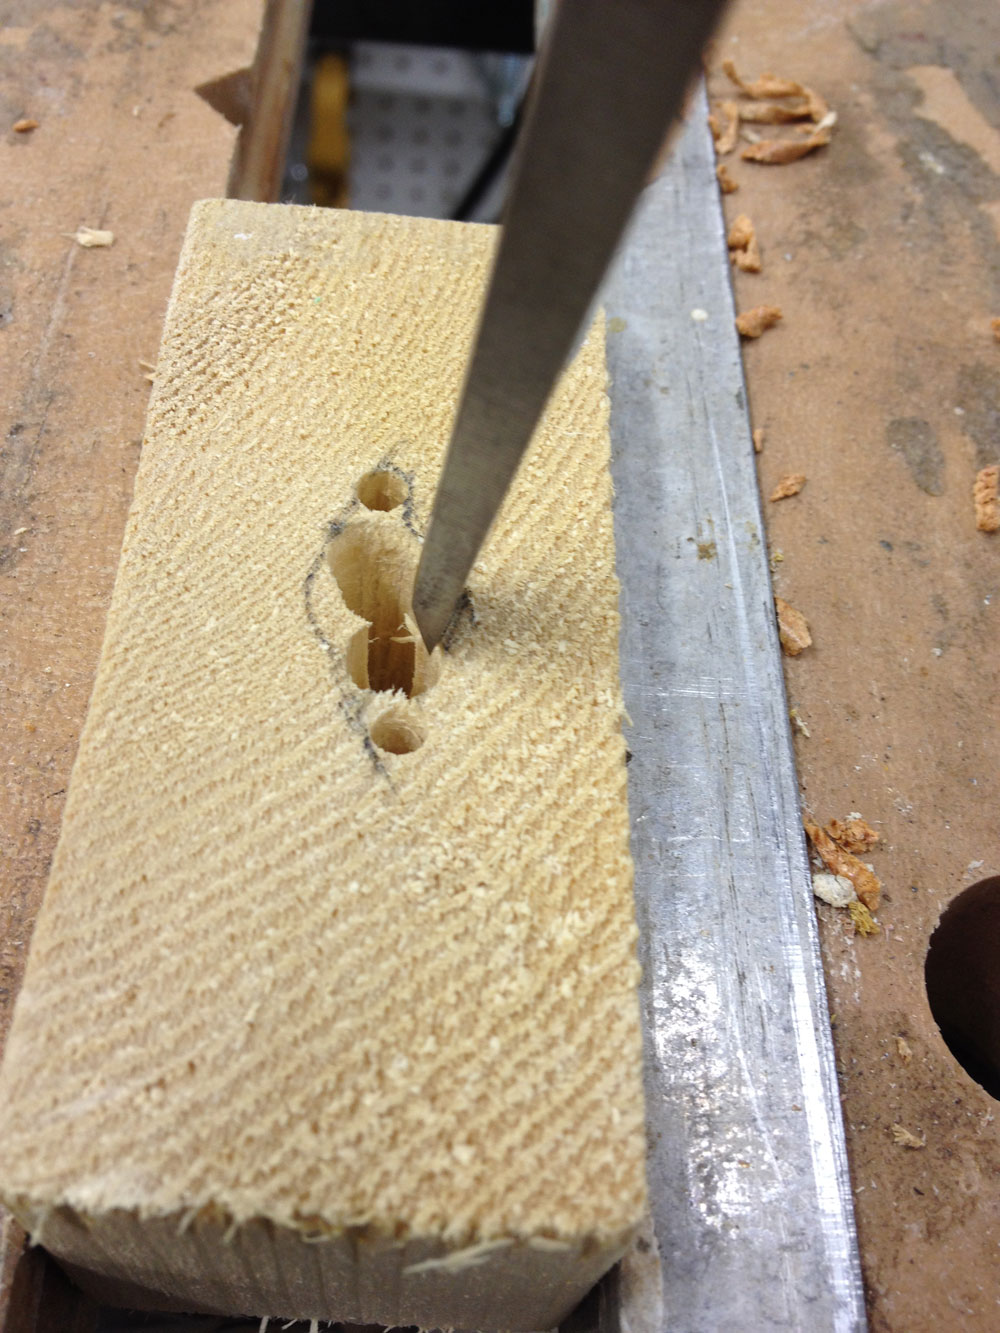
… leaving light work for a 1/4″ chisel.
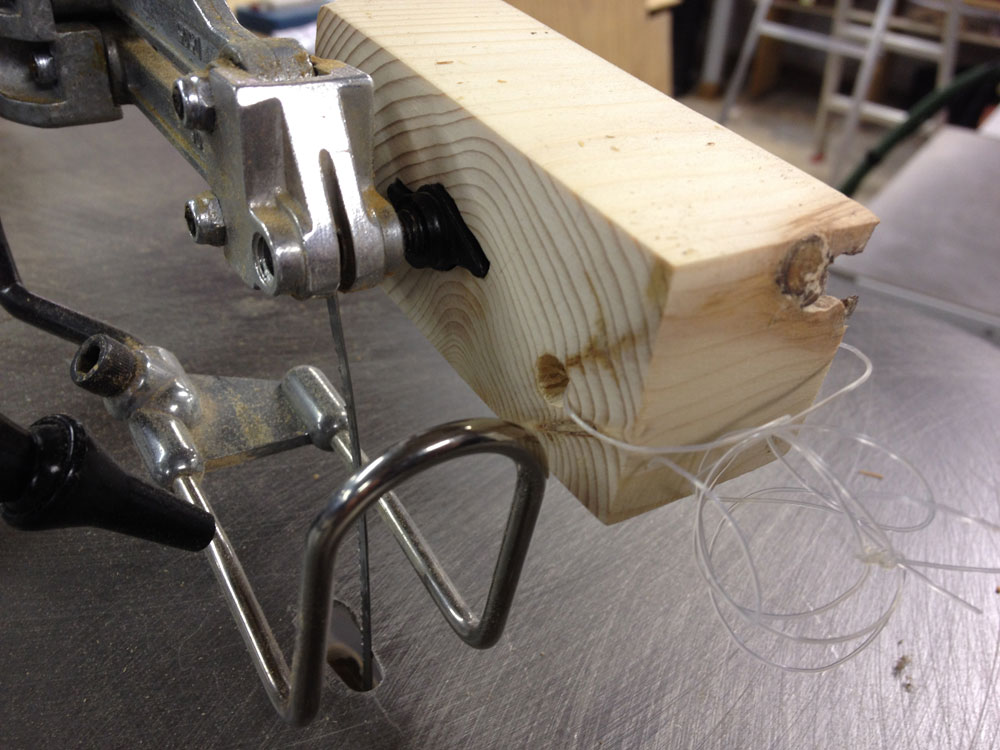
The final product. If you want you can sand the block smooth, put on some stain and some finish. Or, paint it to match your brand of scroll saw. I put a piece of fishing line on mine to hang it from the saw so it’s never far away.

If you have a thumbscrew that’s more of a “knob” than a “wingnut,” the 1/4″ chisel probably isn’t going to allow you to fit the wood to those round tips. All is not lost, there is an opportunity here! Just click on this link to purchase a set of carving gouges. Any opportunity to buy a new tool!
Jim Randolph is a veterinarian in Long Beach, Mississippi. His earlier careers as lawn mower, dairy farmer, automobile mechanic, microwave communications electronics instructor and journeyman carpenter all influence his approach to woodworking. His favorite projects are furniture built for his wife, Brenda, and for their children and grandchildren. His and Brenda’s home, nicknamed Sticks-In-The-Mud, is built on pilings (sticks) near the wetlands (mud) on a bayou off Jourdan River. His shop is in the lower level of their home.Questions and comments on woodworking may be written below in the comments section. Questions about pet care should be directed to his blog on pet care, www.MyPetsDoctor.com. We regret that, because of high volume, not all inquiries can be answered personally.