chris_black

Jun 082011
 

Are They Any Good?

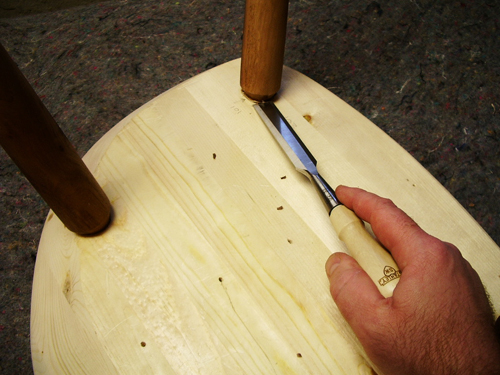
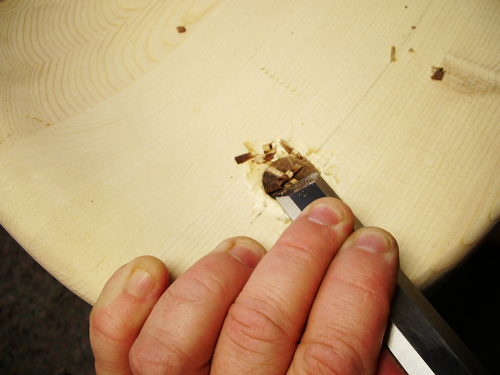
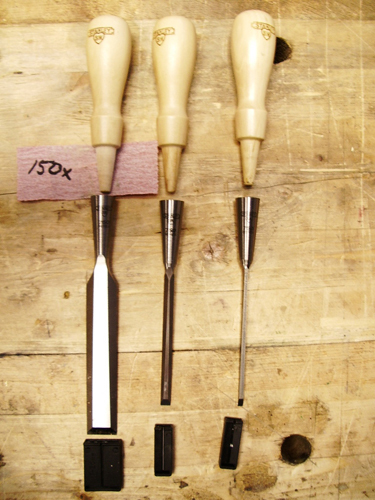
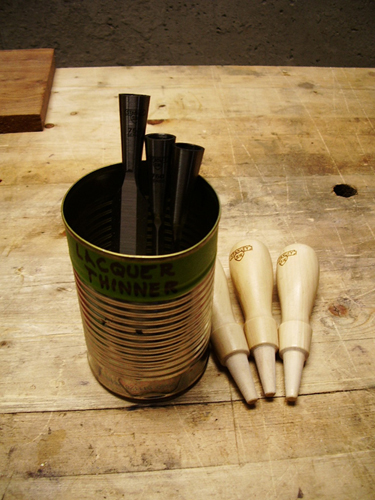
So, I’ve spent the last week using Stanley’s reissue 750 socket chisels in sizes 1/8″, 1/4″, and 3/4″. I didn’t set up any arbitrary test criteria or elaborate measuring devices to determine who knows what. All I did is what I normally do with chisels during a workday in my cabinet shop. You know, pare chamfers, clean out glue glops, chop joints and open paint cans. I’m kidding about the paints cans. For that I use a pocketknife.

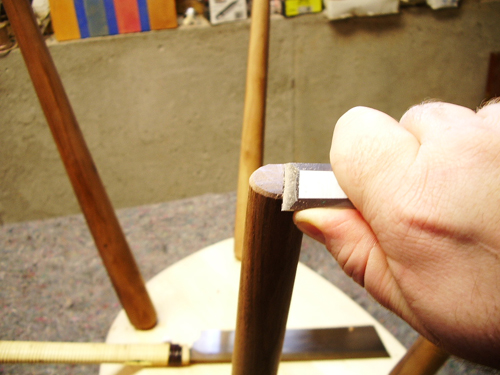
Over the years I’ve decided I want 4 things in a new bench chisel. It has to be well machined from the factory – I can’t afford to spend the entire day tuning it up. It must stay sharp for a reasonable amount of time – The edge can’t deform every time I hit it with a mallet. The handles have to be comfortable and not prone to splitting or breaking. I’d like the tool to look nice as well. I think a little care in form and design adds to the innate pleasure of using a fine tool.

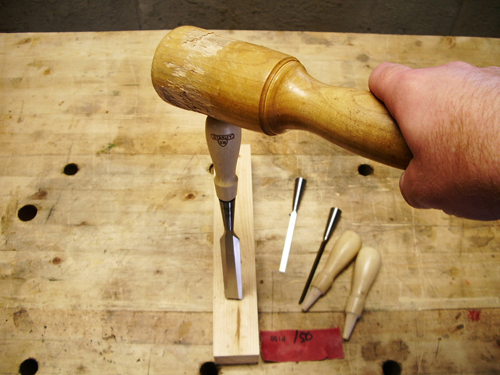
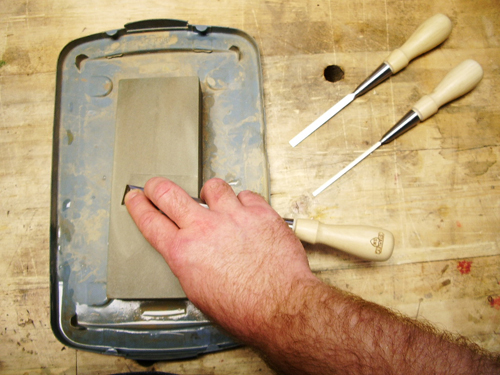
As I mentioned above, I found these new 750s to be well machined out of the box. I got the backs flat quickly. You’d expect this from a premium tool. Were they as perfect in form as, say, the Lie-Nielsen’s? No, but the lower price of the Stanley’s adequately reflects this. After the initial sharpening, I only had to touch up each edge on either a strop charged with honing compound or my 8000 grit water stone during this evaluation. This seems right to me based on my experience with other premium chisels. They definitely held up better edgewise than any of the economy line chisels I own. Now all this is purely anecdotal on my part of course, but I feel I’ve gained a good grasp over the years on how long a chisel edge should last. As for the handles not splitting, only time will tell. Hornbeam is pretty tough stuff after all. In my opinion, nothing beats a socket chisel for looks and longevity. Socket chisels are definitely worth the extra money compared to say a tang fitted handle.

Bottom line? I’m enjoying Stanley’s new 750s. I feel the price to quality ratio is certainly there. They are a great option if you’ve always wanted a set of socket chisels and either couldn’t find the originals or afford the ones on the used market. You’ll have to spend a little more time on these to get them pretty if that’s important to you, but you’ll save money. I, for one, look forward to rounding out my collection with some fill-in sizes soon.

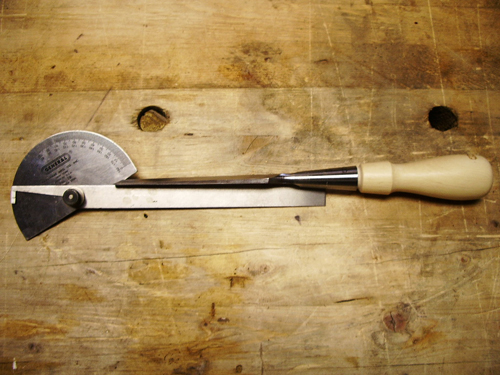
Here’s a parting tip a friend suggested. While the handles are off, why not make a pattern by tracing around one of the handles on a piece of scrap. Label the pattern and store it in case you ever need to turn a replacement.


Chris Black makes cabinets, sharpens hand saws and sells old woodworking tools. Send him an email at redscabinet@gmail.com and follow him on twitter @chrislblack.

To see our full selection of Stanley Sweetheart chisels, CLICK HERE:

Jun 072011
 

New Chisel Preparation

In my last post, I discussed Stanley’s reissue of their famous 750 socket chisel.  In today’s post, I’ll go over how I prepped them for use in my cabinet shop, and I’ll give you my first impressions of them.

After I got the chisels out of the box, I visually inspected them. The machining, although not as refined as the Lie-Nielsen version, is certainly clean with tight milling marks as opposed to the haphazard sanding swirls you find on economy tools. More on that later. I found the hornbeam handles nicely turned and defect free.

Because socket chisels are prone to loose handles, I removed the handles to sand their tapers for more friction in the sockets. Handle removal is easy. With the edge protector on, firmly grip the blade and lightly rap the handle on a piece of soft wood. It should come off with little effort. Some light sanding with some 150x paper removed the factory finish from the taper ensuring enough tooth to grip the interior of the socket once the handle was driven home.


With the handles still off, I removed the shipping lacquer from the chisels by soaking them in a soup can full of lacquer thinner. Five minutes was all it took to dissolve the film. A quick go with a Scotch-Brite pad buffed away the last bit of residue.


There are many ways to reseat a socket chisel handle. My technique is simply to place the cutting edge of the chisel on a piece of softwood and give the top of the handle a good bash with a wooden mallet. No more to it than that.


I chose to flatten the back of these chisels with my 200 grit Japanese waterstone. Of course you could use sandpaper on glass, a diamond stone or any other abrasive you like. I was pleased to find that the 3/4″ chisel only took 2-3 minutes to remove the factories milling marks and to get the tool’s back flat to my satisfaction. The small sizes took slightly less time. Nice.

As for coarse sharpening and bevel shaping, I like a slow speed grinder (around 1750-2000 rpm’s) with a 60 grit aluminum-oxide wheel. The wheel pictured happens to be a Norton Blue wheel. The bevel angle from the factory came in at 30 degrees. Right where I like it.


So, I eyeballed my Wolverine Jig to set the center of the bevel tangent to the wheel, and started to grind. Now, let me say here that it is not necessary to do any power grinding. A good honing guide and a coarse diamond stone, water stone or sandpaper will certainly do the same thing. The point is to remove the factory milling marks, quickly adjust the bevel angle and move on to the next finer abrasive. I promise the woodworking police will not come knocking if you have another method.

I removed the grinding marks from the bevel and the 200 grit waterstone scratches from the back with a 1000 grit water stone. I honed the bevel and polished the back with an 8000 grit waterstone. That’s it. I found these chisels tuned up much faster than all but the most expensive brands I’ve come across. I spent no more than an hour preparing all three chisels. Now my standards are purely practical. I didn’t bother to make them pretty only functional. I need to get to work and push some product out the door after all. You may choose to spend more time fettling your chisels. This may include but is not limited to grinding the side bevels closer to the back (called stoning) and polishing out the factory machining marks from the top and sides. By the way, these chisels took a fine edge as you’d expect. Check back tomorrow and I’ll tell you how that edge held up in the final post of this series.

Jun 062011
 

New Tool Joy

Good news! Stanley UK has reissued the 750 socket chisel. What’s the big deal you say? Ask any woodworking tool collector what the most sought-after bench chisels are and chances are many will say the Stanley 750 series. The popularity of these chisels stems from several reasons. They are Stanley products after all. Old Stanley tools have always been collectable, generally at reasonable prices. Good publicity in the trade journals and blogosphere has also added to the mystique of the 750s lately. Lastly they are just good looking and good quality tools. As a result, Stanley’s 750 socket chisels were the inspiration for Lie-Nielsen’s excellent line of bevel edge chisels.

Currently the only drawback to used 750s is the price. The high prices are a result of increased demand from all the good press these chisels get. On the used market an individual Stanley 750 in useable shape can run $50 plus. What’s left in the affordable range are beat-up, rusted tools with missing handles. I always find the sockets mushroomed from repeated hammer blows when the handles are missing. Given these facts, the Lie-Nielsen version looks like a deal starting at $55. But as well made as the Lie-Nielsen chisels are, they are outside the budget of many woodworkers. So, when I found out the new Stanley 750s (sold under the Sweetheart label) were going to sell at a starting price of $30, I wanted to give them a go.

Let me tell you, I was pretty happy when I received 3 brand new Stanley 750s in the mail, sized 1/8″, 1/4″ & 3/4″. These are the widths I use most during the workday for joinery and general paring jobs.

In my next two entries of this three part post, I’ll tell you how I prepared the new chisels for use, and what I thought of them as I used them.

Aug 082007
 

By Chris Black
Woodworking Tools for Children by Chris BlackOver the years we’ve been asked numerous times if we carry children’s tool sets. Unfortunately, the quality of these sets marketed for children is so shoddy that the tools quickly break, or they are unusable to begin with. Like learning to play music on a cheap instrument, working wood with poorly constructed tools will soon frustrate even the most ambitious student. We recommend buying quality, age appropriate tools. Even if you purchase professional class tools, your investment can still be modest.
SAFETY
As rewarding as woodworking is, it is also inherently dangerous. Tools are not toys. Adults must closely supervise children. You are personally responsible for learning proper techniques and teaching these skills to your children. Remember, always wear eye protection! Our child-sized safety glasses (818349) have adjustable temple arms to fit most heads. Time spent crafting with kids is a great joy, so use good judgment and keep it safe.
TOOLS & MATERIALS
Tools for children must work right out of the box without modification. Only a minimal amount of skill should be necessary to put the tools into service, and they need to fit small hands. The tools listed here meet these standards. As for materials, stick with softer woods like white pine and basswood. These woods are inexpensive, easy to work and readily available at any home center.

  • SAFETY GLASSES (818349) – an absolute must for kids and adults
  • PORTABLE WORKBENCH VISE (169133) – You’ll need a way to hold the wood while you work with it. This one can be mounted just about anywhere, like on a picnic table.
  • EASY CARPENTRY FOR CHILDREN (202644) – A wonderful little book with basic projects that require just a few tools.
  • WOODWORKING FOR KIDS (202463) – A more detailed study with extra projects.
  • COPING SAW (051901) – These saws are prefect for children. They cut on the pull stroke (easier for children), and the inexpensive blades are replaceable.
  • SCHROEDER HAND DRILL (071817) – Eggbeater type drills like this are safe and fun to use. You should also get a 1/16” drill bit for making starter holes for nails and a 1/8” bit for screws. Loading the screw threads with a little candle wax makes driving screws effortless.
  • SURFORM TOOL (8131219) – Surforms smooth and shape wood fast, fit small hands and have replaceable cutting surfaces. Unlike a handplane, a Surform doesn’t need to be tuned or sharpened to work.
  • 6″ COMBINATION SQUARE (461520) – A small, adjustable square helps mark out projects with straight lines.
  • SMALL JAPANESE HAMMER (146605) – Any small hammer will do, but we’ve found that traditional Japanese hammers are better balanced, and are more comfortable for kids to use.
  • WOOD GLUE (165039) – Basic white school glue works just fine. Our yellow woodworking variety sets faster for short attention spans.
  • 16” STANDARD TAPE MEASURE (167238) – This one has a rubberized armored case, so it won’t break when it hits the basement floor.
  • SCREWDRIVERS – One slotted, one Phillips.
  • PLIERS – for straightening or pulling bent nails.
  • NAIL & SCREW ASSORTMENT
  • SANDPAPER – 80 OR 100 grit. Anything finer is not necessary at this level.
  • PENCIL & SHARPENER
  • RUBBERBANDS – Use them as clamps while the glue dries.

NOTES:
Even though we want to emphasize safety, too often these projects become our projects. Let the kids do the work. The point is not necessarily to accomplish a task or even finish a job. Kids operate in the moment, and are more interested in the process than getting the job done.
Keep the tasks simple at first. Limit your initial projects to something that can be accomplished in about an hour or so. Boats with paper sails, cutting boards and one or two piece toys will spark interest and lead to more complex ideas later.
If you purchased just the tools listed here (the ones with our part numbers), your initial investment would be just under $120 with shipping. Although this is a considerable sum, it’s much less than a hand held video game system or the latest battery powered whiz-bang. We’d like to think doing something interactive with your kids, like woodworking, will create more happiness, joy and memories in your lives than a video game. WONDERFUL!

Apr 162007
 

Free Hand ResawingAs with any job, there's usually more than one way to do it. Instead of learning a specific technique, it's better to understand the principles behind the task, so you can problem solve when things don't work out. Resawing is the same way. You learn one method only to find out it doesn't work today on this piece of wood with this particular blade. Having a couple of techniques and understanding the principles of resawing will give you options during different circumstances.

The following methods assume a well-tuned saw, proper blade selection and a certain amount of skill. I highly suggest practicing these methods on scrap wood rather than on something you're depending on for a finished project. For further reading I recommend Mark Duginske's Bandsaw Handbook (200393).

Continue reading »

Apr 132007
 

anantlogo.jpg

As stated in our catalog, Kamal bench planes represent Anant’s premium line of planes. This being the case, Anant’s standard line of planes isn’t bad either. We believe both to be excellent values. You get far more plane in either case than you would expect given the price.
IRONS AND CHIP BREAKERS
Kamal bench plane irons are nearly 1/8” thick! The standard irons run 5/64”, which is still thicker than most vintage Stanley’s. In general, a thicker iron means less chatter and fewer marks left on the wood. A thicker iron or cutter also allows you to move the frog forward to close up the throat opening without having the unsupported end of the blade flopping in the breeze. For the most part, a tighter throat means you’ll experience less tear out on the face of the wood when planing. A tight throat is especially desired on smoothing planes (#3 and #4) where the planed surface will be seen.
The chip breakers on the Kamals are also 1/8” thick. Having a stouter chip breaker adds additional support and heft to the cutting edge, and therefore dampens blade vibration. Again, this is more important on smoothing planes that have the frog in a forward position.
MACHINING AND WEIGHT
Anant does a pretty good job of machining their tools. In fact, of all the iron bodied, Bailey pattern planes coming out of Asia at this time, Anant’s machining is far and away the best, and that goes for both of their lines. To finish rough castings on their standard line, Anant sands all surfaces. On their Kamal line, they machine grind working surfaces. If you’re someone who likes to polish plane bodies to a high shine, then you’ll appreciate the Kamal series’ finish, and you’ll have far less work to do. On both lines, Anant manages to get things reasonably flat and true. However, the machining on the frogs is nicer on the Kamals, but this is mostly aesthetic rather than practical. Any minor blemish that does pop up is almost always remedied with a quick stroke of a file.
Each Kamal plane is slightly heavier than its standard counterpart. For instance, a Kamal 4-1/2 weighs in at 5.25 lb while the standard 4-1/2 is 4.5 lb. The Kamal castings are slightly thicker. We’ll let you debate the merits of hand plane mass.
HARDWARE, KNOBS AND TOTES
Both Anant bench plane lines come with wooden handles (knobs and totes). For some unknown reason, Anant insists on putting a plastic knob in the bullnose position of their otherwise brilliant 78 standard rabbet plane (199208). The original Stanley and Record never had this. We recommend you remove the offending knob and toss it out. Ah, much better. Anyway, Kamals get brass buttons, screws, wheels and levers while the regular Anants come issued with zinc hardware.
FINAL THOUGHTS
We like Anant products because, let’s face it, not all of us can afford a $350 handplane. Anant gives you value for your money and much better than average quality. With the addition of the Kamal line, you have a real choice when it comes to premium planes. It’s a cliché, but you will always come out on top buying the best you can afford. Generally speaking, quality is more critical on smaller planes that produce finished surfaces, surfaces that will be seen, and less important on larger planes designed for surface preparation or stock removal. Many woodworkers spend the bulk of their plane budget on a smoothing plane and a block plane and less on a jointer and jack. Of course, quality is its own reward and having nice tools is a luxury worth pursuing. Now, as nice as these tools are don’t think for a minute you won’t have some tuning and sharpening to do on these planes. So roll up your sleeves and get to work. For further reading on tuning metal planes, please check out my article, Tuning Metal Bench Planes for the Rest of Us.
Chris Black

Apr 042007
 

Irwin Blue Chip ChiselsLet me start off by saying I’m not an engineer, although I did flunk out of engineering school and join the Army. I’m also not a trained metallurgist, but I have done quite a bit of blacksmithing and tool making. In fact one of my homemade jobs made it into an issue of Fine Woodworking. So when I say I tested a batch of Irwin’s new version of the Blue Chips, think woodshop, not laboratory. My test criteria basically consisted of me sharpening the chisels and using them over the course of a day as I would normally use my own bench chisels. Then, given my experience using hundreds of chisels over the years as a cabinetmaker, I decided if I liked them. You know, do they stay sharp, do they hold up, are they worthy or are they paint can openers.
If you read my previous entry, then you know Irwin moved the manufacture of the Blue Chip chisels from Sheffield, England to China. Now, I’m not one to pass judgment on the global economy and all that, but I do want to provide our customers with good information and good tools. So into the shop I went with the new Blue Chips.

Continue reading »