Brian Benham

Brian Benham has made his lifelong passion for woodworking his profession. He enjoys taking his clients ideas and combing them with traditional woodworking techniques to create a unique piece of furniture. You can find more about his furniture at http://www.benhamdesignconcepts.com/

Apr 302015
 

Editor’s Note: A few years ago, a couple of well known woodworkers (The Wood WhispererTom’s Workbench, Modern Woodworker’s Association, just to name a few) started woodworking safety week, which later turned into Woodworking Safety Day. This day is tomorrow, May 1st and we thought we would have some of our bloggers share their own woodworking safety stories and tips.

messy-shop

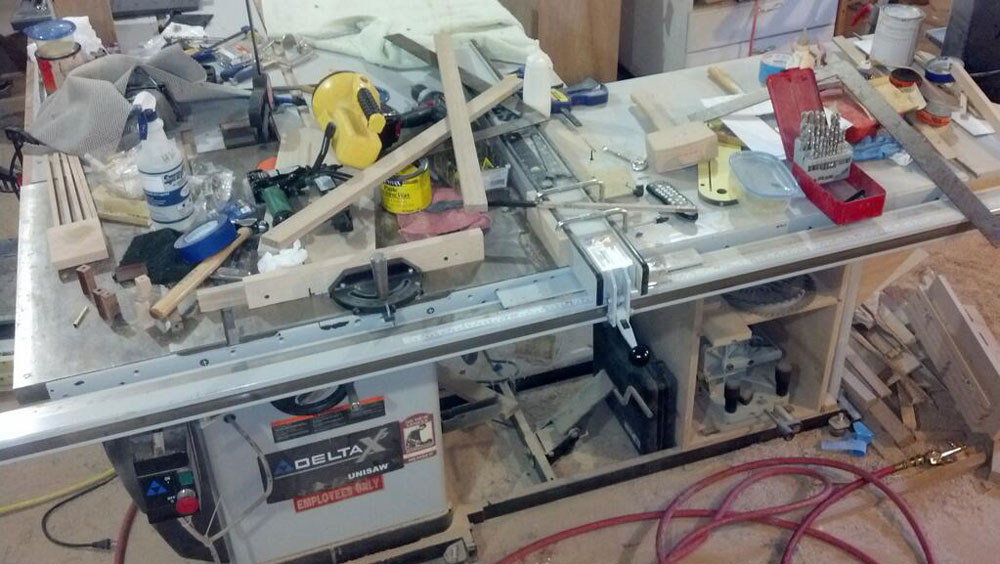
Over the last 20 years, I have worked in several different shops, from welding to woodworking. In each shop, I witnessed quite a few accidents, and in most cases, at least one of three things caused all. The number one cause of accidents that I witnessed was a messy shop. The worst accident I saw was my coworker got his feet tangled up in a rat’s nest of an extension cord while working at the table saw. Instead of paying attention to his hand placement he was paying attention to stepping around the extension cord and ran his hand right into the blade. Three surgeries later, he has partial use of his hand. Too bad SawStop wasn’t around back then.

It doesn’t stop with tripping over cords on the floor. The tangled extension cord can catch you off guard at the workbench as well. I have had the cord of a router tangled up on a pile of stuff on the workbench. While trying to hold the router with one hand and get the cord untangled with the other, I ruined my work piece. Luckily that is all I ruined.

Having a messy shop goes hand in hand with the second stooge of a dangerous shop, and that is being in a hurry. I don’t know how many times I have seen coworkers and I as well use the wrong tool for the job because we were in too much of a hurry to stop and go find the right tool. We run around the shop looking for that clamp to clamp down the work piece to the drill press only not to find it. We are in such a hurry to get back to work on the project we say, “Screw it” and decided just to hold the piece down, only to have it spin out of control when the drill bit catches. A flying work piece often results in smashed fingers, loss of fingernails, or worse yet, stitches. There are far worse examples of being in a hurry that can result in far worse injuries. Using the wrong tool for the job can be devastating. If we hadn’t been in such a hurry we would have cleaned the shop as we went, making it easier to find the right tool for the job.

The third stooge for a dangerous shop I have witnessed is complacency. I may not have seen this one as often as the messy shop or the hurried worker, but it often results in some of the most horrific injuries. It most commonly happens when doing product work, or a repetitive process. When I worked in a welding shop, we had a huge metal shear that would shear sheet metal up to 3/4” thick. My coworker had several hundred of the same pieces to cut out. As the day went on his mind started to wander and he became very comfortable with the operation. Not paying attention (being complacent), he got his finger in between the guard and the work piece. When the shear came down the work piece flipped up and smashed his finger between it and the guard. The pressure was so great it split his finger open and shattered the bone. I changed jobs shortly after that incident so I am not sure how his finger healed, but it reminded us all to pay attention, and stay focused on the task at hand.

These three stooges of danger are not the only dangers in the shop but when an effort is made to prevent them, we can avoid many injuries, save many work pieces from the scrap bin, and have bigger paychecks from not missing work.


Brian Benham has made his lifelong passion for woodworking his profession. He enjoys taking his clients ideas and combining them with traditional woodworking techniques to create a unique piece of furniture.

You can find more about his furniture at http://www.benhamdesignconcepts.com/

You can Follow Brian on Google Plus

Apr 062015
 

When cutting out the parts for a project, I usually start by planning my cut list to cut around the defect, or have the ugliest side of the board face towards the back. I have also filled many knotholes with epoxy, which creates a nice affect. However, before modern day epoxies it was standard practice to inlay a Dutchman over the defect to cover it up. By using a similar piece of wood, one would hope it would blend in, and not be noticeable. But what to do if the defect is too big to use a Dutchman to cover it up?

Rotted_stump_5.7


Well a large defect was what I was up against in a recent project when a customer brought me a cross section of a stump he wanted made into a table. The cross section had an unusual and beautiful shape; it was well worth saving. The only problem was that the center of the stump was rotted out. He left it to me to figure out how to fill it in and make it look good.

My first thought was to try to figure out how do a bow tie inlay across the rotted area, but I just couldn’t make it look right. So I started playing around with cutting a circle to inlay over the section. The circle looked too forced. I finally settled on inlaying an accent wood so it would follow the shape of the growth rings of the stump.

To create the inlay I used a piece of tracing paper and picked a growth ring to trace. I dug through my scrap bin and found a walnut cut off that had a small knot in it, with growth rings radiating out from the knot. I used some spray adhesive to attach the tracing paper to the walnut, taking special care to align the knot in the center. I went to the scroll saw and carefully cut out the shape.

Stump-inlay


Once the shape was cut out, I used an inlay router bit kit, to cut out the inverse shape of my plug to use as a template to cut out the recessed shape on the stump. I fine-tuned the template with sandpaper, used double stick tape, taping it to the stump taking care to align the shape of the template to the growth ring, and then routed out the shape.

The router bit kit did a perfect job of copying the accent plug I made; it fit in place with a little tap from my mallet and was snug all the way around. I glued it in and sanded it flush. The rotted area may have been too big for a Dutchman but it was perfect for a custom accent inlay.

Live_edge_stump_table


Brian Benham has made his lifelong passion for woodworking his profession. He enjoys taking his clients ideas and combining them with traditional woodworking techniques to create a unique piece of furniture.

You can find more about his furniture at http://www.benhamdesignconcepts.com/

You can Follow Brian on Google Plus

Feb 192015
 

brynns-desk-accent-woodMy 7-year-old daughter has an art supply collection to rival most craft stores.  She decided to use these supplies to make me something for my birthday.  That morning she came into my office and asked if she could borrow one of my furniture books to get some ideas.  I gave her Great Designs from Fine Woodworking and off she went.

A few hours later, she brought back my book and her creation.  It was a desk/table thing, and most importantly, a sweet thought my little girl was proud of.  It of course didn’t look anything like one of the pieces of furniture in the book, but it did have many elements.  There where curved rails on the sides, and she even took the time to color in what I think are dovetails.

When it comes to my own designs, I go through a similar process to help me get to my end result and make it as original as I can.  I look through tons of Google images and design books, looking for elements to incorporate into my design.

When I find a piece of furniture that really speaks to me and I want to use for inspiration, I study the design.  I try to determine what parts I like and are drawn to and what parts I am not drawn to.  I keep those in mind as I work towards my final design.

Next, I go to the drawing phase. After I have studied the inspiration piece or pieces for a while, I cover up the photo and redraw it without looking at.  Several things happen as I do this.

First, I have no idea what size the piece is in the photo so I have to decide for myself what size it needs to be.  To come up with the right size for the piece, I think about where I would put it.  If it is for a client, I ask them where they plan to put it.  Often times their needs will dictate the overall size it needs to be.  Just changing the size can change the look and feel of a piece of furniture because all the proportions will end up different from the original.  Defining the overall size is the first step into making it my own style.

Second, is to change the details of the piece.  I can’t remember every aspect of the piece as it appeared in the photo.  This is when the piece really starts to take on a life of its own.  I have to fill in the blanks in my memory using my own experience of how I think things should look.  For example, if it‘s a table I am working on I most likely won’t remember what the original apron looked like.  I will have to decide how far to set the apron back from the edge.  I would have to remember if the apron was set back from the legs creating a reveal or if it was flush with the legs.  Then I have to decide how to join the legs to the apron.  Do I want to use standard mortise and tenons, or add some visual interest by using through mortise and tenon joints?

Then I would have to try to remember the shape of the legs, where they curved at the end, did they start out thick at the top and get thinner as they went to the bottom?  If the legs are one of the elements that  I didn’t like in the original photo because they were too thick, then this is the time to change them by thinning them down or by making it a more gradual curve.

This list of things to remember from the original will continue as I redraw the piece.  There are several things you can change from the original that will change the overall look and feel of a piece of furniture.  Even as simple as using different wood spices or throwing in an accent wood to add visual interest.

By deciding on how to handle all those subtle differences, and by using my own preferences and not referencing back to the original, I come up with something that is inspired by but different from the original.  All those design and construction details, as small as they are individually, add up to big changes.  I had to decide on each of them as I redrew the piece, bringing in my own design tastes and personality.

Many times, I am not 100 percent satisfied with my first redraw.  From that point, I will repeat the process and redraw it several times, tweaking this, that, and the other thing.  Each time asking myself what it is that is not speaking to me, and then changing that until I have come up with a design I am excited to build.

However, it doesn’t stop there.  Once I am in the shop, I may redraw elements of the design full size to get a feel for how the finished product is going to look.  Alternatively, if I can’t decide for sure whether or not the leg should be 2-1/2” or 3” wide, I will mill an extra leg at 2-1/2″ to get a feel for what it is going to look like.  If I like it, I will adjust the design on the fly.  When I am finished, I am always satisfied with my design that is inspired by, but not a direct copy of the original piece.

————

Brian Benham has made his lifelong passion for woodworking his profession. He enjoys taking his clients ideas and combining them with traditional woodworking techniques to create a unique piece of furniture.

You can find more about his furniture at http://www.benhamdesignconcepts.com/

You can Follow Brian on Google Plus


Dec 192014
 

When designing furniture one of the things that makes a piece go from the mundane, to “WOW that’s a nice piece”, is choosing an awesome looking piece of wood to feature in the project. It could be anything from that great figure in the wood, to the spalting streaks, and even the cracks and imperfections that make it stand out.

Oftentimes when I go to the lumberyard with a design in mind, I am looking for one of those WOW pieces of wood to feature. However, most times I just can’t find exactly what I am looking for. The stack has either been picked through by others before I got there, sorted out before that particular shipment arrived at the dealer, or mother nature just didn’t provide what I wanted that day.

Not all is lost; there are other resources such as veneering, as well as other woodworking techniques that can be employed to mimic the desired piece. Much like in the case of my recent project. I was building a bench and wanted to add a decorative feature by putting butterfly inlays over a crack in the wood. I scoured all of my local lumberyards within a two-hour drive of my shop to no avail. It seemed that the perfect piece of cherry that I could visualize in my imagination just didn’t exist in real life.

Once I was out of lumberyards to visit, I started thinking of other options I could use to incorporate the use of butterfly inlays. I didn’t like any of the options I came up with so I decided to make my own crack.

I started out by jointing the two boards I picked out for the top to be sure I like how they looked together. I then sketched the shape of the crack I wanted on the top and on the ends of the boards. I used a carving wheel on my grinder, various rasps, and sandpaper to create the shape. I worked slowly taking only a few passes at a time and then sliding the boards together to be sure I was on the right track in making a shape I liked.

When I was finished, I had carved a convex shape on one board and a matching concaved shape on the other. The resulting shape made it look like they had been one piece that had split apart. I thought it looked great with the crack in the wood meandering back a few inches from the end.

Before gluing the two boards together, I stained the area I had carved on making it look like the split in the wood had been there for a long time. I think the result was a nice solution when I was not able to find that choice piece of wood in the wild.

Bench Leg View

DSCF4495

Brian Benham has made his lifelong passion for woodworking his profession. He enjoys taking his clients ideas and combining them with traditional woodworking techniques to create a unique piece of furniture.

You can find more about his furniture at http://www.benhamdesignconcepts.com/

You can Follow Brian on Google Plus

Oct 092014
 

Do not throw rocks at this sign.

My eighth grade teacher Mr. Knox put a sign in the parking lot that said “Do Not Throw Rocks at This Sign.” He put it there to prove a point that if you tell a kid not to do something, most likely they will want to do it. He was right. By the end of the week, the sign was demolished.

Maybe it is the kid in me or I’m just the rebellious type, but when a friend told me it is not possible to steam bend kiln dried lumber, I just had to try. My plan was to create a wooden handle that had three tight bends in it. Of course, my first try splintered along the outer radius of the bends, proving my friend right.

Apparently, when wood is kiln dried, the lignin in the wood dries out and hardens, not allowing it to bend. Now, I am not a biologist, so I may not be qualified to explain exactly what lignin is. However, the same friend who told me you can’t steam bend kiln dried lumber provided me with this definition. Lignin is an organic substance binding the cells and fibers in wood together. By the way, he is not a biologist either.

Not letting his explanation stop me, I set out to do my own research. I didn’t waste any time researching things that would tell me I couldn’t do it, like studying what lignin is. I did however find an old Woodwright’s shop episode were Roy Underhill showed how to use a metal strap during the bending process to compress the outer fibers, preventing them from splintering.

Now the wood Roy used was not kiln dried, but his technique was what I was interested in and I thought it was worth a try. I headed off to the hardware store to find some flexible metal.  It turns out they don’t really sell anything that I thought would work. Feeling defeated I headed towards the door to leave when I spotted a piece of metal banding sticking out of a trashcan. Not wanting to be tackled in the parking lot for stealing their trash, I found an employee and asked if I could have it. While giving me an odd look, he said “sure”. I headed back to the shop to test it out. On a side note, after showing my friend what I was using to prevent splintering, he suggested using metal strapping that plumbers use to secure pipes and ductwork, which can be purchased at most hardware stores.

It took me a few practice runs to figure out how to keep the metal banding tight against the outside curves where the most splintering could happen. After some practice, it worked out pretty well. It didn’t stop all of the splintering, but the little parts that did splinter were easily sanded off.

I have seen some elaborate setups for building steam boxes; however, my setup for this project was simple. Since the piece I wanted to bend was small, I just used a trash bag to contain the steam. To generate the steam, I snuck into my wife’s closet and got the little steamer she uses to steam out the wrinkles in her clothes (let’s keep that part on the down low).  I stuck the end of the nozzle in the bag, taped it shut, and let it fill with steam for 30 minutes before pulling the piece out and bending it into my form and clamping it.

Steam-bent-handle

When I showed my friend my accomplishment, he didn’t readily admit to defeat. He said, “The handle is only 1/8 inch thick, it is like a bent lamination.” On the other hand, unlike a bent lamination where the gluing of the layers are what holds its shape, this is only one piece of wood and no glue. It is holding its shape all on its own. The two outer curves are almost at a 90-degree bend, which is tough to do even with a 1/8 inch thick piece of wood. In the end, whether or not I am rebellious or just determined, I ended up with a beautiful steam bent handle.


Brian Benham has made his lifelong passion for woodworking his profession. He enjoys taking his clients’ ideas and combining them with traditional woodworking techniques to create a unique piece of furniture. You can find more about his furniture at http://www.benhamdesignconcepts.com/

Sep 262014
 

If you have been woodworking for a while, there is a good chance you have seen or even built a rendition of Norm Abram’s Miter saw station. I built my version several years ago and as the years have passed, I have made several changes to it to meet my shop needs. My most recent change was to the area behind the miter saw fence. That area has become a drop zone for clutter. I seem always to be losing project pieces and small tools directly behind the fence where it is out of my sight. Even worse, the pile of scrap wood and miscellaneous supplies stack up and spill onto the fence getting in the way, preventing my miter saw’s stop block from sliding down the fence and making it unusable.

Honestly, I could probably throw half of the scrap wood away to clean up the mess, and not miss it. However, there seems to be an unspoken rule among woodworkers to never throw away scrap wood, so if I did I’m afraid I would have to turn in my woodworker’s card. To clean this mess up and take back that valuable shop space, I decided to build storage bins directly behind the fence.

DSCF2905In addition to cleaning up the mess, I found a use for some of the scrap wood in the pile and used it to build the bins. I started by screwing down a 2×4 to the workbench behind the fence. I paid special attention to be sure I left a space for the miter saw’s stop block to slide past, and a comfortable amount of room for my hand to reach back to clamp it to the fence. The 2×4 will provide a solid surface to screw my dividers to as well as a stop to prevent the wood in the bins from sliding against the fence causing the same problems as before.

To make the dividers, I cut some scrap plywood into triangles and attached them to the wall as well as to the 2×4 using pocket screws. My shop walls are made from structural panels so I can put a screw anywhere. If you are in a traditionally framed shop be sure to find studs in the wall for the screws to get a good strong bite. The studs being spaced 16 inches apart will make for a nice sized bin and help keep them evenly spaced out.

Now that the bins are complete, I sorted out my pile of scrap wood by size and species. It keeps it all visible and at my fingertips, ready to be incorporated into a project. The bins are also helping me stay organized as well. As I am cutting the lumber down to size, I can easily sort the cutoffs into the scrap bin as I go.

DSCF2904

Aug 262014
 

benhamtableMany times as furniture makers, we will put a finish on the underside of a tabletop to prevent it from warping or cupping. The theory being, if you put the same finish on the top as you do the bottom the moisture transfer will be equalized on all sides, helping to prevent wood movement. Regardless whether or not this theory is true, there are other reasons to finish the bottom of your tabletop.

I am often asked to match a stain color and in doing so I end up mixing different colors together in an attempt to get the color just right. The underside of the tabletop gives me a blank canvas and plenty of room to dial in the color. This also adds extra reassurance that the stain will react the same on the top as it did on the bottom because I am staining the same piece of wood. If the bottom blotched badly I know the top most likely will too. I can then adjust my application method before applying the finish to the show side.

Staining the bottom also give me an opportunity to see what the color will look like on a larger scale, to be sure I like the final color. This is especially helpful if you have a customer or spouse that has a hard time visualizing what the entire piece will look like from a little stain sample. It is much easier to strip the finish off the bottom to try a different color opposed to the whole piece.

Having the blank canvas on the bottom also allows me a risk free area to practice a new application technique. When I first started using water based gel stains, I found the application method I typically used for oil based stains left streaks and overlap marks. The water base finish dried much faster than an oil finish. Without using the right application technique, I found the water based stain would dry before I had a chance to come back and wipe up the excess, leaving overlap marks. That is something I would have never discovered on a small test board, and would have been devastating to discover when staining the show side of the tabletop.

However, practicing my application technique has saved me from many tabletop do overs; it is not the main reason for finishing the underside of a table. When I build any piece of furniture, I want people to be drawn to it. I want them to reach out and feel how smooth the finish is by running their hand across the top. I think we both would be disappointed, if as there hand glides across the smooth top, wrapping around to the underside of the table, only to discover a rough unfinished piece of wood. When someone buys custom furniture, I believe part of what they are paying for is for the craftsman to pay attention to the details. I think finishing the underside of a table adds a nice detail.


Brian Benham has made his lifelong passion for woodworking his profession. He enjoys taking his clients’ ideas and combing them with traditional woodworking techniques to create a unique piece of furniture. You can find more about his furniture at http://www.benhamdesignconcepts.com/