Welcome to “Tips From Sticks-In-The-Mud Woodshop.” I am a hobbyist who loves woodworking and writing for those who also love the craft. I have found some ways to accomplish tasks in the workshop that might be helpful to you, and I enjoy hearing your own problem-solving ideas. Please share them in the COMMENTS section of each tip. If, in the process, I can also make you laugh, I have achieved 100% of my goals.
I have been working on a painting project every weekend for several months. Actually, it started three years ago. Brenda said, “Since we’re taking the carpet out, before Brent gets here to start putting in the oak floors, what about if we painted the living room?” You might think the operative word here is “we.” It isn’t. I started, of course, with the ceiling. Because our house is built on pilings, it moves a lot. Or, maybe we just had a sorry Sheetrock guy, but, whatever the reason, the panel joints in the ceiling were all cracked. I wasn’t going to sand them down, tape them and apply new knockdown before I painted, but I did take the time to caulk the cracks the best I could.
From there it was on to the walls, which went fast enough. When the baseboards were first installed, they weren’t properly sanded and primed, so it was time-consuming to take them all the way down to bare wood before painting. I worked every night after work, and every Saturday after we closed at noon, for months and months.
Because we have an open floor plan between the living room and kitchen, there was no painting the living room and not painting the kitchen (I painted the kitchen ceiling at the same time as the living room).
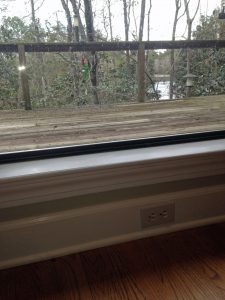
The massiveness of the millwork on the living room windows and kitchen bay windows was overwhelming.

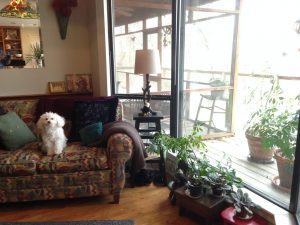
This bank of windows is wonderful to look through, but the convoluted millwork at the bottom is an amateur painter’s nightmare. Sore fingers were a nightly feature when I was sanding them to bare wood. And, working on the floor wasn’t this hard when I was in my 30’s.

This bay window is one of Brenda’s favorite sitting spots, so it needs to look good. Willie likes it, too.
I don’t recall what interrupted me, but, at some point in 2014 I stopped painting and, despite good intentions, couldn’t get going again.
This go-round, I took a more practical approach. Rather than unrealistically working every night, I decided to devote every Saturday until I finished.
Not surprisingly, I’m not getting much woodworking in. In fact, I wonder how long one can go between projects and still call himself a woodworker.
Now, the kitchen and living room are finished and that made the adjacent foyer look dark, so we’re (there’s that word again) painting over all of the stained wood.
Nothing beats the Festool system when it comes to a sanding project like this. The CT36 Dust Extractor with a Dust Separator has made this an almost completely dust-free project. Like Steve Johnson letting his inner woodworker creep into his barn project, I couldn’t be satisfied with the machine marks left in the millwork, so I’m sanding most of it to bare wood. The dark stain needs to come off anyway for better white paint coverage. The RO125 Festool Sander is loaded with 120 grit paper, and it doesn’t take long to get down to a smooth surface. Alan Noel recommended 220 grit for a nice, painted finish, and the Festool ETS125REQ Sander, with its shorter stroke, and fine paper, makes every flat surface paint-ready.
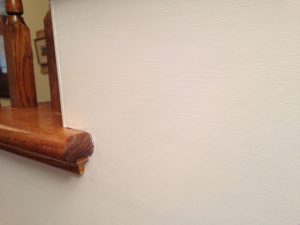
There are plenty of nooks and crannies in this project, and the Festool RO90 Sander, with its triangular head attachment, has made short work of those spots.

This skirtboard was the place where the RO90’s triangular head made sanding the hard-to-get-to spots really easy.
There are still areas that require hand sanding, and that’s the only dust generation there has been. Disconnect the sander from the CT, switch from AUTO to MANUAL, and the dust is gone. With the separator, there is no worry of filling up those expensive Festool Dust Extractor Bags.
Dust management is one of Festool’s biggest selling points for the pros, but, it’s pretty darn nice, too, for the DIY handyman with no time to waste.
One day, all of this will be finished, and I will be proud for visitors to come through the foyer, into the living room and lounge in the kitchen.
Just stay out of the parts of the house “we” haven’t gotten to yet.
Jim Randolph is a veterinarian in Long Beach, Mississippi. His earlier careers as lawn mower, dairy farmer, automobile mechanic, microwave communications electronics instructor and journeyman carpenter all influence his approach to woodworking. His favorite projects are furniture built for his wife, Brenda, and for their children and grandchildren. His and Brenda’s home, nicknamed Sticks-In-The-Mud, is built on pilings (sticks) near the wetlands (mud) on a bayou off Jourdan River. His shop is in the lower level of their home.Questions and comments on woodworking may be written below in the comments section. Questions about pet care should be directed to his blog on pet care, www.MyPetsDoctor.com. We regret that, because of high volume, not all inquiries can be answered personally.

