

Welcome to “Tips From Sticks-In-The-Mud Woodshop.” I am a hobbyist who loves woodworking and writing for those who also love the craft. I have found some ways to accomplish tasks in the workshop that might be helpful to you, and I enjoy hearing your own problem-solving ideas. Please share them in the COMMENTS section of each tip. If, in the process, I can also make you laugh, I have achieved 100% of my goals.
The last time one of our air conditioners had to be replaced, I asked the AC techs to save the old squirrel-cage fan for me. I wanted to make an exhaust fan for the shop, and I had two reasons:
First, I grew up in a time when almost every home had an attic fan to draw ventilation through its windows. As Americans became accustomed to lower humidity levels in our homes and businesses, such fans became relics.
We didn’t have an attic fan down on the farm; those were for rich city folks. We just had a window fan. Not just a box fan stuck in an open window, mind you, but a three-speed, reversible purpose-made window fan. The fan was in my bedroom. That was where I first learned the value of white noise to block out sleep-disturbing sounds.
Since I don’t have air conditioning in the shop, it was completely practical to ventilate a little.
The second reason I needed an exhaust fan is that I’ve been using CPES, Clear Penetrating Epoxy Sealer on a project, and the instructions include the notice, “WARNING: This product is inherently unsafe. It cannot be made safe. That’s why it works so well. We recommend the use of a respirator capable of filtering organic solvent fumes and vinyl gloves during application.” No, I didn’t use it in my garage with our living level right above. I did the bulk of the CPES work outdoors under our First Up tent. However, I did need a little coat on the bottom of the feet, and I’d already moved the entire project back indoors. The finish coat is Epifanes varnish. As many of you know, Epifanes is extremely thick, and some recommend cutting the first coat as much as 3:1 with mineral spirits. That’s a little too much fumes for me, so I took the old fan that had been sitting around the shop for a couple of years and finally made a movable window unit. Here’s how:
I started with an old piece of 3/4″ CDX plywood. You didn’t think I was going to spend actual money on this project, did you? Then, to find out how big the panel could be and still go in and out of a window, I did a series of measurements and test-fits. Clearly, the panel needs to fill the opening, lest breeze move around it, defeating its efforts to create air movement.
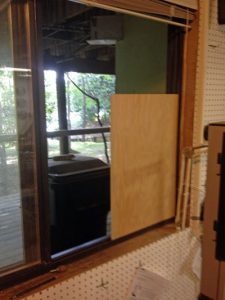
This window near the band saw was the best place to pull fumes from the finishing area. The ultimate plywood size would maximize sealing.
Step two was to determine the best position on the plywood and cut a hole for exhausted air flow.
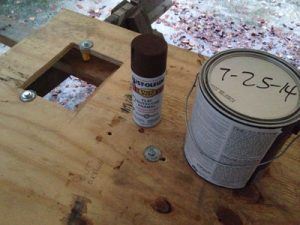
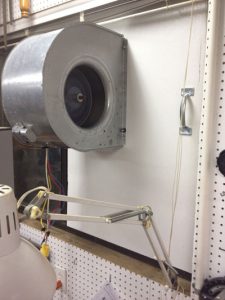
Step three was to install studs to correspond to the bolt holes in the fan housing. I drilled relief depressions and epoxied the studs so they wouldn’t turn when installing the fan-holding nuts.
After cutting an initial small exhaust hole, I mounted the fan and enlarged the opening everywhere that would improve air flow but not remove important structural support.
Most everyone knows that latex paint rusts steel. Here’s a bonus tip this month: spray all exposed metal with a rusty-metal primer first, and allow it to dry thoroughly before coating with latex primer.
Rust-oleum Rusty Metal Primer will prevent metal parts from being corroded by latex paint, and it dries rapidly, but be sure it’s completely dry before starting to brush on latex primer.
Two coats of primer, then we’re ready for finish paint. This project called for a special-order paint job. I wanted it as inconspicuous as possible on the outside, so it’s the same dark brown as the storm shutters. Inside, I wanted it to reflect as much light as possible, so it’s white.
The edges? Two brown, two white. Of course.
Bonus tip two: I keep balloons in the shop (more on that in a future post), and they were perfect for protecting the threads of the studs from being painted.
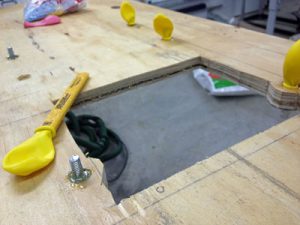
Don’t make fun of me because all of the balloons are yellow. It helps me to have inner peace! Some of you understand.)
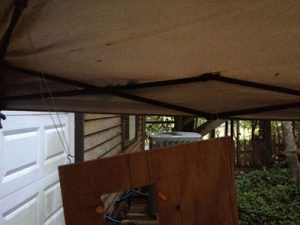
Hanging the plywood under the tent allows me to get to all surfaces for a quick paint job, rain or shine.
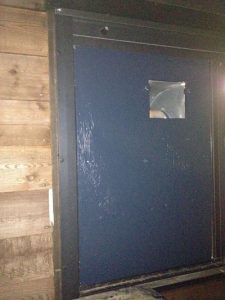
The final product has two big handles and can easily be picked up and inserted into the window opening. It takes 2:04 to install and 1:36 to remove.
Even wired to the highest speed, it won’t create a hurricane, but there is plenty of air movement to evacuate fumes, and I can control where the air moves through the shop by which windows I open. For safety, the exhaust port needs a screen or grille.)
Word of caution: this fan is not spark-free and is not intended to be used in an environment where fumes might be combustible. Be safe!
Jim Randolph is a veterinarian in Long Beach, Mississippi. His earlier careers as lawn mower, dairy farmer, automobile mechanic, microwave communications electronics instructor and journeyman carpenter all influence his approach to woodworking. His favorite projects are furniture built for his wife, Brenda, and for their children and grandchildren. His and Brenda’s home, nicknamed Sticks-In-The-Mud, is built on pilings (sticks) near the wetlands (mud) on a bayou off Jourdan River. His shop is in the lower level of their home.Questions and comments on woodworking may be written below in the comments section. Questions about pet care should be directed to his blog on pet care, www.MyPetsDoctor.com. We regret that, because of high volume, not all inquiries can be answered personally.