

Welcome to “Tips From Sticks-In-The-Mud Woodshop.” I am a hobbyist, not a professional, someone who loves woodworking, just like you do. I have found some better ways to accomplish tasks in the workshop and look forward to sharing those with you each month, as well as hearing your problem-solving ideas.
Tip #1: RED NAIL POLISH
Everyone who is patient raise your hand. That’s what I thought: nobody. Well, except for you, in the back, and I thought you looked a little strange. I am with the majority, having no patience, especially with electrical plugs. When I am ready to plug in, I want to plug in now!
NO body is going to make a mistake with these: the round part goes in the round hole, and it directs the other two where they belong.
The 3-prong jobs are easy; even those over 40 with “too-short arms” can see which orientation is correct for them. These newfangled double-insulated tools, however, with their polarized plugs just don’t create enough contrast to tell the wider blade of the plug from the narrow one. Now, you could just try to put it in, then turn it over when it doesn’t go.

“Everything’s a little fuzzy. I think I have some glasses around the shop somewhere. Which one is the wide one?”
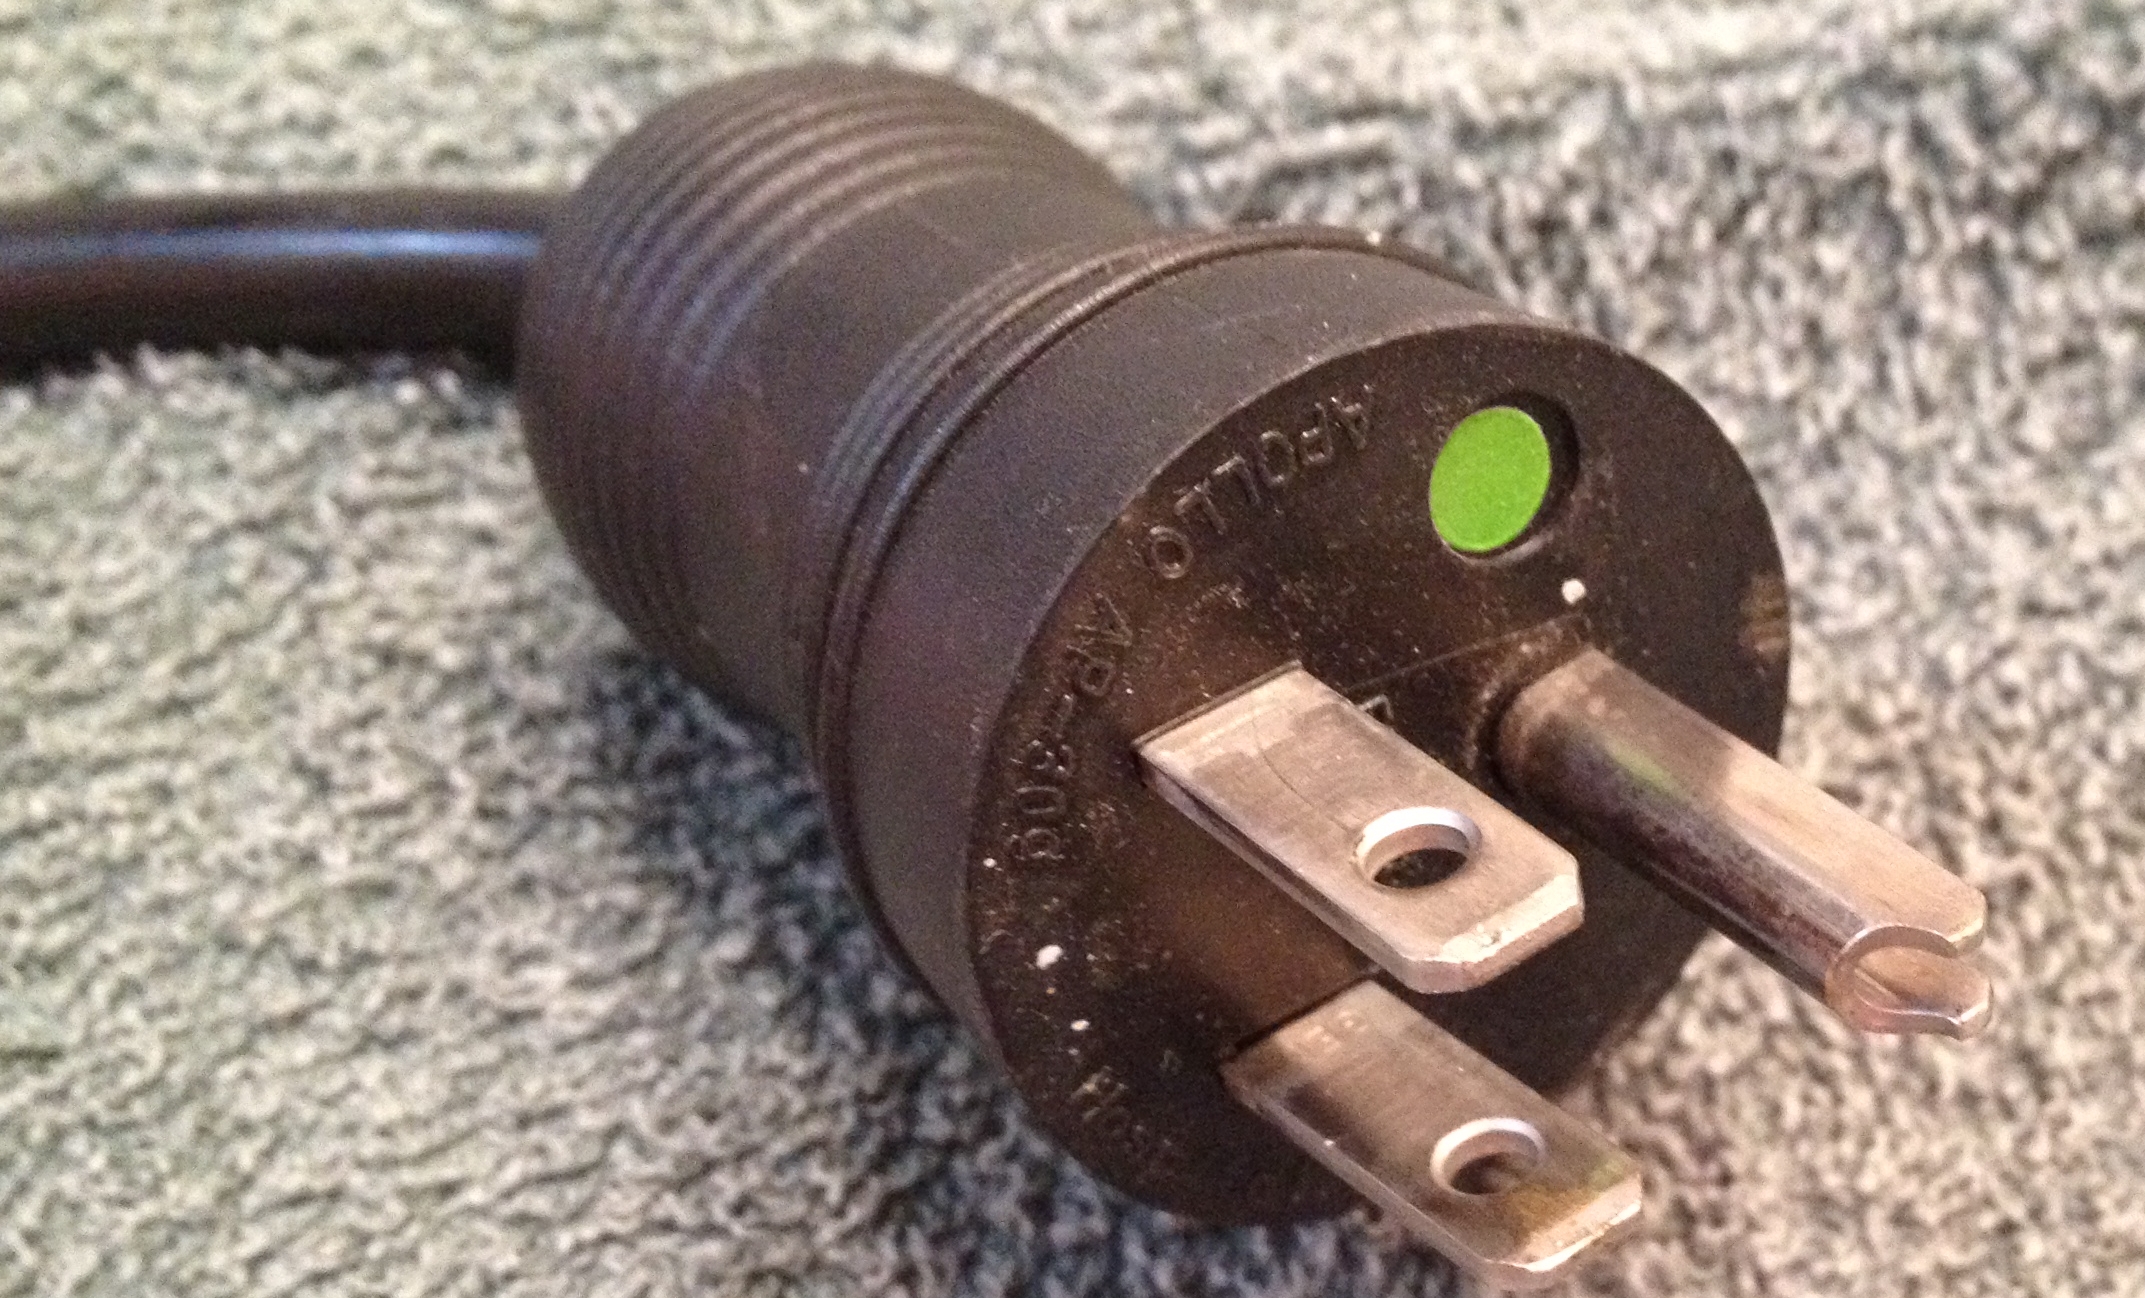
But who has time for that? Then, some manufacturers feel the need to buck the international standard when they incorporate cord-holding moldings into their plugs. On most tools the side with the holding loop lines up with the grounding hole, but not always!
The manufacturer of this Craftsman vacuum, who shall remain unnamed, thought it would be smart to put the cord-holding loop on the side opposite the ground hole. Why? Just to be different? Just to annoy me?
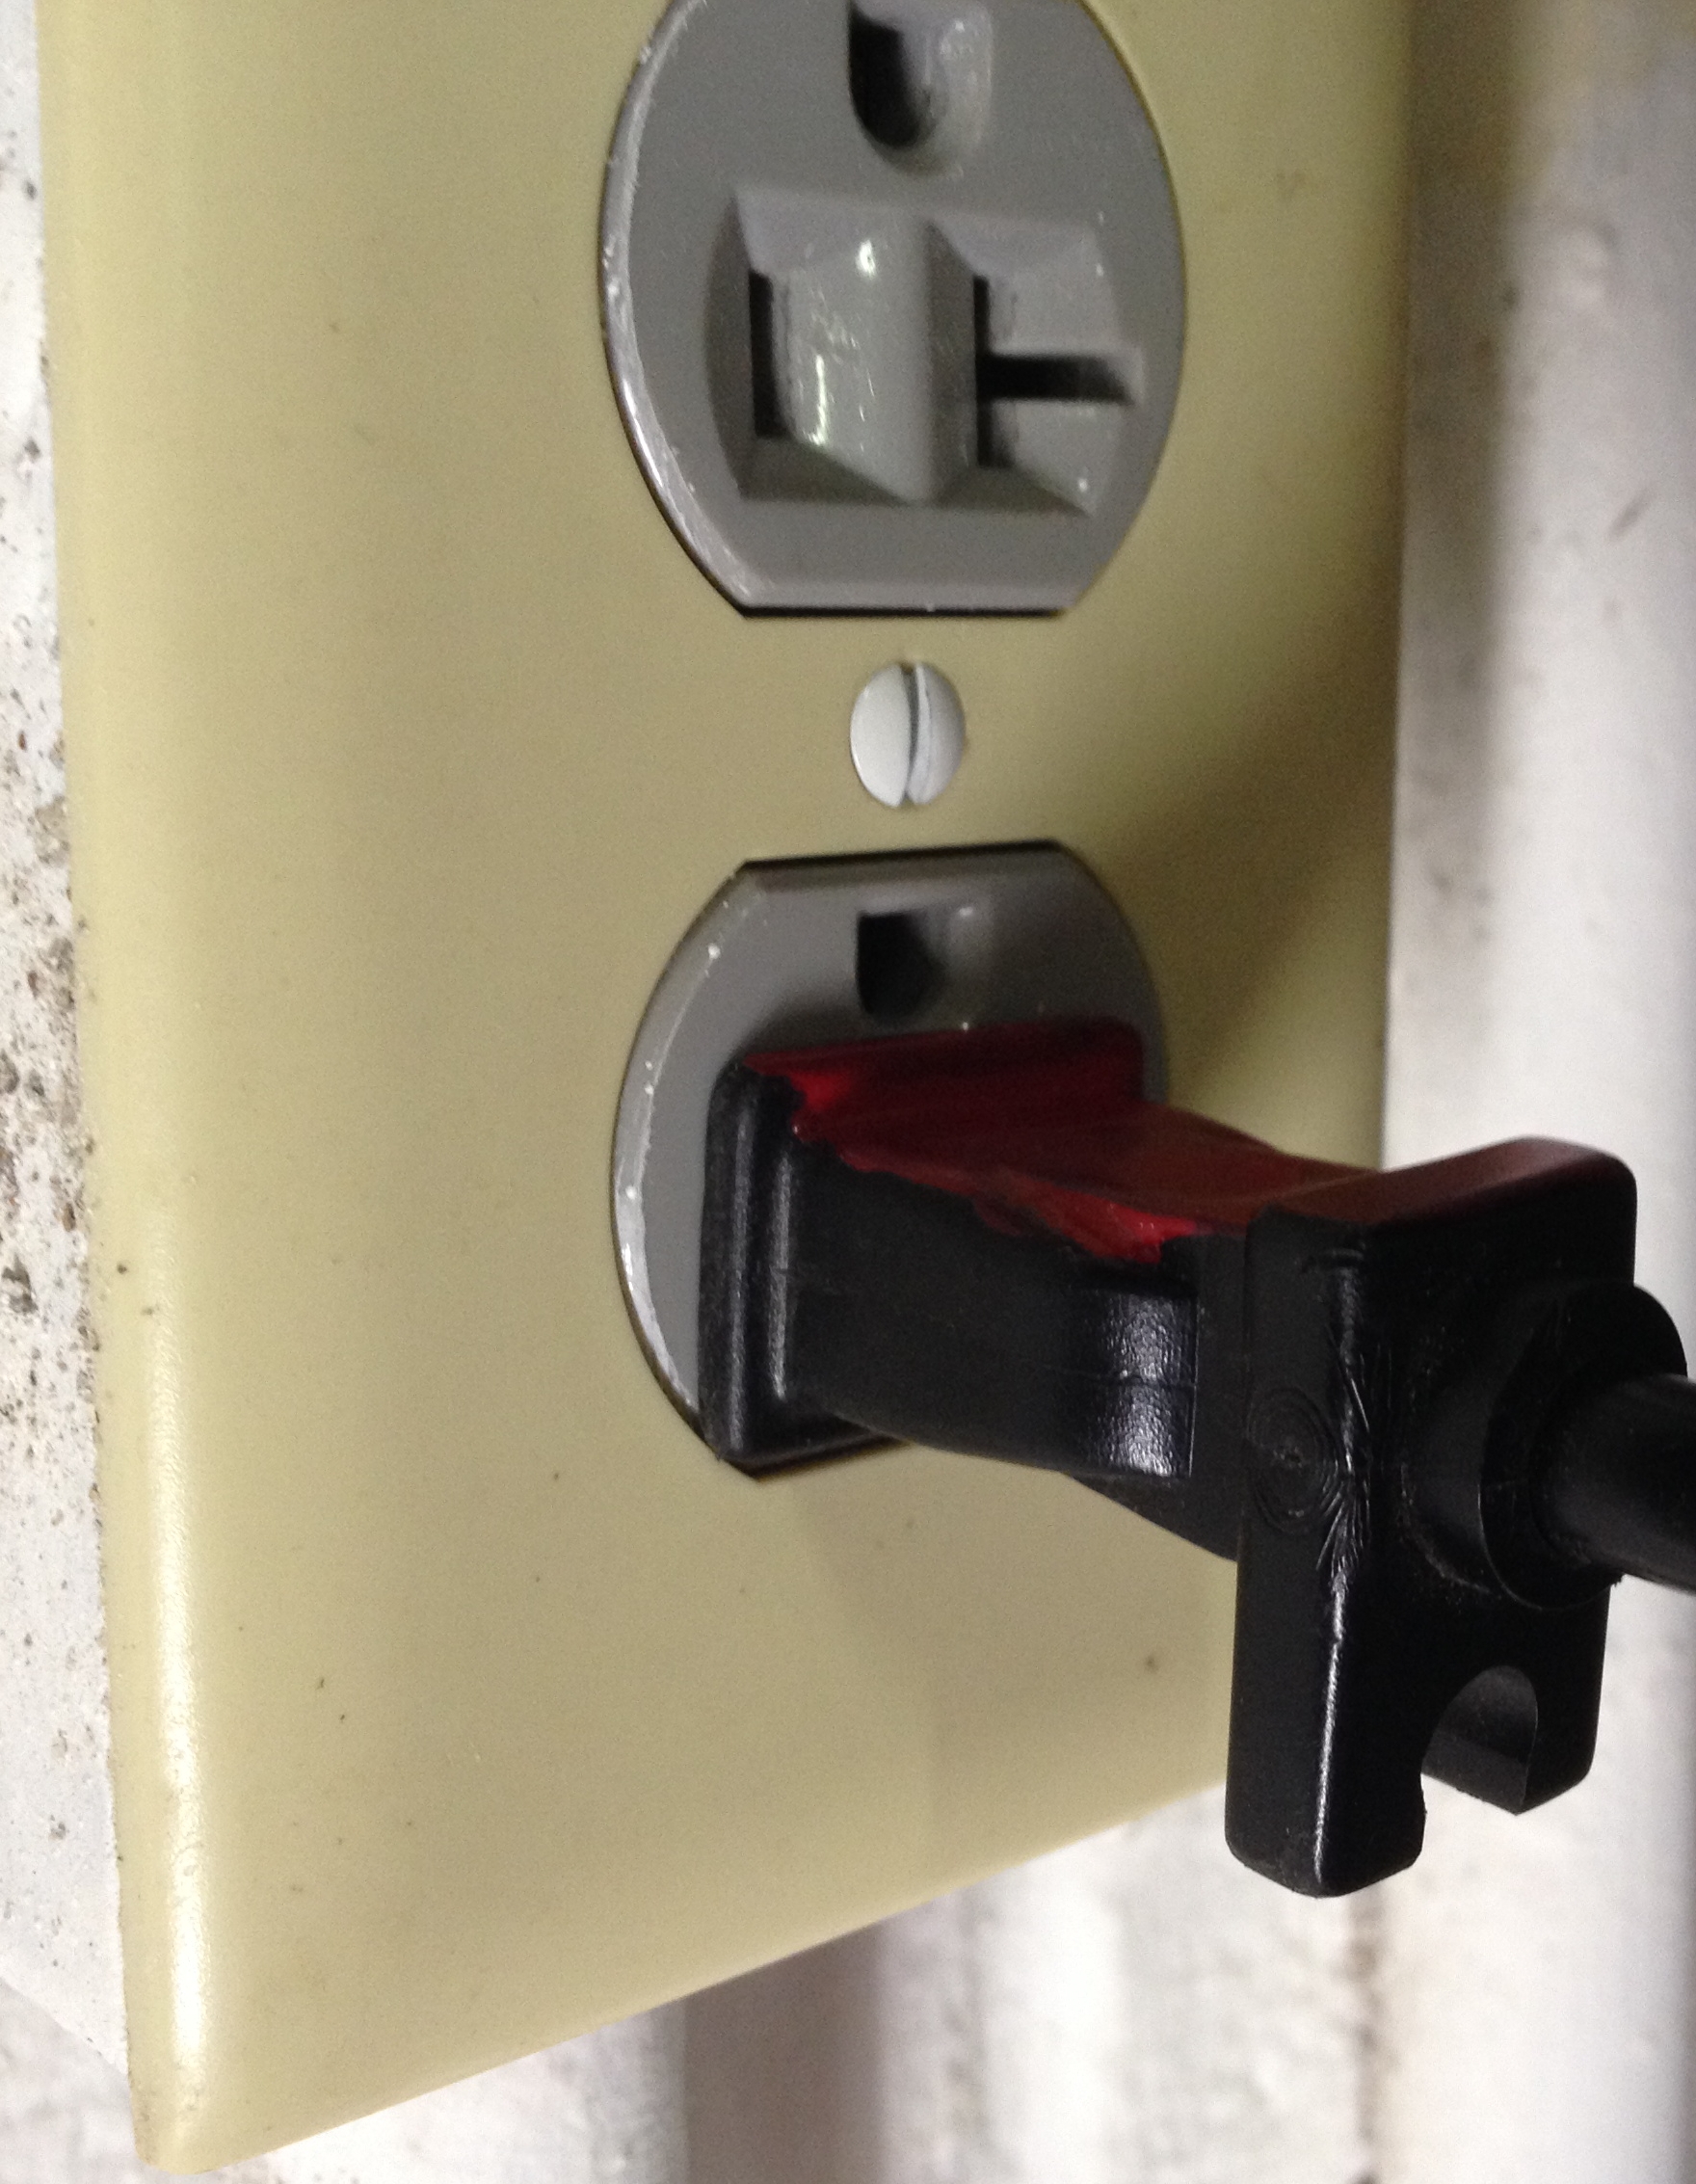
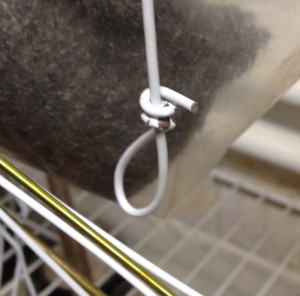
My timesaving solution for this problem is to paint red nail polish (why, yes, it is the shade I usually wear!) on the side of the plug that coordinates to the grounding hole.
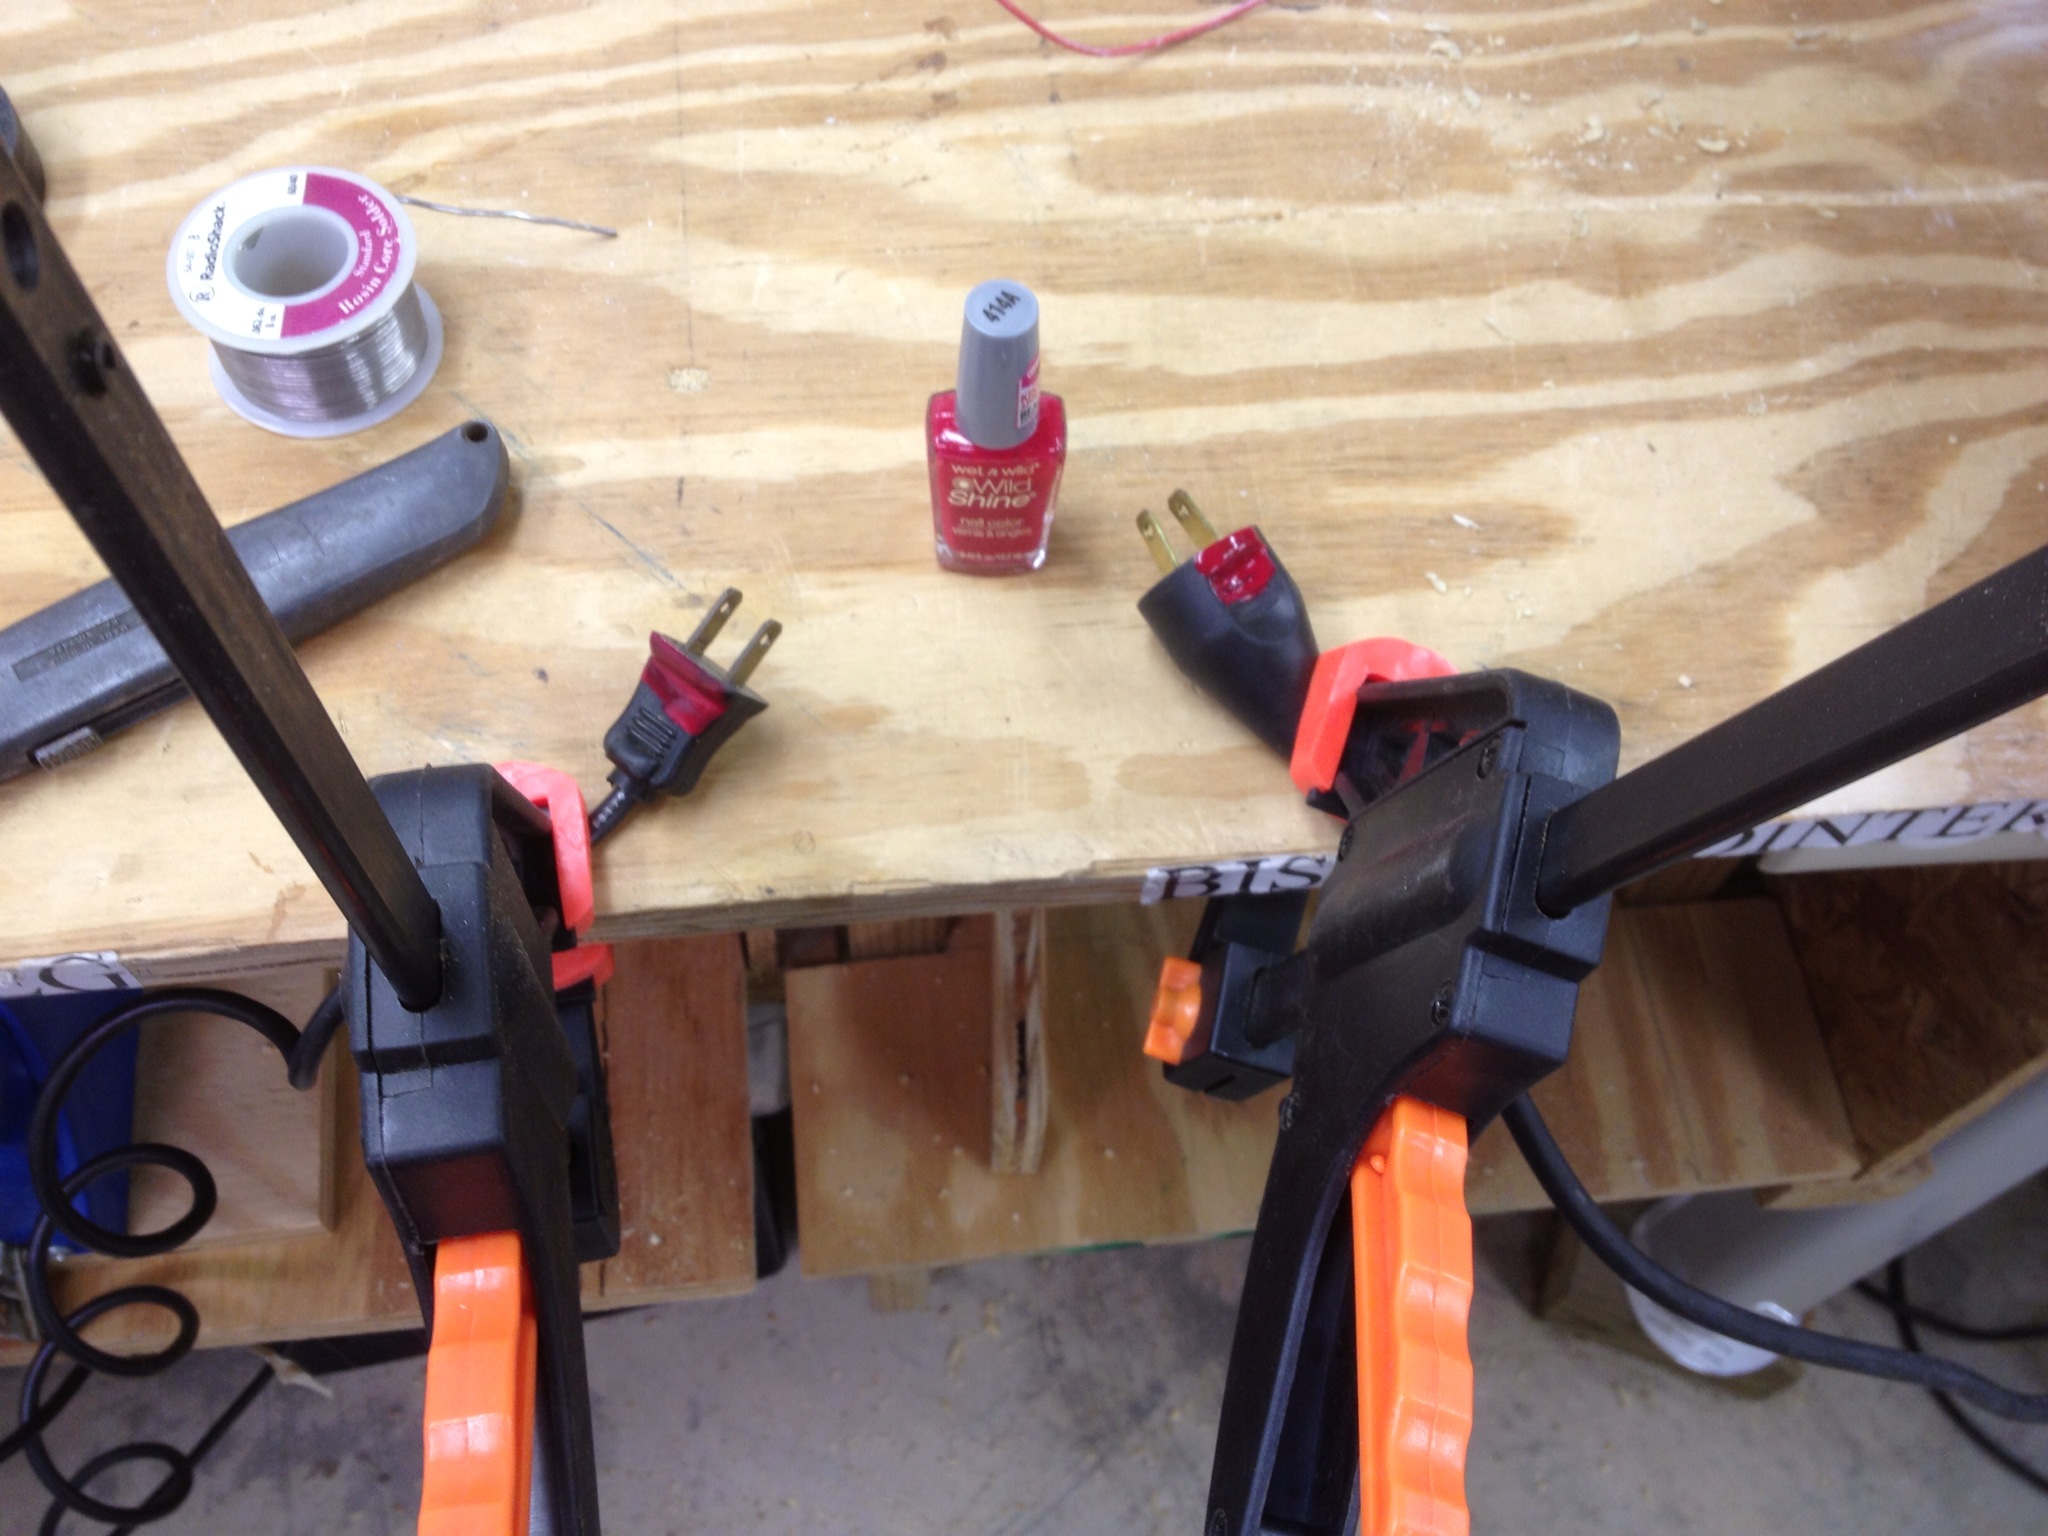
Cover the entire surface so that you will see at first glance which way to orient the plug. Use multiple thin coats. Nail polish dries quickly, you can finish an entire plug in 15 minutes.
Technique: Like any paint job, multiple, thin layers work best. Maybe it’s the cheap nail polish I bought, but it took me 5 coats to get really good coverage. The stuff wears like iron, though!
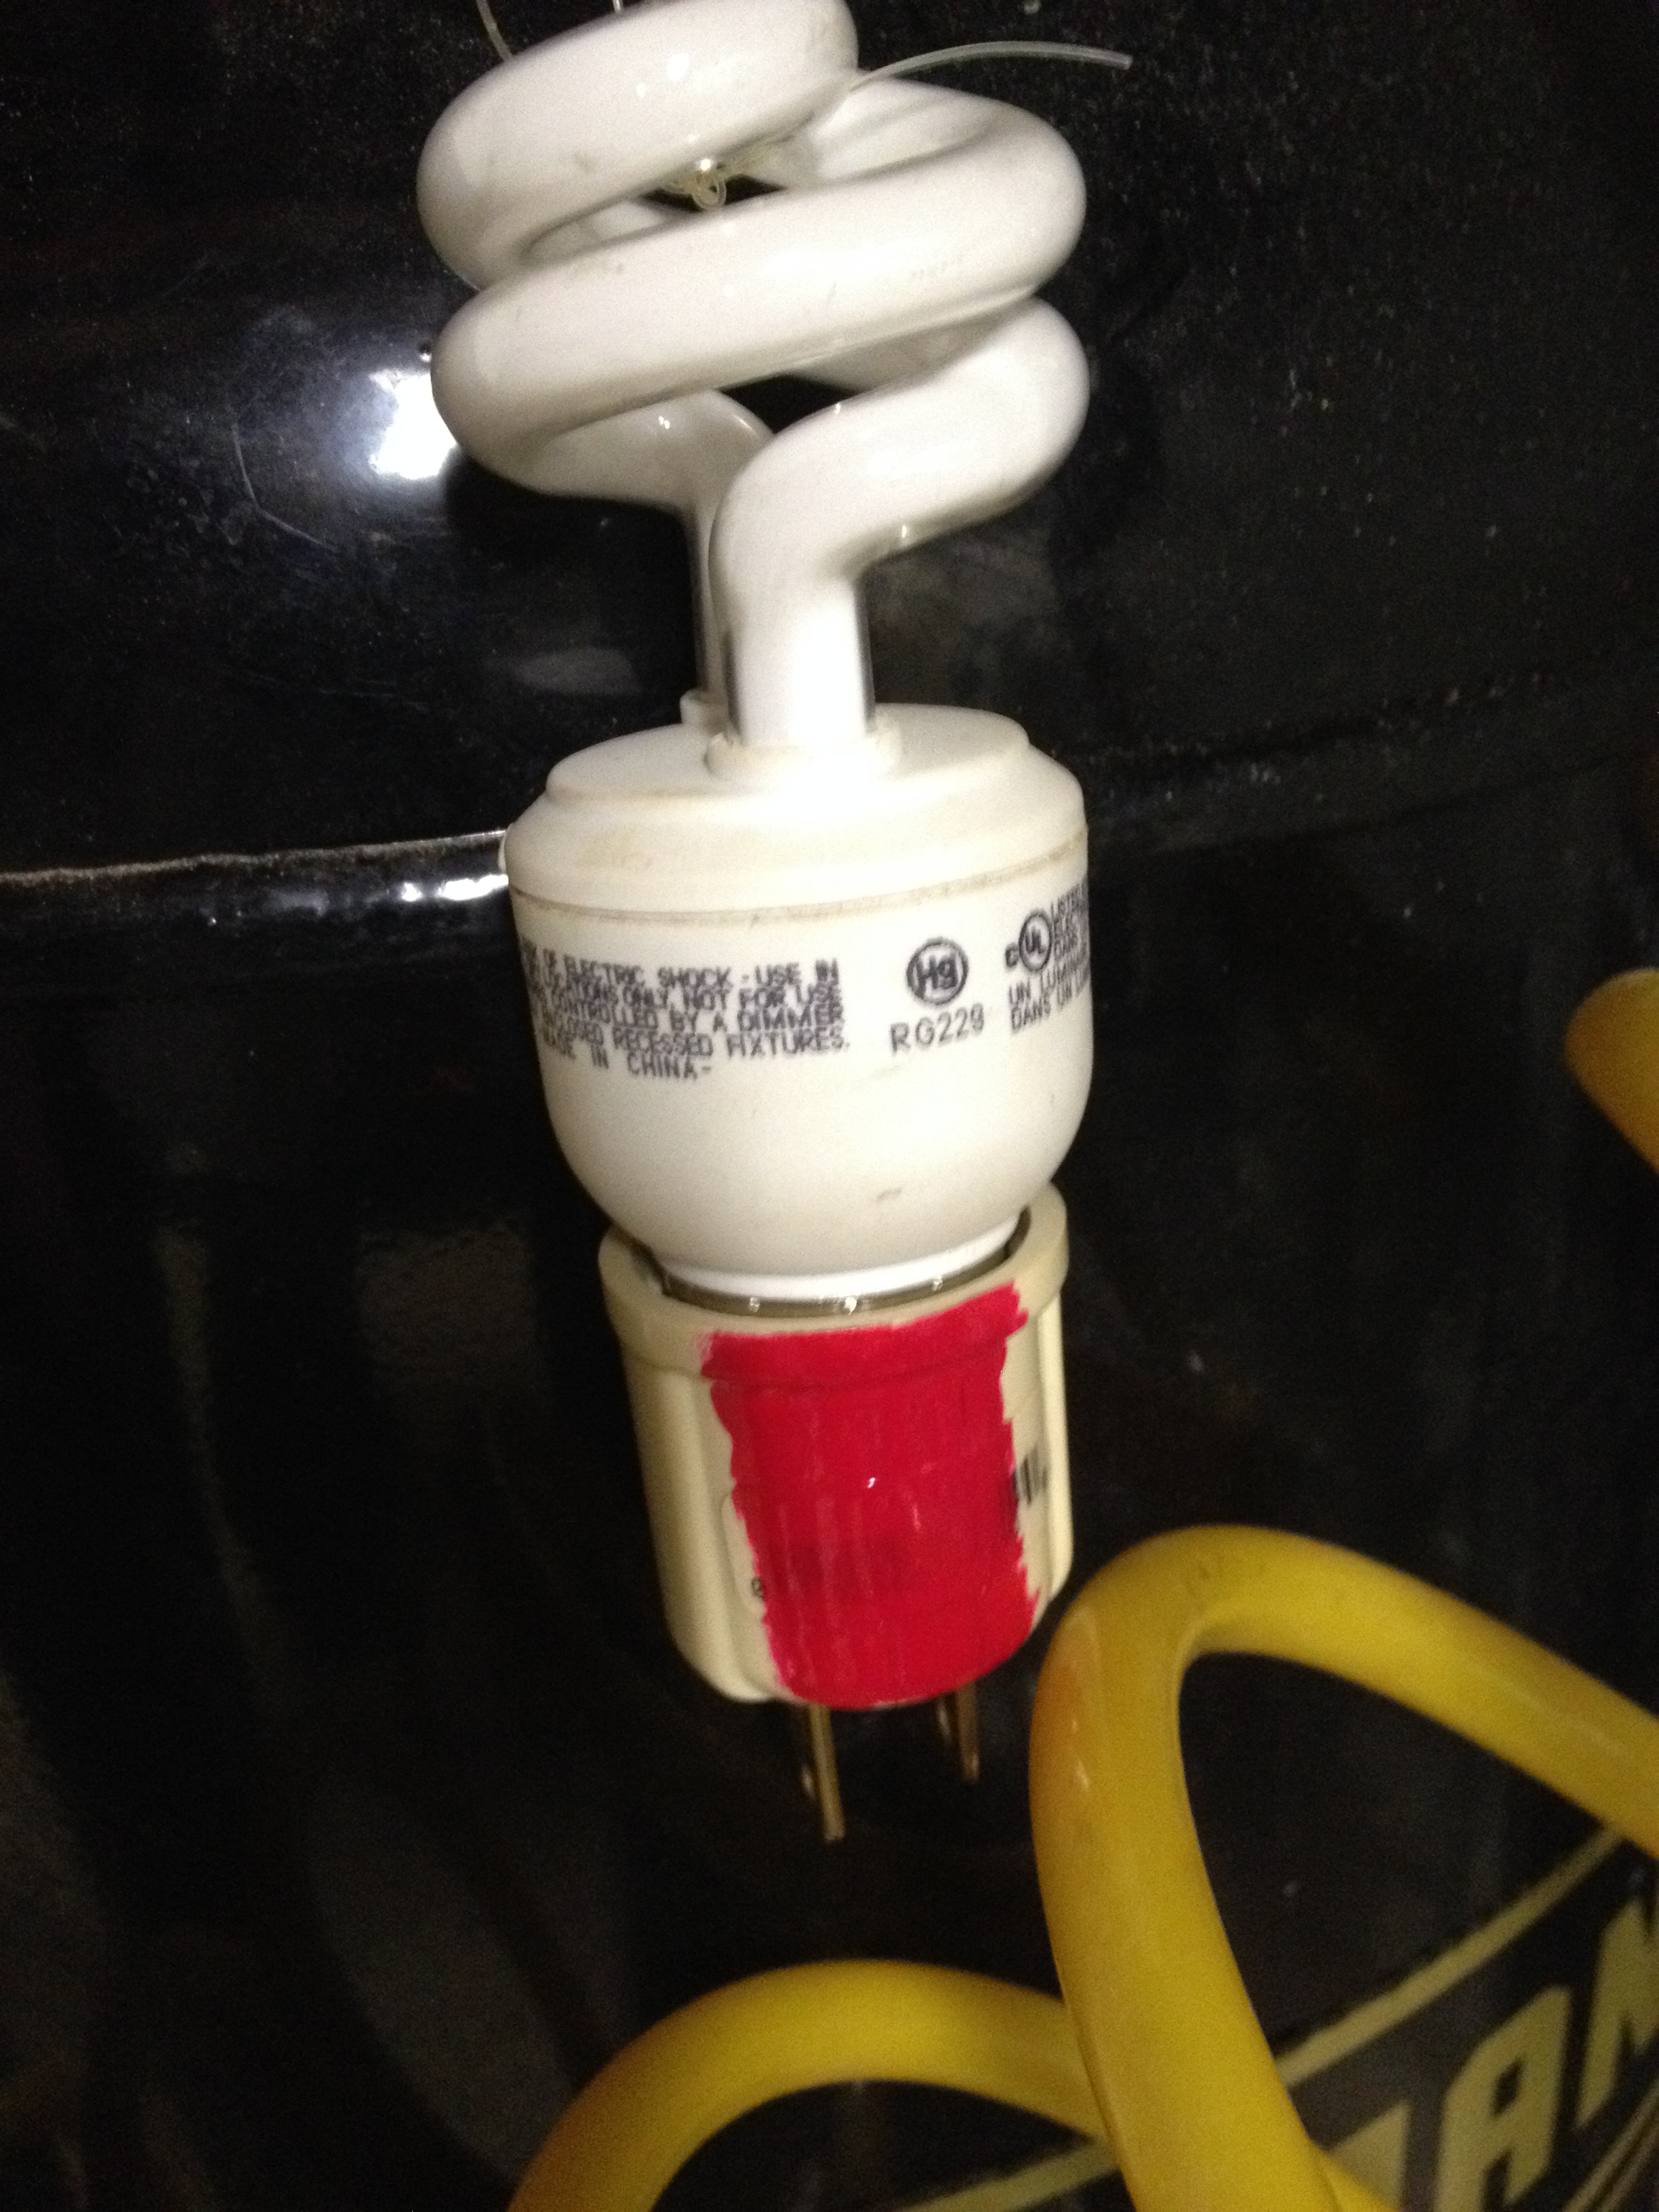
The same technique works on anything that plugs in. I used it on this lightbulb adapter so I quickly know which way to turn it to plug it in.
Tip #2: COAT HANGERS
No Southern-fried Southern boy wants to be called a Yankee, but we share the characteristics of shrewdness and thrift. Thus, each month we include a money-saving tip. It’s OK if you call me “cheap.”
Coat hanger, coat hanger, how do I love thee? Let me count the ways. No, this won’t be a treatise on 1000 ways to use coat hangers (yes, I looked it up, it’s supposed to be written as two words unless you’re from the land where “women glow and men plunder,” where coathanger is said to be preferred).
- Need a long drill bit? If you’re drilling through something relatively soft, like wood or insulation board, cut the bottom part of the coat hanger off, restricting yourself to just the completely straight part. Cut one end square and the other end on the most acute angle you can.

A light wiping of WD40, machine oil or even Vaseline will lube this “drill bit” for easier entry. Shown is the chisel point version, but you can also sharpen the tip on your grinder for an even easier and faster entry.
Wrap your fist around the middle for support to prevent bending. Using discretion, don’t push too hard or run the drill too fast, either of which could cause you to lose control. Now, the business end can act as a chisel-point bit and if you need a guide to show you where to come out on the opposite side of a wall, drill away. As always, be sure you’re not going to hit electrical wires or water pipes. This baby will drill right through Romex and PVC.

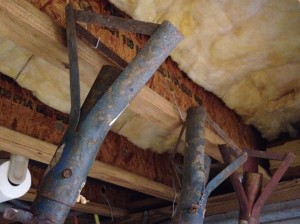
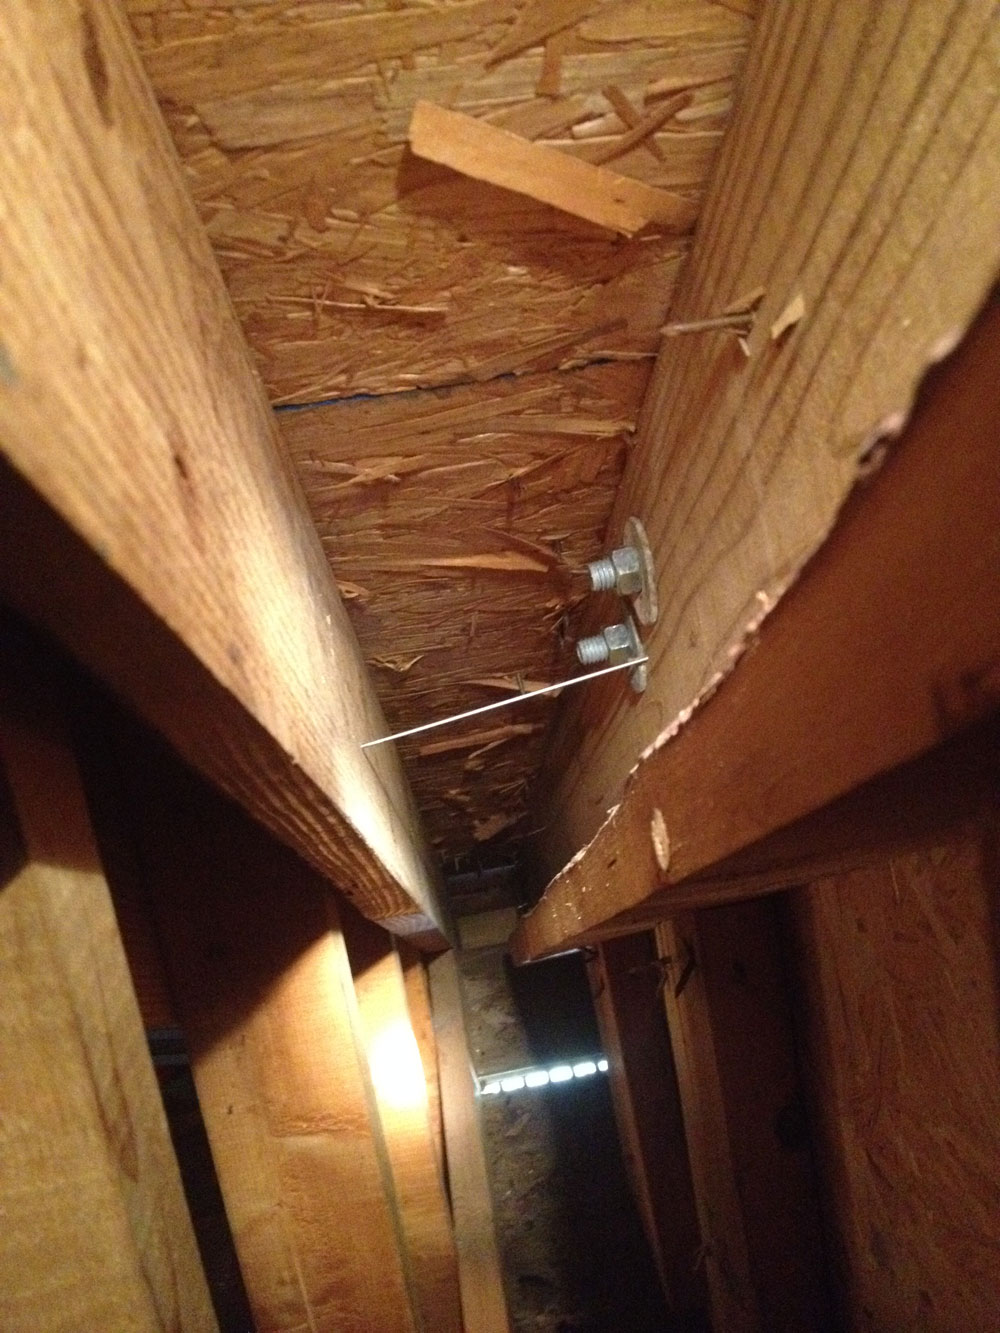
I needed to know where to drill outside on the roof to put these lag bolts into the rafter. With this guide I was right on target.
- If your stud finder isn’t giving you clearcut direction, this “drill bit” will allow you to define the edges of a stud without making gigantic holes.
- A coat hanger is the repairman’s chewing gum. I have brazed many a muffler and tailpipe with nothing more than an acetylene torch and a hanger.
- Speaking of repairs, the soft metal of a coat hanger will assume almost any shape you want. I once had a broken fan belt and no time to go to the store for a replacement. Using tip #1 above I drilled a hole either side of the rent in the belt. I then cut a U-shaped piece of hanger, passed it through the holes from the “pulley side,” and twisted the ends together on the outside. It worked so well on the fan that I forgot to replace the belt for months.
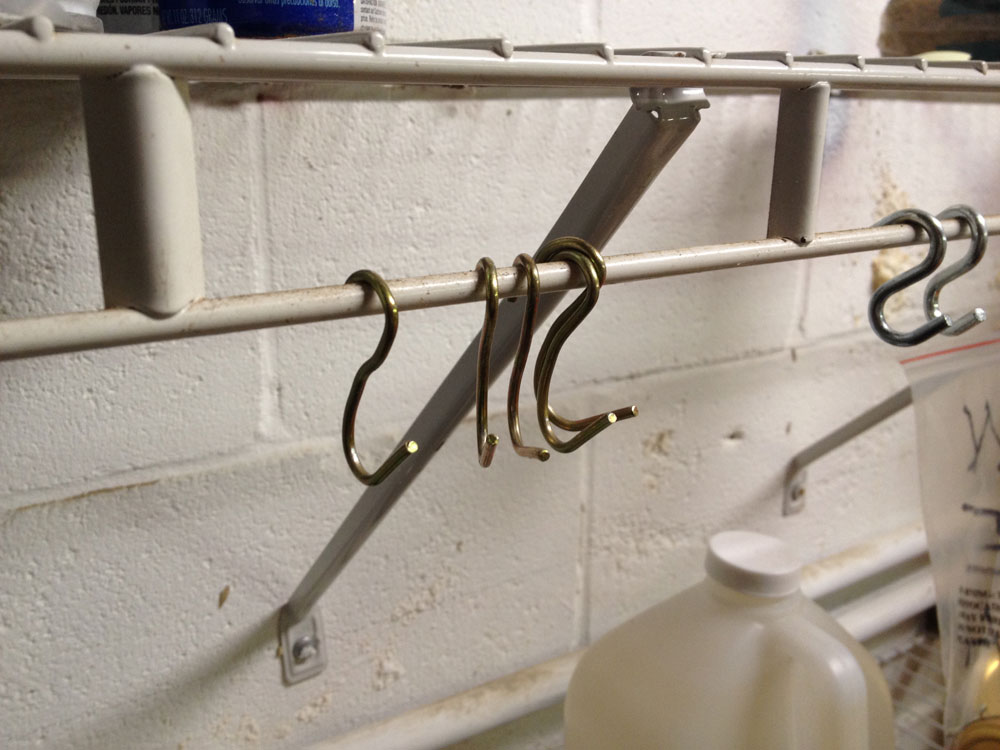
- Genetically incapable of discarding anything with future value, I keep a collection of hangers previously used.
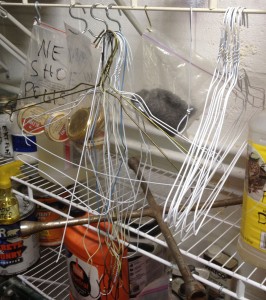
These are all “gently used,” but stand ready for their next service opportunity. I even keep the ones I’ve used for drill bits as long as they aren’t damaged in use.
Straightened, but with the hook still on the top, you can hang almost anything from them. They are great for painting small, medium, even large items. In the area I use for painting, there are a kazillion (Sorry, Steve) nails in the I-beam rafters.

These nails are permanently in these ceiling joists in the painting area, always ready to be pressed into service for hanging.
Because it’s an open and well-lighted area, I can spread a plastic drop cloth to catch most of the drippy paint.
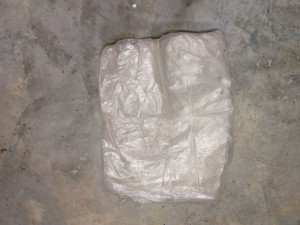
What? Sure, it’s beat up. And patched. You thought I’d throw it away after I used it once? You must be new to the column!
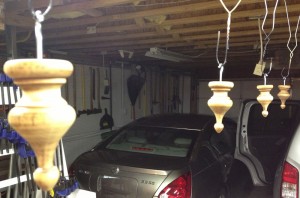
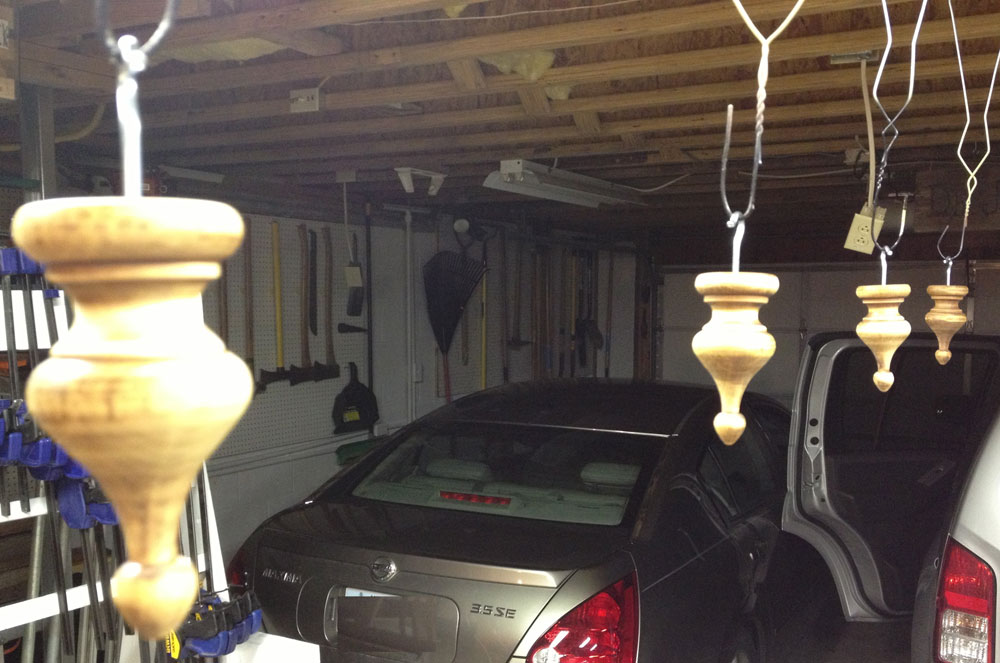
For little bitty items, like these finials, you can screw a hook into the mounting hole, gang two or even three hangers together to get it down to a comfortable working height, and paint away.
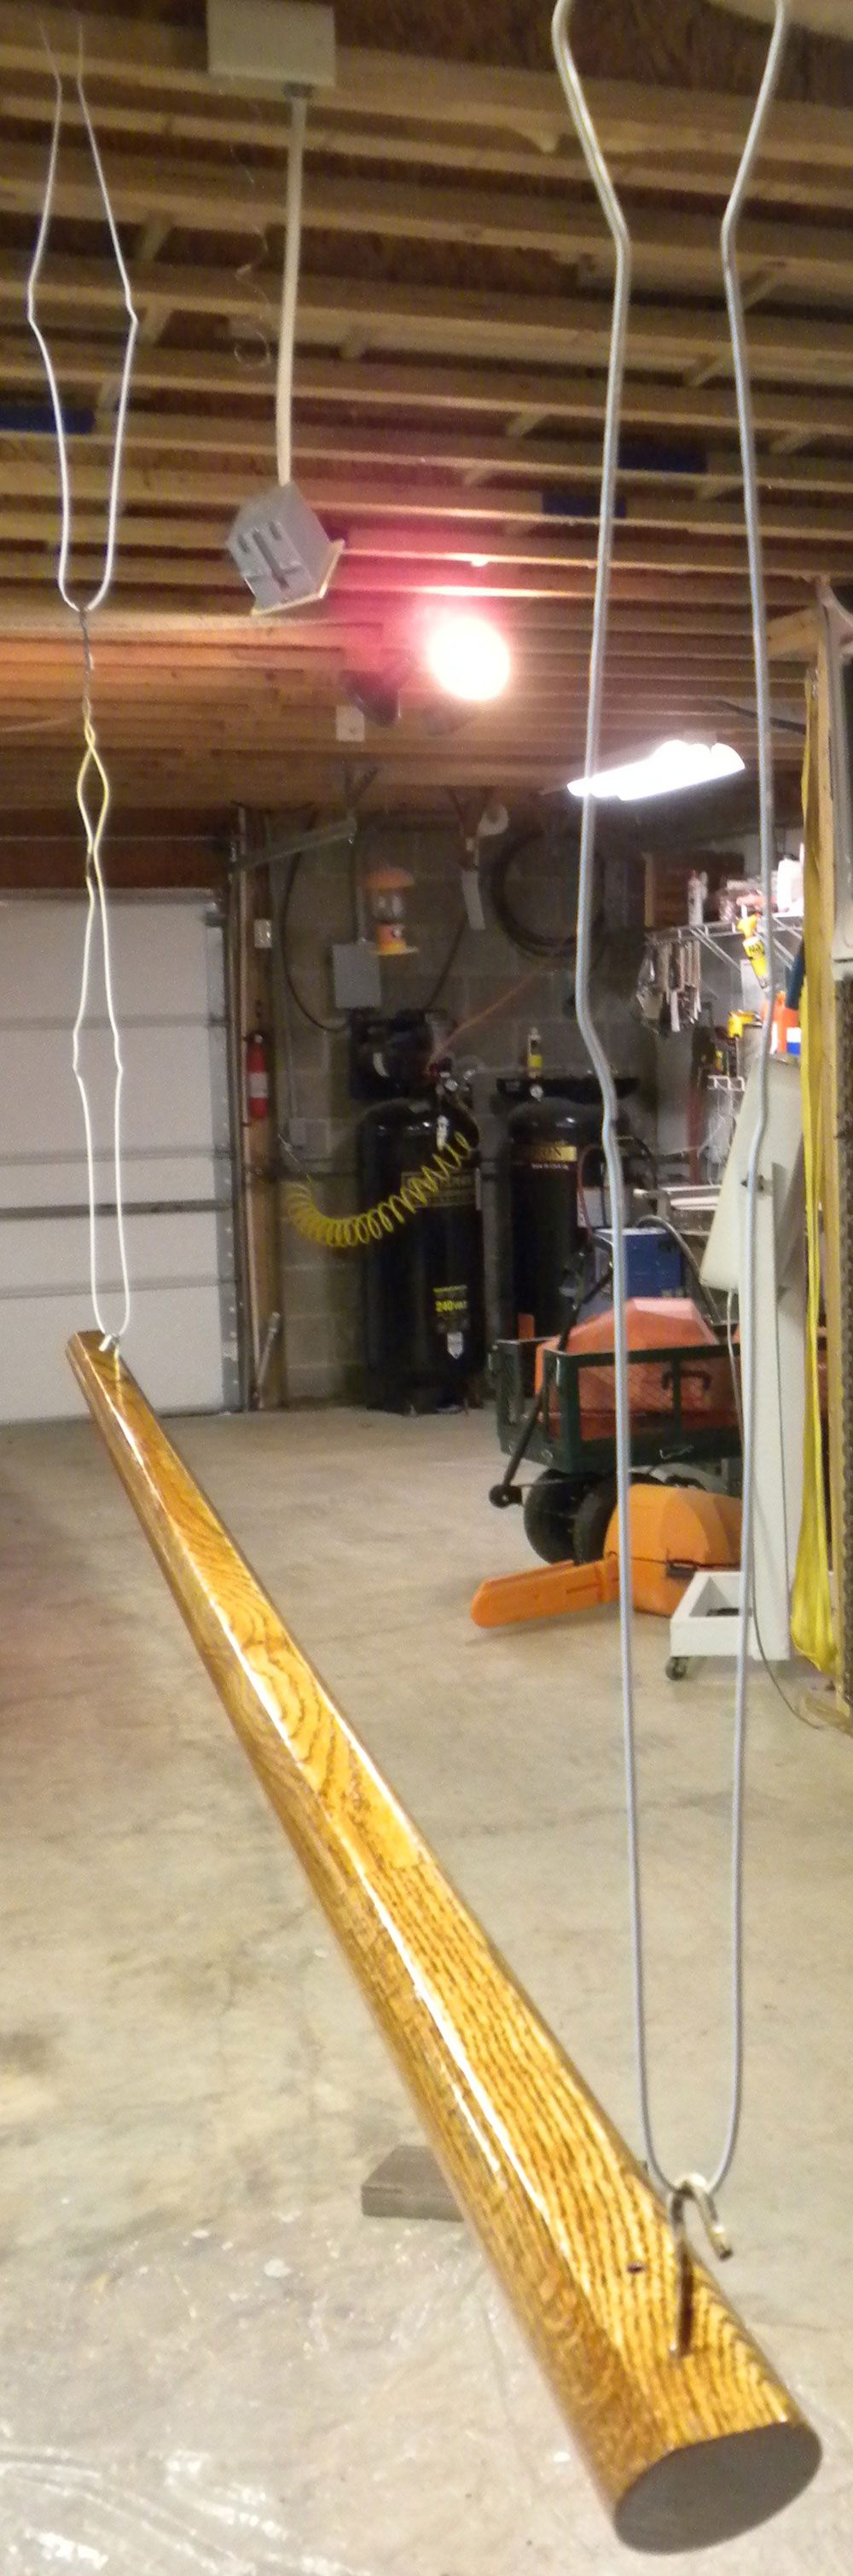
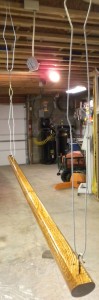 Longer items, like this handrail to the left, can be hung lower, or horizontally, for easy access. Note that two straightened hangers are used to accomplish the desired height. The screw hook in the middle makes a handy way to stop the item’s movement while applying finish without touching the wet surface.
 - The metal in coat hangers is soft and malleable. That can be good or bad. Depends on your planned usage. The softness of the metal makes it easy to cut with even the least sophisticated tool, such as the shear in the jaws of your slip-joint pliers. On the other hand, if you want to take a piece out by fatiguing the metal, you will be at it for a while. Hard, brittle metals lend themselves to better success with that method.

Because the metal is soft, I was able to shape it into these hangers.
On the other hand, soft metal is easily bent, so making these hooks for jack stands, the angle had to be very acute.
Coat hangers make a great twist tie. Okay, so they’re not quite as easy to use as the ones from the grocery’s produce department, but they are a lot more substantial!
CLICK HERE to go back to the October 2014 issue of Wood News Online
Jim Randolph is a veterinarian in Long Beach, Mississippi. His earlier careers as lawn mower, dairy farmer, automobile mechanic, microwave communications electronics instructor and journeyman carpenter all influence his approach to woodworking. His favorite projects are furniture built for his wife, Brenda, and for their children and grandchildren. His and Brenda’s home, nicknamed Sticks-In-The-Mud, is built on pilings (sticks) near the wetlands (mud) on a bayou off Jourdan River. His shop is in the lower level of their home. Questions and comments on woodworking may be written below in the comments section. Questions about pet care should be directed to his blog on pet care, www.MyPetsDoctor.com. We regret that, because of high volume, not all inquiries can be answered personally.


Love the tips for long and skinny free things. Also in that department but stronger is used welding rod from your friends who have had 1/8″ low hydrogen rod laying around too long or if it got wet it’s useless. Whack it with the hammer and off comes all the shielding. This is serious strong rod, I make all my peg board hangers with it. And a myriad of other things. Since it’s 7018 it will temper and can be made into small blades, drills and saws as the need arises.
Eugene Turgeon writes: “An alternate solution to the plug problem. It takes about 10 seconds with a pocket knife. It also works in the dark, in case you are trying to plug in a lamp in to look for your bifocals. Just put your thumb on the notch and plug in (if it isn’t too dark to see the outlet).” Yes, Gene, there’s always that, isn’t there? And, for those too slow to plan ahead: pull your thumb back before the prongs contact the juice and make it an even more enlightening event. Also, some manufacturers will consider their warranty voided with any alteration to their plugs, even though this modification causes no change in function.
Thanks for the great addition, Gene.