

When Peter Galbert comes to the High next month to teach his class on Windsor Chairmaking, I am sure he will bring his Galbert Caliper with him. He should bring it with him so you can buy one.

The High loaned me one a couple of weeks ago to try out and let me tell you about this little gem. This is a neat little tool for gauging the diameter of a turning as you turn. Now everyone has his or her little tricks for checking the diameter and matching a pattern when turning. I have seen people use open-end wrenches as a “go no-go” and outside calipers are very common. I am sure there are many other methods since getting one turning to match another is to my mind a very difficult task.
I am fond of Shaker Candle Stands. I love the overall shape of the table and the center post is a subtle, delicate, difficult piece of pure joy when shaped correctly. Roy Underhill had a show a couple of seasons ago where he resorted to someone else’s pattern so he could get it right. I have seen an original at Old Sturbridge Village (well worth a special trip if you have never been) and I just love the thing. Knowing I would not be able to freehand the shape, I bought a plan from the New Yankee Workshop and made a pattern in SketchUp. I tweaked it in the computer until I liked it and then printed it out full size and traced it onto a piece of eighth inch ply. After cutting it out very carefully and smoothing the edges on the spindle sander, I measured the width at critical points in the shape and noted them on the pattern. Going from the pattern to the final shape is where the Galbert fits into your shop.
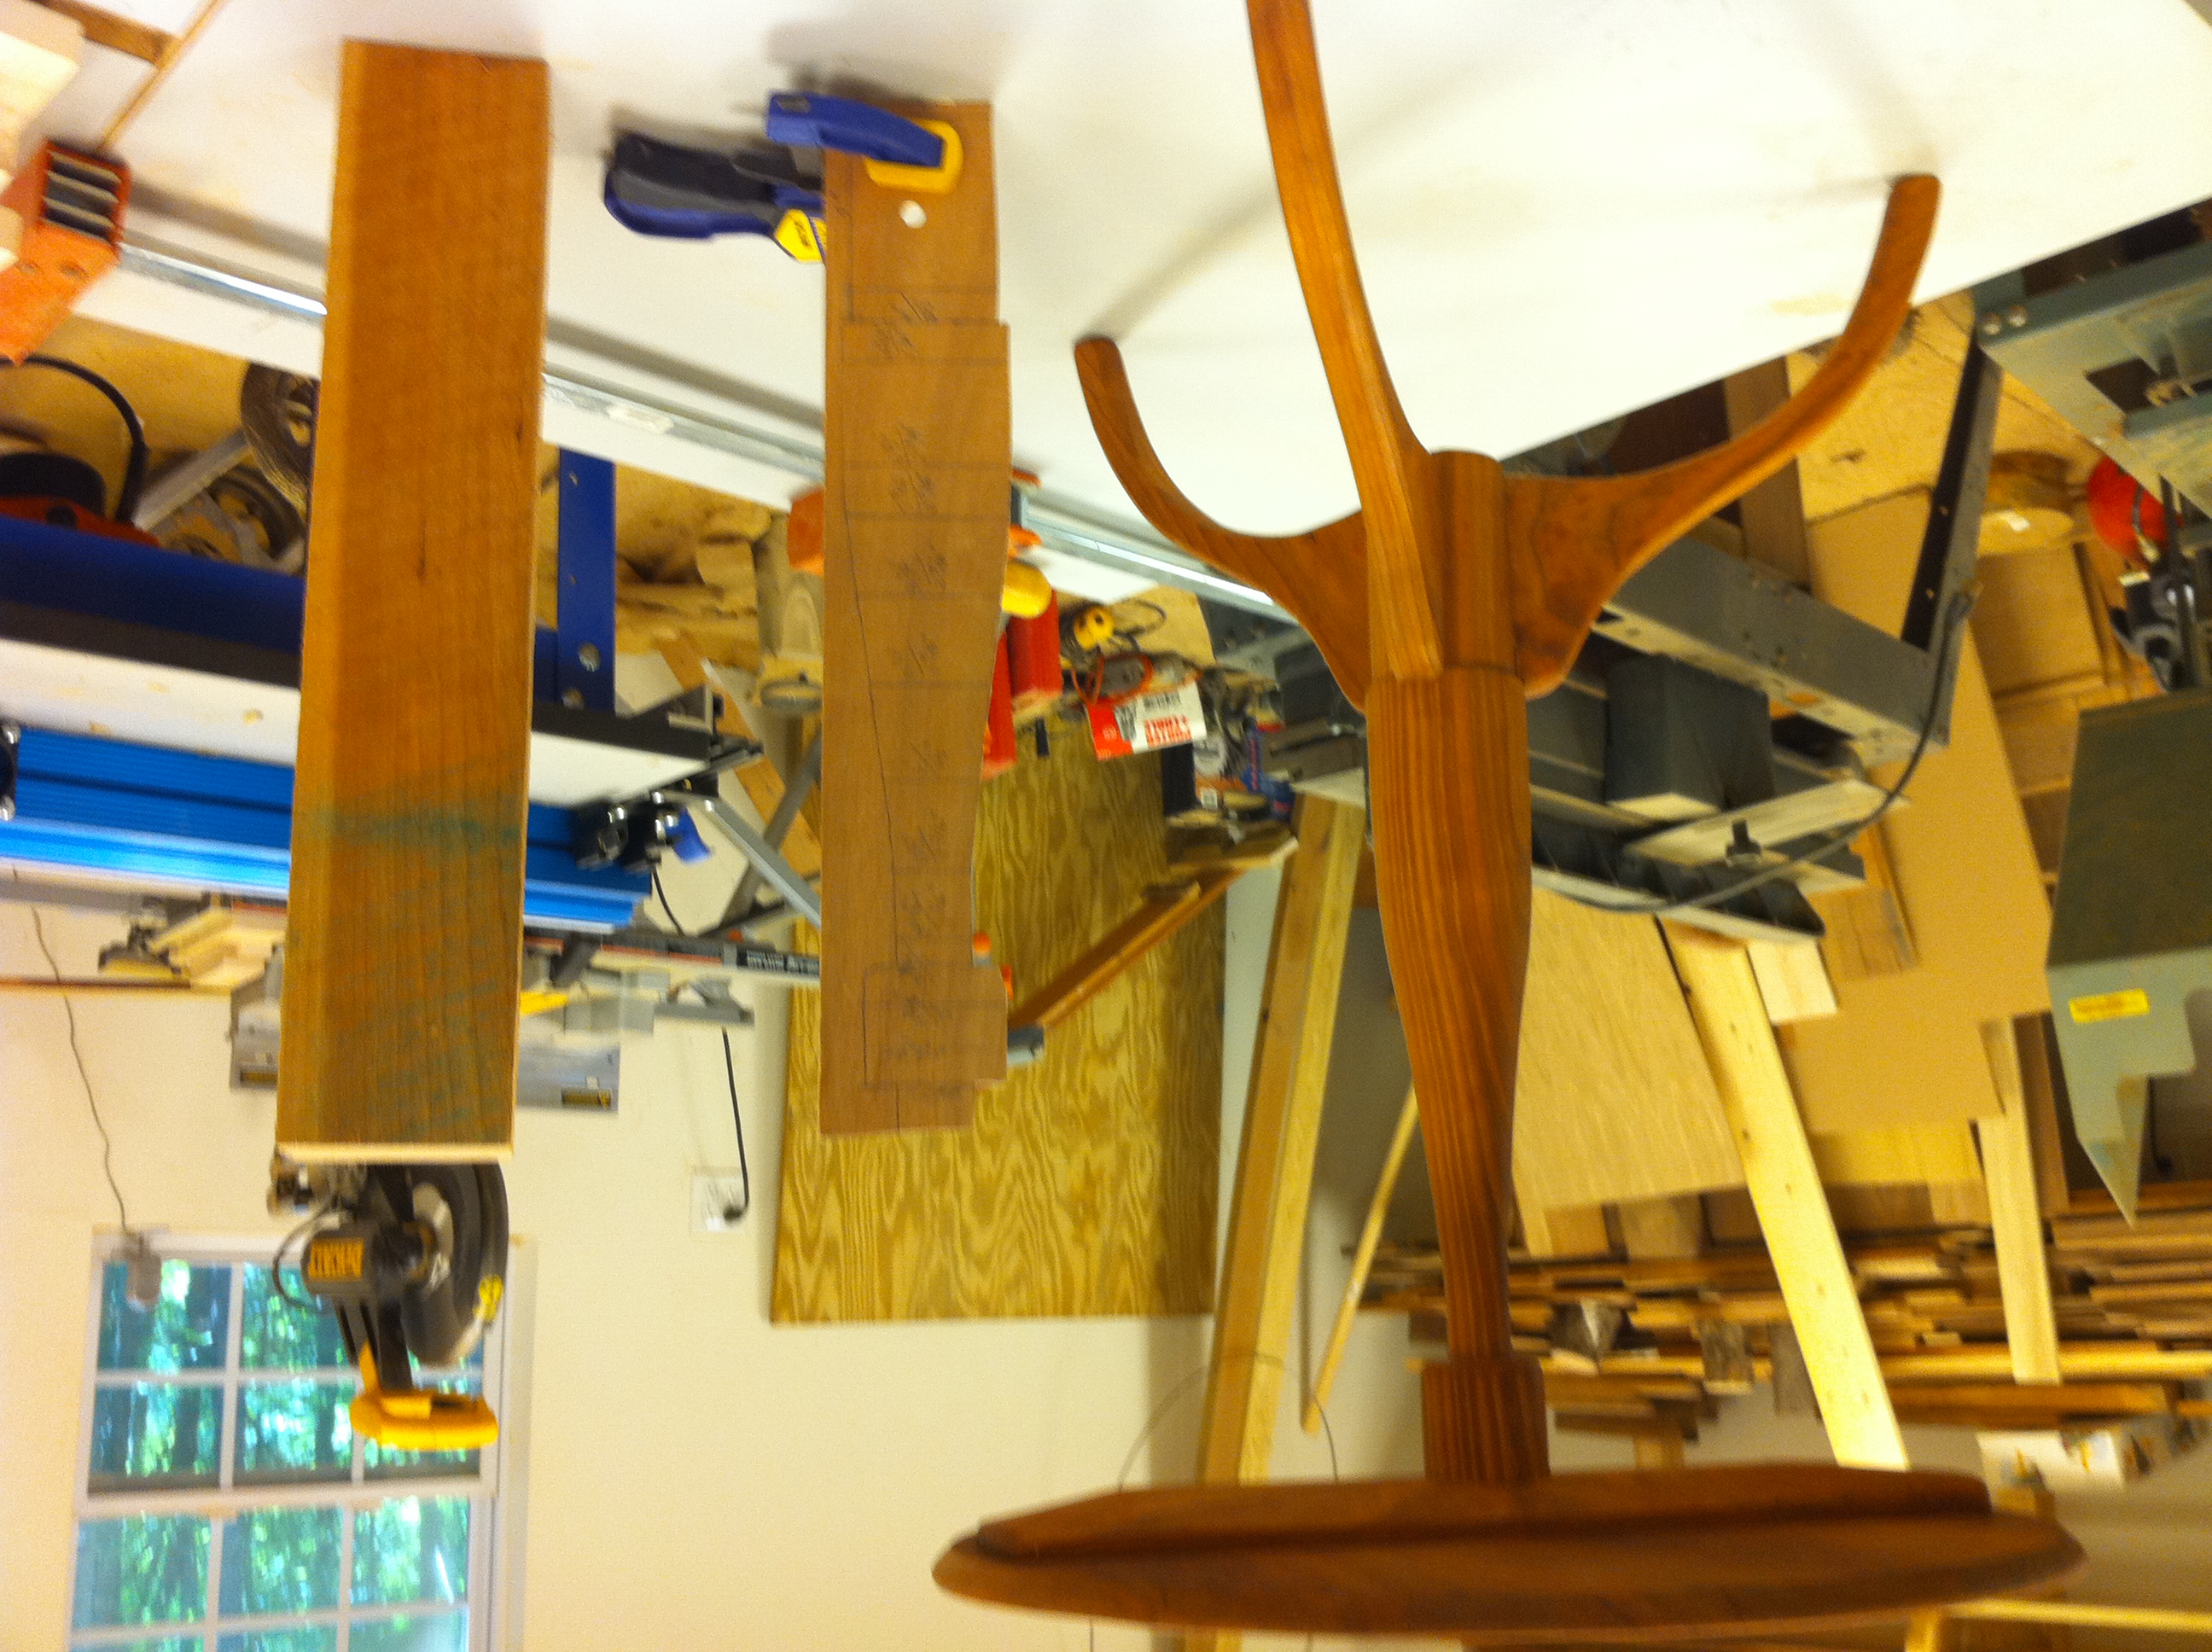
Shaker Candle Stand, Pattern and Turning Blank
I set my turning block of cherry on the lathe and rounded it off. I then took the pattern, marked the location of all my measurements, and while the lathe was turning very slowly, penciled in lines all around the piece. Using a parting tool and the Galbert, I made grooves in the piece to leave the proper pattern diameter at the bottom of each respective groove. The Galbert is perfect for this operation with only a few cautions.
First, since this was my first time using the Galbert, I was hesitant to use it while the lathe was running. I think with more experience, I would be comfortable using the Galbert without turning off the lathe.
The other issue was when I made the grooves with a parting tool; there is a depth beyond which the Galbert will not bottom out in the slot because the bottom front edge of the case bumps against the side of the slot.
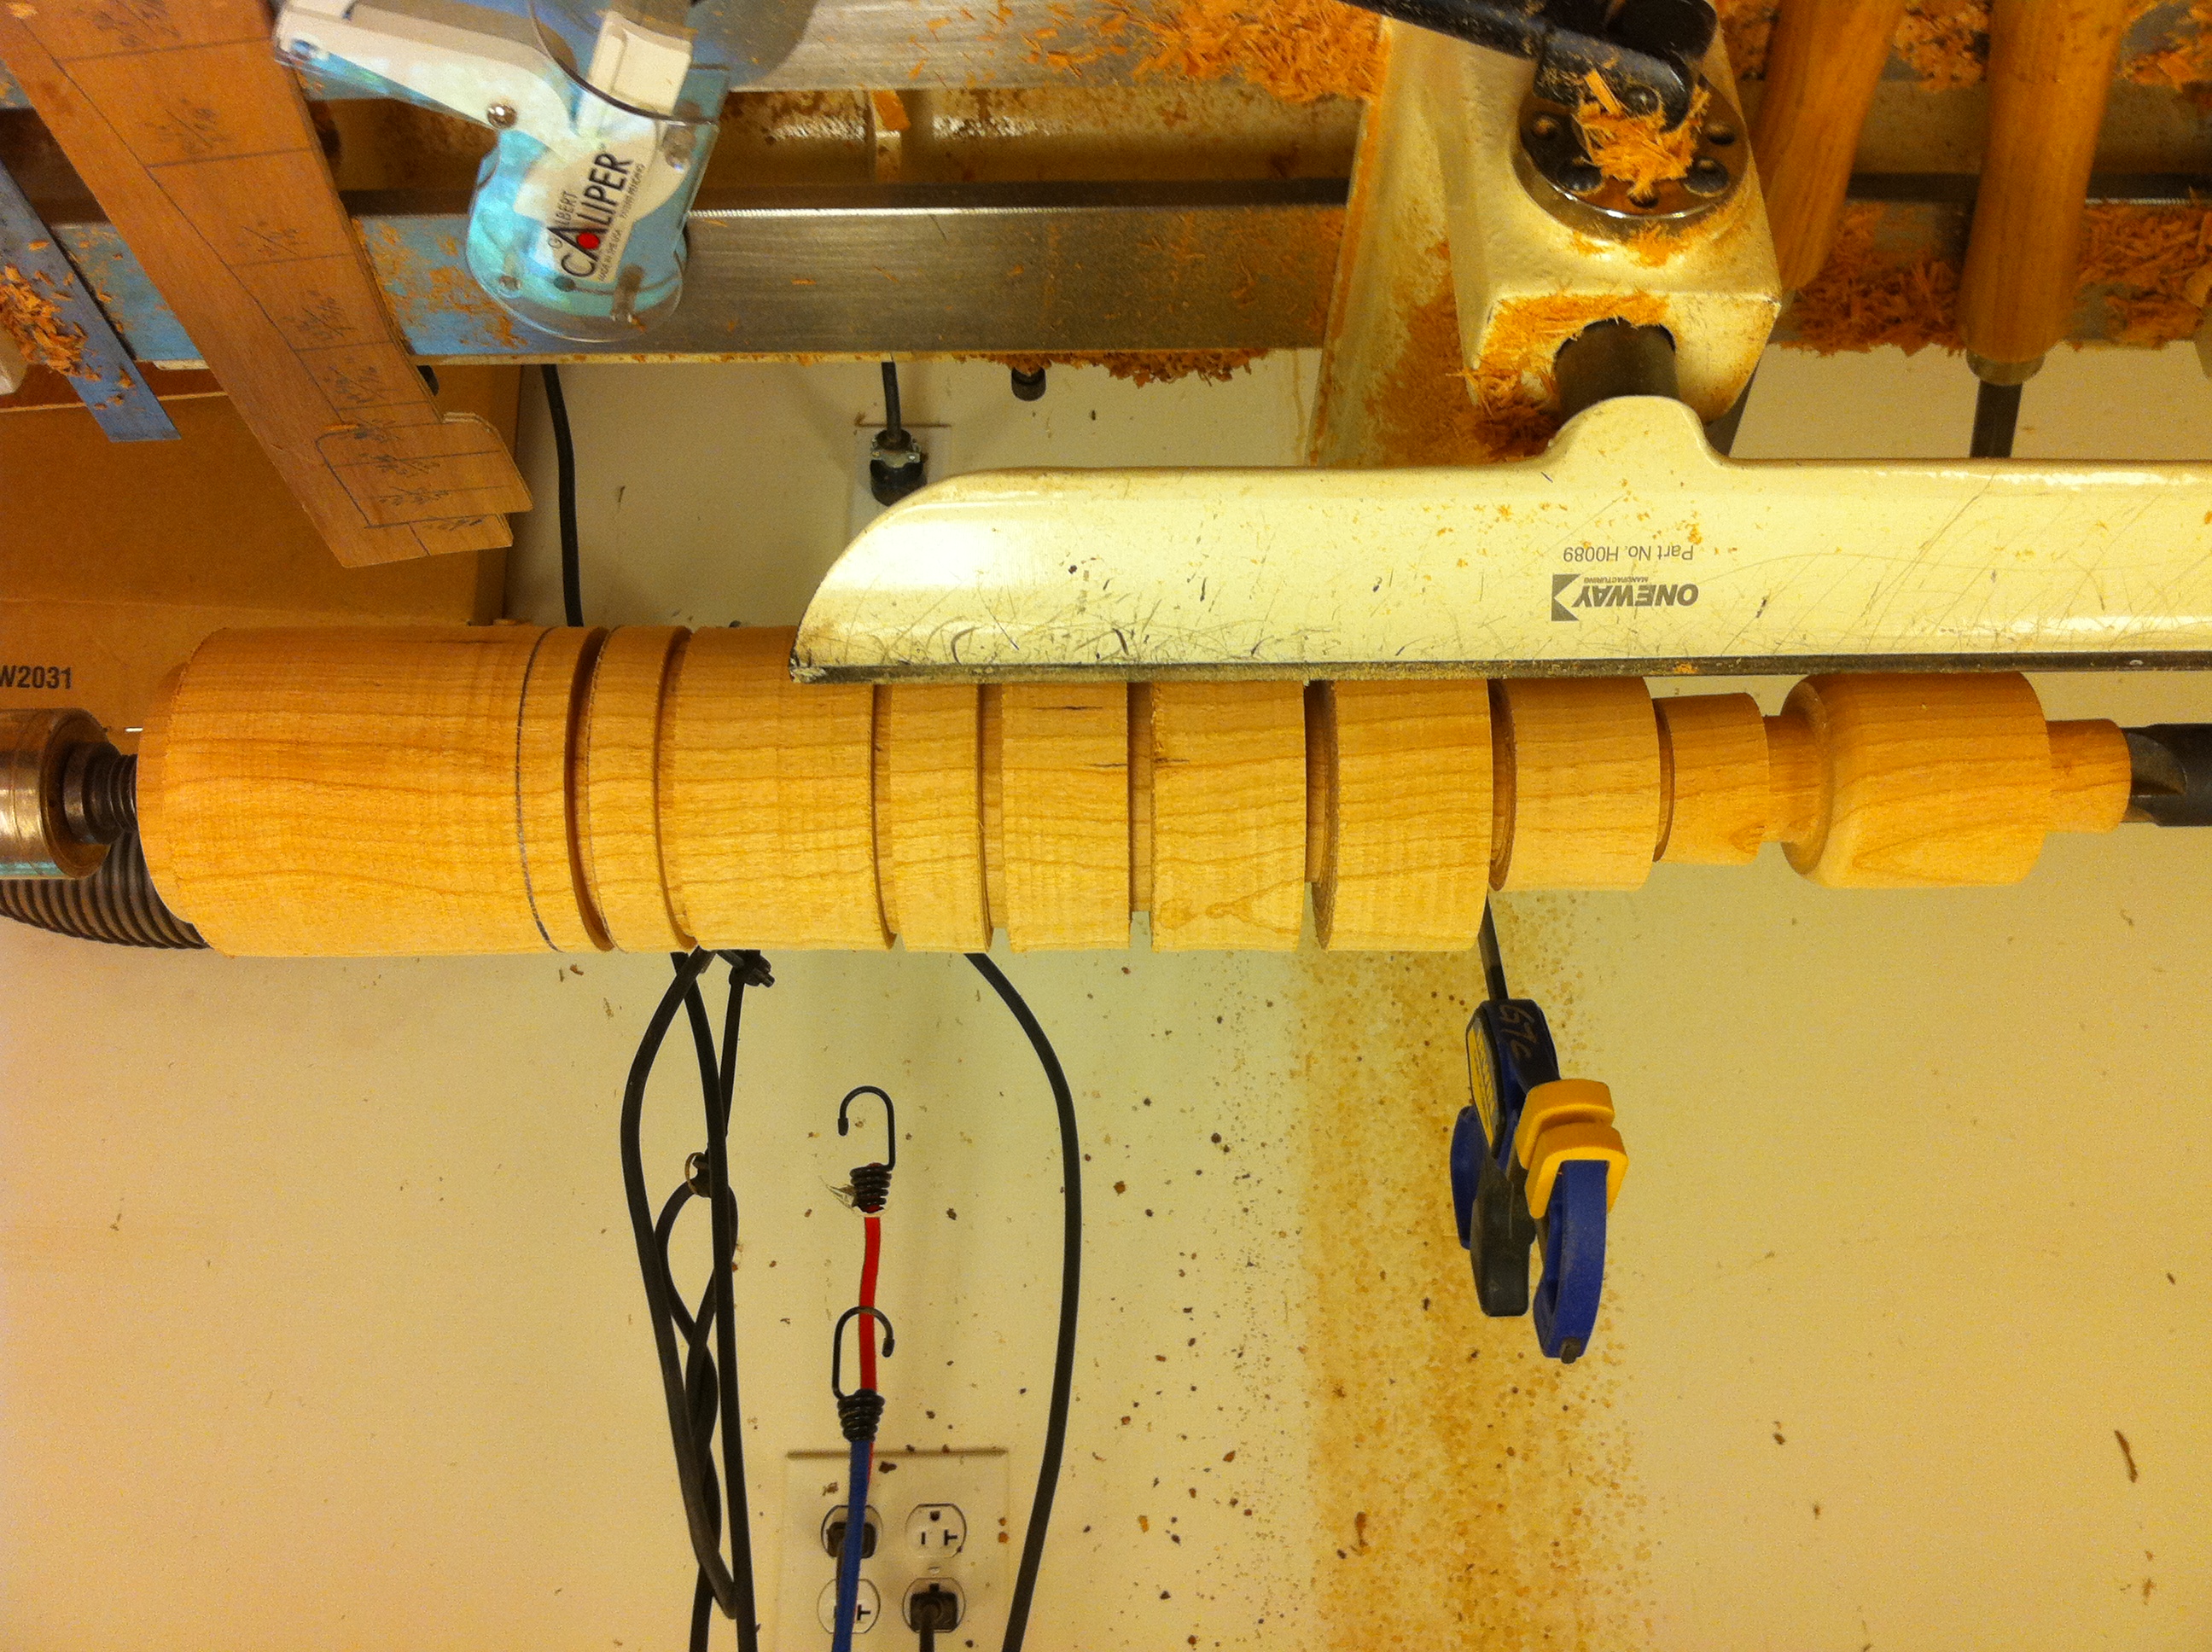
Blank with Measured Grooves
You have to make room for the case to slide into the groove to get an accurate reading. That made a problem in a couple of areas since making the groove wide enough took out my marking lines. Since I am right handed, I tend to start on the right end of a spindle and work left. The extra width of the case of the Galbert is on the left side as you use it. Part of the solution is to work from left to right and generally, you will be cutting away enough material for it to slide into the grooves.

Just a Little Sanding Left
Altogether, it took me about an hour to make this center post. Last time I made it, I spent over twice as long. Not sure the High will get this little toy back — I may just have to send them a check.
Check out Peter’s video to see a real expert turner use the Galbert, then send in your order before the class.
Sorry, the comment form is closed at this time.