Jim Randolph

Mar 052019
 

Welcome to “Tips From Sticks-In-The-Mud Woodshop.” I am a hobbyist who loves woodworking and writing for those who also love the craft. I have found some ways to accomplish tasks in the workshop that might be helpful to you, and I enjoy hearing your own problem-solving ideasPlease share them in the COMMENTS section of each tip.  If, in the process, I can also make you laugh, I have achieved 100% of my goals.

Discarded doors have a million uses. Just as good or better, they’re usually free.

Believe it or not, I actually paid for the reject door in this story. As you might imagine, I didn’t pay much.

What’s so great about doors? For starters, they’re flat. Even a cheap interior door is likely to be reliably flat unless it’s been wet or lain in a garbage pile for a week.

What else? They’re pretty strong. In order to stay flat, a door has internal structures that keep it stable. That may be a wooden frame or, in the cheapest of doors, corrugated cardboard on edge.

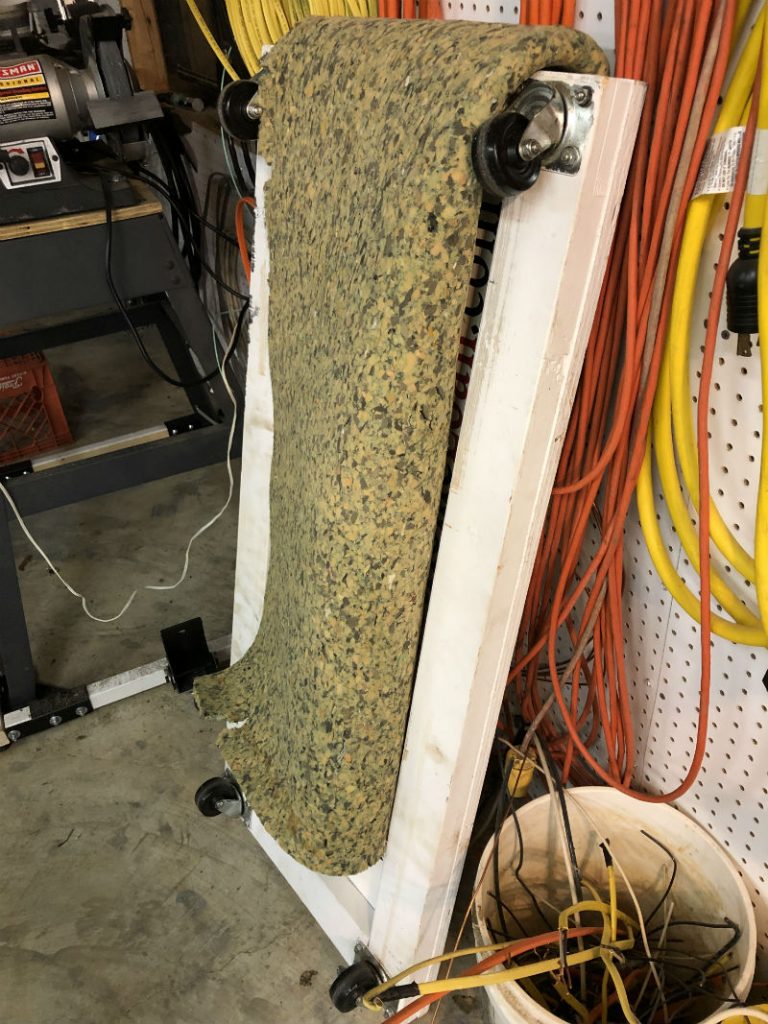
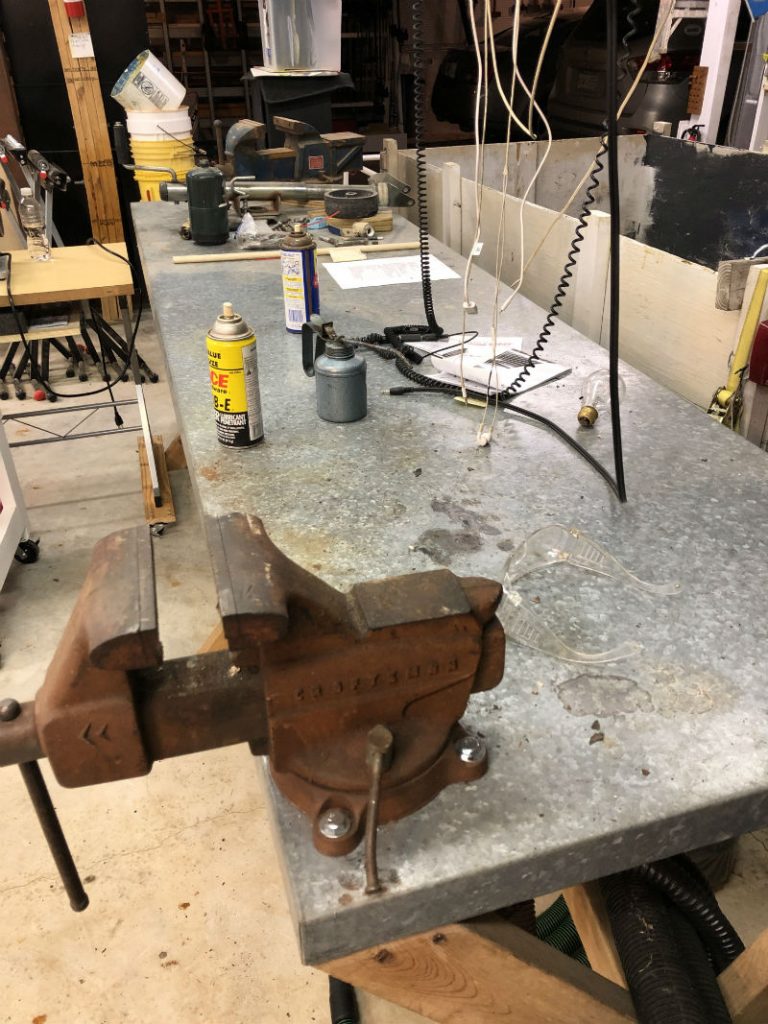
Sometimes a door is even waterproof, like this one I made my sharpening station from.

I found this PVC-coated interior door lying in someone’s yard on garbage day. I had absolutely no use for it, but I stored it in the garage at work until the need arose. I’m glad I did! It made the perfect foundation for the sharpening center.

After years and years of using roller stands around my table saw when I had wide and/or long materials to cut, I finally decided I wanted an outfeed table.

I built this “table” from a door my work next-door-neighbor had acquired. A Bell Telephone building in Biloxi was being torn down, and my friend got word that there were accordion doors inside. As you might imagine, Ma Bell didn’t buy cheap doors. Although this is only one panel of a long, long partition, it weighs a ton.

I asked my friend if I could buy a couple, and he graciously agreed.

I took one to a sheet metal shop and asked them to wrap it in galvanized steel. I use it for wet and dirty things that require the surface be protected.

This table is impervious to oil, solvents and light banging. When I hired the sheet metal company to encase it, I should have asked the cost. I nearly lost my breakfast when I picked it up! Still, it’s been invaluable.

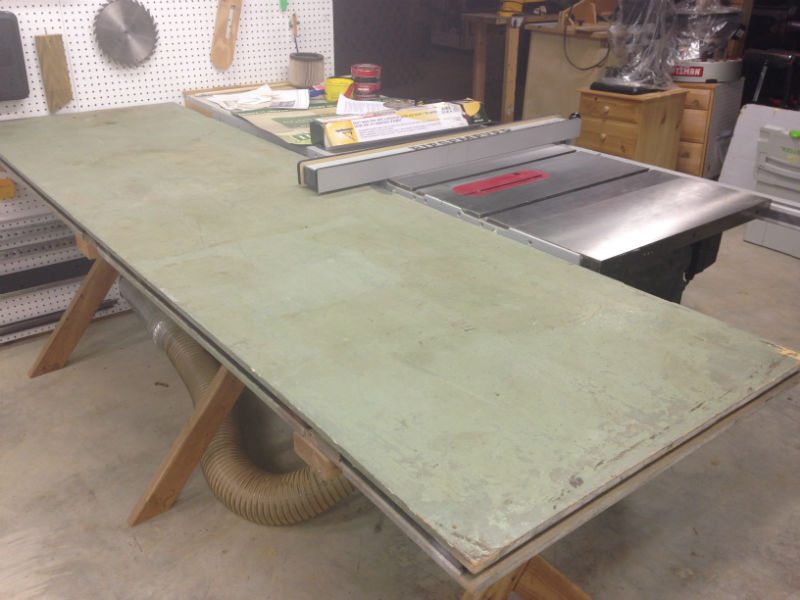
I made the other door into a general working table. It wouldn’t have hurt my feelings if it had been wider, but two together would have been too much. It’s flat. It’s solid. It’s green. Not that green is an advantage of any kind. In fact, it’s kind of ugly, but you ignore it after a while.

Here is the finished product: my simple outfeed table. I don’t need the table to contain storage, so there was no need to make a cabinet out of it. The picnic-style legs make it extremely steady.

Challenge Number One was getting it home to my shop, as it was in the clinic garage. It took three of us to load it into the utility trailer. I put it upside down on a thick blanket. It’s pretty top-heavy and I didn’t want the rough floor of the trailer ruining the door-smooth top on the way home.

That went well.

But, I got home and realized, “Wait a minute. I don’t have any help. I have to get this off the trailer and diagonally across the garage, around the table saw, past the planer and jointer and into position.” For the solution to that problem, click on this month’s Tip Number Two.

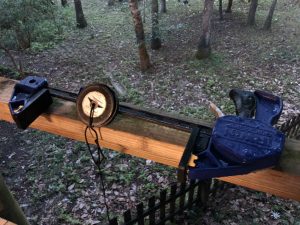
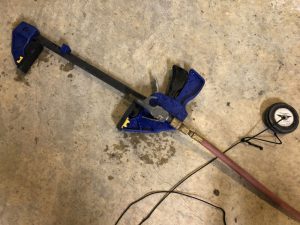
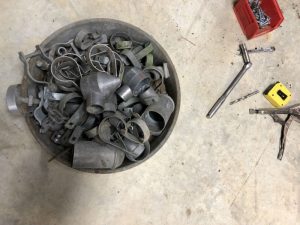
OK, now it was behind the table saw. And, it was too tall. Arrgghh! I needed to turn this monstrosity over to trim the legs! I had to keep reminding myself it was free!

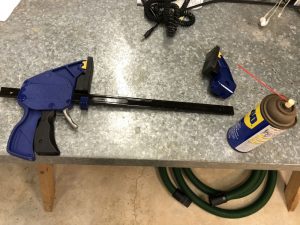
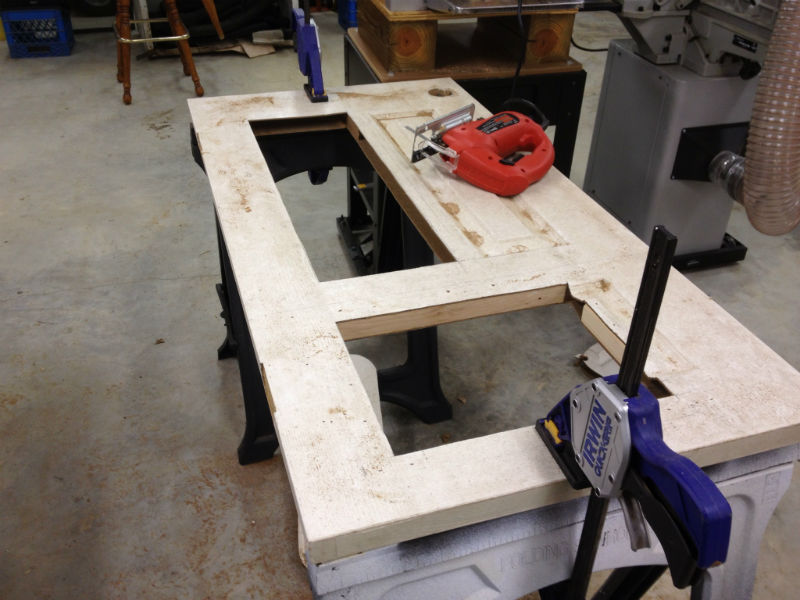
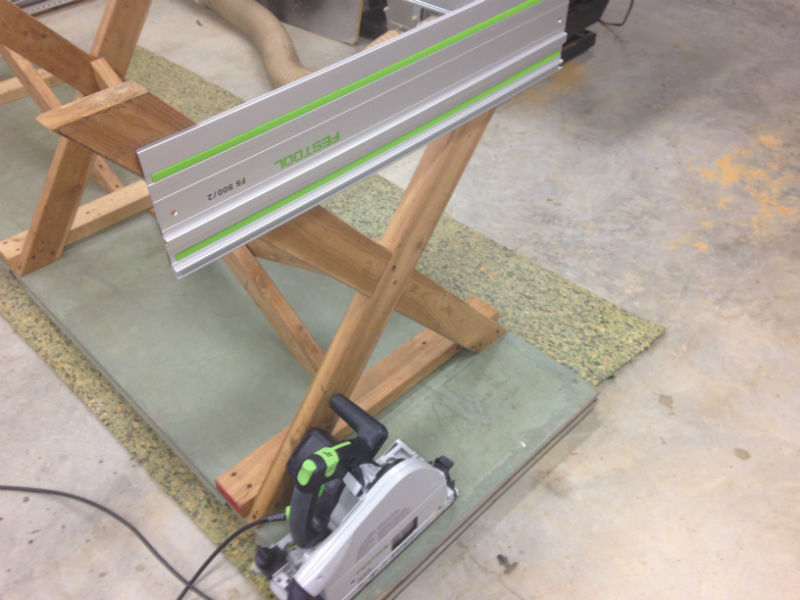
Regular readers already know I’m into overkill. What I was about to do next is overkill, but with no good justification. I’d only recently bought my Festool TS 75 Track Saw, and I was dying for any excuse to use it. “Besides,” I thought, “I want the bottom of these legs to be as flat as possible.” With that in mind, I carefully attached a Festool track to each pair of legs and cut. Perfection!

Festool TS 75 Track Saw at the ready, track almost in position. These are going to be the flattest, straightest leg feet in the history of shop furniture!

Like most people, I use my “outfeed table” as an assembly table and everything else you can imagine. While I might like it to be a bit wider, the improvement when cutting full sheets of plywood all by myself is incomparable.

Although, now that I have the Festool TS 75 Track Saw, I might not be doing that much anymore.


Jim Randolph is a veterinarian in Long Beach, Mississippi. His earlier careers as lawn mower, dairy farmer, automobile mechanic, microwave communications electronics instructor and journeyman carpenter all influence his approach to woodworking. His favorite projects are furniture built for his wife, Brenda, and for their children and grandchildren. His and Brenda’s home, nicknamed Sticks-In-The-Mud, is built on pilings (sticks) near the wetlands (mud) on a bayou off Jourdan River. His shop is in the lower level of their home.Questions and comments on woodworking may be written below in the comments section. Questions about pet care should be directed to his blog on pet care, www.MyPetsDoctor.com. We regret that, because of high volume, not all inquiries can be answered personally.

Mar 052019
 

No Southern-fried Southern boy wants to be called a Yankee, but we share the characteristics of shrewdness and thrift. Thus, each month we include a money-saving tip. It’s OK if you call me “cheap.”

The solution to the moving problem (from Tip #1) started with an almost-freebie. I got some free 3/4″ plywood I found on the side of the road and made a dolly. I framed it with scrap 2x4s and all I had to spend on it was the locking wheels, some paint, bolts, nuts and washers.

When I got home, I put an old blanket on the back of the trailer so the iron frame wouldn’t scratch the top. I put my little dolly, covered in another old blanket, where I thought the end of the table would end up and began to slide it out. While the table is heavy, it was manageable to work with one end at a time. Once the first end was secure, I climbed into the trailer and lowered the other end out. After the table was horizontal again it was easy to balance it on the dolly and move it into place.

What of the planer and jointer that were in the way? Almost all of my power tools are on wheels. Unplug the tool, push down the lever that puts the wheels on the floor and soon the tool is out of the way.

If I need to move the Delta UniSaw, there’s no calling the neighbor, just roll it wherever it needs to go. Ditto for the band saw, grinder table, oscillating spindle sander, router table and scroll saw. More on that next month.

I chose the dimensions simply: 4 feet by 2 feet. There are lots of screws attaching the plywood to the lumber, and 5/16″ bolts holding the substantial wheels. This cart could haul Godzilla around!

Heavy duty and low-cost. That’s the way I like my equipment. Make one of these for yourself. Being flat, it’s easy to store, too!

Jim Randolph is a veterinarian in Long Beach, Mississippi. His earlier careers as lawn mower, dairy farmer, automobile mechanic, microwave communications electronics instructor and journeyman carpenter all influence his approach to woodworking. His favorite projects are furniture built for his wife, Brenda, and for their children and grandchildren. His and Brenda’s home, nicknamed Sticks-In-The-Mud, is built on pilings (sticks) near the wetlands (mud) on a bayou off Jourdan River. His shop is in the lower level of their home. Questions and comments on woodworking may be written below in the comments section. Questions about pet care should be directed to his blog on pet care, www.MyPetsDoctor.com. We regret that, because of high volume, not all inquiries can be answered personally.

Mar 012019
 

Mr. Organized likes to finish one thing before starting another.

Mr. Organized also likes to clean his entire shop between projects.

Mr. Organized’s mother used to say, “You’re old enough to know you can’t always have everything you want.”

When I was working on the grandkids’ round picnic table, it took so long that I had many other things I had to do. It was a challenge, because the table and its parts took up so much room.

It also meant I had to work on other things while that was going on. There’s always something that needs to be made or fixed. But, invariably, the tool you need is on the bench with the other project. Or the size drill bit is being used on that other project.

It’s a recipe for frustration.

Right this minute I have some birdhouses I started years ago lying on the saw table, a stool I’m making for Brenda (like she needs another stool from me) sitting on the table saw outfeed table, the unfinished setup of my new Tormek T-8, and a Kapex that needs a stand.

I believe this is going to be a nice surprise for Brenda when it’s finished. Will that be before the next millennium?

I’m not sounding much like Mr. Organized, am I?

What about you? Are you up for working on more than one project at a time?


Jim Randolph is a veterinarian in Long Beach, Mississippi. His earlier careers as lawn mower, dairy farmer, automobile mechanic, microwave communications electronics instructor and journeyman carpenter all influence his approach to woodworking. His favorite projects are furniture built for his wife, Brenda, and for their children and grandchildren. His and Brenda’s home, nicknamed Sticks-In-The-Mud, is built on pilings (sticks) near the wetlands (mud) on a bayou off Jourdan River. His shop is in the lower level of their home.Questions and comments on woodworking may be written below in the comments section. Questions about pet care should be directed to his blog on pet care, www.MyPetsDoctor.com. We regret that, because of high volume, not all inquiries can be answered personally.

Feb 052019
 

No Southern-fried Southern boy wants to be called a Yankee, but we share the characteristics of shrewdness and thrift. Thus, each month we include a money-saving tip. It’s OK if you call me “cheap.”

You want something free? Well, almost free.

If you eat whipped butter, margarine, Cool Whip, or other foodstuffs that come in plastic tubs, you can make use of those tubs in the shop and they won’t cost you an additional dime.

Now, if you, like me, don’t eat any of those above items, you, like me, probably know someone who does. It’s not hard to talk them into saving some containers.

What are they good for? A kazillion uses! (Sorry, Steve.)

Probably the thing I use them for most is parts washing.

Over the utility sink turned out to be the best place for some shelves to store my “butter containers.” If I need to wash something, there is one close by. If I need the lid, I know right where it is.

From cleaning paint brushes to wheel bearings, they’re impervious to every solvent I’ve ever used, which means if you’re cleaning parts in batches you can use the same cleaner repeatedly until it’s dirty.

They’re neither air-tight nor water-tight, so you shouldn’t store liquids for the long term.

Speaking of liquids, they’re great for decanting from a large container of finish into one you can work from. If you need to go to the door to sign for a UPS package, and you’re coming right back, you can pop on the top to slow drying and evaporation. However, don’t plan to store finishes in these containers; the lids don’t fit securely. Over a short amount of time oxygen will enter and ruin the finish, and, if it falls from a height, finish is going everywhere.

Component storage is a good use for the long and short term. If you’ve taken a piece apart for restoration and you want to save
all the screws, bolts, nuts, washers and hardware, an old butter container will keep them together with your project until you’re ready to reassemble. Most aren’t see-through, but, with a proper label, or even a temporary Post It Note, you can store any sort of small hardware. Personally, I prefer organizers with drawers, but these still beat my Uncle Sam’s old system of “throw everything into a coffee can.”

These organizers with plastic, see-through drawers won’t break the bank, either. I have screws in one, nails in another, nuts and bolts in the third.


Jim Randolph is a veterinarian in Long Beach, Mississippi. His earlier careers as lawn mower, dairy farmer, automobile mechanic, microwave communications electronics instructor and journeyman carpenter all influence his approach to woodworking. His favorite projects are furniture built for his wife, Brenda, and for their children and grandchildren. His and Brenda’s home, nicknamed Sticks-In-The-Mud, is built on pilings (sticks) near the wetlands (mud) on a bayou off Jourdan River. His shop is in the lower level of their home. Questions and comments on woodworking may be written below in the comments section. Questions about pet care should be directed to his blog on pet care, www.MyPetsDoctor.com. We regret that, because of high volume, not all inquiries can be answered personally.

Feb 042019
 

Welcome to “Tips From Sticks-In-The-Mud Woodshop.” I am a hobbyist who loves woodworking and writing for those who also love the craft. I have found some ways to accomplish tasks in the workshop that might be helpful to you, and I enjoy hearing your own problem-solving ideasPlease share them in the COMMENTS section of each tip.  If, in the process, I can also make you laugh, I have achieved 100% of my goals.

Steven Johnson has a bag of tools he carries when he’s working in someone else’s house. Think of them as “beaters.” There are no Japanese chisels in that bag. Even the screwdrivers, he admits, are barely worth having.

The disadvantage is obvious: you don’t get to have the nice feel of a quality tool as you’re working.

The advantages are just as obvious: If you lose them while you’re out, you won’t shed a tear. Also, if someone other than you uses, or abuses, them, you won’t have to create a scene, like I did once when I came home from work to find the air conditioner installers had “borrowed” one of my good chisels to dig through our home’s outside wall to run their refrigerant line. Not surprisingly, they ran into one or more nails. My 3/4″ chisel had a U-shaped divot in what had been a very sharp edge.

The workers were long gone by the time I got home, but I couldn’t contain my rage. I called their boss. They called me the next day with a sincere apology.

With that in mind, had someone else done with my Irwin clamp what I did one day, I would have hit the roof.

Last summer I built a couple of screech owl nest boxes, one for home and one for the clinic. What I didn’t realize at the time is
that not only do owls not make their own nests, they don’t add their own bedding material, either. I had to take them down to add nest material, but I had designed it to be removable because the box would require annual cleaning.

The home nest box is attached to a post in the bulkhead of our boat ramp. The location is a combination of the little open air in our yard and a place we can see from the house, as well as being beyond jumping distance for squirrels. Yes, I know the squirrels can climb the pole, but don’t tell them, because they haven’t yet.

However, the location makes working a little treacherous, because I have to balance on an 11-1/2″ wide board right over the water.

Taking the nest down is the reverse of installing it: apply an Irwin bar clamp at the top and bottom of the post, remove all but one of the six construction lags attaching it, lever it down carefully. Everything was going fine until I removed a clamp, set it on the deck and my toe nudged it into the Bayou. Well, I couldn’t stop what I was doing, so, when the contraption was safely on the ground I went to the house and put another clamp in harm’s way. Within 15 minutes the beautiful pine shavings were in the nest and it was back in the air.

Now, to find the missing and presumed drowned clamp.

I was sure it had not gone far, so I started with a garden rake, which yielded a bunch of pine needles and leaves.

Not yet panicking, I got the biggest magnet I own, a real honker from a blown-out woofer stereo speaker. It had no means of attachment, so I had to drill a hole in the middle first. And find some stout string in order to go “fishing.”

I fished. And I fished. And I fished some more. I had just about decided that I was going to strike out when, finally, I felt “clink” in the line and some extra weight when I pulled the string.

My next predicament was saving the clamp from its exposure. This is good practice for any time one of your steel or iron tools becomes wet.

Step One is get it clean. Dirt holds moisture, so you want all of the grime off. After a plain-water rinse, I scrubbed it really well with Dawn and a stiff brush. You’re going to re-oil it soon, but you need all of the oil off because oil holds dirt and dirt holds, well, we covered that.

A good rinsing with a hose made the clamp (and the magnet) look pretty good. However, Dawn, a brush and some elbow grease are going to remove dirt you can’t see.

Now that we’ve got the clamp good and wet, let’s get as much water off as we can. One of the first jobs I learned as a budding auto mechanic was cleaning and repacking wheel bearings. In that job, as in this, an air hose can remove a lot of water in a short amount of time.

Blow and blow and blow until the clamp is dry in all its hiding places. Don’t forget your magnet. Take good care of it and it can serve you again one day.

Now, let’s remove even more water. Do you know what “WD” stands for in “WD40?” Here’s a hint: It doesn’t stand for “oiling, lubrication and protection.” WD40 isn’t something you should put on a tool or item for long-term use. It contains solvents and the solvents chemically and physically drive moisture away from objects it touches. “WD” stands for “water displacement.” Its inventors made 40 formulas before they got it just right. It’s great in a situation like this, where we might not be able to completely remove all of the water from the inner workings of the handle and hidden spaces such as around the split pin. Disassemble as many parts as you can, then hose that baby.

The same procedures you use to turn a clamp into a spreader can be used to partially disassemble it. I wasn’t brave enough to dismantle the squeeze mechanism. I could just see parts going BOING and never getting them back together again. WD40 loves for you to use their product like this, maximum volume!

Lubricate all of the parts with a quality spray oil mixture and you’re ready for reassembly. Wipe off the excess.

I never let myself run out of this Ace Hardware spray lube. It comes with a tube, or you can spray a big area with the nozzle.


Jim Randolph is a veterinarian in Long Beach, Mississippi. His earlier careers as lawn mower, dairy farmer, automobile mechanic, microwave communications electronics instructor and journeyman carpenter all influence his approach to woodworking. His favorite projects are furniture built for his wife, Brenda, and for their children and grandchildren. His and Brenda’s home, nicknamed Sticks-In-The-Mud, is built on pilings (sticks) near the wetlands (mud) on a bayou off Jourdan River. His shop is in the lower level of their home.Questions and comments on woodworking may be written below in the comments section. Questions about pet care should be directed to his blog on pet care, www.MyPetsDoctor.com. We regret that, because of high volume, not all inquiries can be answered personally.

Feb 012019


There are web sites and YouTube channels that run down Festool.

There are channels that run down your favorite YouTuber.

I get that.

Not everybody likes the same thing, and not everyone can keep their opinion to themselves, or follow Mama’s advice: “If you can’t say something nice, don’t say anything at all.”

I’ve even found a couple of internet posts critical of Norm Abram.

I don’t get that.

Talented. Accomplished. Easygoing. What more could you want in a wood shop hero?

When I first started more serious woodworking in an actual shop, as opposed to working out in the yard on sawhorses, I tried wearing the carpenter’s apron I bought to begin my carpentry career. After all, it was more than just a fixture on the homebuilding site, it was a necessity. There was simply no way to carry everything in pockets, especially the volume and variety of nails used back in the days before air nailers.

Once indoors, however, I was never very far from the things I needed. I wear overalls, and the huge pockets easily accommodate the 25′ Stanley tape I like to carry. My phone is in another pocket and I keep four pencils on me all the time. I don’t nail much in my work, and it’s easy enough to keep a box of screws and a cordless drill-driver on the bench.

I find the sticking-out nature of a nail apron to be a hindrance. It makes me stand a bit away from the bench or table I’m working on. And, nothing makes a back tired and strained like leaning over.

I bought this nail apron in 1973, the year I left the Air Force and began working with Jack  English, building houses. A few years ago I took it to a shoe repair shop to see if he could sew the parts that needed repair, explaining that the antique item was an old friend. He said, “It’s beyond help. You should have taken better care of it along the way.” Not only did I take it home and fix it myself, I never went back to that grouch.

I did, however, purchase a new carpenter’s apron. It lacks the character (read “miles”) that the old one has.

This month we have an easy-answer poll: “Yes,” or “No.” I’m interested in what percentage of woodworkers and furniture makers wears a carpenter’s apron (not to be confused with a shop apron, that covers one’s entire front) inside the shop, like Norm. As always, we welcome your comments below.


Jim Randolph is a veterinarian in Long Beach, Mississippi. His earlier careers as lawn mower, dairy farmer, automobile mechanic, microwave communications electronics instructor and journeyman carpenter all influence his approach to woodworking. His favorite projects are furniture built for his wife, Brenda, and for their children and grandchildren. His and Brenda’s home, nicknamed Sticks-In-The-Mud, is built on pilings (sticks) near the wetlands (mud) on a bayou off Jourdan River. His shop is in the lower level of their home.Questions and comments on woodworking may be written below in the comments section. Questions about pet care should be directed to his blog on pet care, www.MyPetsDoctor.com. We regret that, because of high volume, not all inquiries can be answered personally.

Jan 072019
 

I admit to being one, and I’m going to submit strong evidence in support of you being one, too.

As many of you know, one of my interests is birding. “What is birding?” some of you are asking. My earliest avian-studies mentor, the late Judith Toups, used to say there were three levels of bird-interest enthusiasts.

The first was backyard birdwatchers. These are folks who feed birds and look out at the feeder on a somewhat regular basis, but they’re not going beyond the yard to make a feathered friend.

The second level is a birdwatcher, no qualifying adjective. Birdwatchers typically have a pair of binoculars and may infrequently go on outings to find and look at birds.

The third level is birders. Think “woodworkers.” Obsessed. Willing to spend large amounts of money on equipment. Able to spend hours and hours in pursuit of perfection. I think the woodworkers in the audience have the concept.

A few months ago, my wife, Brenda, and I went on a trip, a vacation, a chance to sit around and do nothing.

Unfortunately, doing nothing is not something I’m good at. Fortunately, the place we went has good birding, so I had plenty to do. Being a beach location, one can sit in his condo and watch osprey, gulls of several species, egrets, herons and other shorebirds without ever leaving his room. It’s almost like doing nothing, while expending just a little effort.

I did some of that, but I also spent a good bit of time wandering the island in a more adventurous mode. That meant a backpack, water, binoculars, camera, spotting scope, a tripod and lightweight portable seat. About a 26 pound load.

To get all that stuff to and from the destination, I used all of the skills my Navy corpsman father taught me about packing a suitcase. My tripod was nestled in one leg of a pair of jeans, and the seat was in the other leg, with all of that surrounded by other clothing. Somehow, on the return trip, baggage handlers managed to break the plastic handles on a wing nut which was part of my tripod.

My tripod is old, a Vivitar that is no longer manufactured, and the Vivitar company is out of business. In other words, replacement parts are not available. How was I going to fix this crucial adjustment part?

Of course, when I returned home, the first order of business was business. After 8 days out of town, there were plenty of appointments when Monday morning came calling.

Likewise for Tuesday through Saturday.

But, Saturday afternoon I had time to visit the garage and begin to ponder a repair process. Step One was to determine the thread type. Good! It wasn’t metric! That piece of information alone gives you a hint as to how old the tripod must be.

Since a 5/16″ nut fit on the broken wing nut, which is actually a bolt, I began looking at my supply of adjustment knobs I keep for assemblies. Darn! I had every configuration of knob except one that would work.

Plan B: Dig through the supply of 5/16″ bolts and figure out a way to attach a “handle” to it. Then, what should appear in the pile, but the attachment knobs to my old Lowrance paper graph. Non-fishermen call them “fish finders.” When that albatross died, the only usable parts were the “U” bracket it was mounted in and the knobs that attached it to the bracket.

Moment of truth: will the threaded part be the right length? It worked!

I’d saved those knobs for over 20 years, but the effort finally paid off. This Lowrance part was going to save my Vivitar tripod!

A week or so later I found myself looking for old, saved valuables again. The chain-link fence gate at our clinic had rusted and needed to be rebuilt. Having installed the original fence, I knew I had fence parts somewhere. Out of a pan of elements I was able to find enough corners and brackets that all I had to buy was some new pipe.

“Thar’s gold in that-there pan!” I just had to save those parts a few decades to come up with an almost free new gate.

“Never throw anything away.”

Having been raised by five children of the Depression, I’ve heard that all of my life.

In the span of a couple of weeks, the practice proved itself right again.

While many of these little plastic drawers have new supplies in them, there is a lot of vintage treasure, too.


Jim Randolph is a veterinarian in Long Beach, Mississippi. His earlier careers as lawn mower, dairy farmer, automobile mechanic, microwave communications electronics instructor and journeyman carpenter all influence his approach to woodworking. His favorite projects are furniture built for his wife, Brenda, and for their children and grandchildren. His and Brenda’s home, nicknamed Sticks-In-The-Mud, is built on pilings (sticks) near the wetlands (mud) on a bayou off Jourdan River. His shop is in the lower level of their home.Questions and comments on woodworking may be written below in the comments section. Questions about pet care should be directed to his blog on pet care, www.MyPetsDoctor.com. We regret that, because of high volume, not all inquiries can be answered personally.