Ed

May 092016
 

tormekRepetition and practice are often all that are needed to bring about an improved outcome with just about any task. This includes pushing a lawnmower (my kids get better at it with each passing summer), swinging a golf club or tennis racquet, or paring & sawing right to your marked line. Practice and experience, along with a little sheer will power thrown in, propel our species to get better at doing the things we do.

Yet try as we may, oftentimes we can find ourselves at a place where we just get “stuck.” The road to improvement may be right in front of us, but we cannot see the path. Fortunately during these “stuck moments,” sometimes all it takes is a person with a more skillful and practiced eye to share just the simplest of feedback, which then enables us to move forward. Duffers experience this when a golf pro points out the tiniest of adjustment to one’s golf club grip and voilà, the dam holding you back from hitting a nice straight drive suddenly bursts.

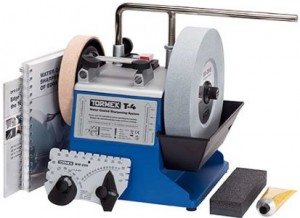
The other day I had one of these moments using a Tormek Sharpener and it involved the task of stropping the backs of chisels on the leather wheel. Though stropping a chisel’s bevel on the Tormek can be done using the tool guide bar & the Square Edge Jig for perfect positioning, stropping the back of the chisel is a “freehand” operation, which for me personally meant “the liberty and freedom to screw it up.” The 8­-1/2” diameter stropping wheel gives a good amount of open access to the wheel’s circumference (face). So much so that I was presenting the back of the chisel to the stropping wheel in haphazard random places along the wheel (but hey, I was consistent in my randomness) and thus getting predictable, lackluster honing results because I was slightly “rounding” the edge on the back side of the chisel. Because of this, I had resorted to using a manual flat strop in order to avoid my “rounding errors” when stropping on the wheel.

Of course an easy solution to allow me to hone the chisel back correctly on the wheel was right in front of me, but I was not seeing it. However, once it was pointed out to me, my personal log jam keeping me from stropping successfully on the wheel was joyfully breached.

Turns out the carrying handle on top of the Large Tormek Sharpeners, models T-7 & T-8, is a perfect visual reference for highlighting a center line point at the top of the wheel. At that intersecting point on the wheel, when you draw the chisel back so the end is at that tangent point on the wheel and with the chisel being held level, the back will be flat on top of the wheel, and the honing will happen on the back, right at the cutting edge, and in the “flattest” manner possible. And it just so happens the T­4 model sharpener has a line in the casting that serves as the same visual reference.

I don’t know why I couldn’t see what now seems obvious, or couldn’t figure it out without having to be shown, even after sharpening a good number of chisels. (My hat goes off to “Stig,” the Swedish “Tormek” race car driver, for showing me the glaringly obvious among the merely obvious). I do know this won’t be the last time something appears to be staring me in the face which I cannot see.

Yet in the big scheme of things there could be worst things to overlook. I could miss seeing a MARTA bus speeding by as I step off the curb to cross the road or overlook the fact that I am in fact being stubborn when my spouse calls me so. But for now, I remain “unstuck,” in good health, happily married, and now able to put finely honed edges onto my chisels.

Find out more about the Tormek Sharpening Systems

Feb 182016
 

Working at Highland Woodworking, I’m often asked to assist customers with their band sawing questions, of which resawing is a frequent topic. Fortunately for woodworkers, there are plenty of articles, books and videos for use as reference guides to help one navigate the tricky waters of resawing. Suffice it to say most standard two-wheeled shop bandsaws, with well-adjusted guides set to a blade suited for the task at hand, and with an operator at the helm having a wee bit of experience, will typically offer up satisfactory resawing results. Of course this doesn’t mean that sometimes the waters won’t be choppy on the journey and your results may vary some as you work to find your resawing sea legs. My experience has been that there are always common elements to keep in mind, but as with most journeys, the path to arrive at a destination is not always a singular one or one rigidly set in stone. You may like to reference fully against a long fence, or use a point fence or just scribe a line and free hand the cut. You may be on a small saw with just a fraction of a horsepower motor and so your progress on the journey will happen much more slowly than using a saw that dims the lights in the neighborhood when turned on. There are many elements that come into play as you resaw in your own shop on your own bandsaw.

A recent article in the March/April 2016 issue of Fine Woodworking solidly covers resawing basics and you should find it quite helpful. One thing that resonated with me was the mention of how a consistent material feed rate improves results. This is true of most machining work you do in the shop. I found this out years ago while working in a stair building shop where we would mill up long lengths of custom handrail. The machine we used was a monstrous 5 HP, 3 ph Oliver shaper (it did dim the lights on the block when turned on!) Regardless of how evenly we tried to feed the stock through the shaper, afterwards we’d always need to spend a good deal of time removing the blips you could feel along the rail at each place on the rail’s profile where our hand grip had changed at the time when feeding the long stock through the shaper. When the owner of the business purchased a 3HP – 3 wheeled stock feeder and hitched it up to the shaper, the blips in the milling results completely vanished. The feed rate was so perfectly consistent along the rail’s entire length that the need for follow up hand work to remove milling hiccups was no longer necessary. So yes, an even feed rate can make a big difference in your cutting results.

I don’t mean to suggest you need a power feeder to resaw successfully any more than I would suggest you use your 2-wheeled consumer grade bandsaw to process all the trees on your back 40 lot into prized veneer, with the hopes of creating a retirement nest egg. Some things are just not practical.  The consumer grade shop bandsaws we all use typically can resaw when called to do so, but they are not resawing machines. Bandsaws built just for resawing run blades as wide as your fist. Because we are running a 1/2” or 3/4” wide blade which can twist, and are cutting wood that can & will move as it’s liberated of its thickness, we need to pay a bit closer attention to the set-up and the process to achieve satisfactory results. An even feed rate on our saws comes about from listening, feeling, anticipating (where is my push stick?) and yes, practice.

The other thing in the FWW article that perked me up was that the author, Timothy Rousseau, highlighted how much he liked using a no-frills Sterling brand 3 TPI hook tooth blade made by Diamond Saw. I am very happy to report the blade he spoke of is one we have sold at Highland Woodworking for going on 15 years. In fact, it was the same blade that was a top pick in a Fine Woodworking blade evaluation article back in 2004. It has been a solid performing blade for our customers for a very long time and I recommended the blade as a good choice for ripping and resawing thick stock. The blade is listed on our website as our general purpose 1/2” blade and we keep more than 30 lengths in stock, so we probably have one for your saw. Check it out here:

http://www.highlandwoodworking.com/123tpibandsawblades.aspx

Feb 112013
 

The variation, nuisances and beauty of wood are often what inspire woodworkers to craft this amazing material into handsome objects of function and art, and can cause some woodworkers to hold a reverence for the actual trees behind the wood source.  If you appreciate trees, this video on the science of water movement within trees may blow away any notions you’ve held about how water makes it to the upper most leaves on a tree.

Sep 012011
 

Long-time customer Tom Schmitt shares some personal musings on working in the shop while taking into consideration life changes that affect our working ways. A local neighborhood resident, Tom often graces the aisles of Highland Woodworking in search of tools needed to maintain his guitar building habit and for simple, friendly conversation about woodworking dilemmas, Labrador Retrievers, raising teenagers and the nature of the universe.

Arthritis is a nearly inevitable consequence of aging in humans. For many human males, it seems the desire to do some woodworking is also. There are many things the modern woodworker can do to minimize the impact of woodworking on one’s arthritis and to also minimize the impact of arthritis on woodworking.

CLICK HERE to read some of Tom’s suggestions on dealing with arthritis and woodworking.

Aug 172011
 

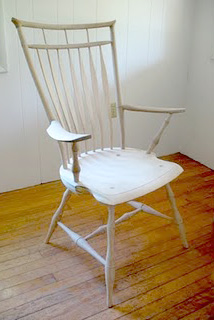
Peter Galbert’s chairs are unique. They are a mixture of time-honored methods & materials blended with Peter’s desire to bring forth a range of aesthetics in his finished work.  Some of these are quite tangible, as in the way his chairs envelope and support the sitter into an almost dream-like state of comfort, while others are less so, like the interplay of light and shadow on a sculpted component that lingers as a pleasant after-taste in the mind’s eye.

Peter’s ability to take the best of the past that works and partner it with fresh ways of seeing form and function are what make him such an exciting chairmaker and craftsman.  Add to this Peter’s extraordinary ability to convey information as a teacher and you know why we’re incredibly pleased for Peter to conduct chairmaking classes at Highland Woodworking.  Peter returns this fall to Highland Woodworking for a week long chair making class to Build a continuous arm Windsor chair. Space is limited so confirm your seat in the class soon.

Discover more about the Windsor chair “design mind” of Peter Galbert in his article, linked below.

Windsor Chairs: Why It All Adds Up, by Peter Galbert


Aug 302010
 

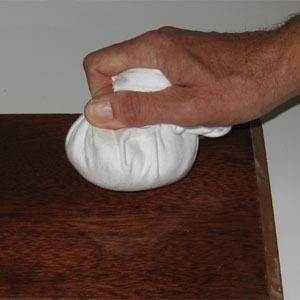
The number of finishing choices available today for protecting your woodworking projects is almost dizzying.  Some options are simple like wipe on/wipe off finishes, while others may require special equipment to apply, like a spray gun system, in order to achieve satisfactory results.   One finishing choice often overlooked is called French polish.  French polish is not a product, but rather the name given to a technique for applying shellac.

Shellac is sometimes referred to as an “old world finish”.  It has been around for hundreds of years and is still often the finish of choice for fine furniture. A properly applied French polish has amazing depth, clarity and warmth that many of today’s high tech coatings simply cannot match.

Professional furniture restorer Alan Noel, with over 30 years of experience, will introduce you to the technique of French polishing and will share some of the subtle nuances in “padding” the shellac onto the surface of the wood.

With a little practice (we don’t recommend attempting to French polish for the first time on your mother-in-law’s piano bench) you’ll come to discover the wonderful properties and look of a French polish, welcoming it as a valuable finish option for your woodworking projects.

To sign up for Alan’s class on September 11, go to the Highland Woodworking website or click here.

Can’t make it for the September class? Don’t worry! Alan is offering the class again in October and November. Sign up now before classes are full!