

For those who haven’t read any of my previous articles, I enjoy utilizing both Western as well as Japanese woodworking tools, in my projects. To lay the groundwork, when I was a pre-teen, I had some good friends as next-door neighbors whose mother was Japanese, and the father had a number of Japanese tools, from hammers to saws. I was always very intrigued with these, partially because they seemed so different than anything I’d ever seen, but also since they seemed to have a lot of interesting aspects in their design.
Fast forward 10+ years and my Mother-in-law and Father-in-law went on a trip to visit family in Japan, and were nice enough to ask what I’d like them to pick up for me. As you might imagine, a ton of different tools flooded my mind, but trying to not take advantage of the family, I told them I’d love to have a nice Ryoba saw. The Ryoba is a saw that has rip teeth on one side of the saw-plate and cross-cut teeth on the opposite side. Since there is no stiffener or back on the saw plate, like you would see on a Western back saw or a dozuki, the saw can cut as deep as you need, or that it can reach.
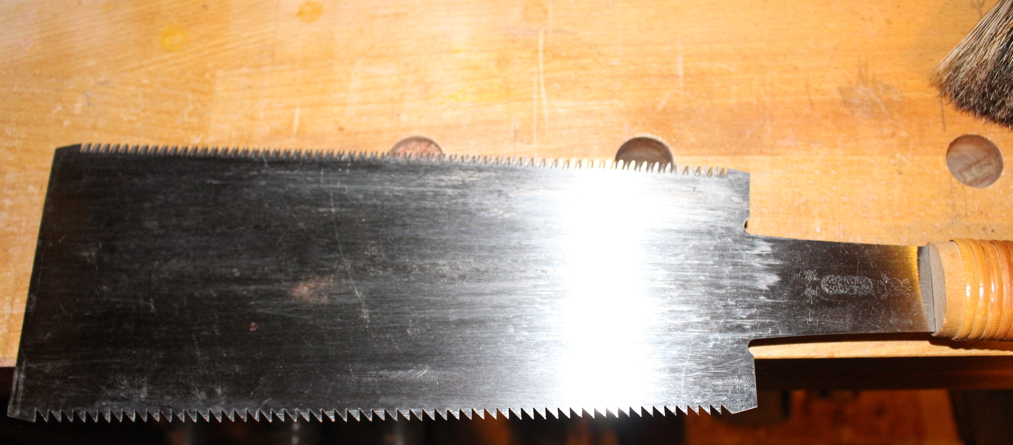
Since I’ve had my Ryoba well over 20 years, and the saw has seen quite a bit of wood, the rip side of the saw has gradually become somewhat dull. You are probably wondering why I didn’t just sharpen it earlier in it’s life when I first started noticing it was slowing in it’s cutting? As part of the answer, there are basically two generic types of Japanese saws on the market, such as the hand-made saws that are hand-sharpened and set, and the other type that are machine-made with impulse hardened teeth. Since I hadn’t specifically asked my family to get me a high-end saw, I assumed my saw likely had the impulse hardened teeth, where the hardening of the plate makes the steel at the teeth harder than a file, so you can’t re-sharpen it. Another attribute of the impulse hardened teeth is that they will stay sharp longer, which seemed as if it also fit with my saw, since it really was relatively sharp for a long time.
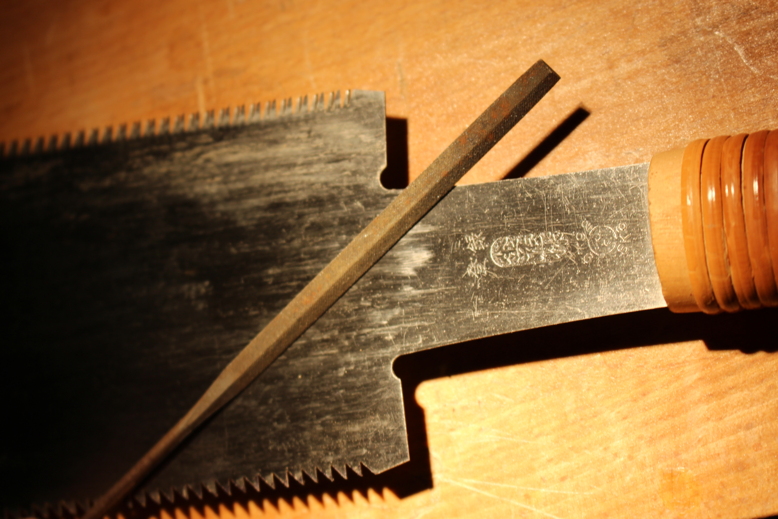
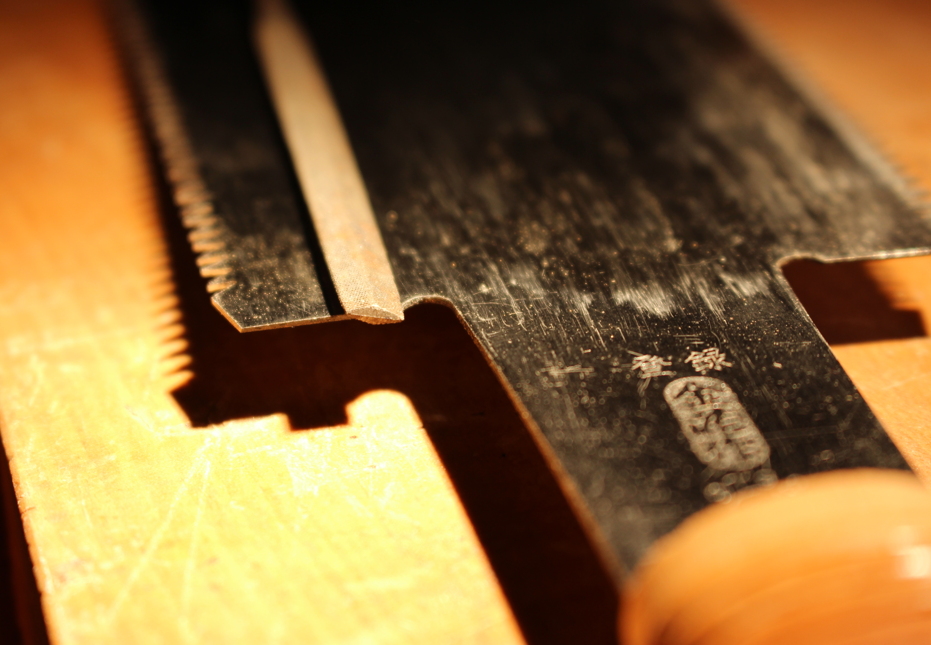
A few days ago, I was cutting some tenons with my Ryoba and it felt like it was just spinning it’s wheels (in a sense), since it was just barely making any progress even after a number of strokes. I knew I didn’t have the feather files that are used to sharpen Japanese saws, as they are a totally different shape than those used to sharpen Western saws, but I remembered that I did have one file that was somewhat similar in shape. My uncle gave me a small bundle of files, that ranged from round, square, triangular, as well as the one that was similar to the feather files. I pulled that file out and was happy to find it fit into the narrow angle that is between each tooth.
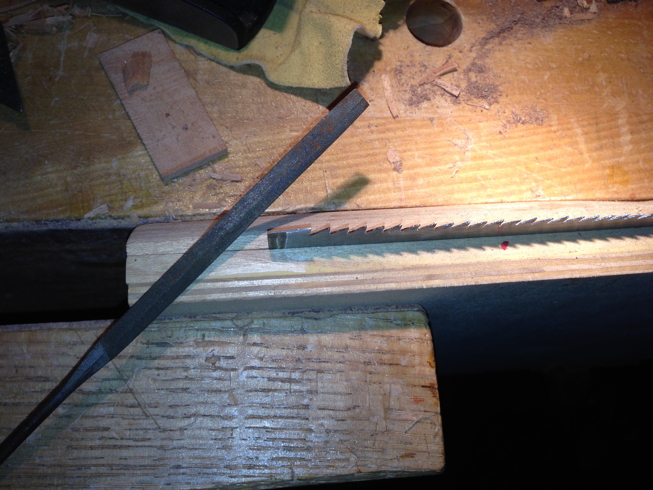
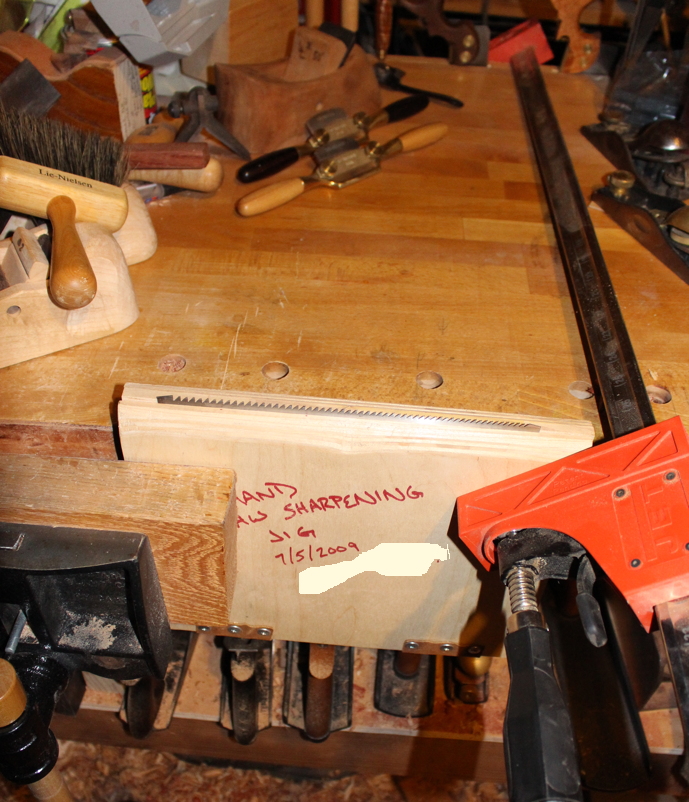
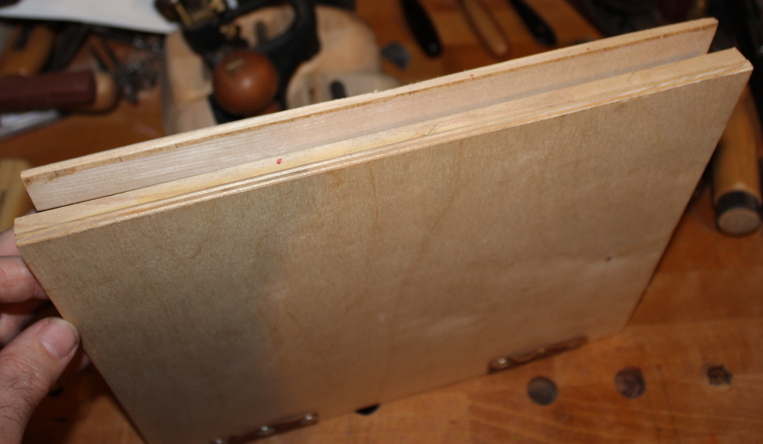
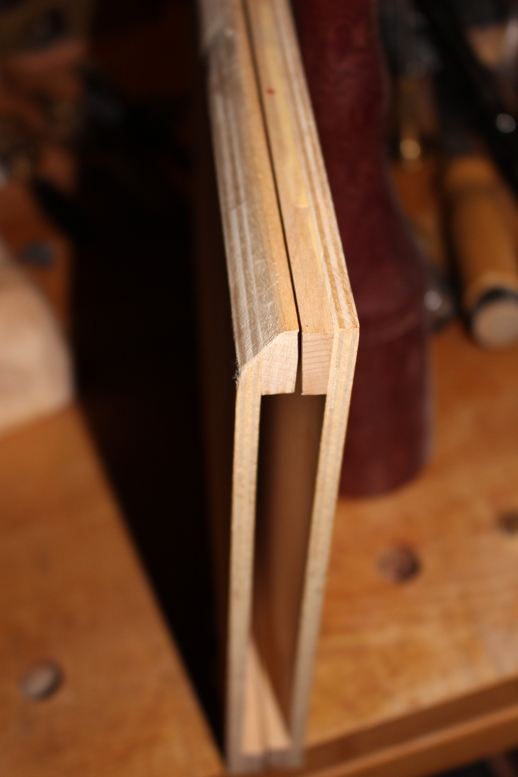
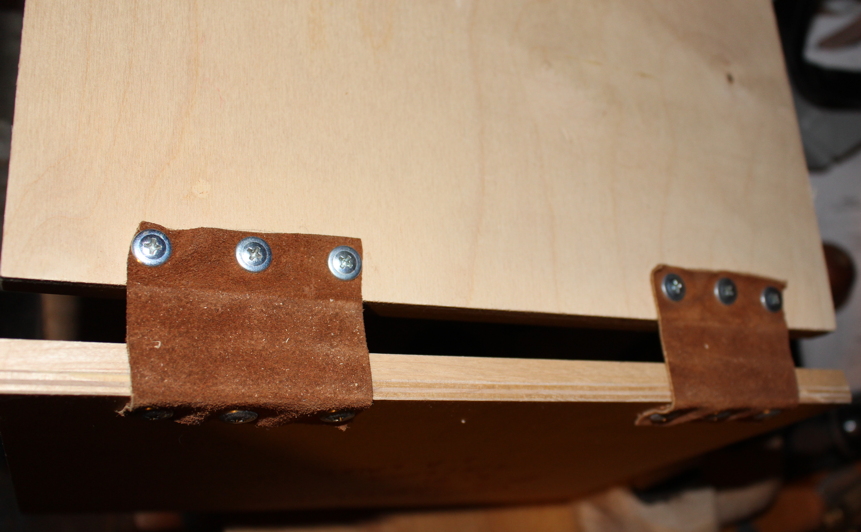
I pulled out a jig (saw holder) that I made about five years ago, that I use to hold my saws when sharpening. The holder is constructed of a couple of pieces of plywood, some hardwood strips, some small pieces of flexible leather used as hinges, and a few screws. When sharpening a saw, I usually put the holder into my dovetailing vise, which applies a good pressure all the way across the holder and onto the saw plate. As I’ve recently rebuilt my dovetailing vise, and it is not 100% complete, I thought I’d show plan “B”. When I put my saw plate into the holder, I position it so it’s teeth are just above the holder’s jaws, enough so the saw’s gullets are accessible without the file making contact with the holder. The closer the gullets are to the holder’s jaws, the better, as this leaves the least amount of tooth out possible, eliminating as much vibration as possible when sharpening. I placed one end of the saw holder into my bench’s face vise and used a long parallel-jaw clamp to hold the jig’s other end, with the other end of the clamp on the other side of my bench. This arrangement allowed me to hold the saw-holder and saw securely, while retaining full access to the saw teeth.
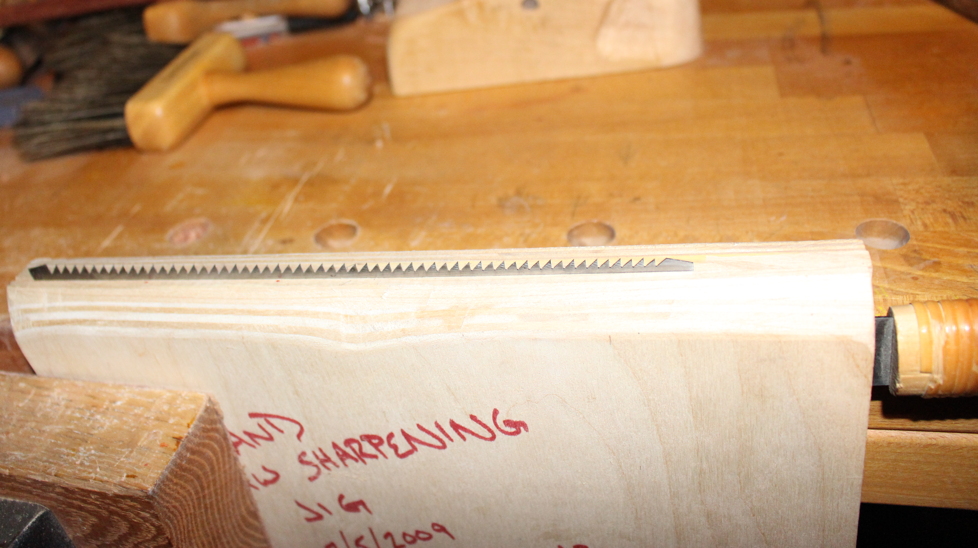
As with any saw (and sometimes plane irons and chisels), I applied some sharpie to the surfaces of the teeth I planned to try sharpening, as it allows you to verify the critical area at the tooth’s point is contacted by the file. It is also much easier to keep track of which teeth you haven’t yet sharpened, as the marker ink is removed as the file removes the metal from each tooth’s surface.
So now it was time to see what would happen when the file meets the saw. I turned on my overhead light source, grabbed my magni-focuser and file and took a stroke on the first tooth, while subconsciously holding my breath. I really expected the file to feel like it was sliding across the tooth, basically unable to “bite” into the steel and remove material, but it surprisingly felt much like it does when sharpening my other saws. I thought it might just be an odd tooth that didn’t get the “full” treatment of the hardening process, so I moved on to the next couple of teeth. I again took some light file passes on these teeth and they responded exactly the same way, which indicates the steel was not impulse hardened and will accept resharpening. Since the file I have isn’t as large across it’s width as many feather files, it took two strokes to cover the distance from the gullet to tip on one side of the tooth, using one stroke out towards the tip of the tooth and one down towards the gullet. The size of the teeth on the rip side of my Ryoba was almost exactly twice the width of my file, so there wasn’t much overlap (if any) of the file strokes, so uneven wear in this current sharpening is not a concern. Now that I’ve determined this saw can be re-sharpened, I’ll likely order a couple of feather files, available at Highland Woodworking, for future
sharpenings. While I feel completely comfortable sharpening the rip side of my Ryoba, as well as both rip and cross-cut teeth on Western style saws, the cross-cut side of the Ryoba has teeth with more facets than a high-end diamond (ok, I’m exaggerating a bit), so it would probably be best left to a professional sharpener.
Unlike my Western saws, where the triangular files remove metal from the back of one tooth and the front of the adjacent tooth simultaneously, I had to work each side of every tooth as a separate process. This is due to the fact that my file isn’t made with the same angle between the teeth. This really isn’t that big of a deal, as it just adds a little extra time to the operation. One important detail I want to make sure to mention is how important it is to use consistent pressure and the same number of strokes on each tooth surface. Since my Ryoba had only ever been sharpened at the time it was made, I felt comfortable leaving out a step that very likely would be necessary for any older or second-hand Ryobas you might obtain. The step I’m referencing is jointing the teeth, which is where a flat file is pushed down the teeth along the length of the saw’s plate, with the file perpendicular to the plate of the saw. This, just like sharpening, is best completed with the saw plate held in the same holding jig and vise so the rip teeth all point to the sky. Hold the file so it is parallel with the ground, and lightly push the file from one end of the saw to the other. This will create a very small flat on the tip of all the teeth it touches. After the first pass with the file, check to see how many of the teeth’s tips have a new small flat area. If you see that all of the teeth’s tips have a flat, you are ready to start sharpening. If on the other hand, you have teeth that show no signs of a flat, this indicates those teeth are shorter than those that already have a flat. This uneven height is something that usually occurs over multiple sharpenings, as more pressure is used or more passes are taken on some teeth than on others. Continue to take passes with the jointing file until the tip of all the saw’s teeth have at least a slight flat on them. This is your indication to stop the jointing operation.
When sharpening following jointing, you should take equal passes with the file on each side of each tooth, removing half of each flat from one side of a tooth, and the other half from the opposite side. By working from both sides of a tooth, in an equal manner, it helps to prevent changing the characteristics of the teeth. Make sure to stop the filing process when the flat just disappears. It can seem that additional passes must make the saw that much more sharp, but it will be wasted time, energy and the saw will not last as long.
Another aspect of sharpening that my Ryoba didn’t require was that of setting the teeth. The set is how each alternating tooth is slightly bent to one side and then the next the opposite direction. The amount the tips of the teeth are bent is very minimal, with some saws only adding about .002” of set per side, which helps to create a small amount of room in the kerf so the saw doesn’t bind. It might seem that if a little set is good, then more would be even better, but as more set is added to a saw, it can quickly change from a very easy and controllable saw to one that wanders all over the place and is very difficult to control. As saws are sharpened repeatedly, the saw can start to feel like the kerf is getting more tight, as the tip of the teeth are bent to create the set. As the saw is sharpened, material is removed from the tip, which diminishes a small amount of the set. If the saw feels too tight in it’s kerf, it is likely time to add some set back to the teeth’s tips. Some saws are set with a light strike from a small hammer, while others are set using a tool called…, you guessed it, a Set. It somewhat resembles some of the old label machines, where you’d turn the dial to a letter and squeeze the handle, to impress that letter onto the plastic strip. These set tools are available in both course and fine versions at Highland Woodworking, so make sure you pay attention to the number of points per inch on the saw(s) you intend to set, or at least the range of points as most of these sets are adjustable to a number of different settings.
After I finish the filing on a saw I’ve just sharpened, I like to pull (or push as is appropriate to the saw style) the saw through some scrap wood, like pine or maybe mahogany, to remove any leftover burrs on the teeth. Now the saw is ready to again perform up to it’s full abilities. Go enjoy the freshly sharpened saw and pay attention to how it behaves. When it drifts too far away from this behavior, repeat this process. Each time you sharpen a saw, you’ll get better with your technique and the next one will be even faster.
I hope you enjoyed this article. Please let me know if you have any questions or comments.
Lee Laird has enjoyed woodworking for over 20 years. He is retired from the U.S.P.S. and works for Lie-Nielsen Toolworks as a show staff member, demonstrating tools and training customers. You can email him at lee@lie-nielsen.com or follow him on Twitter at twitter.com/is9582
Brilliant work and excellent explanation!
Sergey.
Brilliant work and excellent explanation!
[…] contributor, Lee Laird, discusses the Japanese Ryoba Saw and how you can resharpen the rip teeth on the saw once they get dull, and the best type of feather files to use in order to do […]